Why Use Coda with Softr?
Integrating Coda with Softr allows you to:- Centralize Data: Bring Coda tables together with other data sources (like Airtable, Google Sheets, or REST APIs) in a single Softr app with real-time data read/write capability.
- Create Custom Portals: Build client or team portals with tailored views, pulling data from Coda tables, pages, or sections.
- Customize Access: Set granular permissions to control what users see or edit, based on roles or conditions.
- Enhance Workflows: Use Coda’s structured tables to power forms, dashboards, or internal tools with Softr’s powerful no-code interface.
- Brand Your Experience: Style your Softr app to match your brand, creating polished, professional interfaces for Coda data.
Before You Start
Before connecting Coda to Softr, ensure you have:- A Softr account with access to Coda as data source (available on Softr’s Basic plan and up).
- A Coda account with access to the doc(s) or table(s) you want to connect.
- Admin or editor permissions in Coda to generate an API token.
- A Softr app project set up in your Softr Studio dashboard.
Setup
1
Connect Coda to Softr
-
Log in to Softr Studio:
- Navigate to your Softr Studio dashboard at studio.softr.io.
-
Access Data Sources:
- In the left-hand menu, click Data Sources.
- Click Connect Data Source
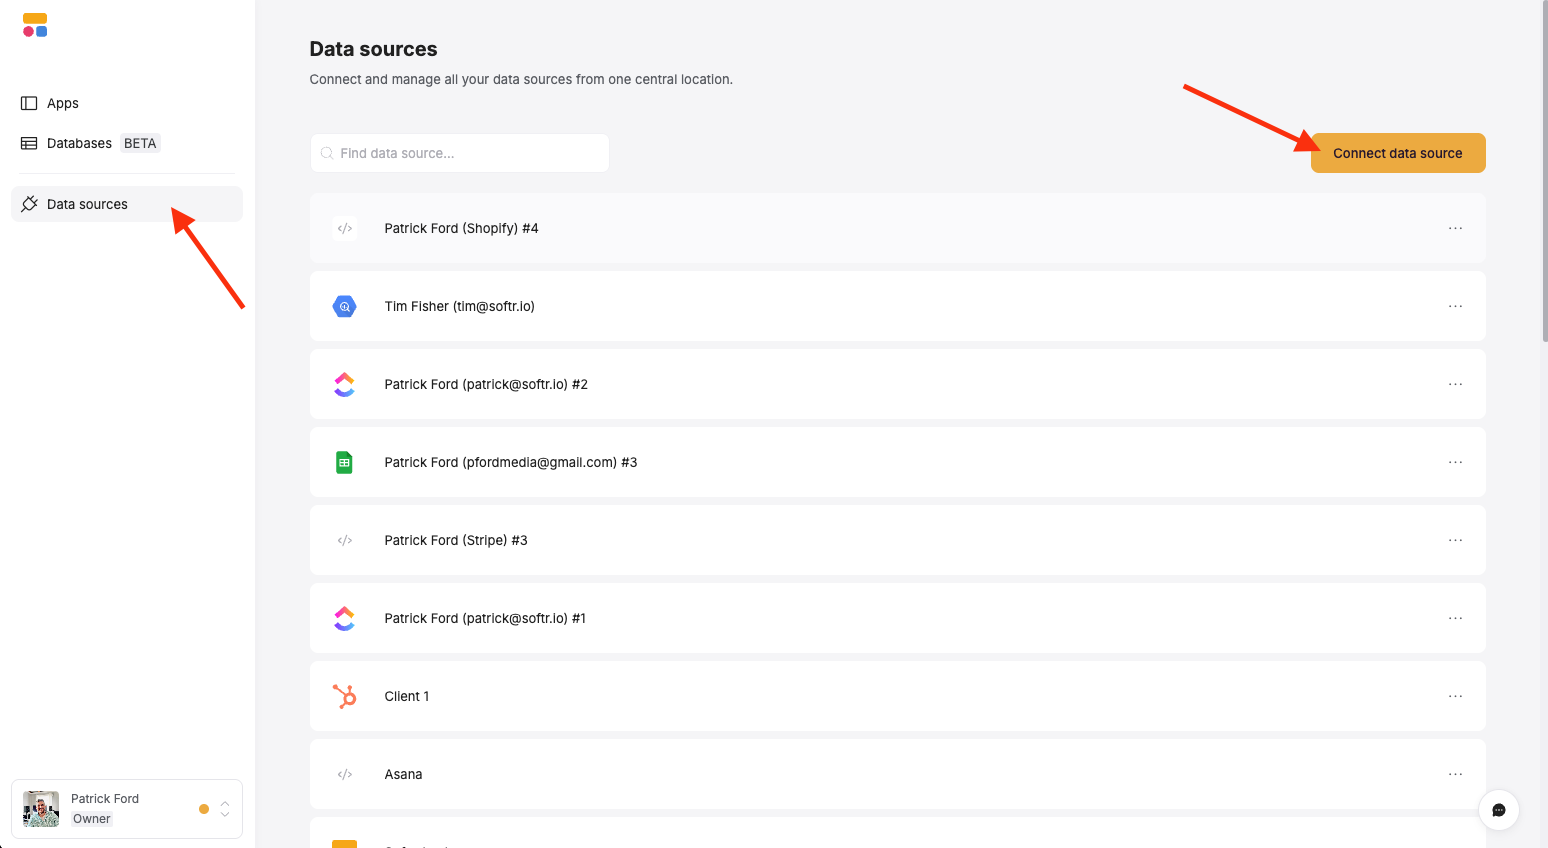
- Select Coda from the list of available integrations, then click Continue.

-
Authenticate with Coda:
- You’ll be prompted to provide an API token.
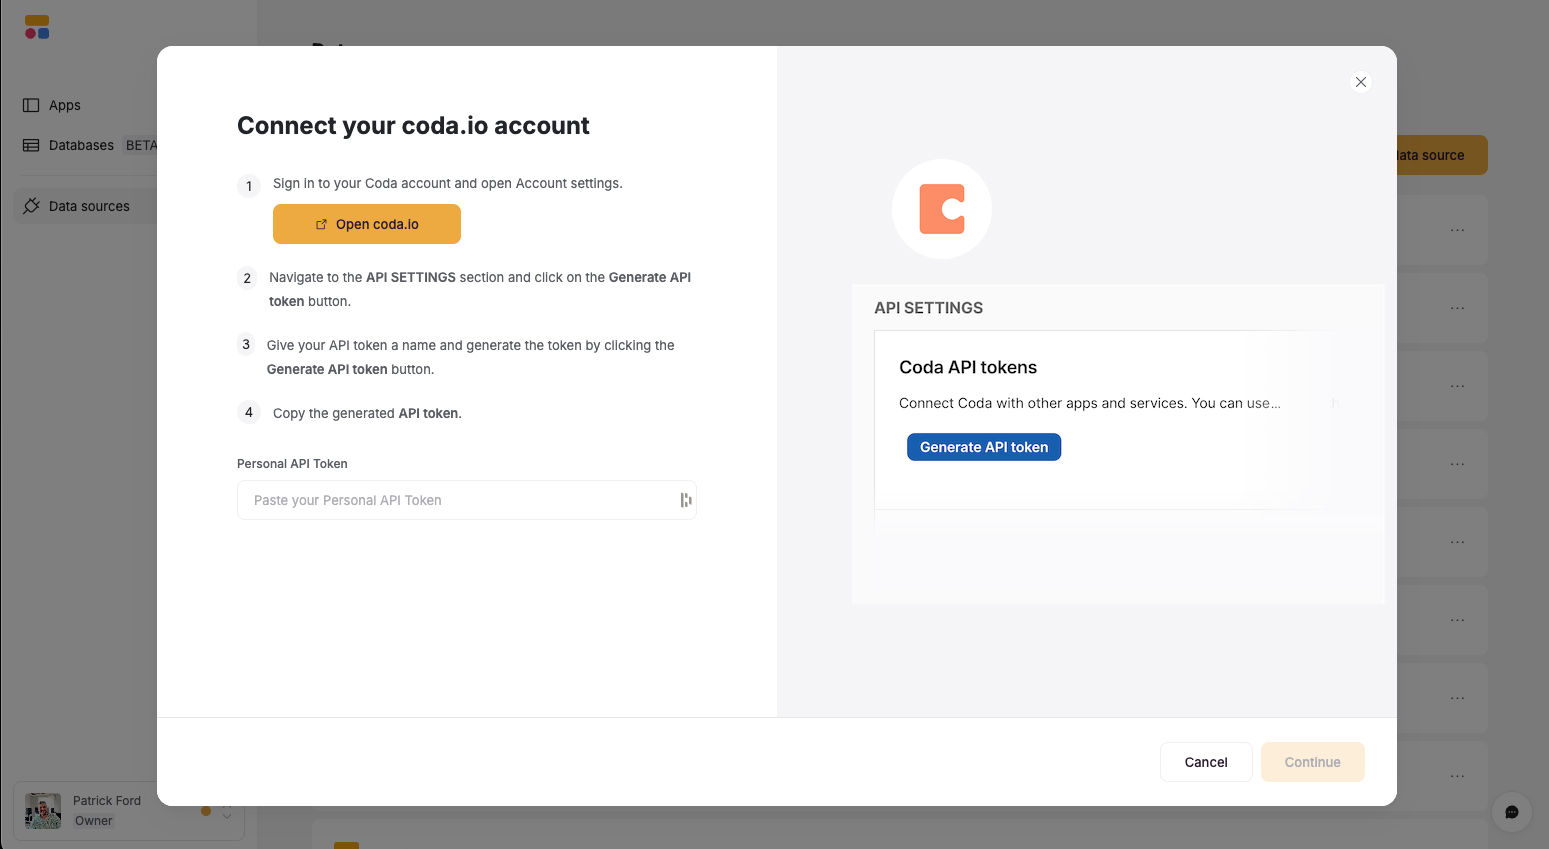
- To generate a Coda API token:
- In Coda, click on your Profile picture in the upper right and select Account Settings.
- Navigate to the API Settings section and click Generate API Token.
- Copy the token and paste the new token into the Softr connection modal.
- You’ll be prompted to provide an API token.
-
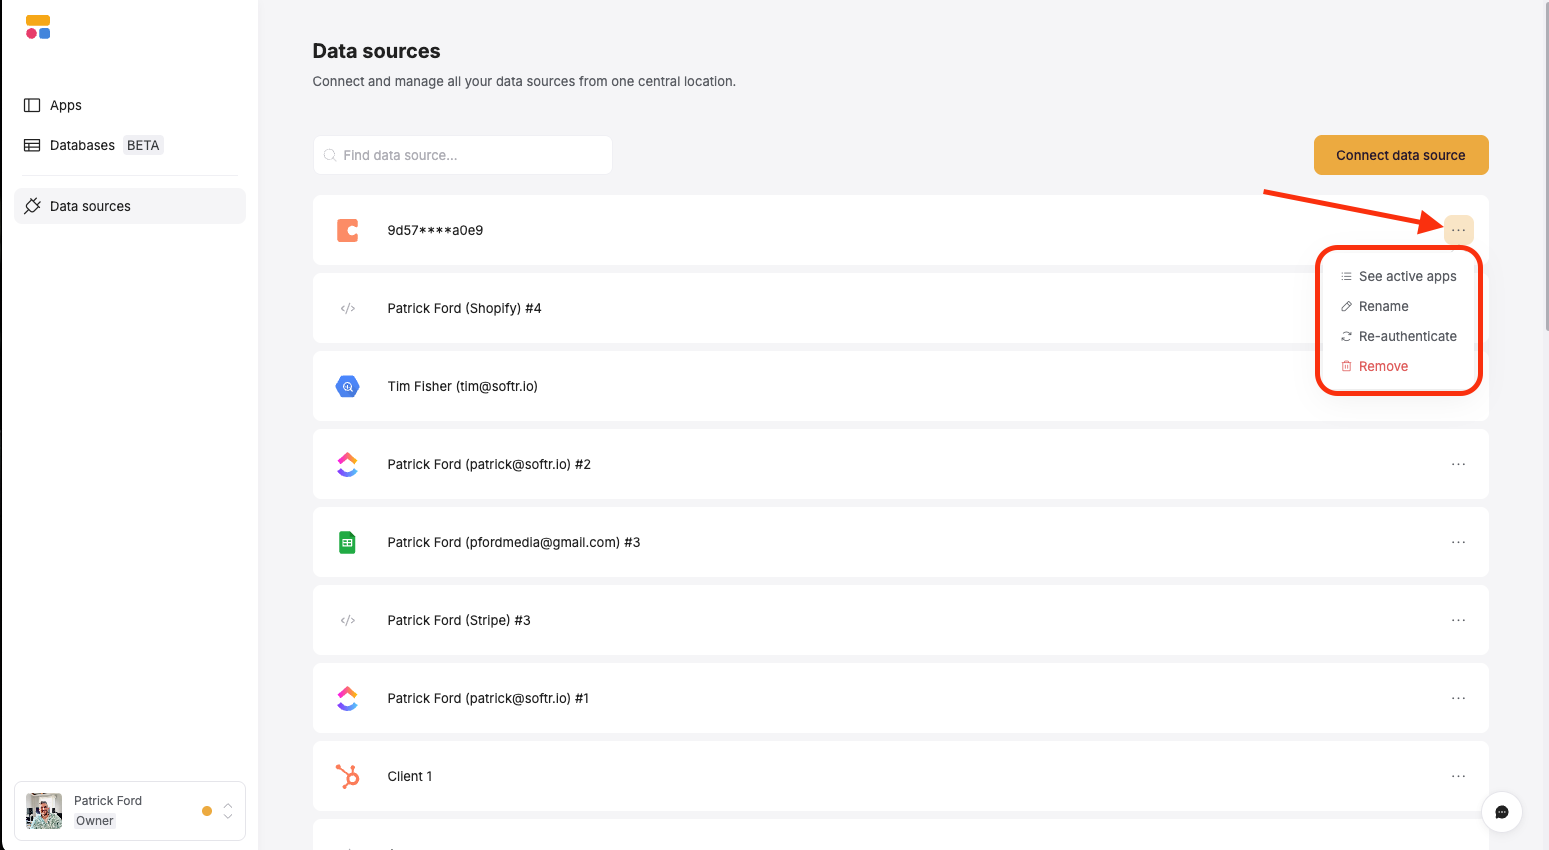
Manage the Coda Connection
- You can rename, edit, of delete the connection by clicking on the three dots on the connection
- Click on See Active Apps to see a list of all the Softr apps the connection is being used in.
2
Configure Data Mapping
With Coda connected, you can now use its data to power your Softr app:
-
Add Blocks:
- In your Softr app, go to the Pages menu and select or create a page.
- Add any dynamic blocks like List, Table, Kanban, or Form to display or interact with Coda data.
-
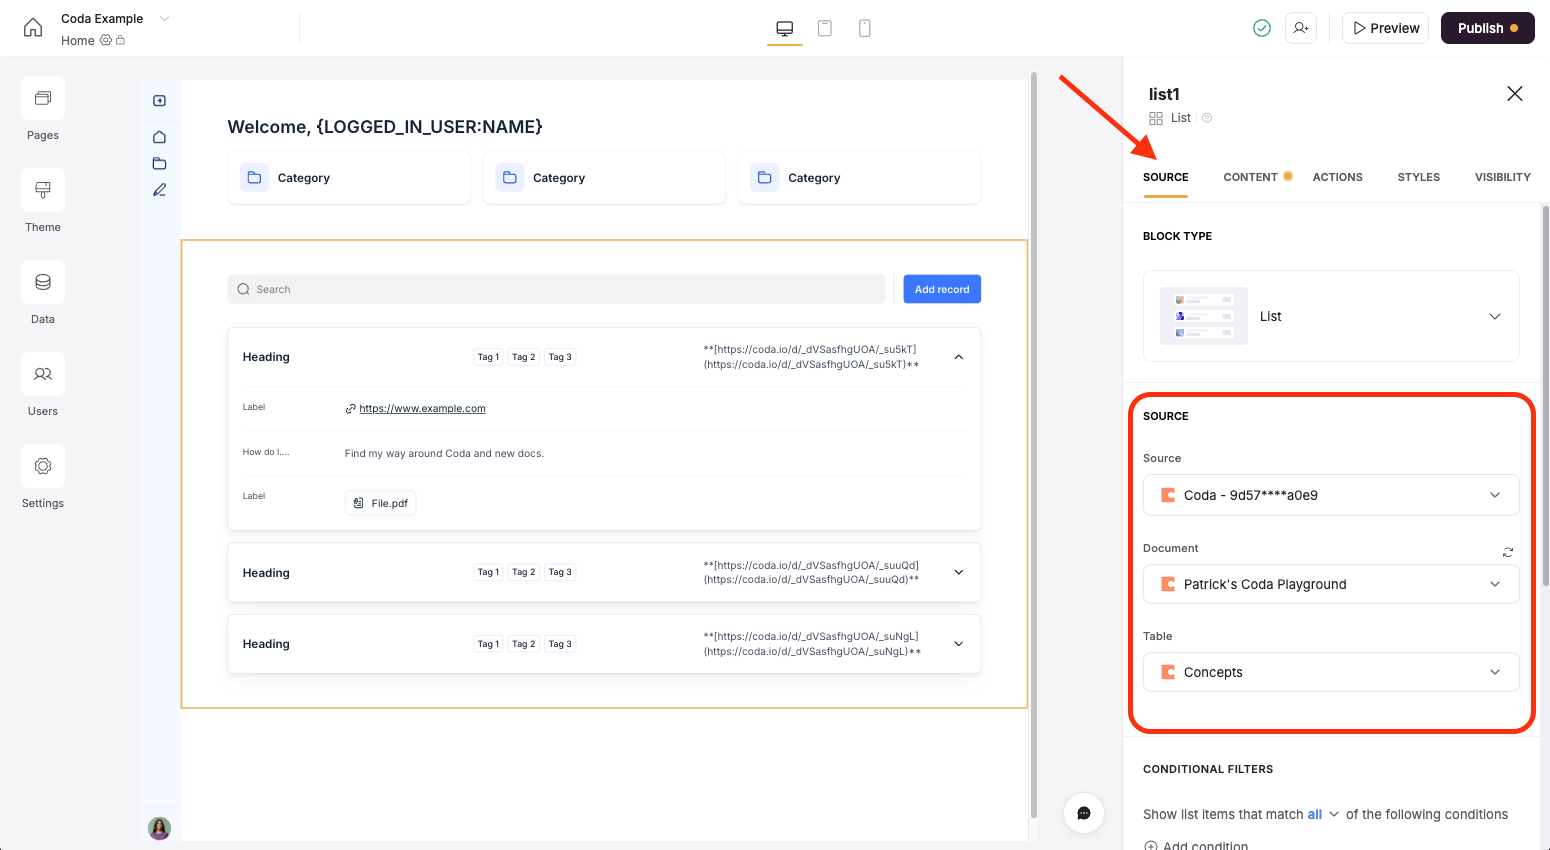
Choose Document and Table:
- Select the block, go to the Source tab and select your Coda connection.
- Choose the Document and table in the document you want to map to the block.
-
Apply Filters and Conditions (Optional):
- Use Softr’s filtering options to display specific rows from your Coda table based on conditions (e.g., show only tasks assigned to a specific user).
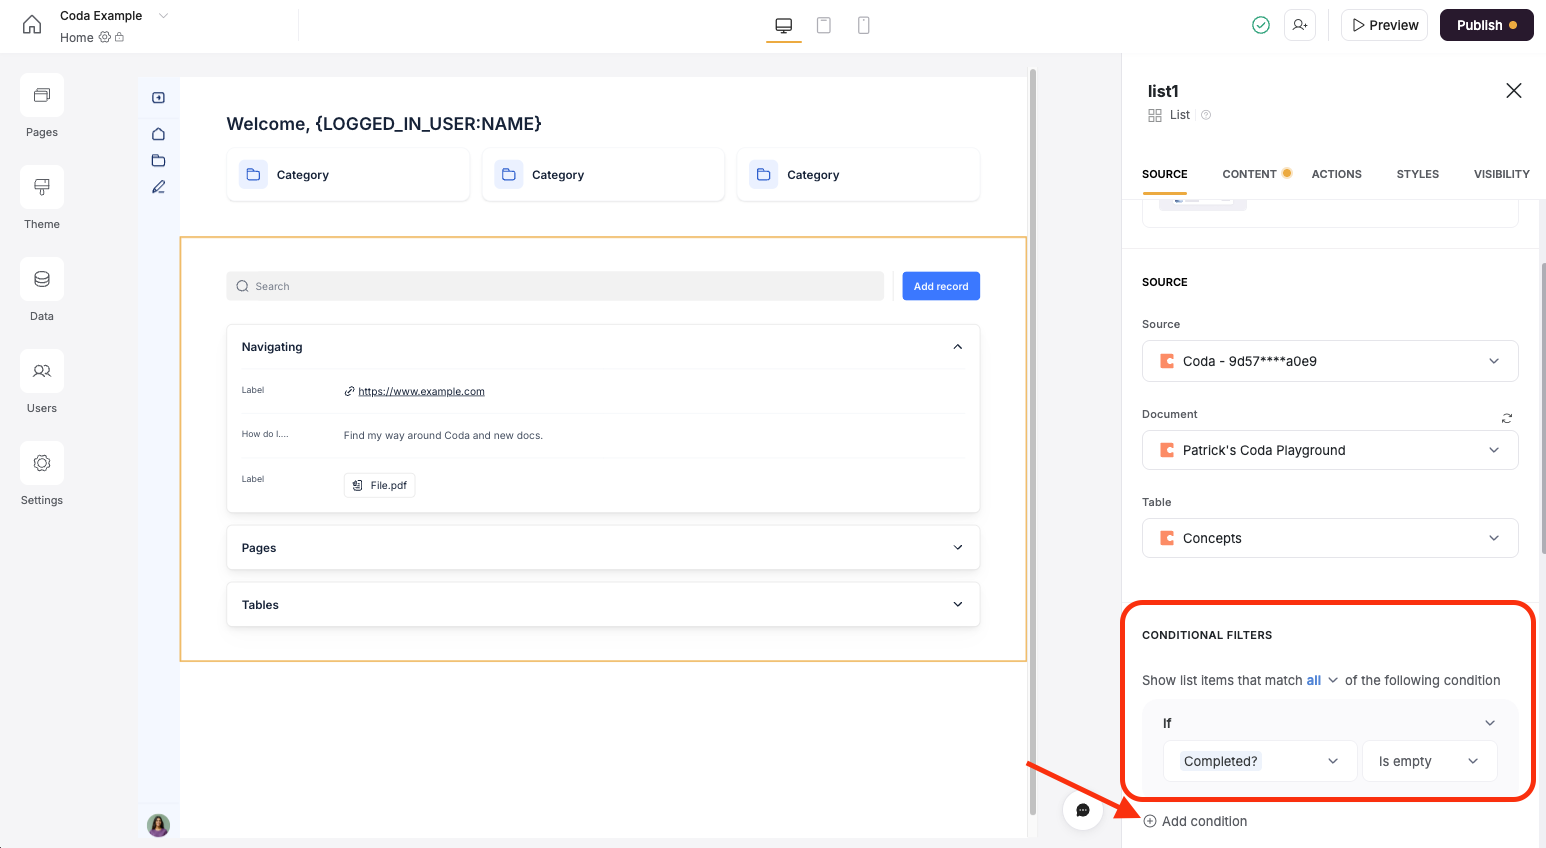
- Set visibility rules to control which data is shown to different user roles. For example, click on the Visibility tab to control who can see the entire block. You can also do this for buttons in the Actions tab as well.

- Use Softr’s filtering options to display specific rows from your Coda table based on conditions (e.g., show only tasks assigned to a specific user).
-
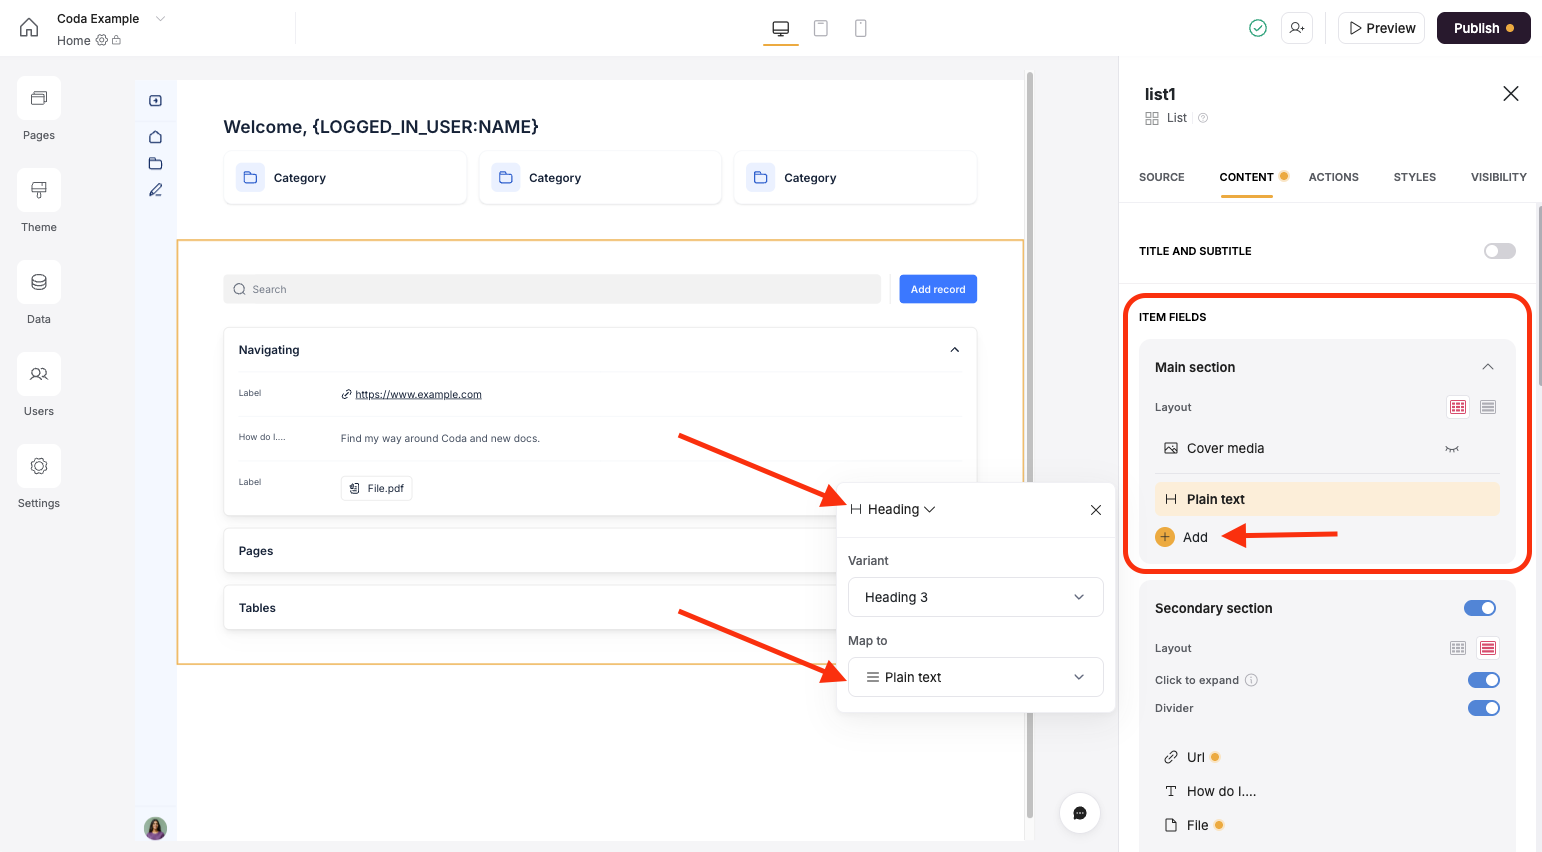
Map Columns to Fields in Softr:
- Click on the Content tab in the Block settings.
- Choose the fields (columns) from your Coda table you want to use in your app (e.g., task names, statuses, dates, or custom fields).
- Add or remove fields as needed or change the display type and its styling.
- Softr supports Coda’s table columns, including text, numbers, dates, select lists, and attachments.
3
Build Your Softr App with Coda Data
With Coda connected, you can now use its data to power your Softr app:
-
Customize Layout and Styling:
- Use Softr’s dynamic, static, and container blocks to display Coda data and customize layouts.
- Apply branding options (colors, fonts, logos) to match your organization’s style.
-
Set Permissions:
- Go to the Users section in Softr Studio to configure user roles using User Groups (e.g., admin, client, team member).
- Use page, block, or button-level visibility to restrict access to sensitive Coda data.
-
Add Interactive Features:
4
Test and Publish
-
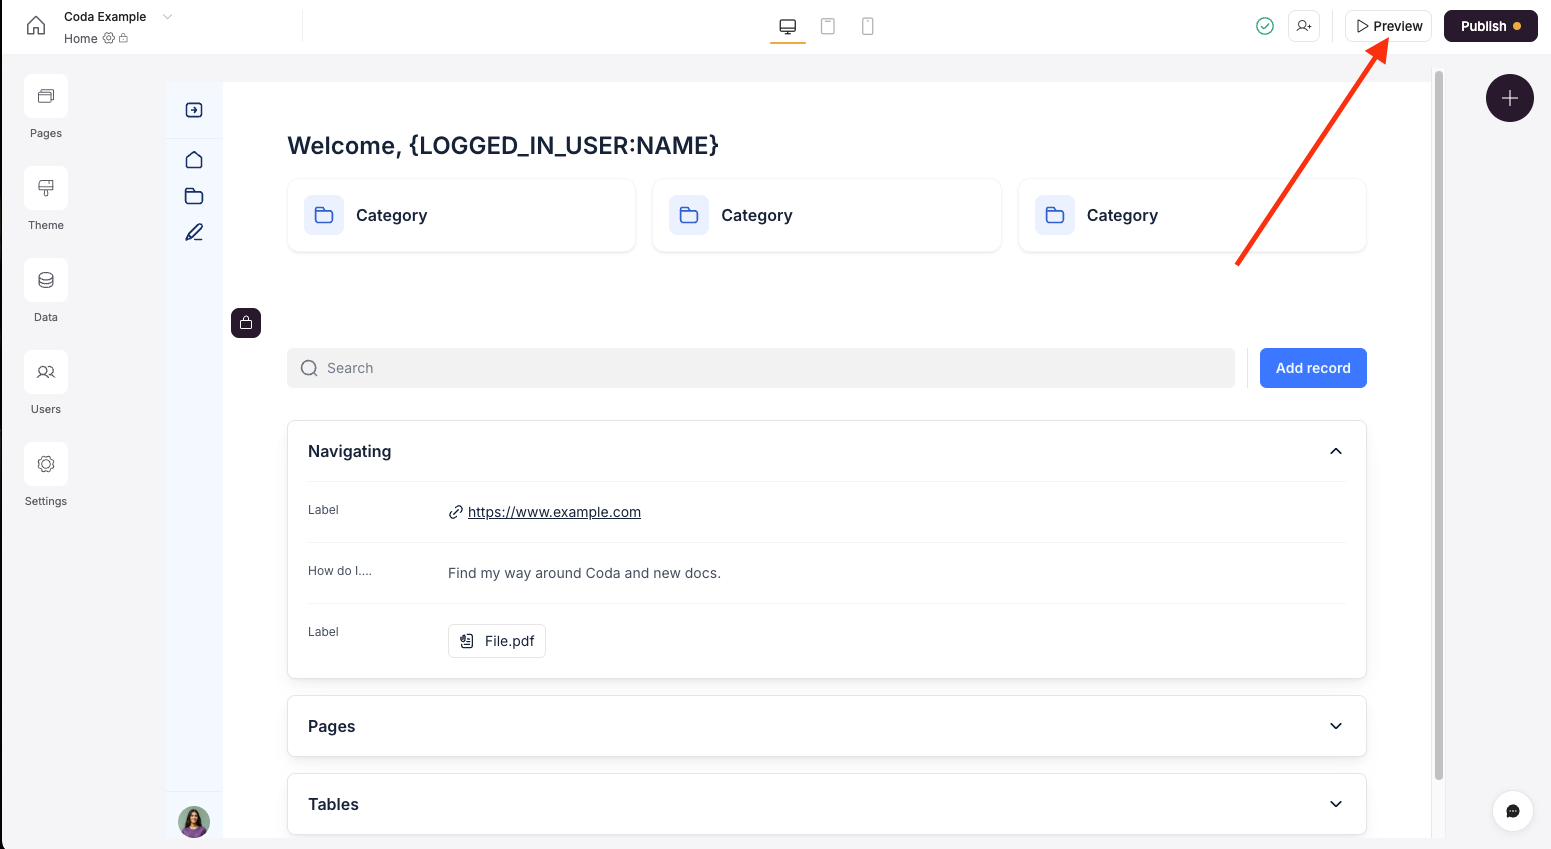
Preview Your App:
- Use Softr’s preview mode to test how your app displays and interacts with Coda data.
- Verify that filters, permissions, and sync settings work as expected.
-
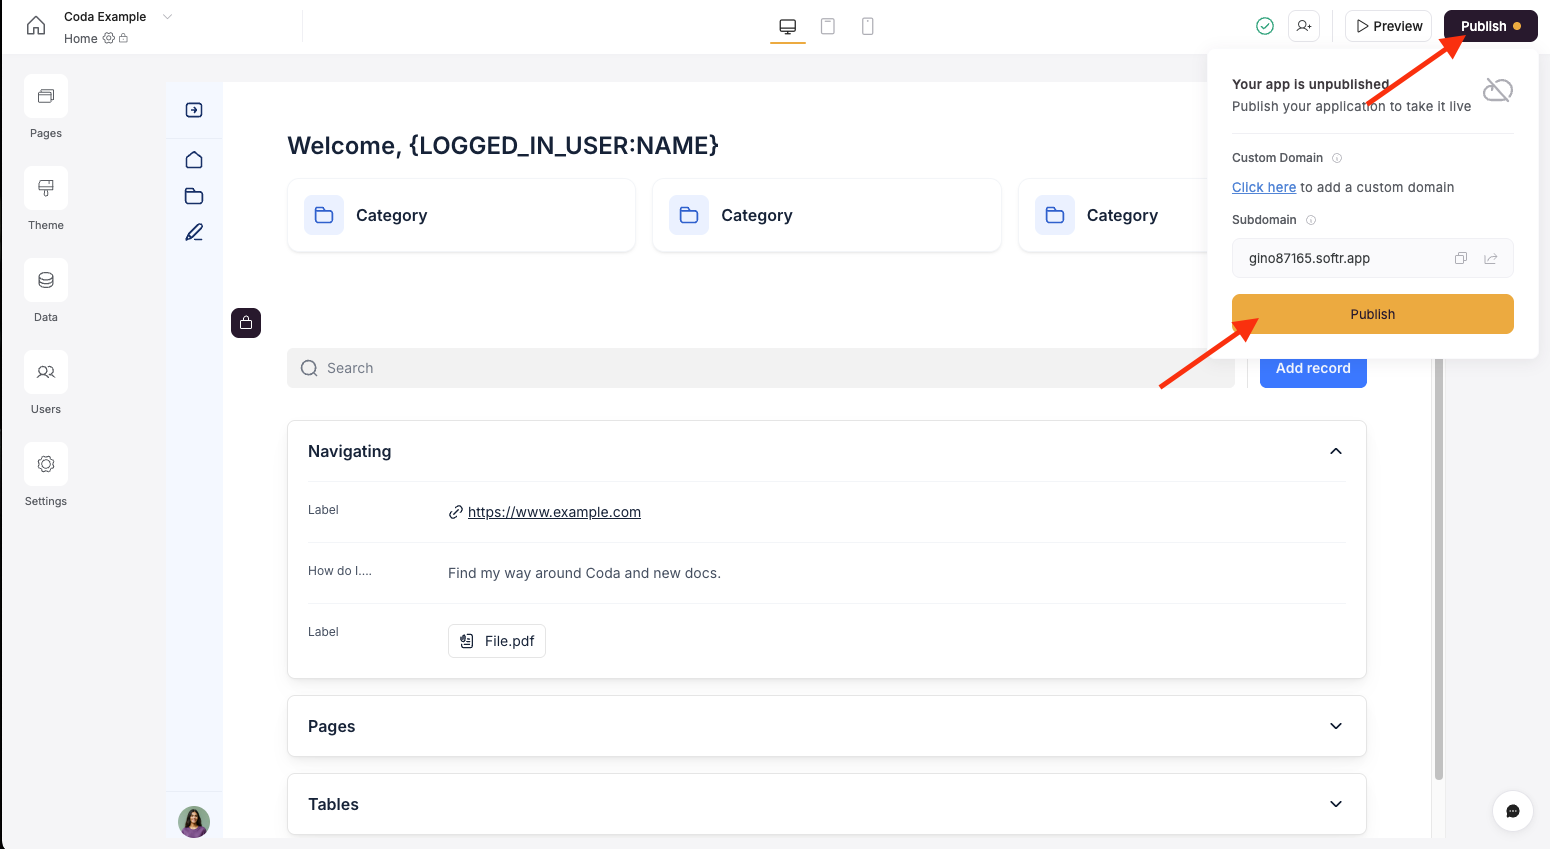
Publish Your App:
- Click Publish in Softr Studio to make your app live.
- Share the app with users via a custom domain, public link, or restricted access for logged-in users.
Best Practices
- Organize Your Coda Tables: Structure your Coda tables with clear column names and consistent data types to simplify mapping in Softr.
- Use Filters for Personalization: Leverage Coda’s table structure to create filtered views in Softr (e.g., show only tasks due this week).
- Secure Your Data: Restrict API token access in Coda and use Softr’s User Groups and/or Data Restrictions to create role-based permissions to protect sensitive information.
- Combine Data Sources: Integrate Coda with other sources (e.g., Google Sheets or HubSpot) in Softr to create a unified app experience.
Keep in Mind
- API Rate Limits: Coda’s API may have rate limits depending on your plan. Check Coda’s documentation for details.
- Complex Data Types: Some Coda features (e.g., embedded docs or advanced automations) may not work or integrate directly with Softr, though you can do a lot with embedding with custom code!
- Plan Requirements: Data availability and advanced permissions may require specific Softr and Coda plans.
- Attachment Handling: Large files or attachments in Coda tables may take longer to. Be sure to compress or convert files before uploading to Coda tables.
Troubleshooting
-
Connection Issues:
- Ensure your Coda API token is valid and has the correct permissions.
- Verify that the selected Coda doc and table are accessible to the account used for authentication.
-
Data Not Syncing:
- Check sync settings in Softr and confirm two-way user sync is enabled if needed.
- Review Coda table permissions to ensure Softr can read/write data.
-
Display Errors:
- Confirm that Softr field mappings match the data types in your Coda table.
- Test dynamic block filters and conditions to ensure they’re correctly applied.
Example Use Cases
-
Client Portal:
- Use Coda to manage client projects and connect to Softr to create a branded portal where clients can view their project status, submit feedback via forms, or download files.
-
Team Dashboard:
- Pull Coda data into a Softr dashboard to display team tasks, deadlines, or KPIs in a Kanban or chart view.
-
Internal Knowledge Base:
- Sync Coda’s documentation tables to create a searchable, user-friendly knowledge base for your team or customers.
-
Event Management:
- Use Coda to track event details and Softr to build a public-facing app for attendees to view schedules or register.