Creating an application
First of all, you need to create an application. To do that, navigate to Enterprise Applications on your Azure dashboard.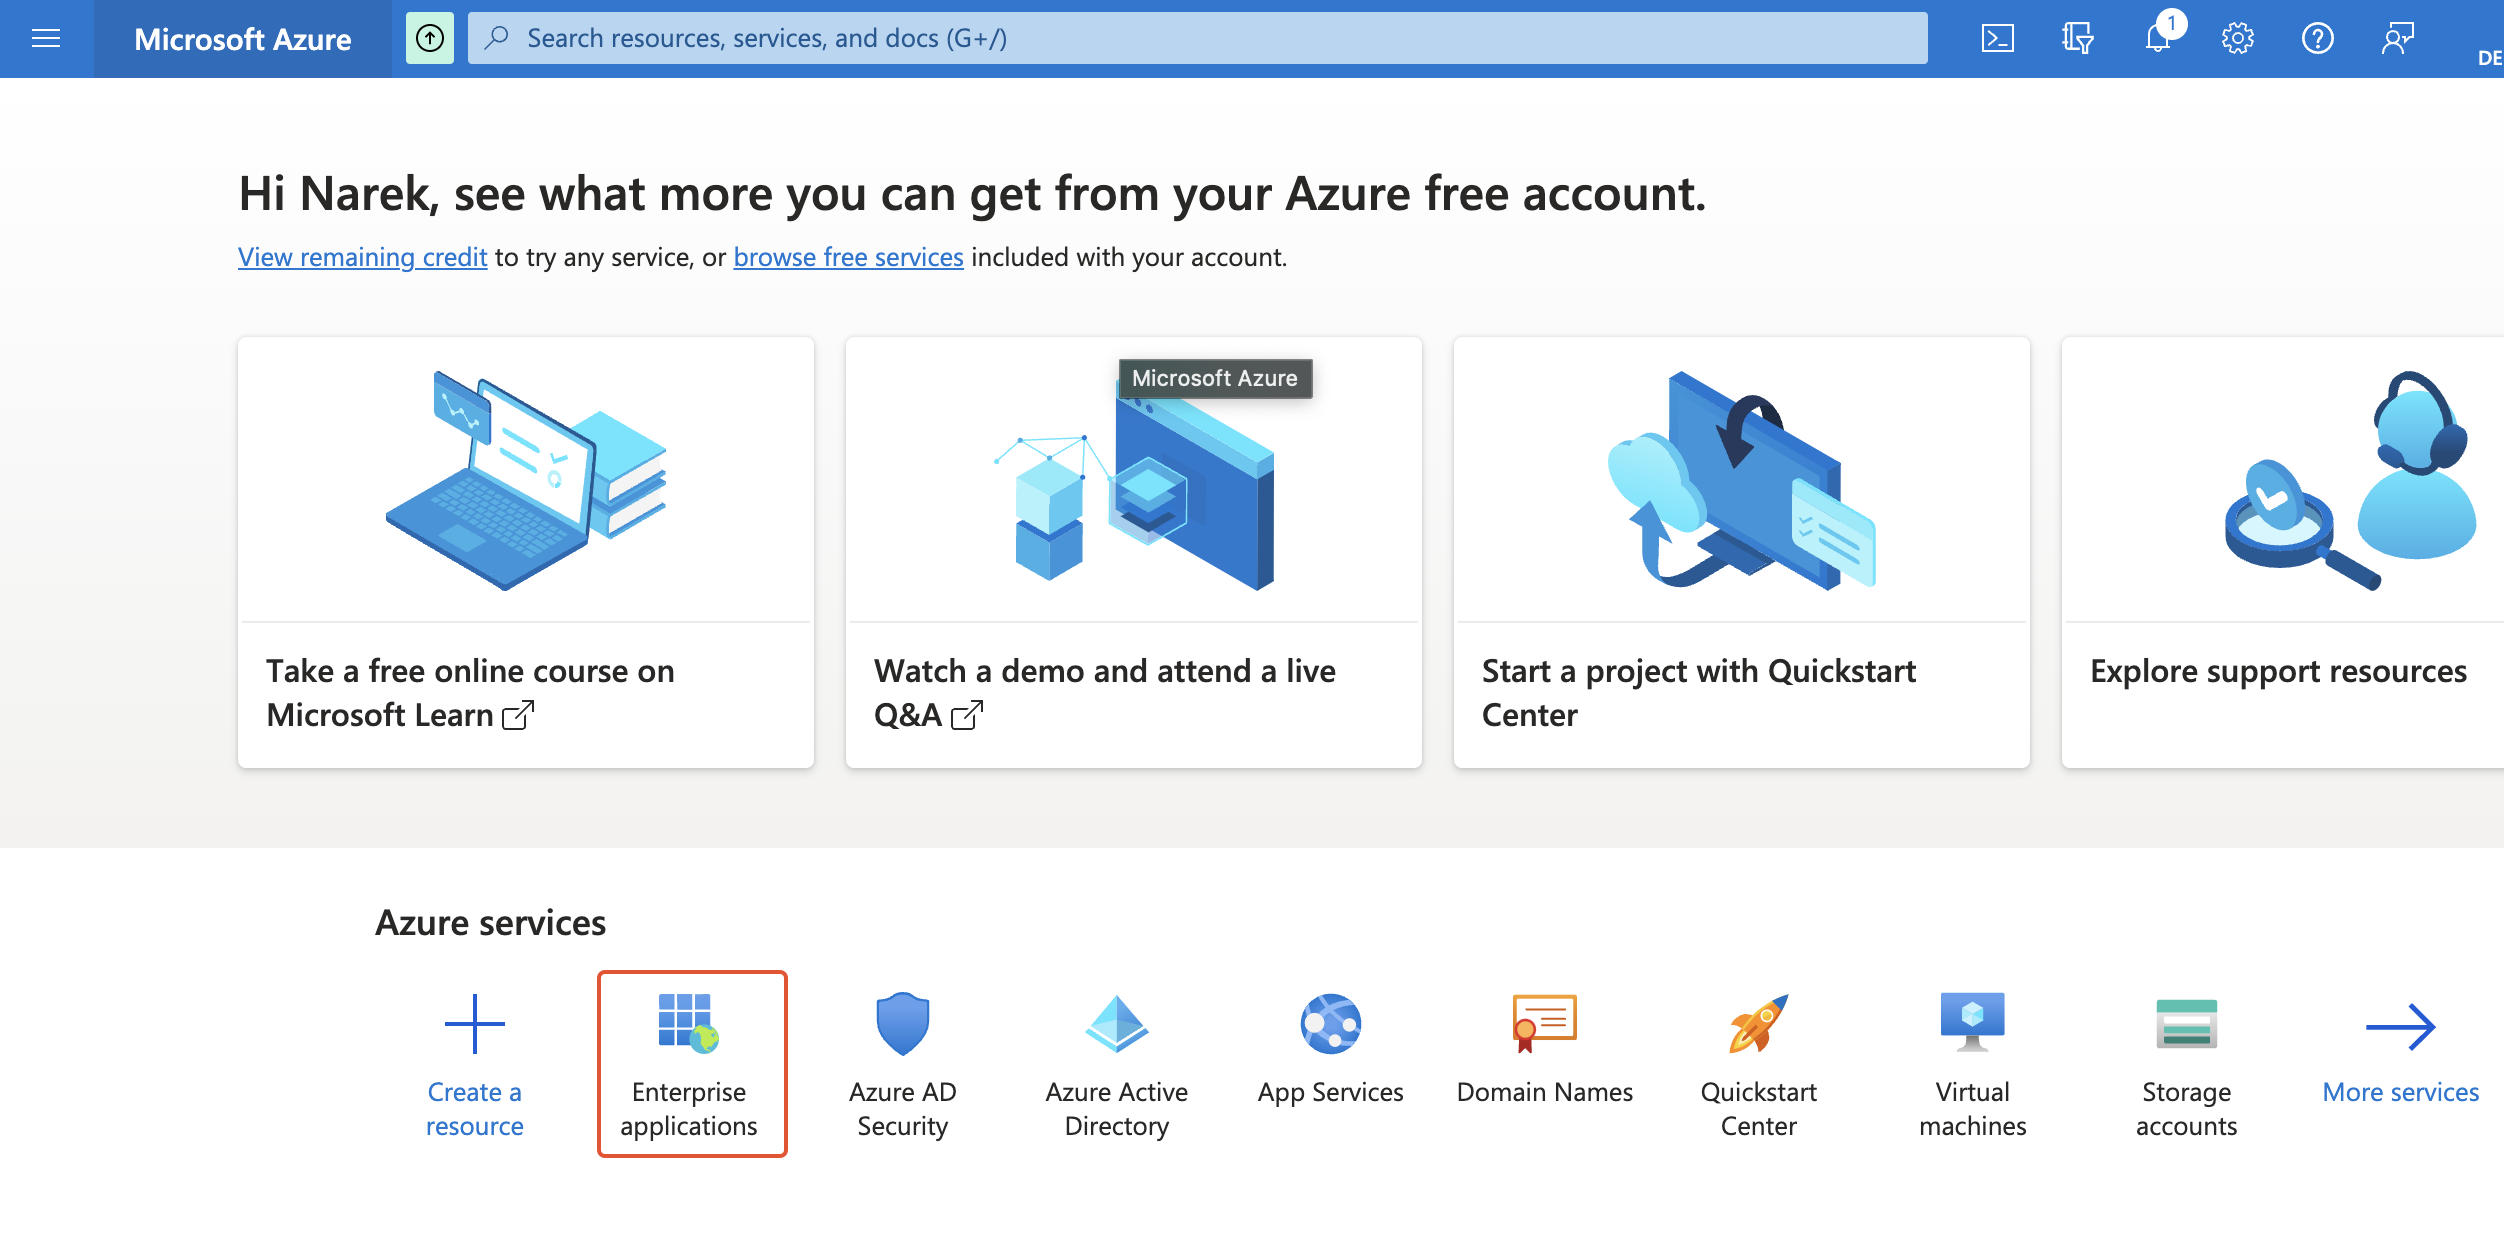
Enterprise applications
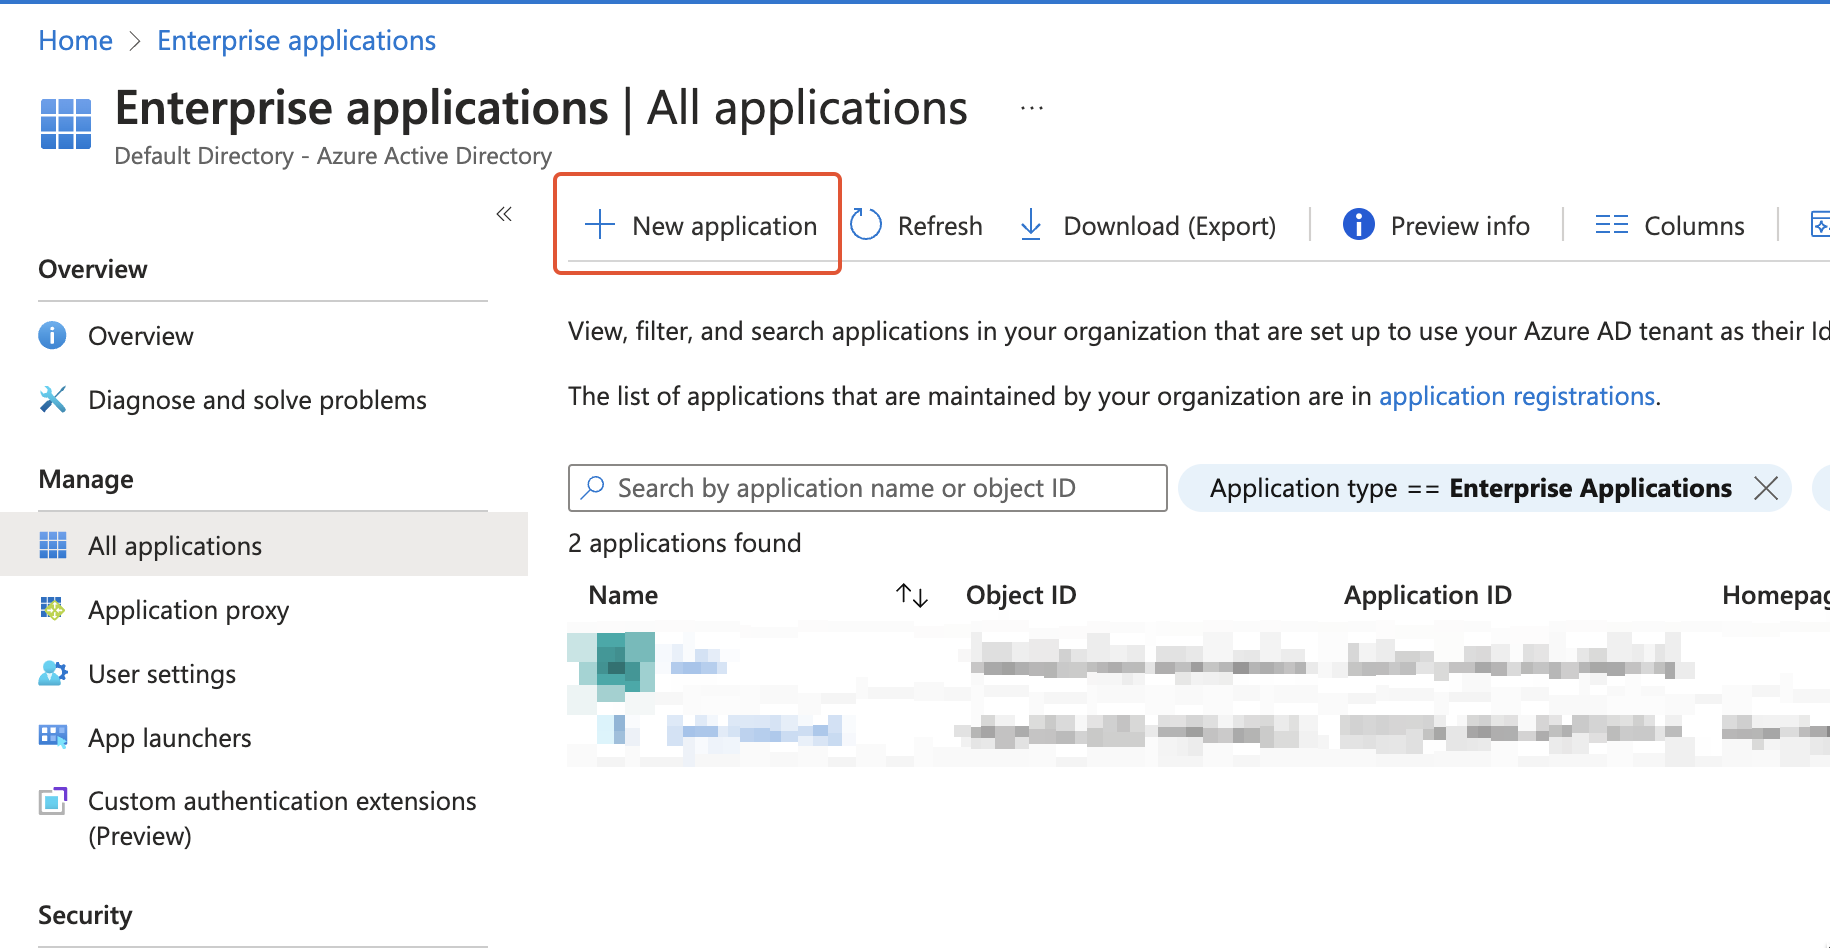
New application
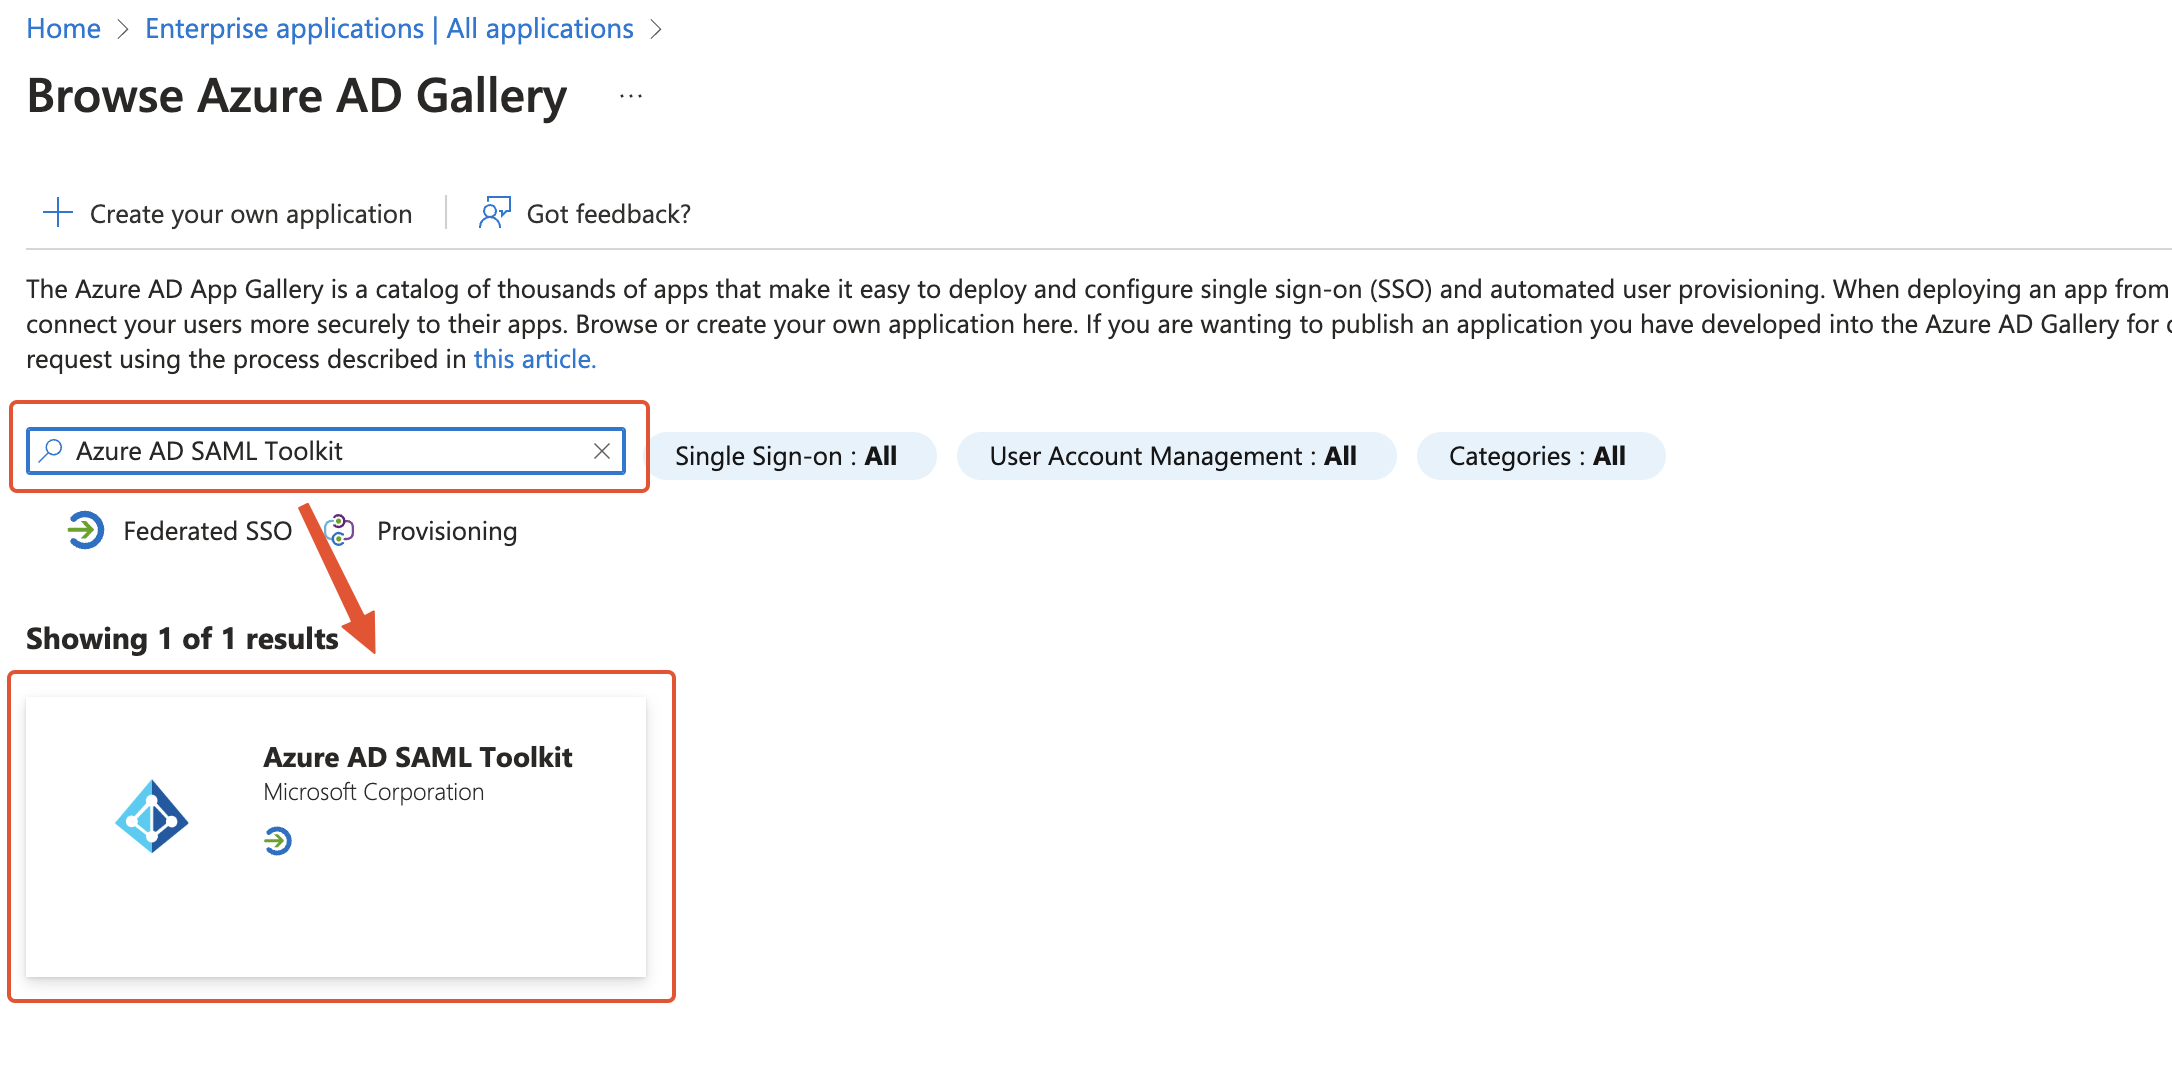
Locating “Azure AD SAML Toolkit”
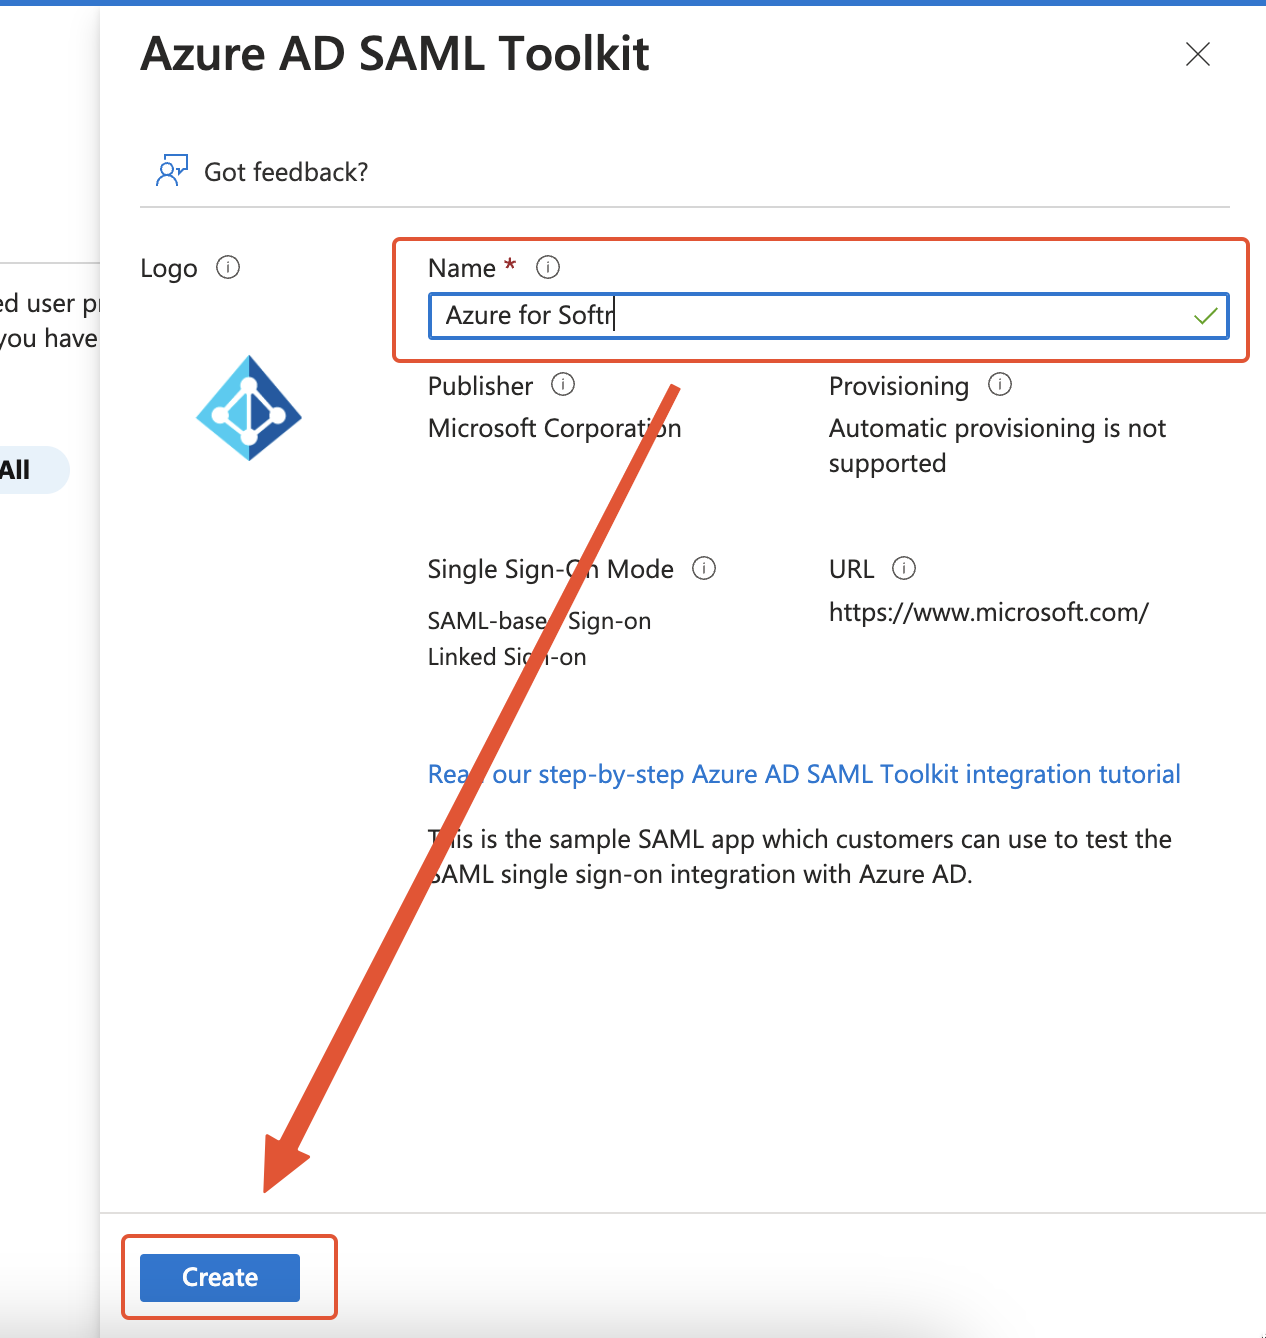
Creating the application
Getting started with single sign-on setup
On the Overview screen of the application that you just created, click Get started under Set up single sign on.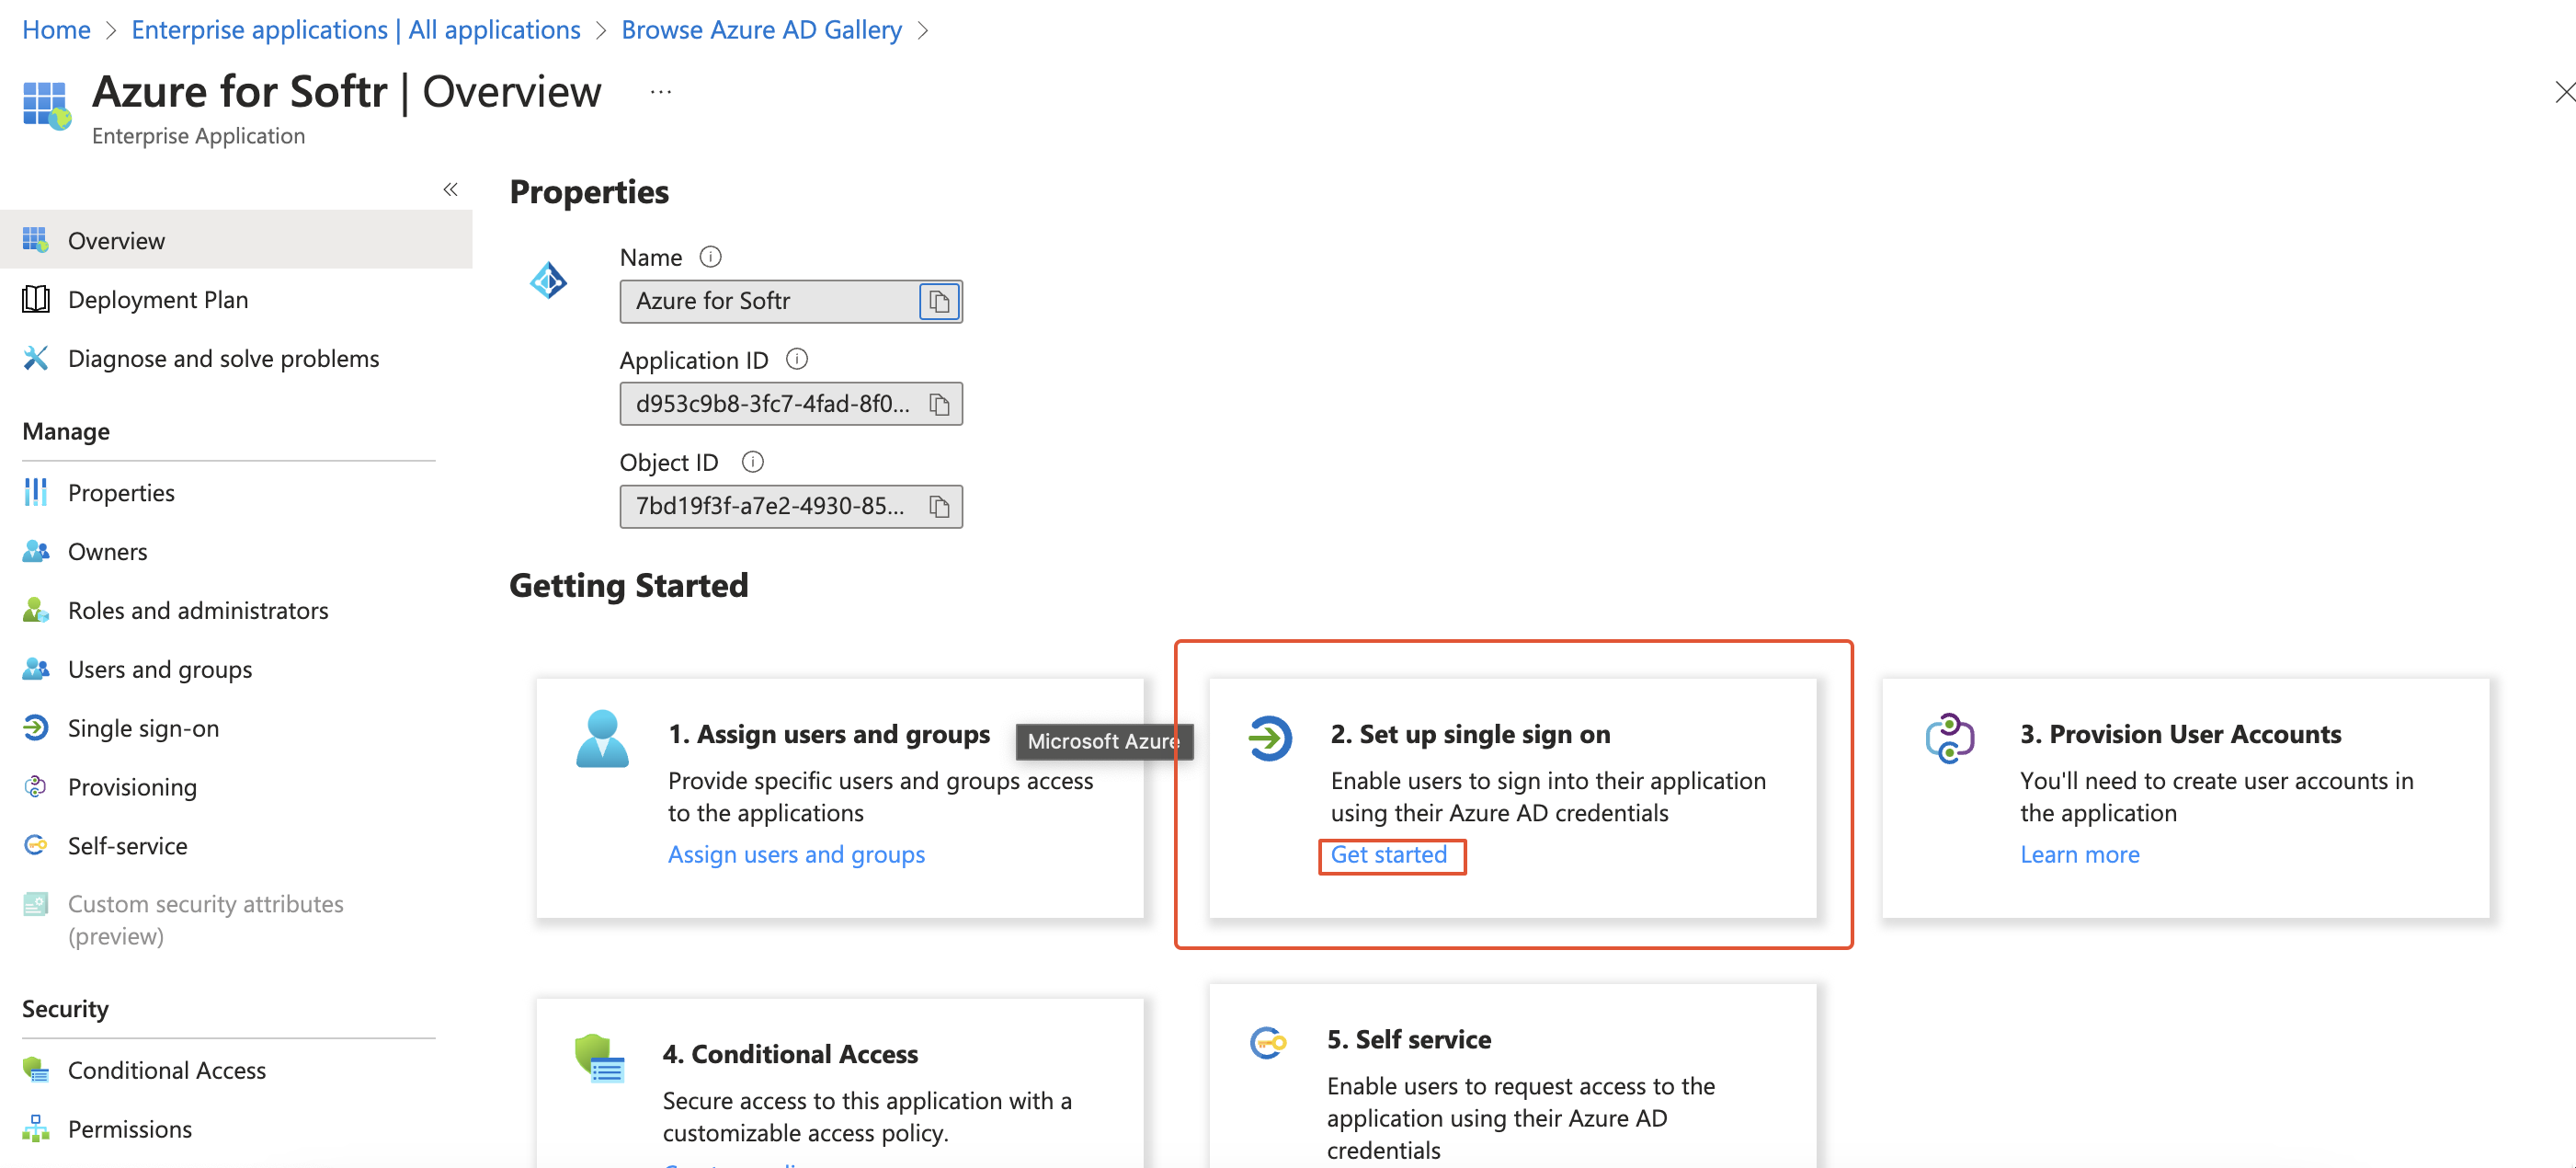
Getting started with single sign-on setup
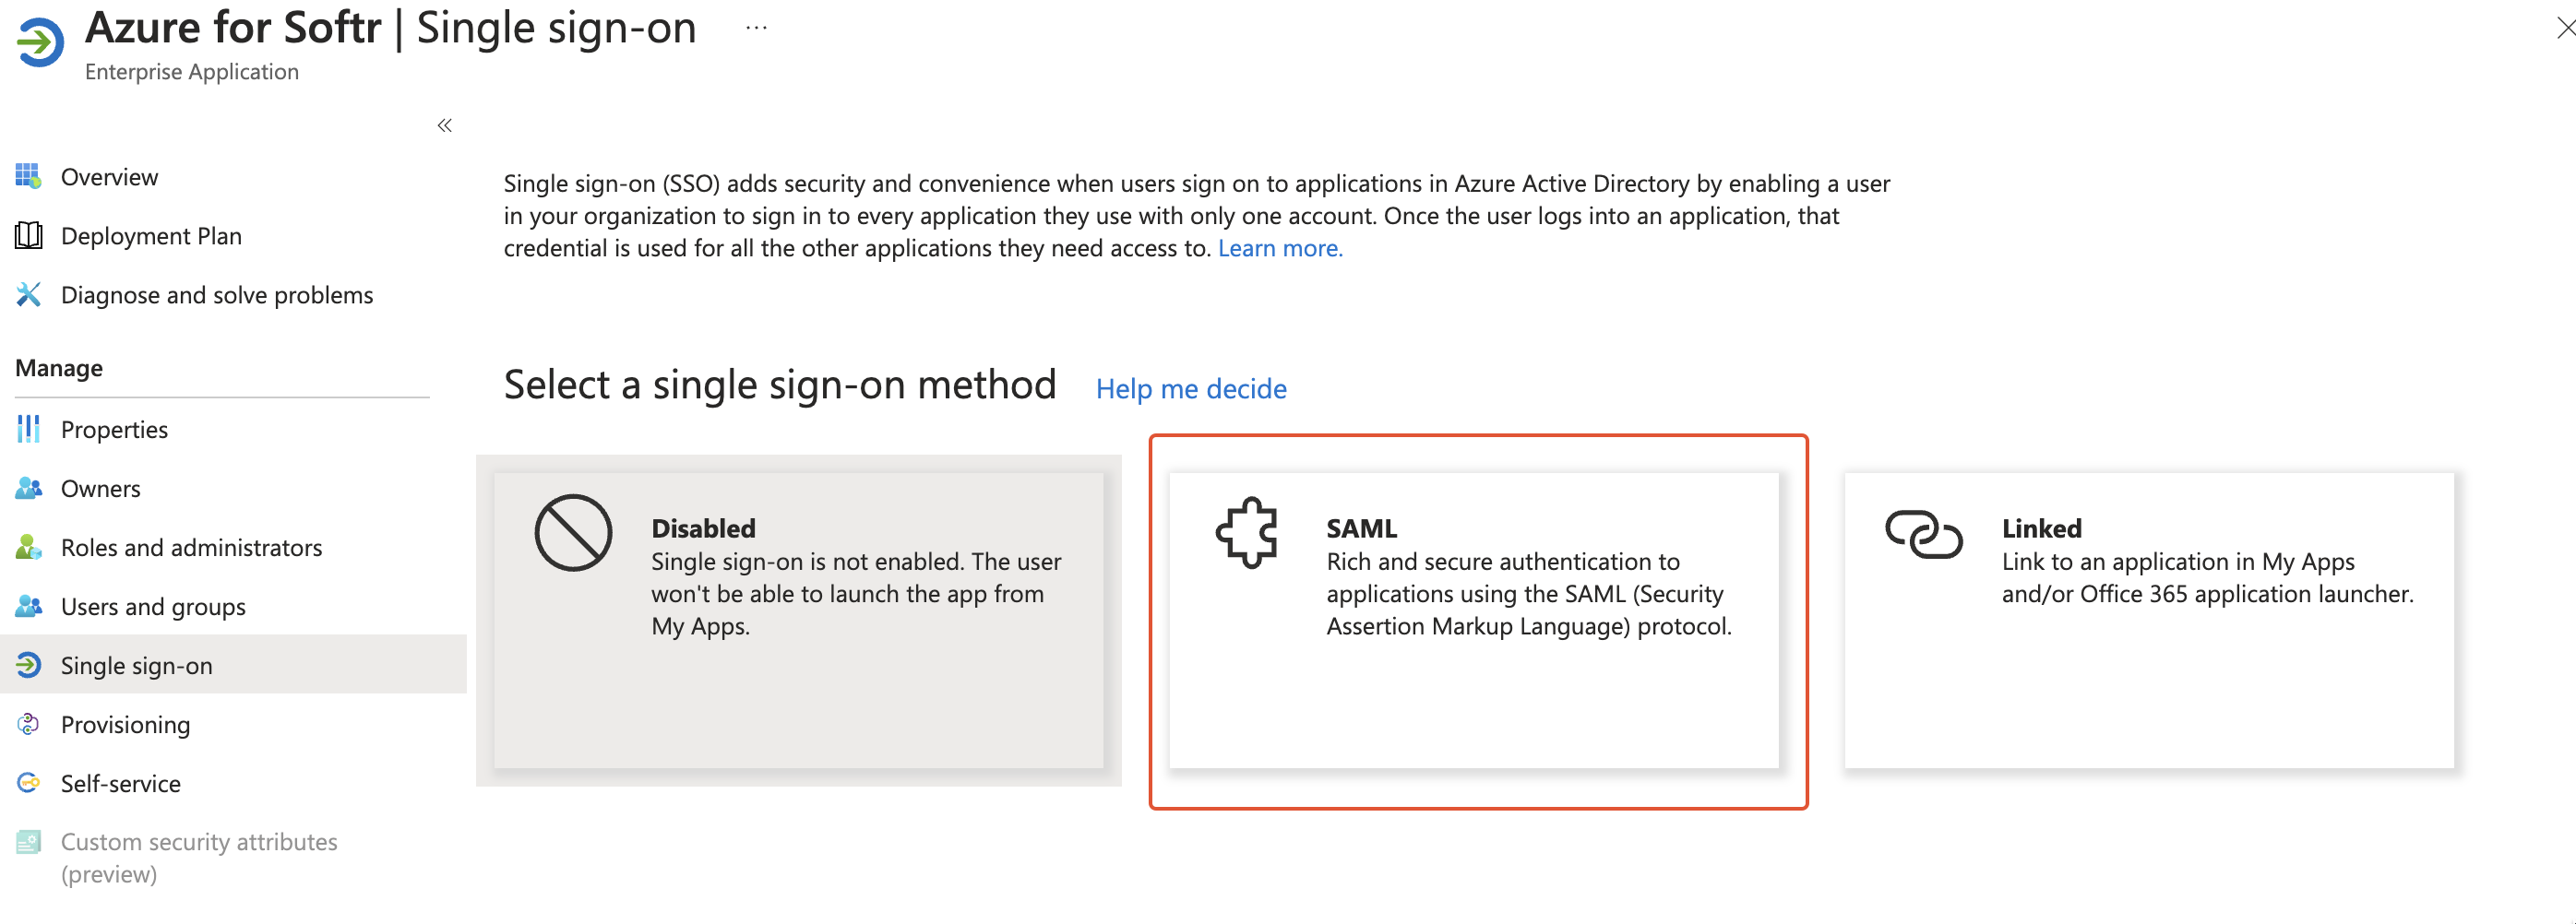
Selecting the single sign-on method
Basic SAML configuration
The first step of the setup is Basic SAML Configuration. Click Edit in the upper right corner to enter the configuration screen.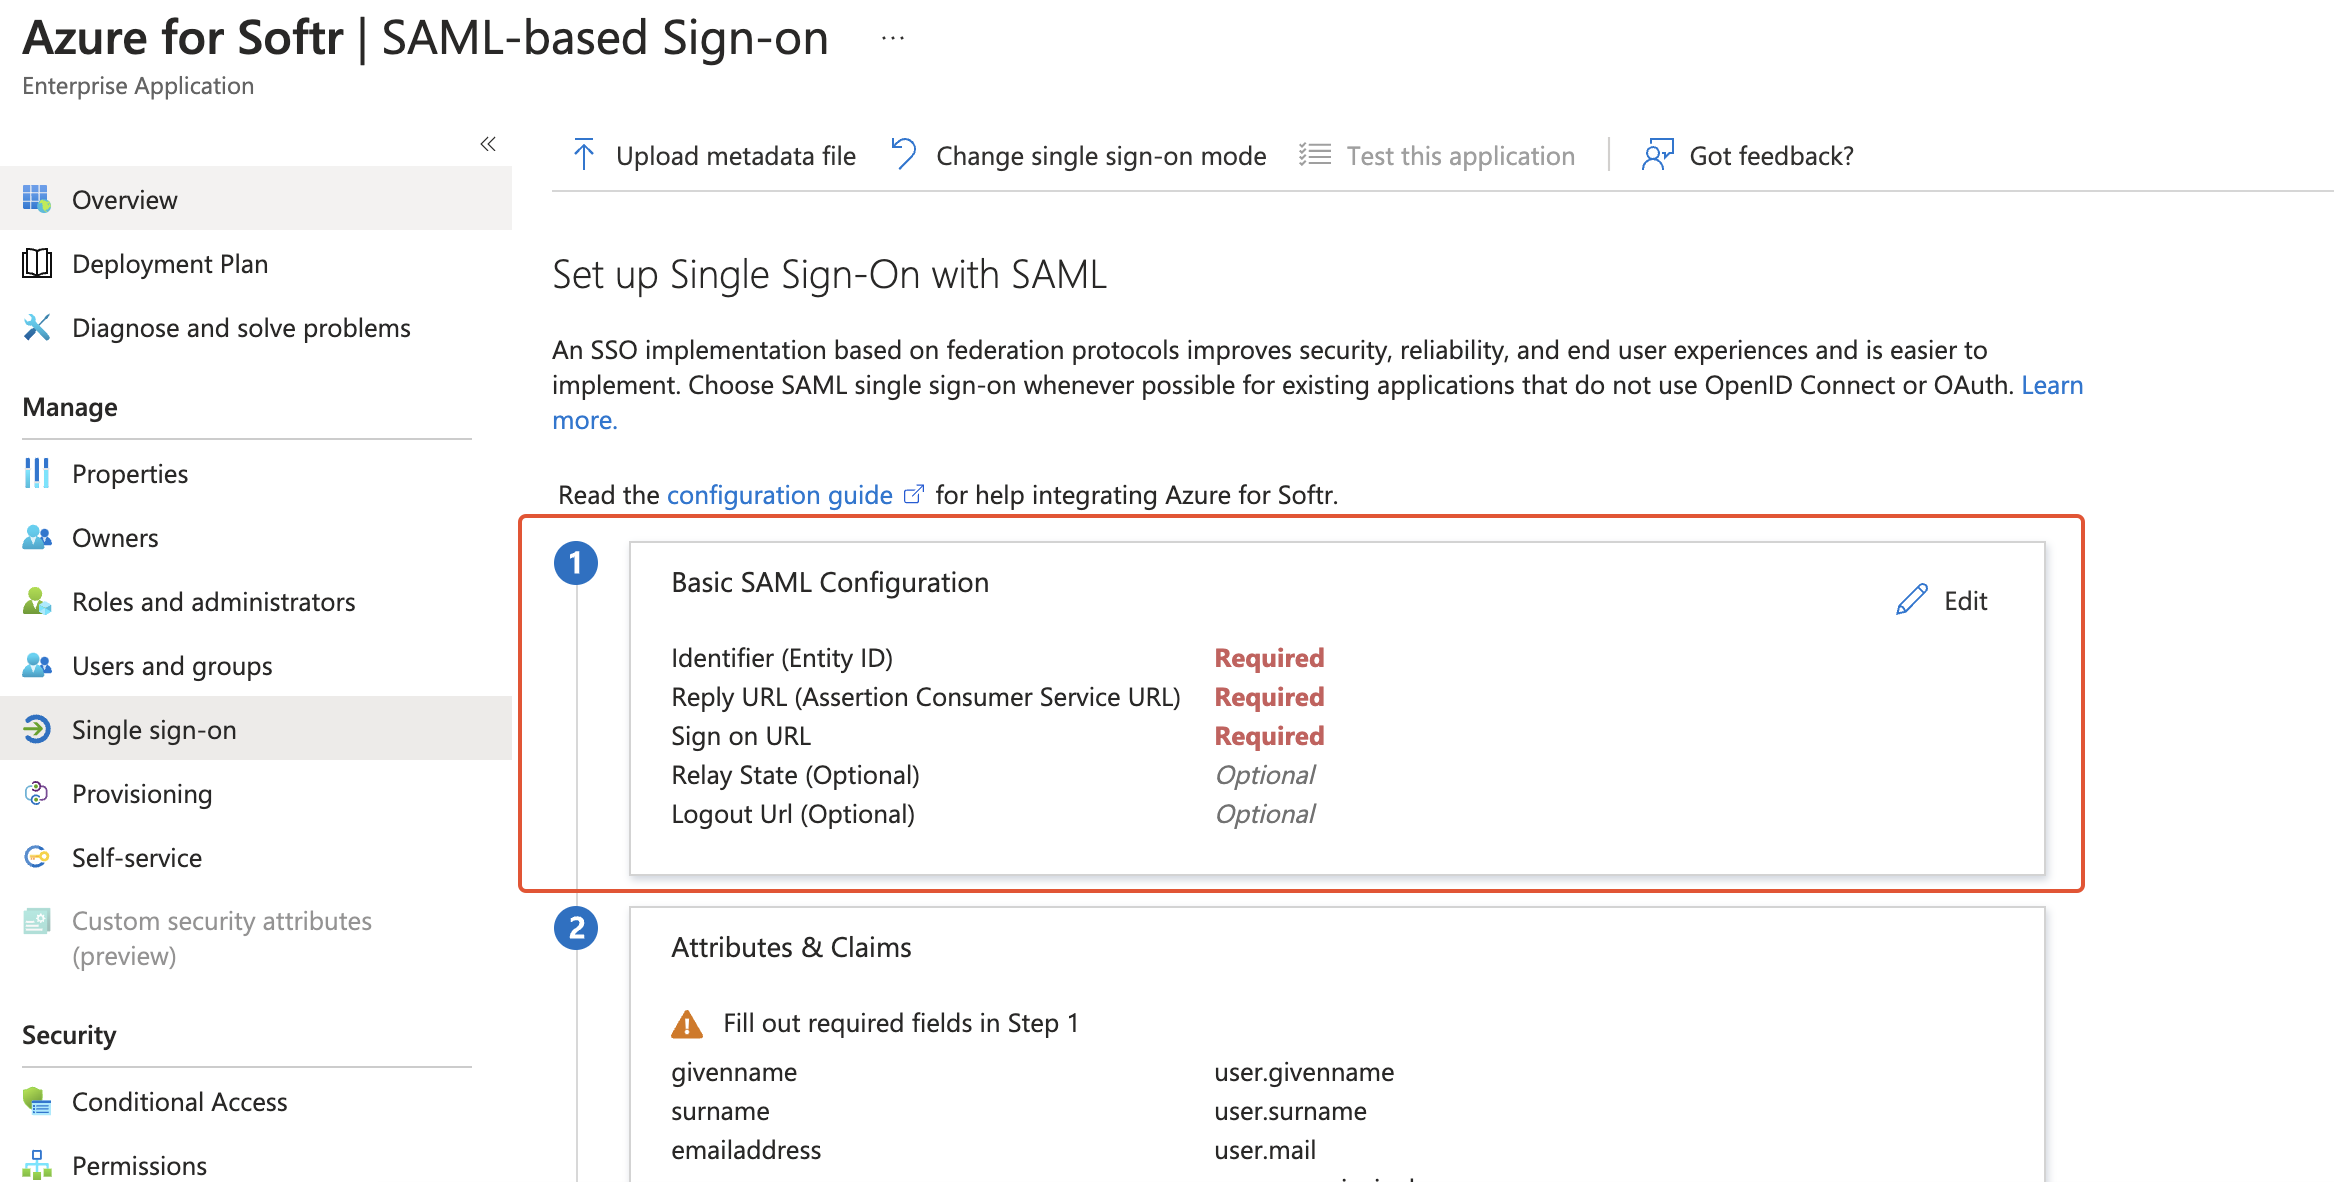
Basic SAML configuration
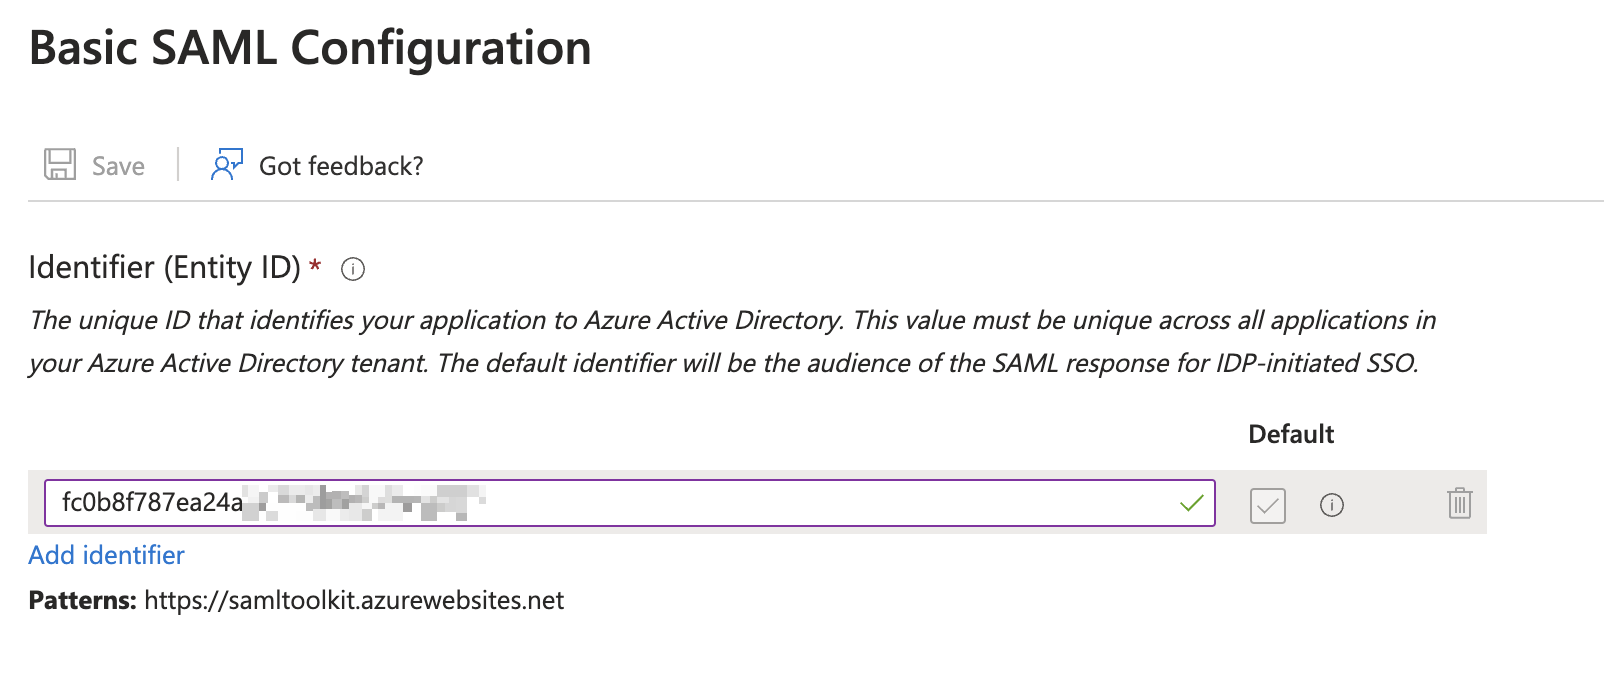
Adding Entity ID
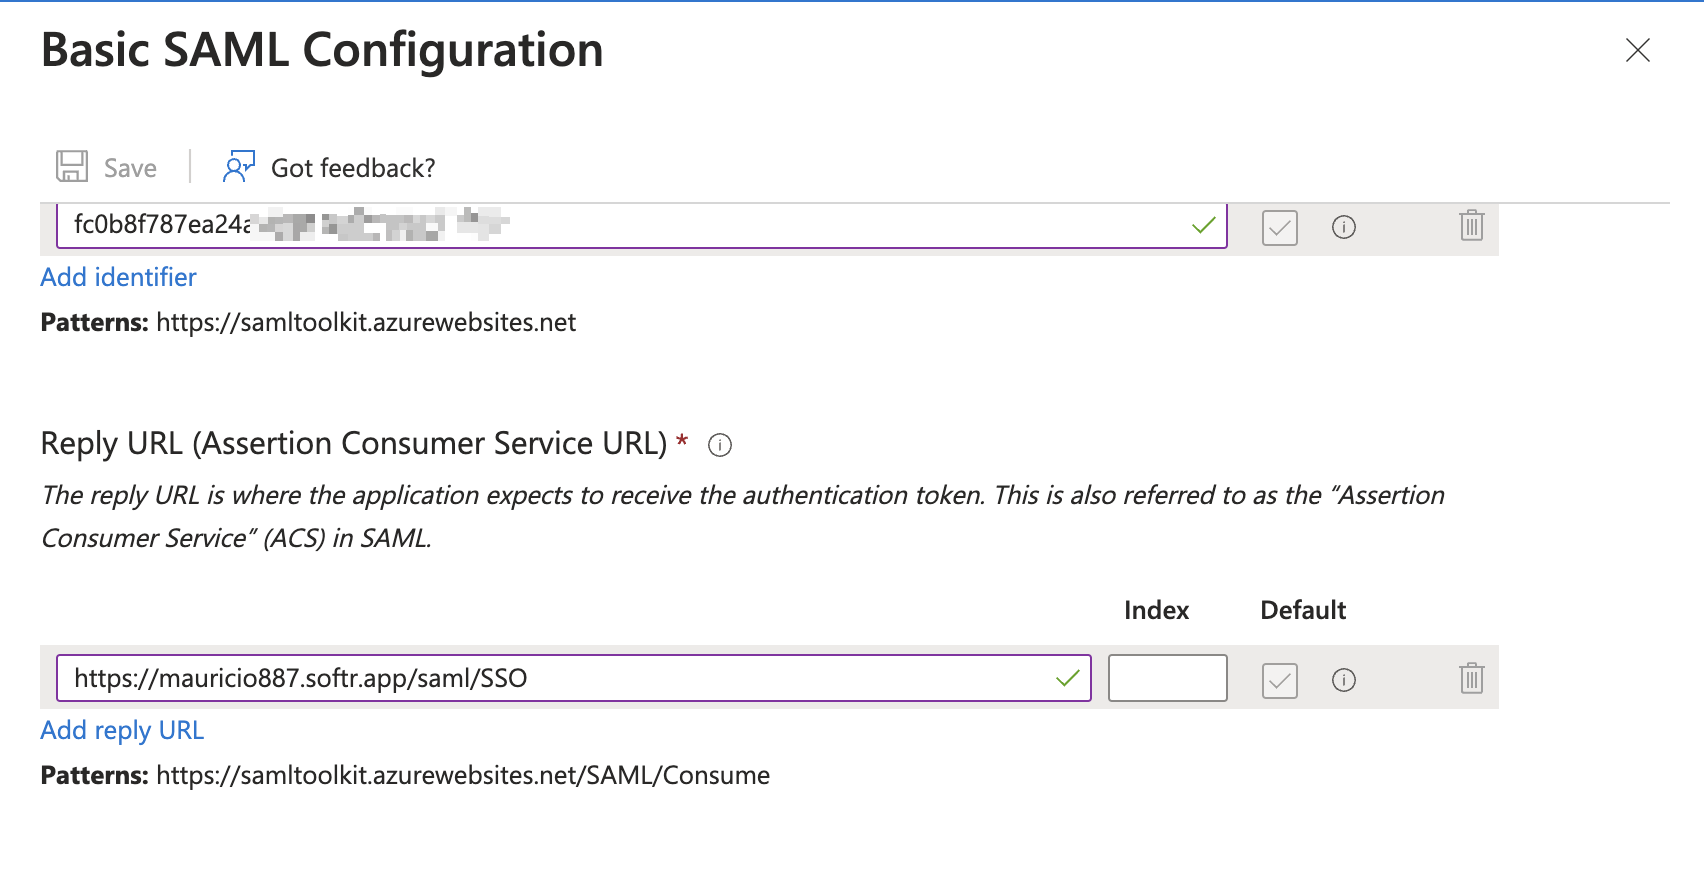
Adding ACS URL
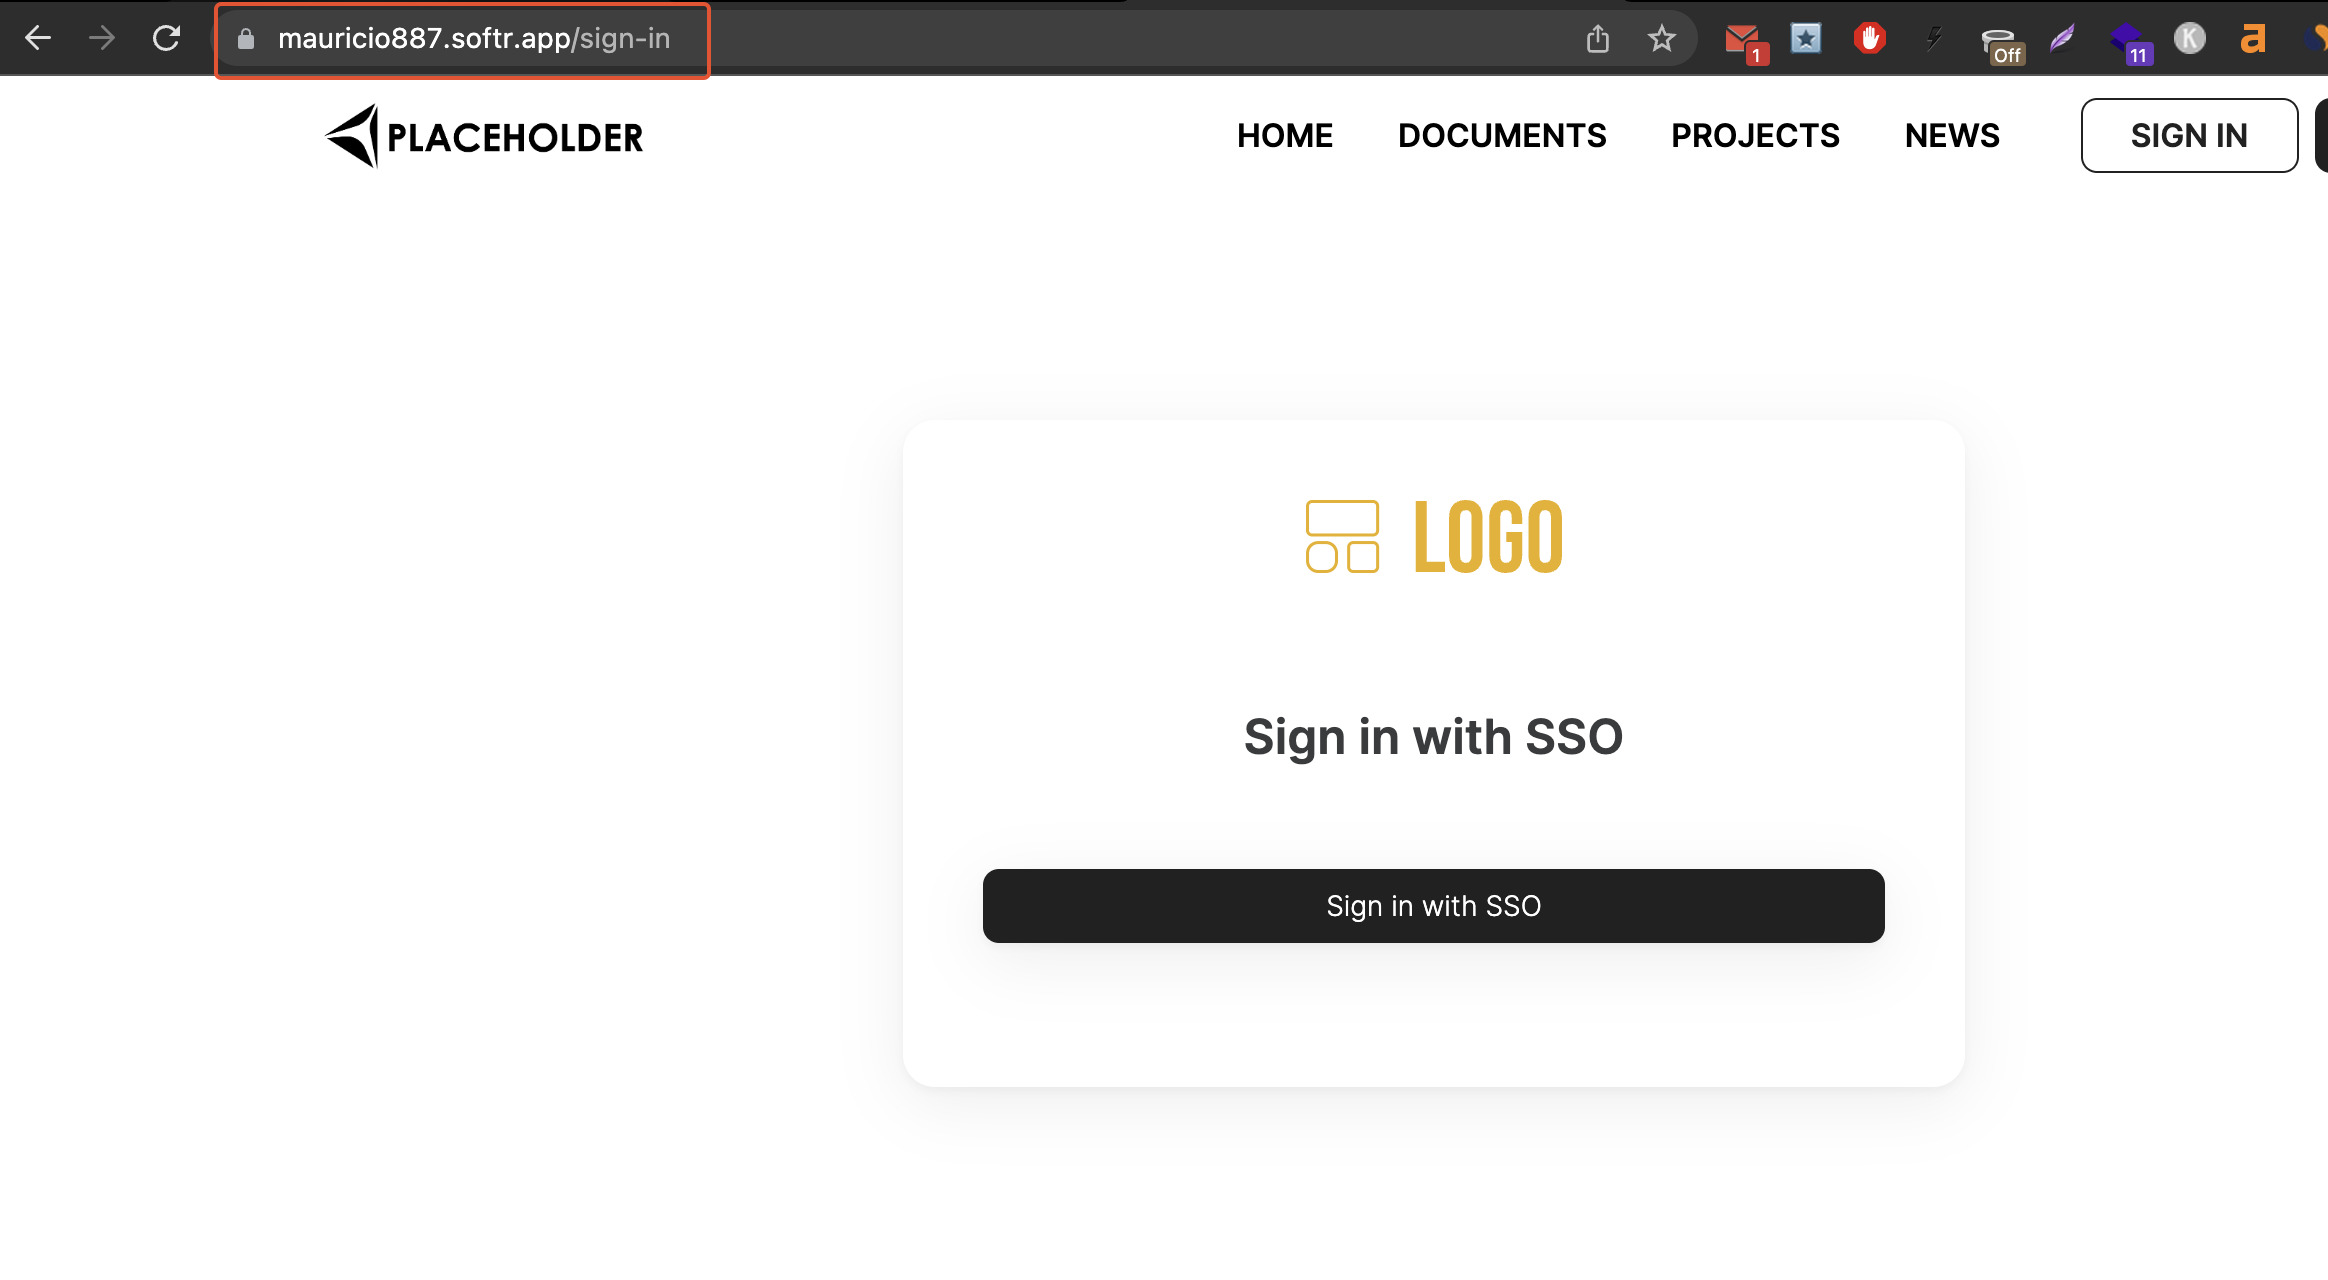
Softr application page with an SSO sign-in block
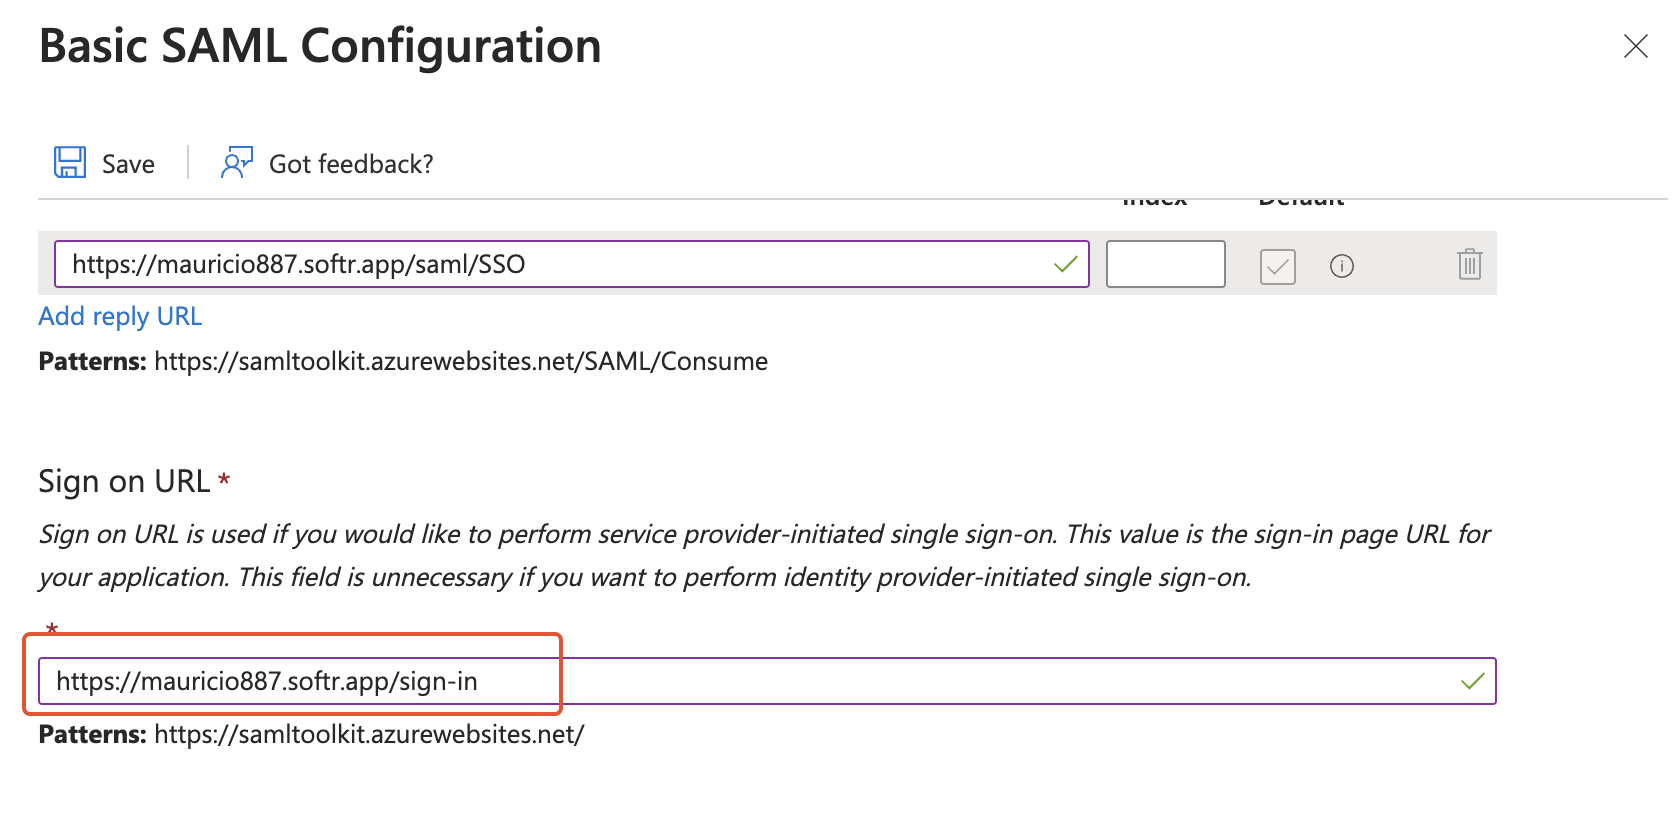
Adding the Sign on URL
Attributes & Claims
In this step, you need to copy the First Name, Last Name, and Email keys from Azure and add them into your Softr app’s single sign-on settings.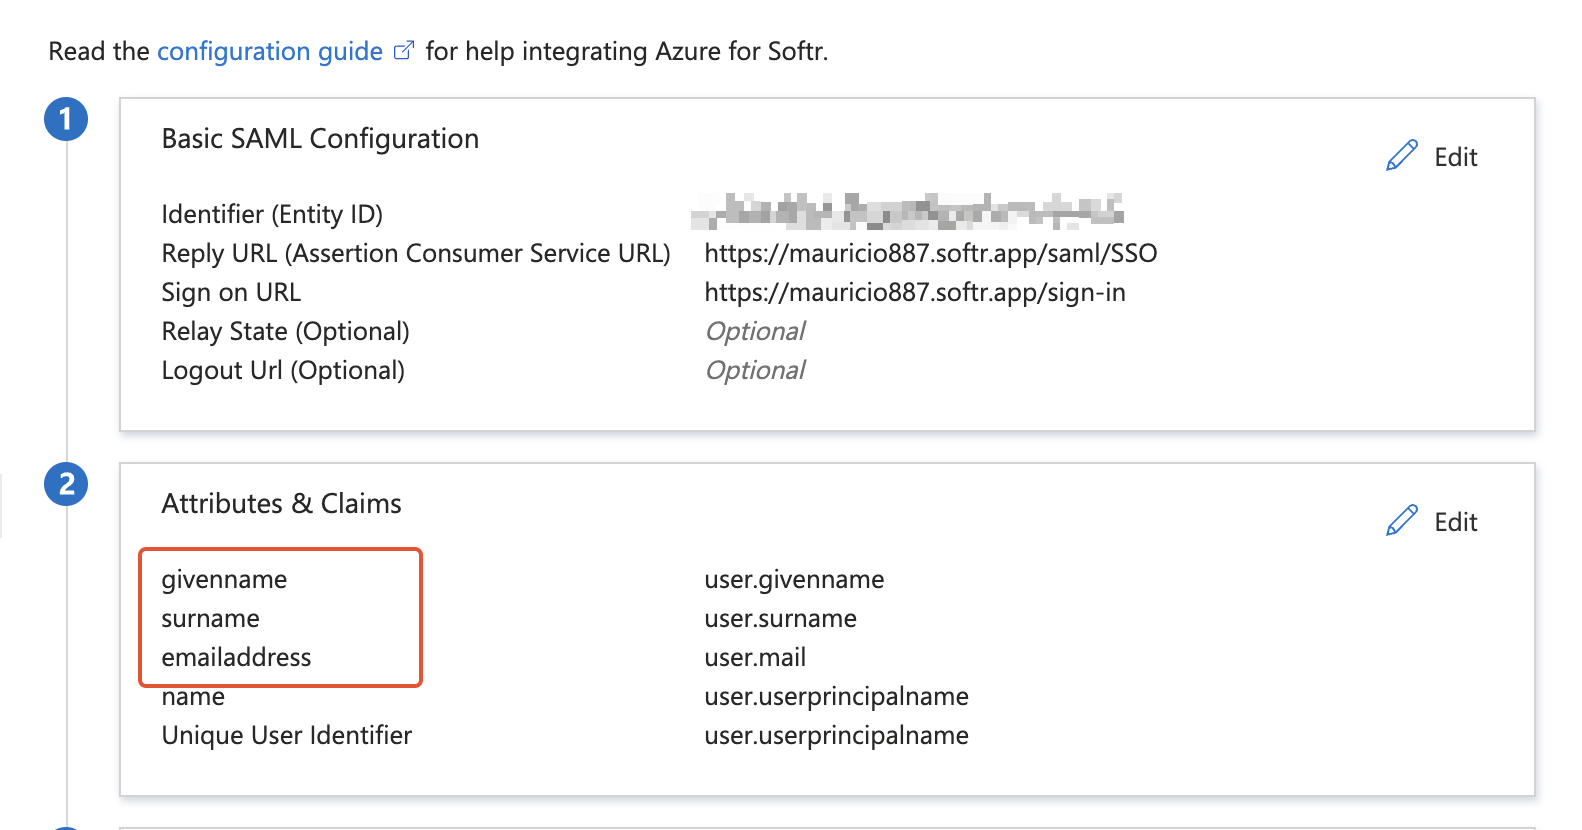
Getting the keys from Azure
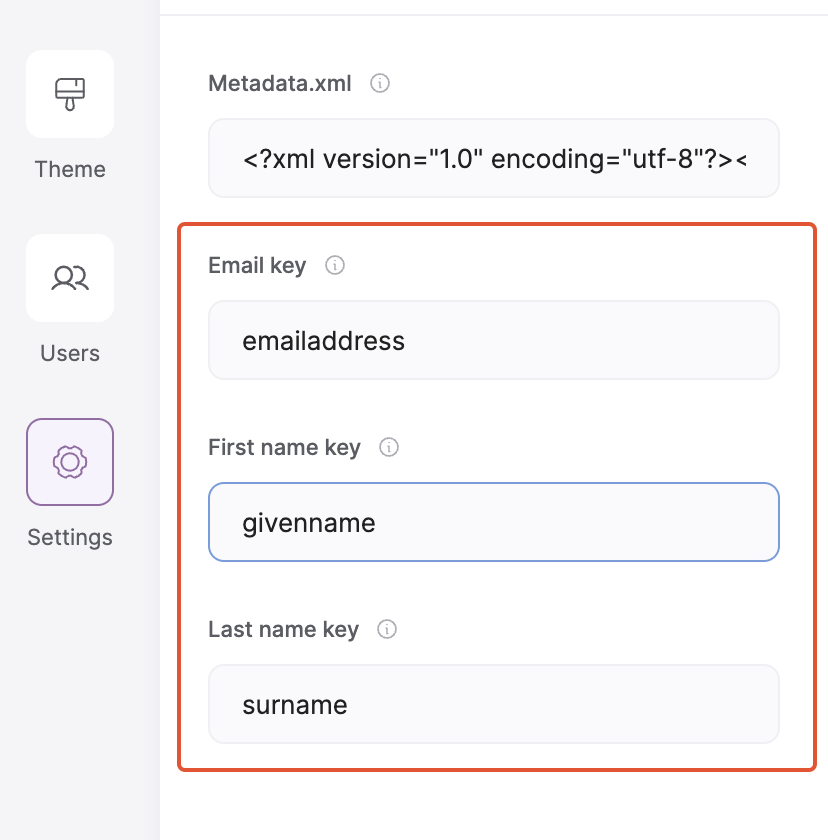
Applying keys in Softr
SAML Certificates
In this step, you need to download the Metadata XML file in Azure.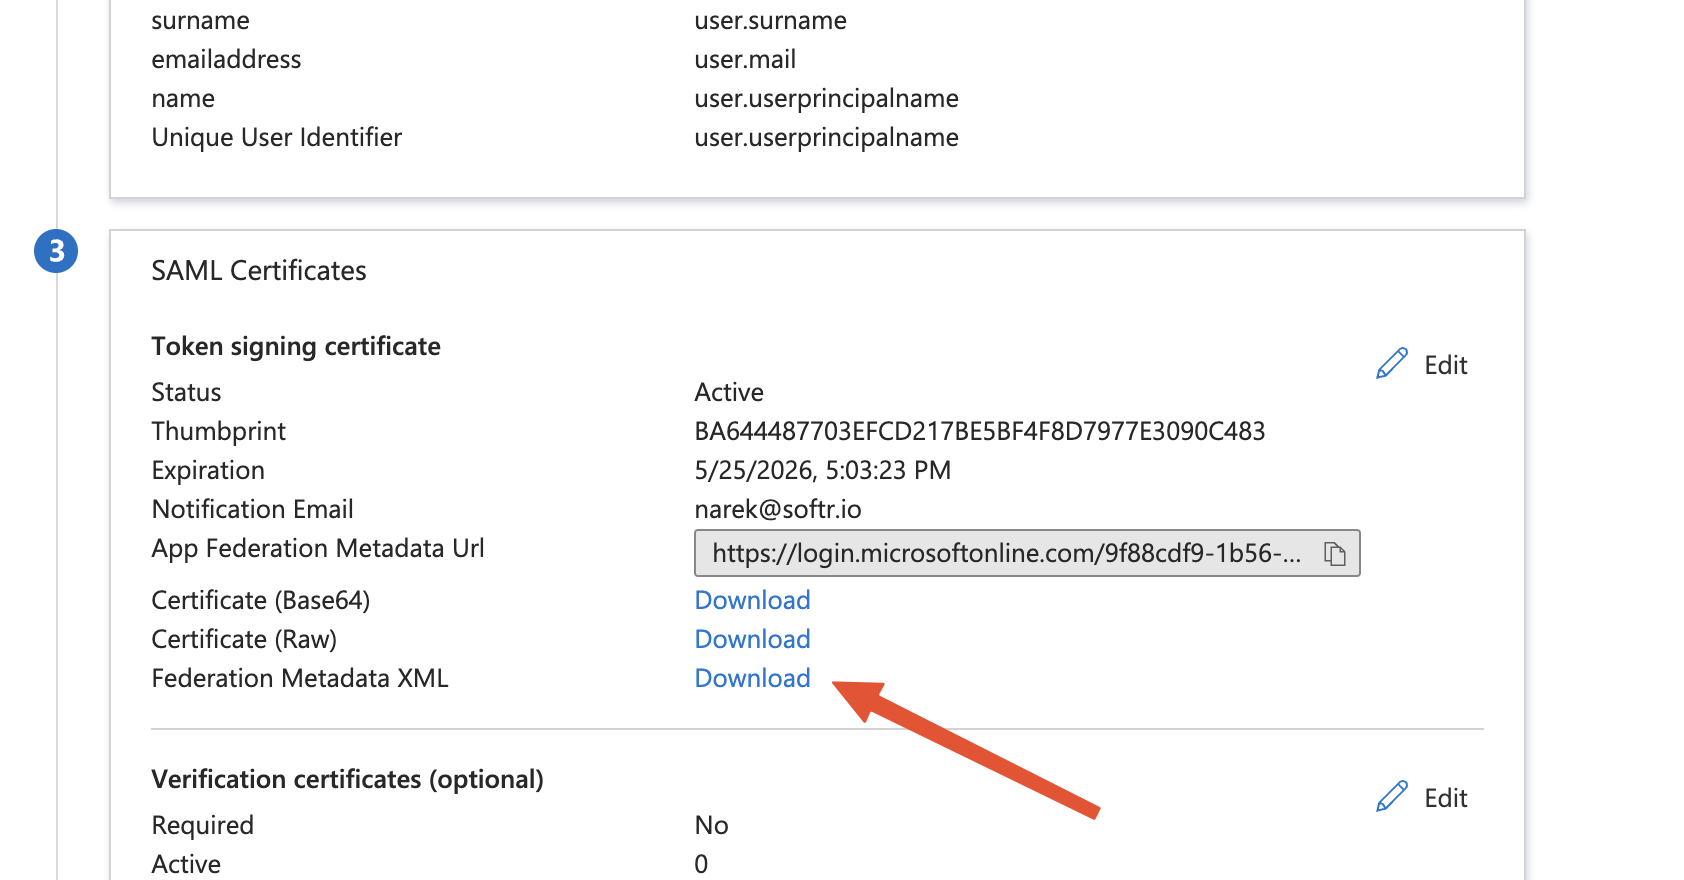
Metadata XML Download
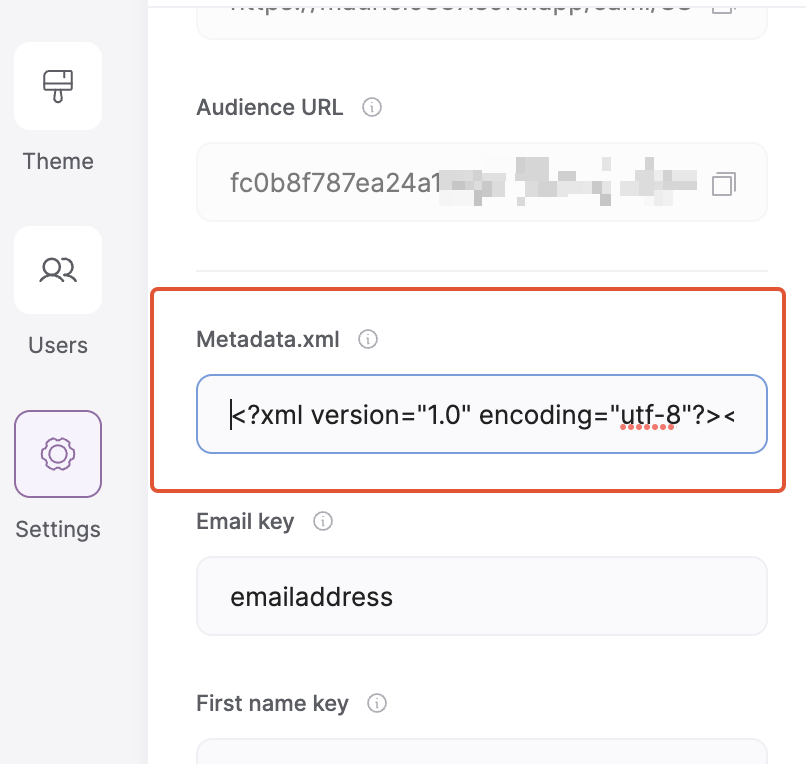
Adding metadata XML to Softr
Assigning users to an application and testing
Now, your users should be able to log into your Softr app with their Active Directory credentials. Note, that the user needs to be assigned to your Azure application to be able to access it. To assign a user, you need to navigate to the Users and groups sections of your application and add that user. The following gif shows the process of assigning a user to an application.
Assigning a user to your application
Signing in with Active Directory credentials