Use Case: Adding Users through Make (formerly Integromat
Using Softr API and Make to add user accounts.
In this use case, we are going to use the API to add users to a Softr app via Make. We are going to add users on Airtable and send them to Softr. Let’s proceed.
Option 1: Make's Softr module
Option 2: Using a Custom HTTP Request
1
Setting a Trigger
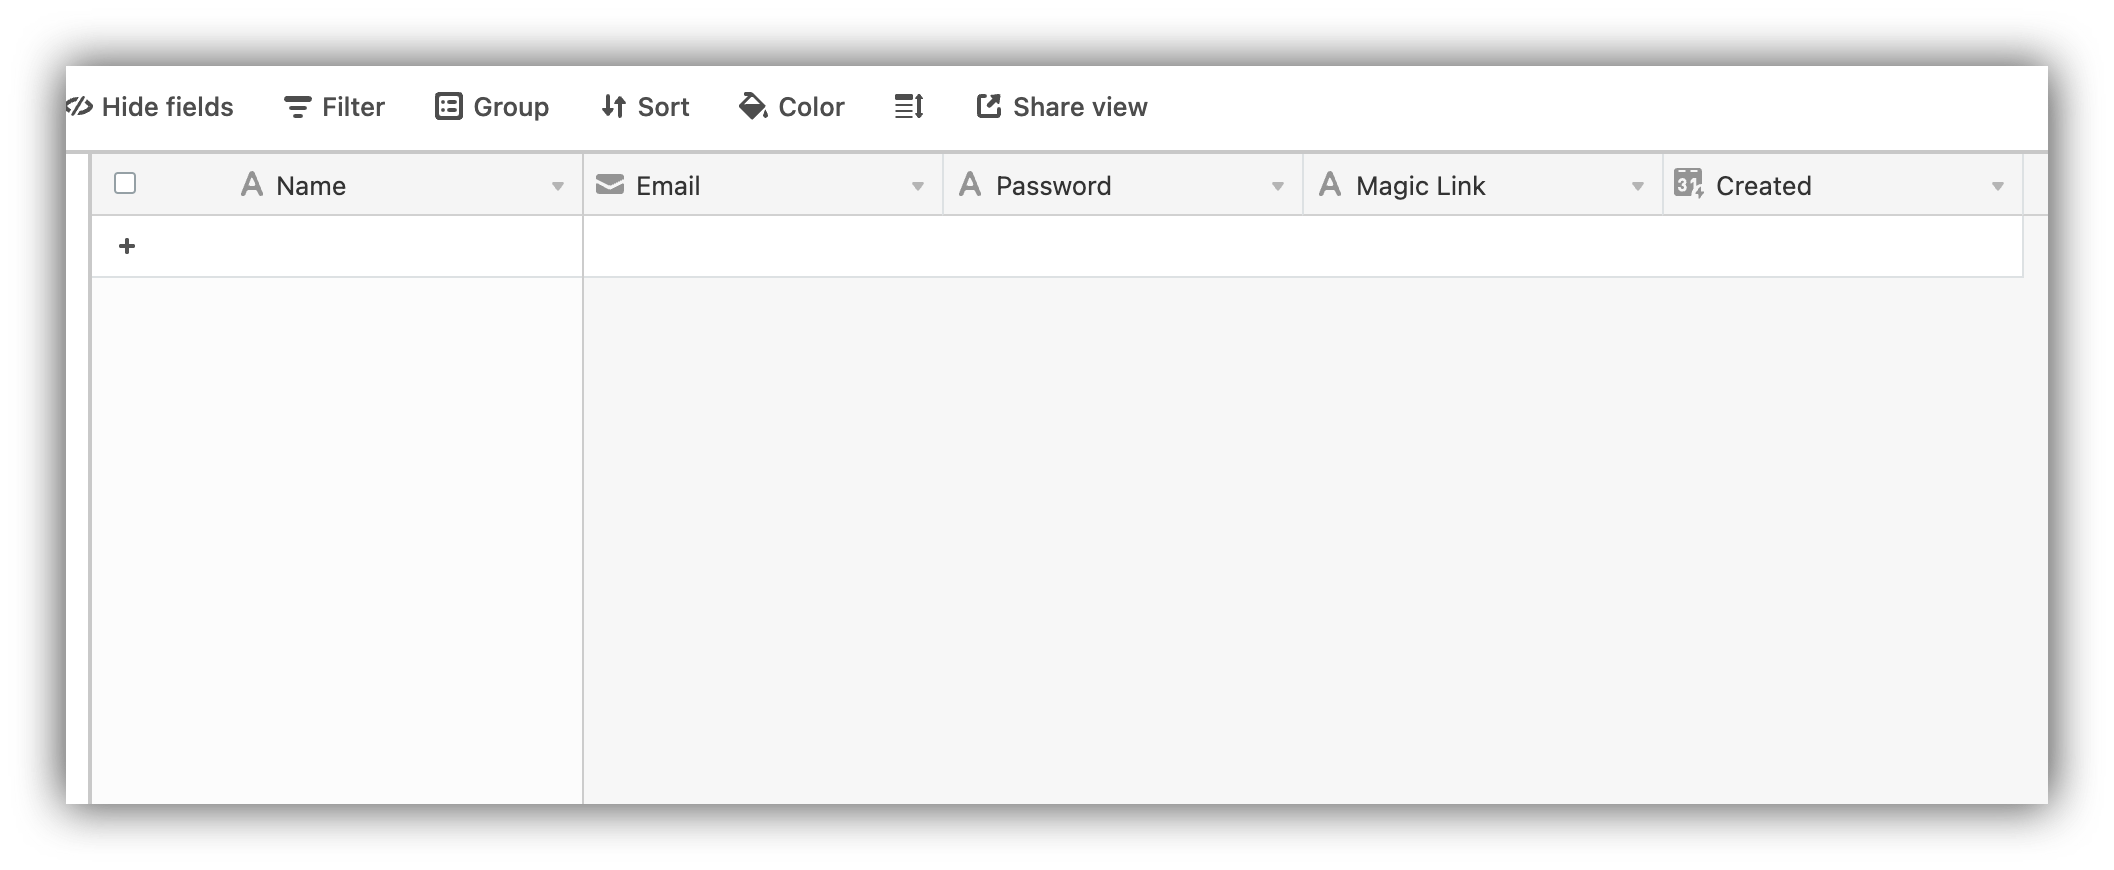
First of all, we’re going to create a table on Airtable with Name, Email, Password, Magic Link, Created Date/Time (needed for watching record creation in Make) columns to store user data.
Table setup on Airtable
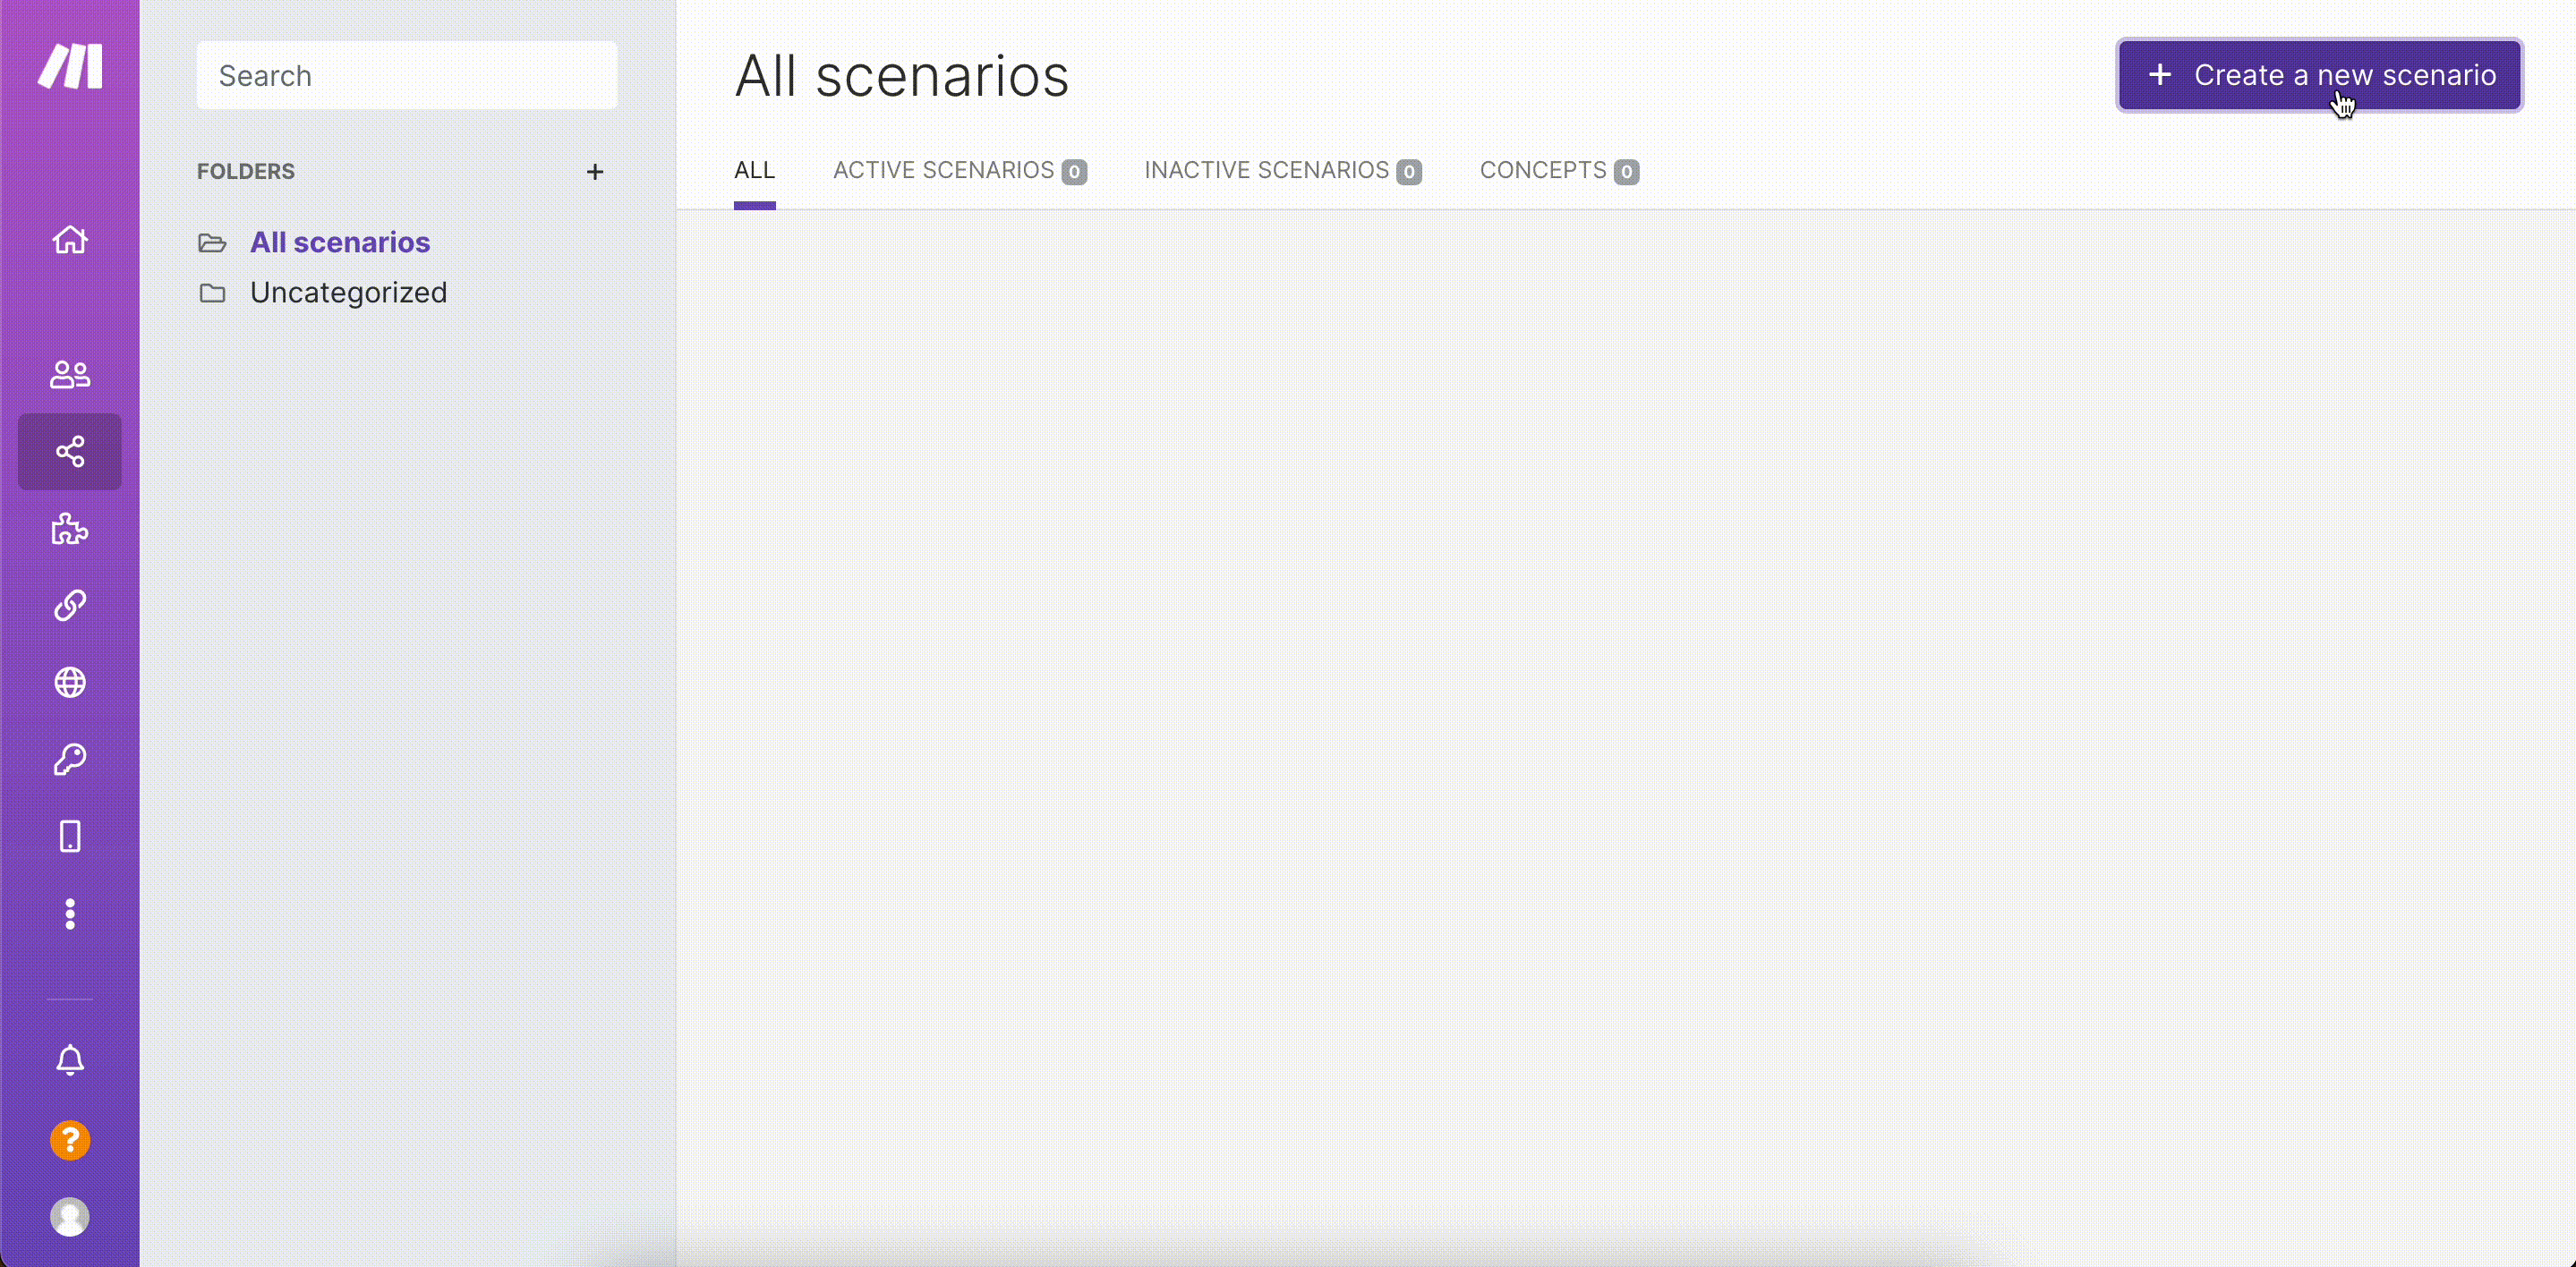
Then, we’ll go to Make dashboard, create a new scenario, and add a trigger that watches for new records on our selected table. See below.
Creating the trigger
Now, we need to set up an Action to add the users received from Airtable. There are two options for this:
Make’s Softr module;
Custom HTTPrequest.
Let’s consider each option separately.
2
Configuring the Action
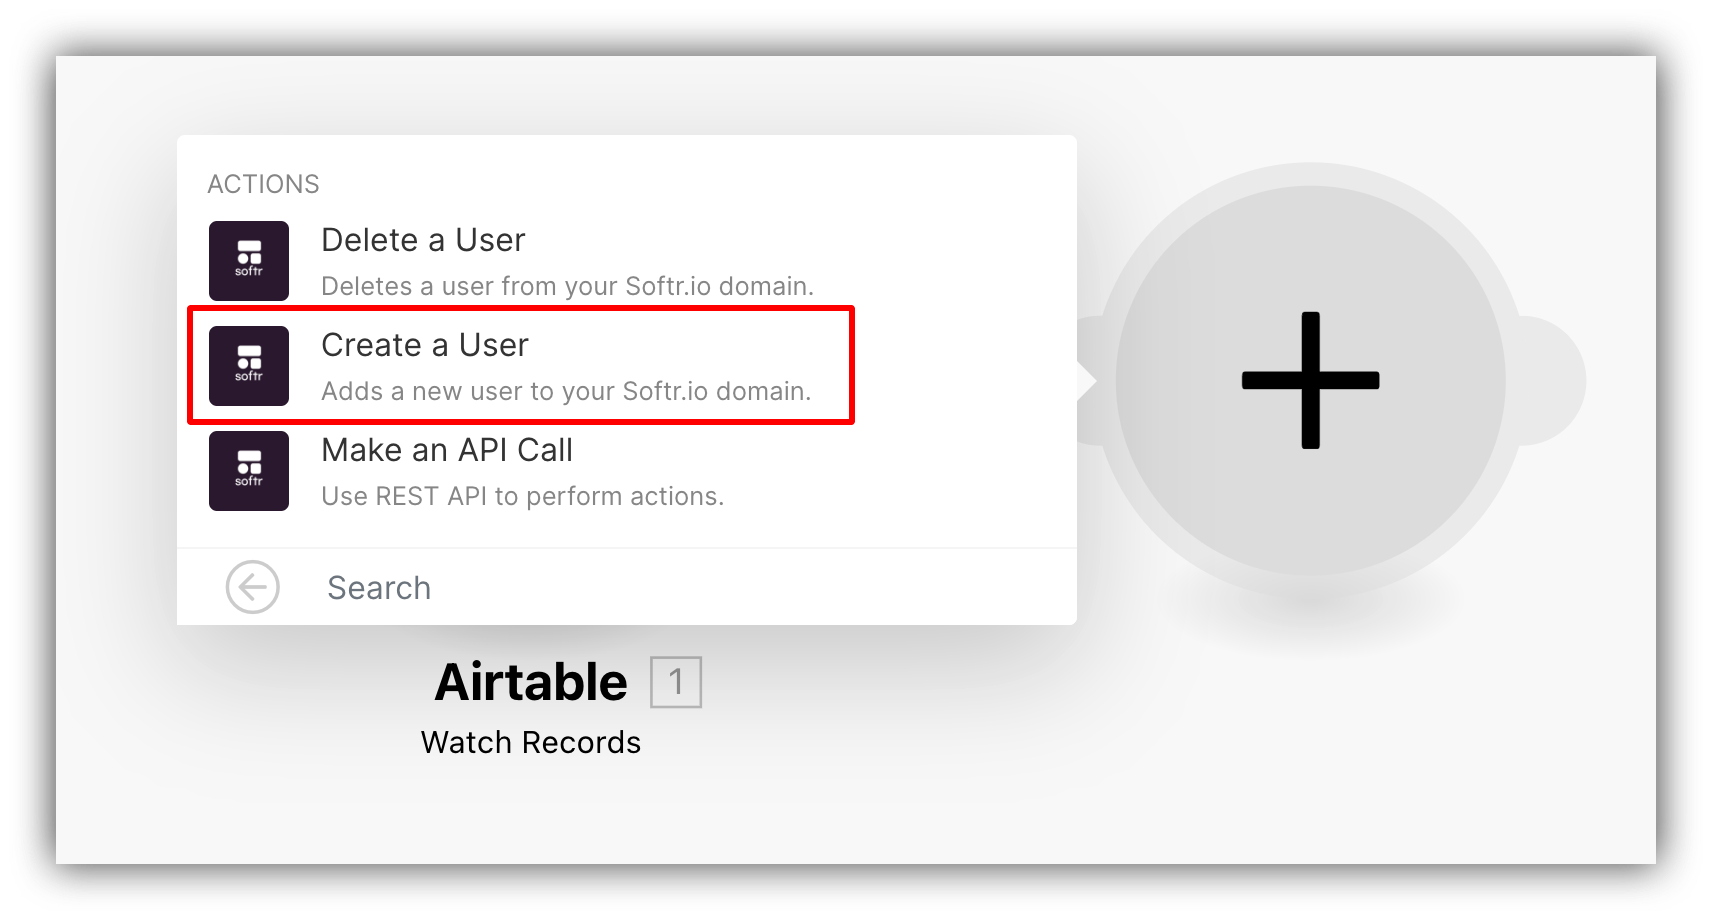
Let’s add a new module to the scenario, search for “Softr,” and select it.
Locating the Softr module
Then, we are going to choose the Create a User option.
Choosing the Action
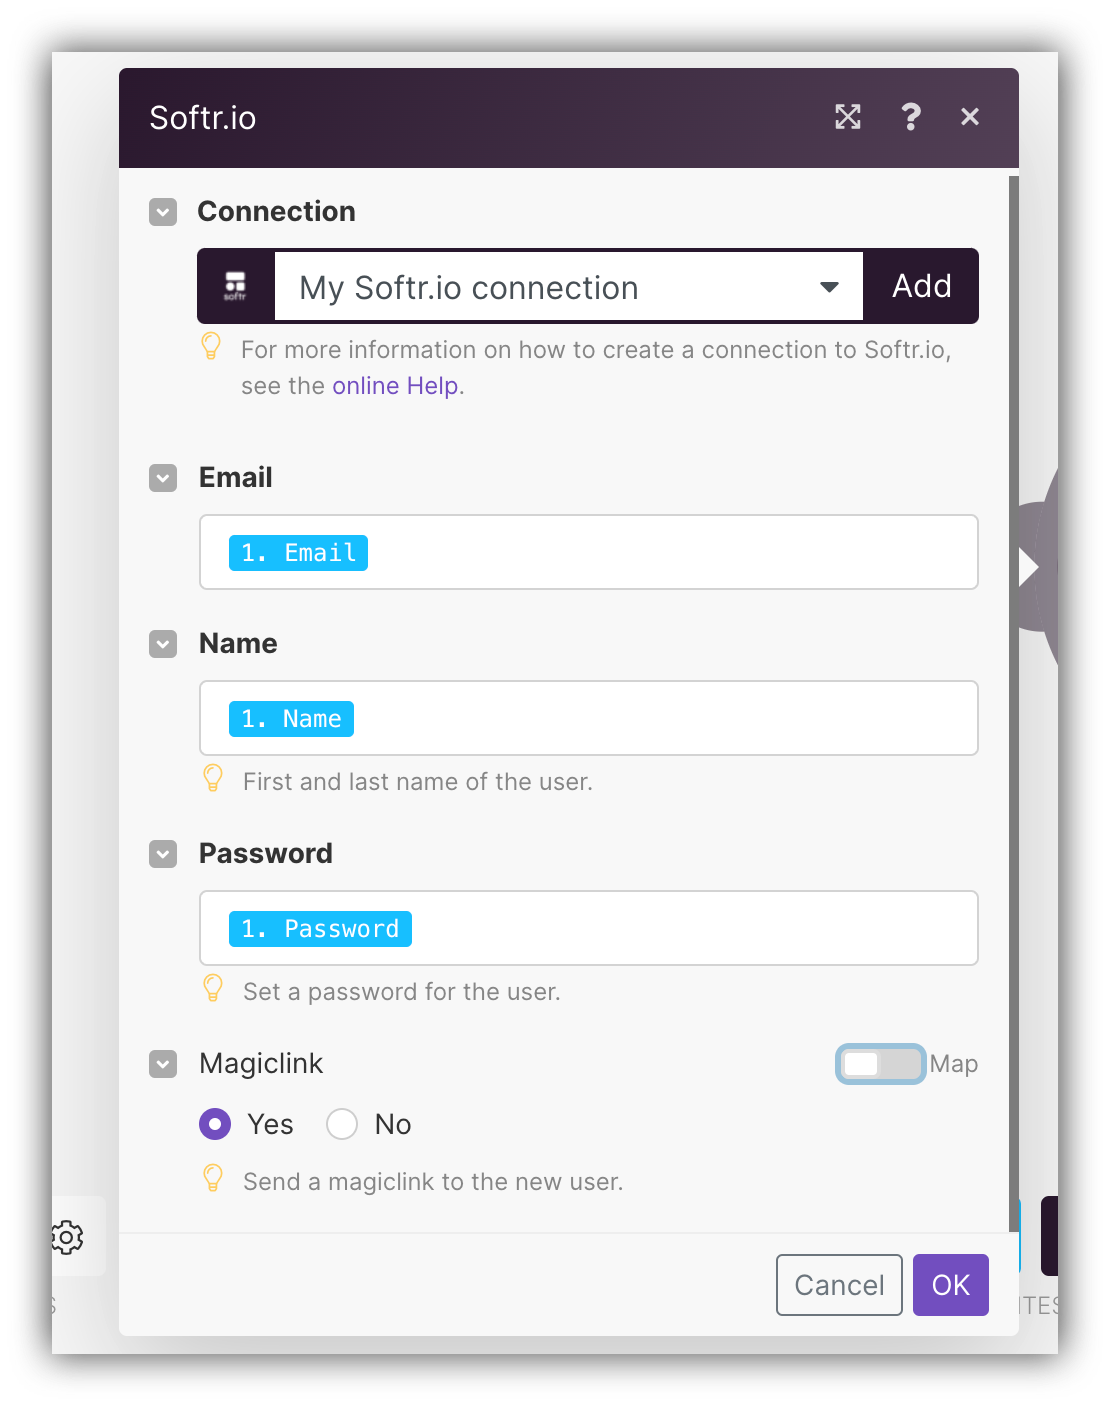
Next, we need to establish a connection with our Softr account and app, inputing the Softr API key and the domain of the app we want to add users to.
Adding a Softr connection
Lastly, we need to map the user fields from our table as shown below.
Mapping the user fields
As you can see, we haven’t mapped the Magiclink field from the table but have just set the value to Yes to generate one automatically. We can sync it back to a Airtable if we connect it to Softr, which we’ll discuss in Step 3.
That’s it. Now, we just need to save the module and the scenario is ready. Let’s test it to make sure everything is working correctly.
3
Testing the Scenario
Let’s add a new user to our table and check if it’s sent to our Softr app successfully.
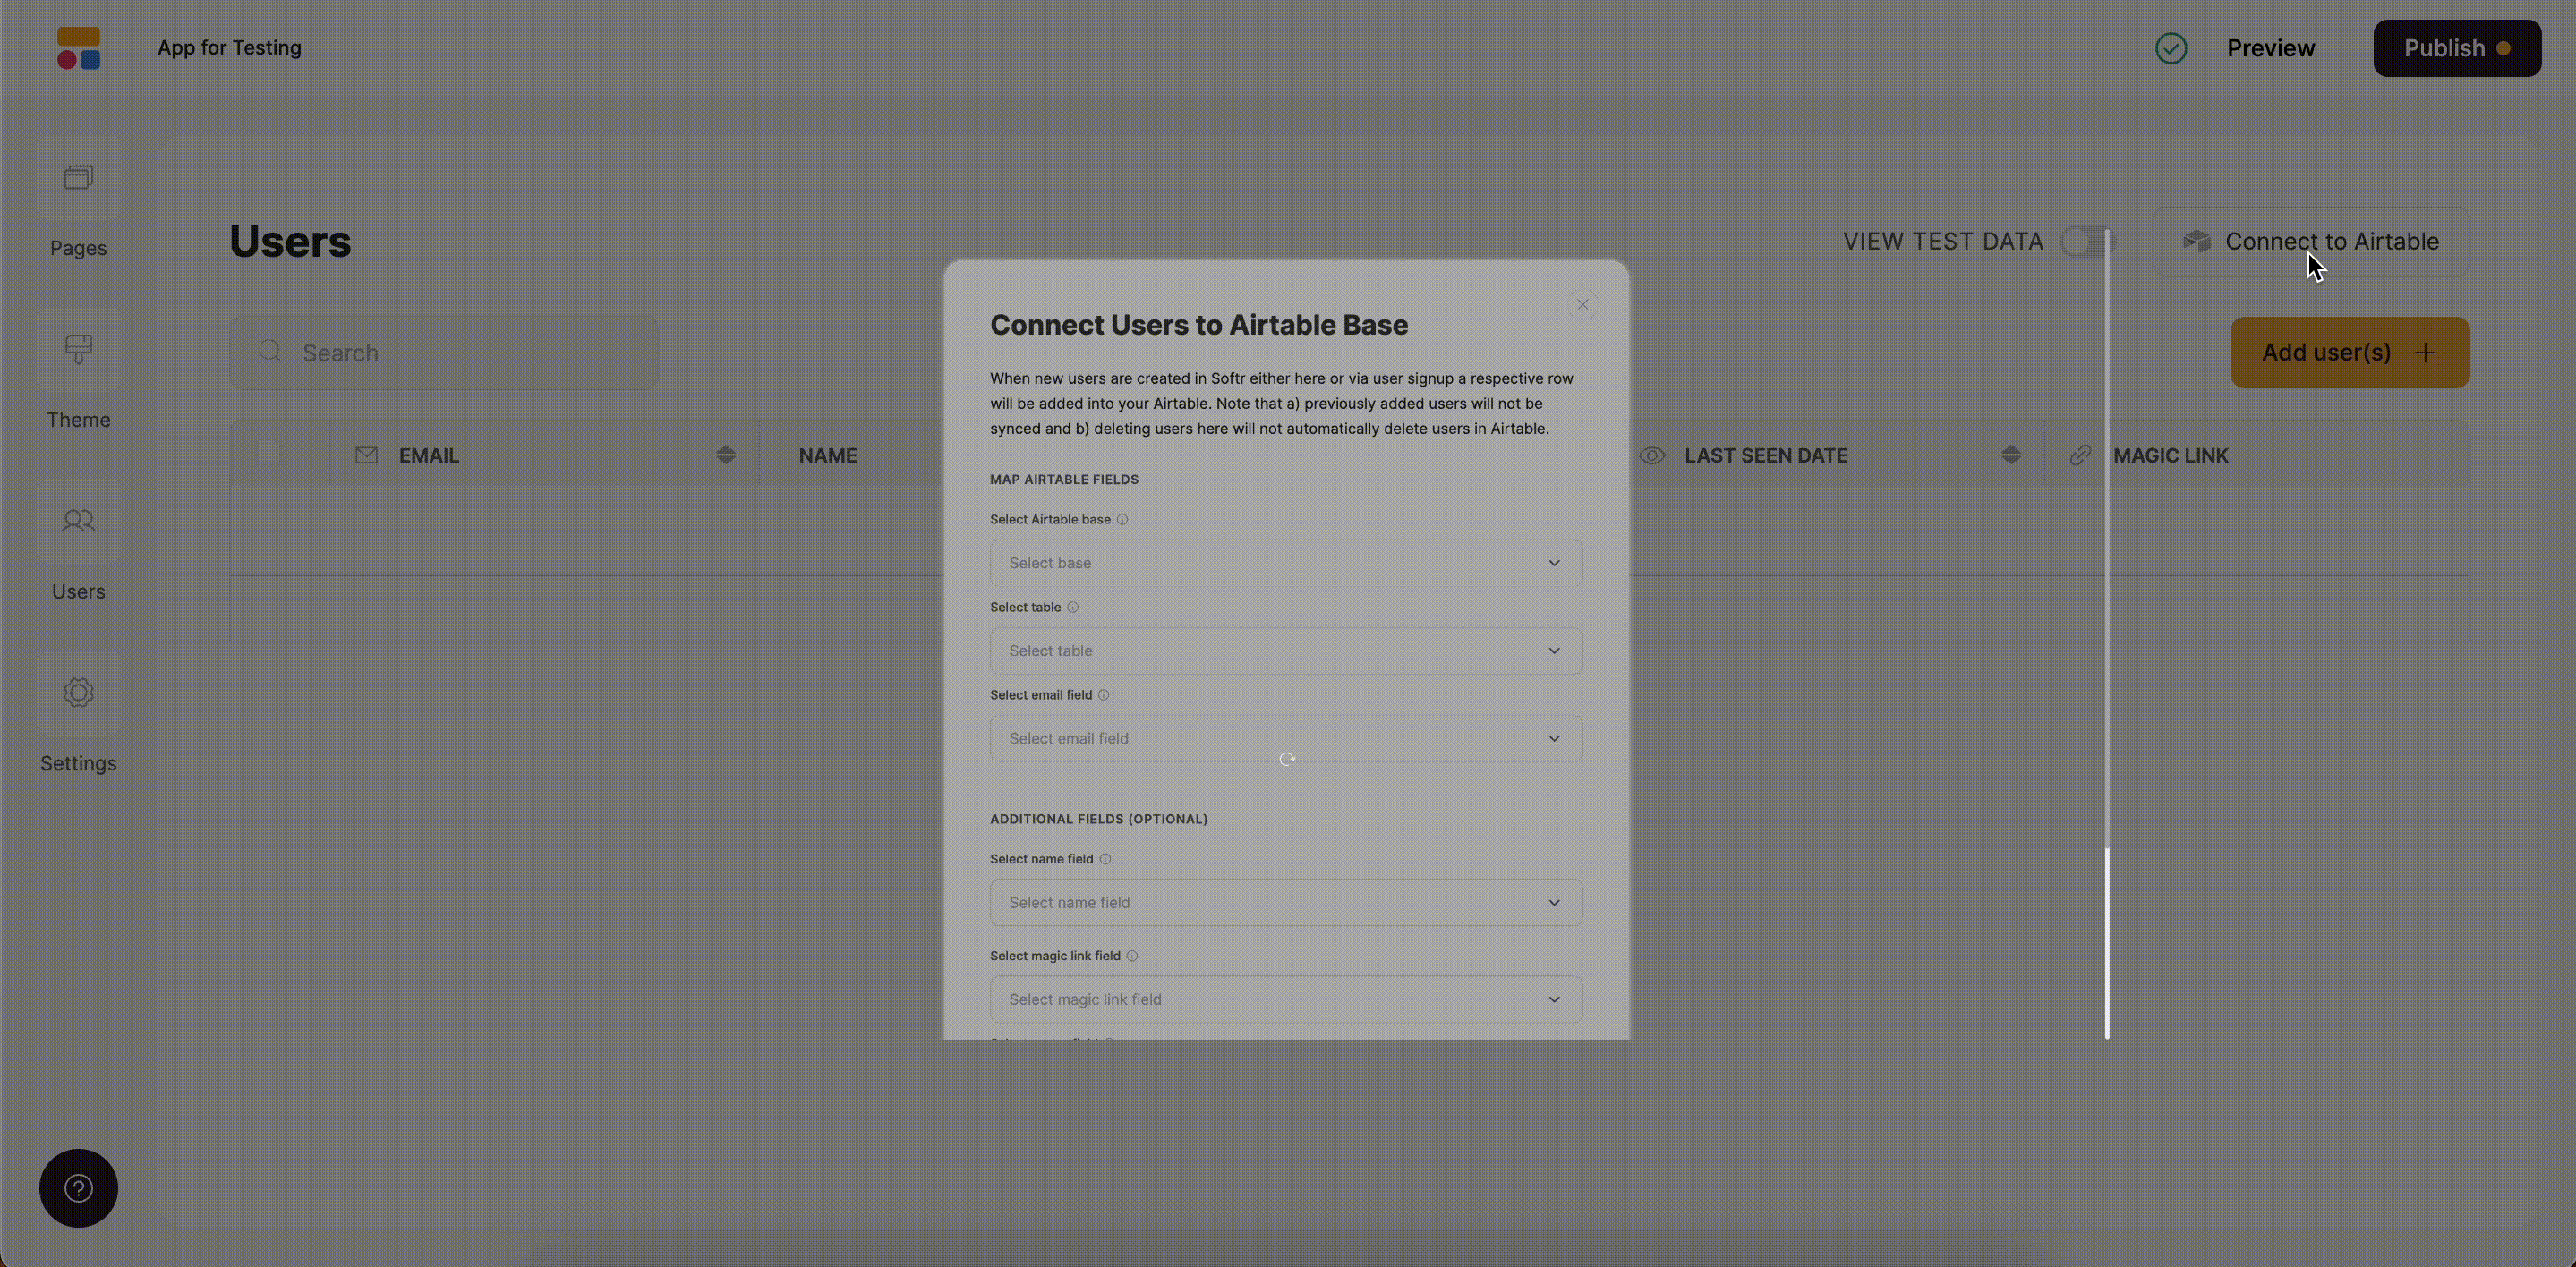
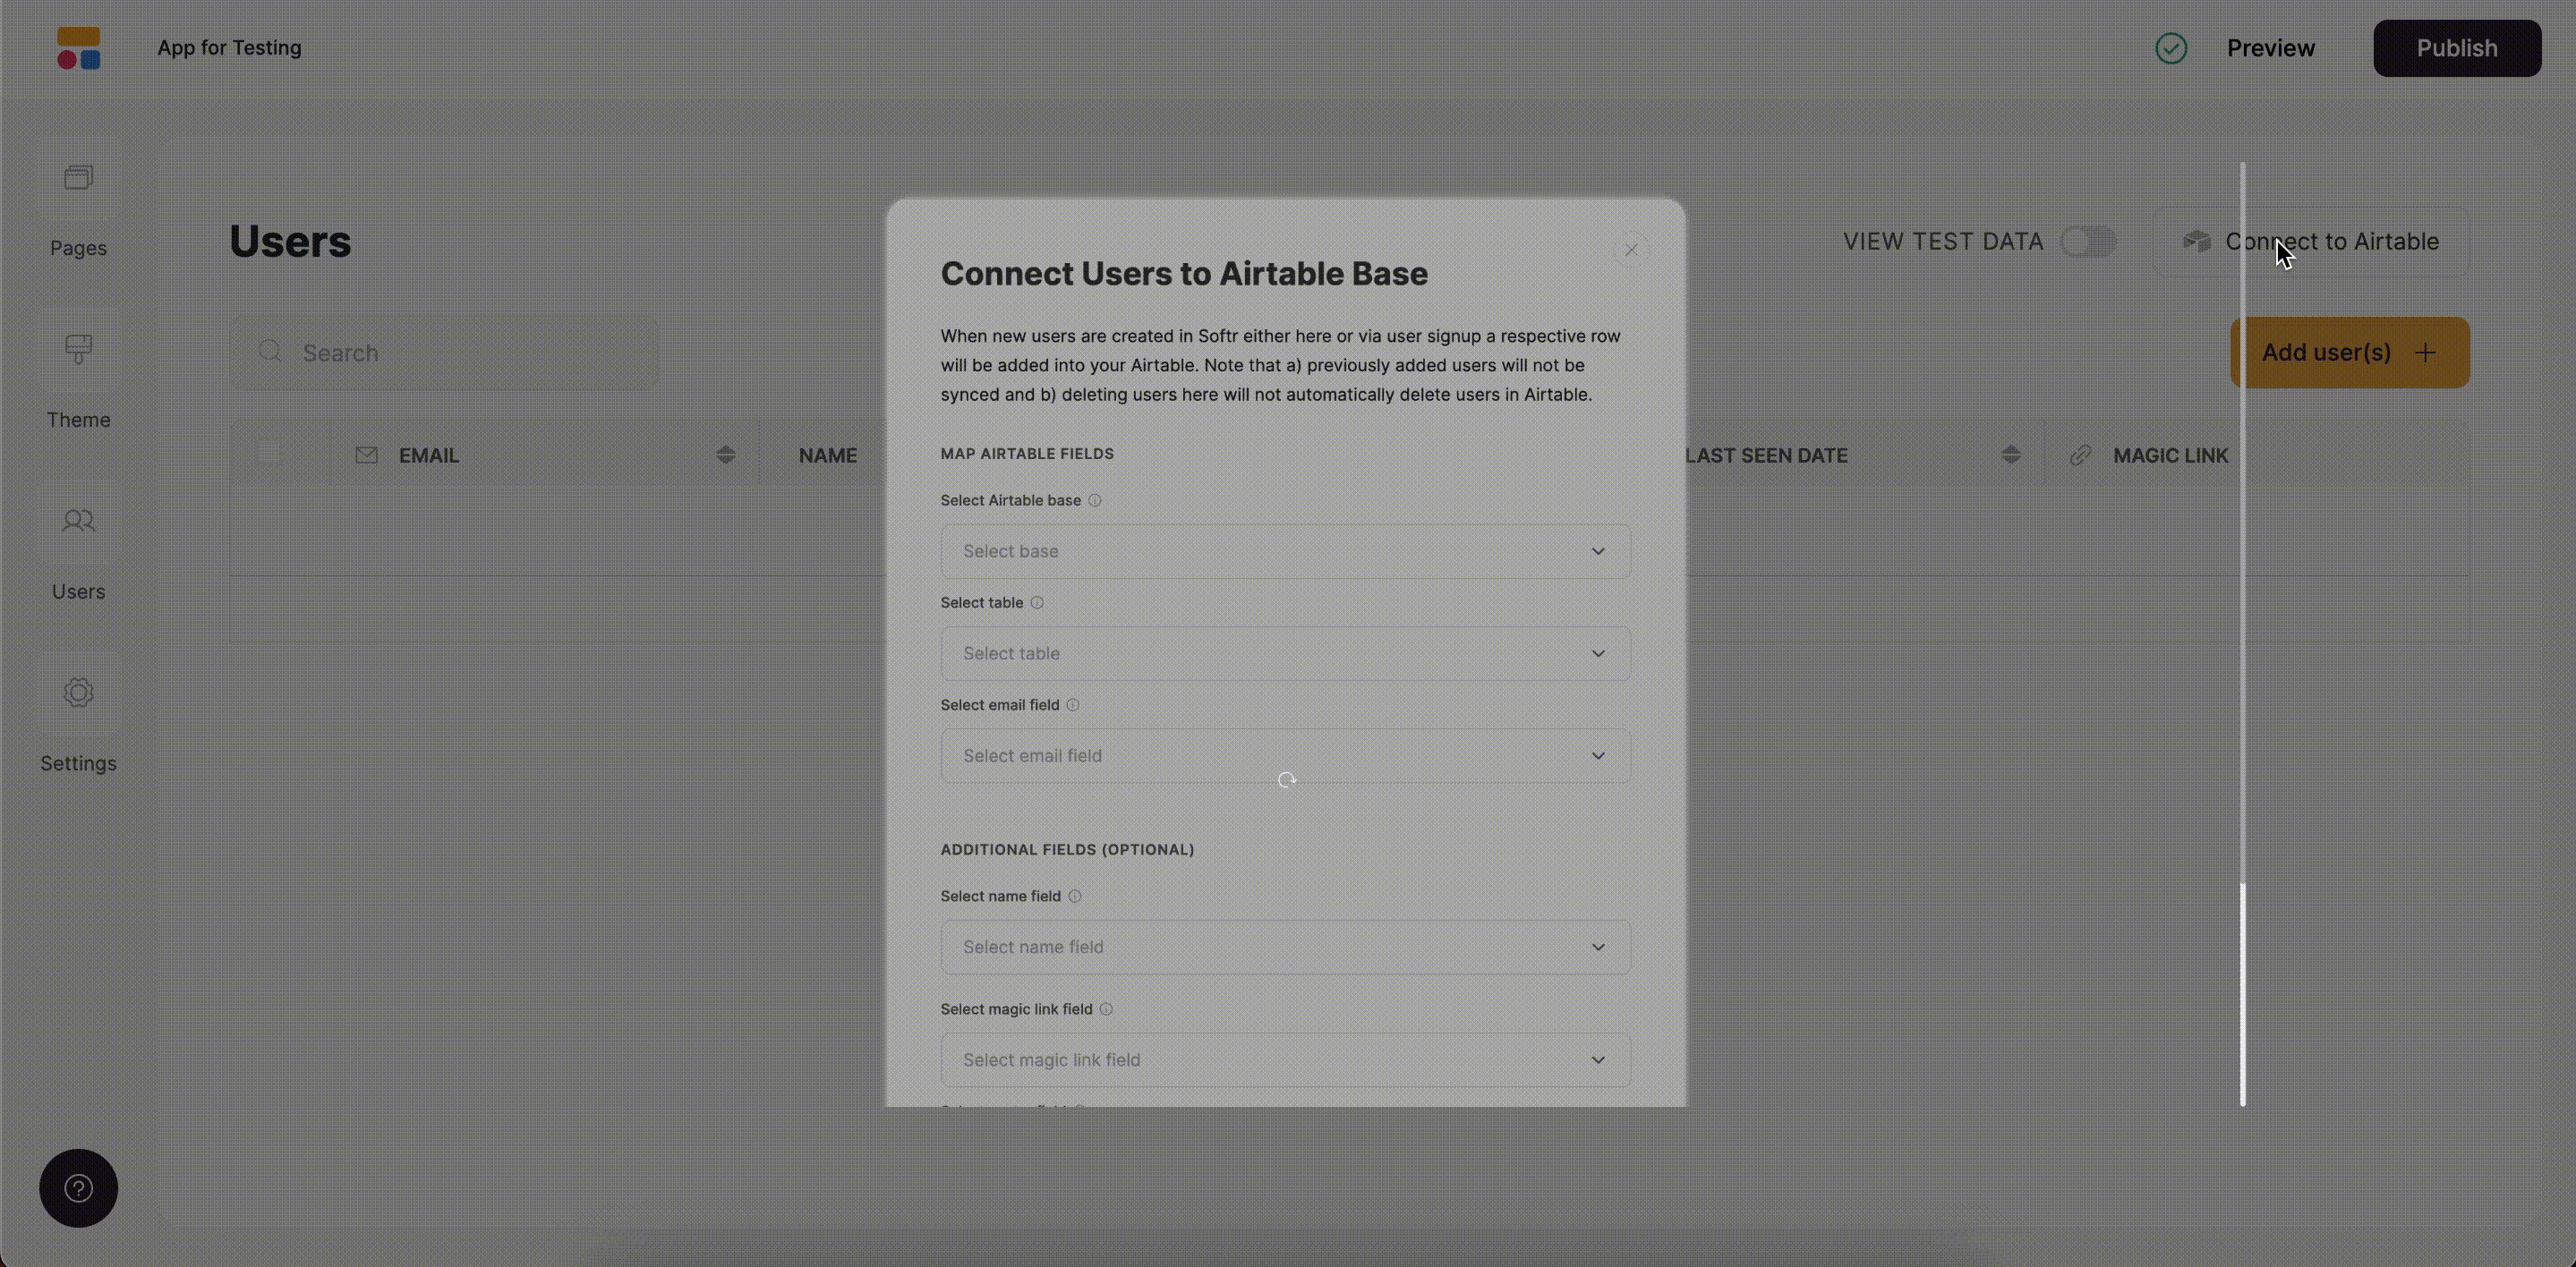
This is optional, but we are also going to connect our Softr users base to the same Airtable base and table at the beginning to sync user data fromSoftr to Airtable as well. This way, the magic link that’s been generated when fetching the user from Airtable to Softr will be stored in Softr and eventually synced back to Airtable.
Testing the scenario
1
Setting a Trigger
First of all, we’re going to create a table on Airtable with Name, Email, Password, Magic Link, Created Date/Time (needed for watching record creation in Make) columns to store user data.
Table setup on Airtable
Then, we’ll go to Make dashboard, create a new scenario, and add a trigger that watches for new records on our selected table. See below.
Creating the trigger
Now, we need to set up an Action to add the users received from Airtable. There are two options for this:
Make’s Softr module;
Custom HTTPrequest.
Let’s consider each option separately.
2
Configuring the Action
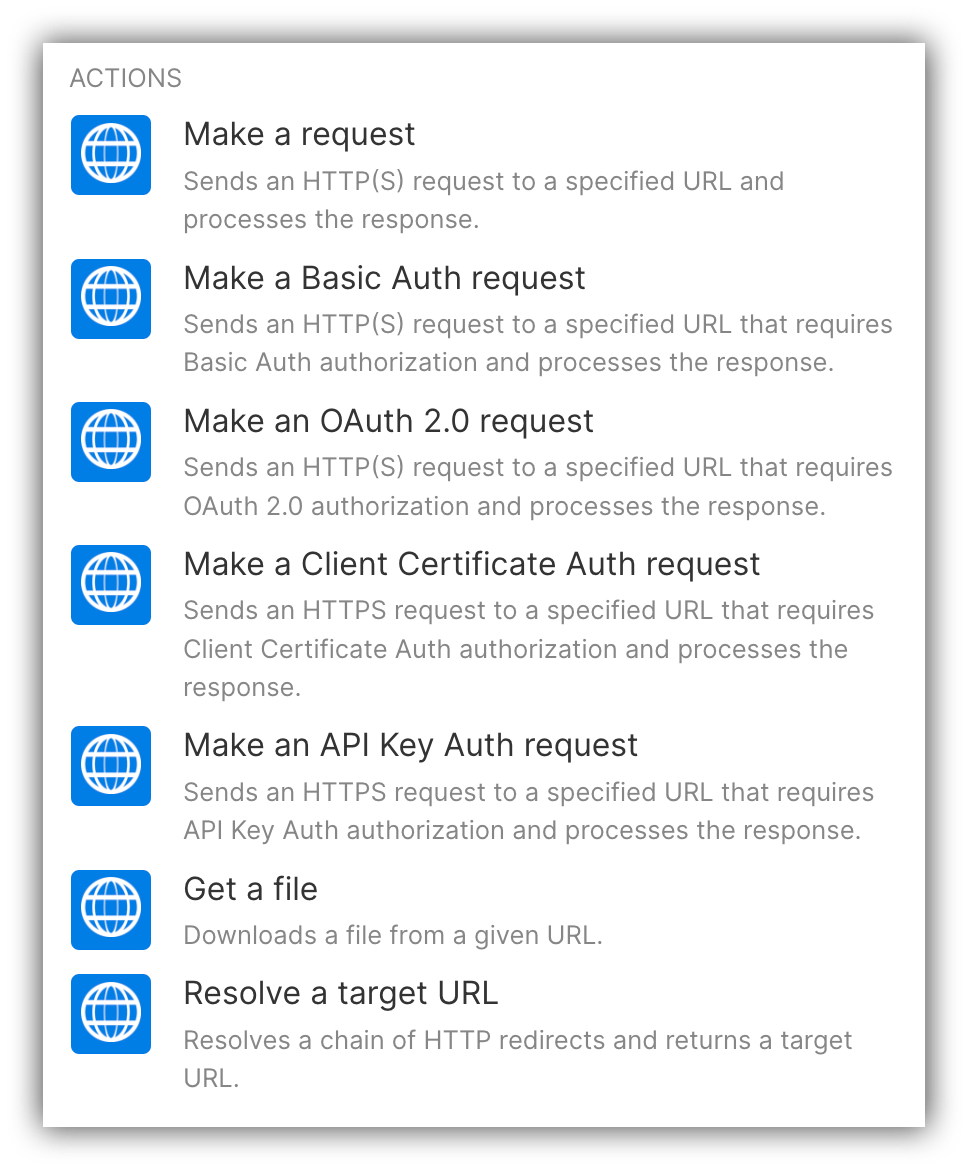
In this case, we need to create a new module, search for HTTP, select it, and choose the Make a request action.
Selecting the action
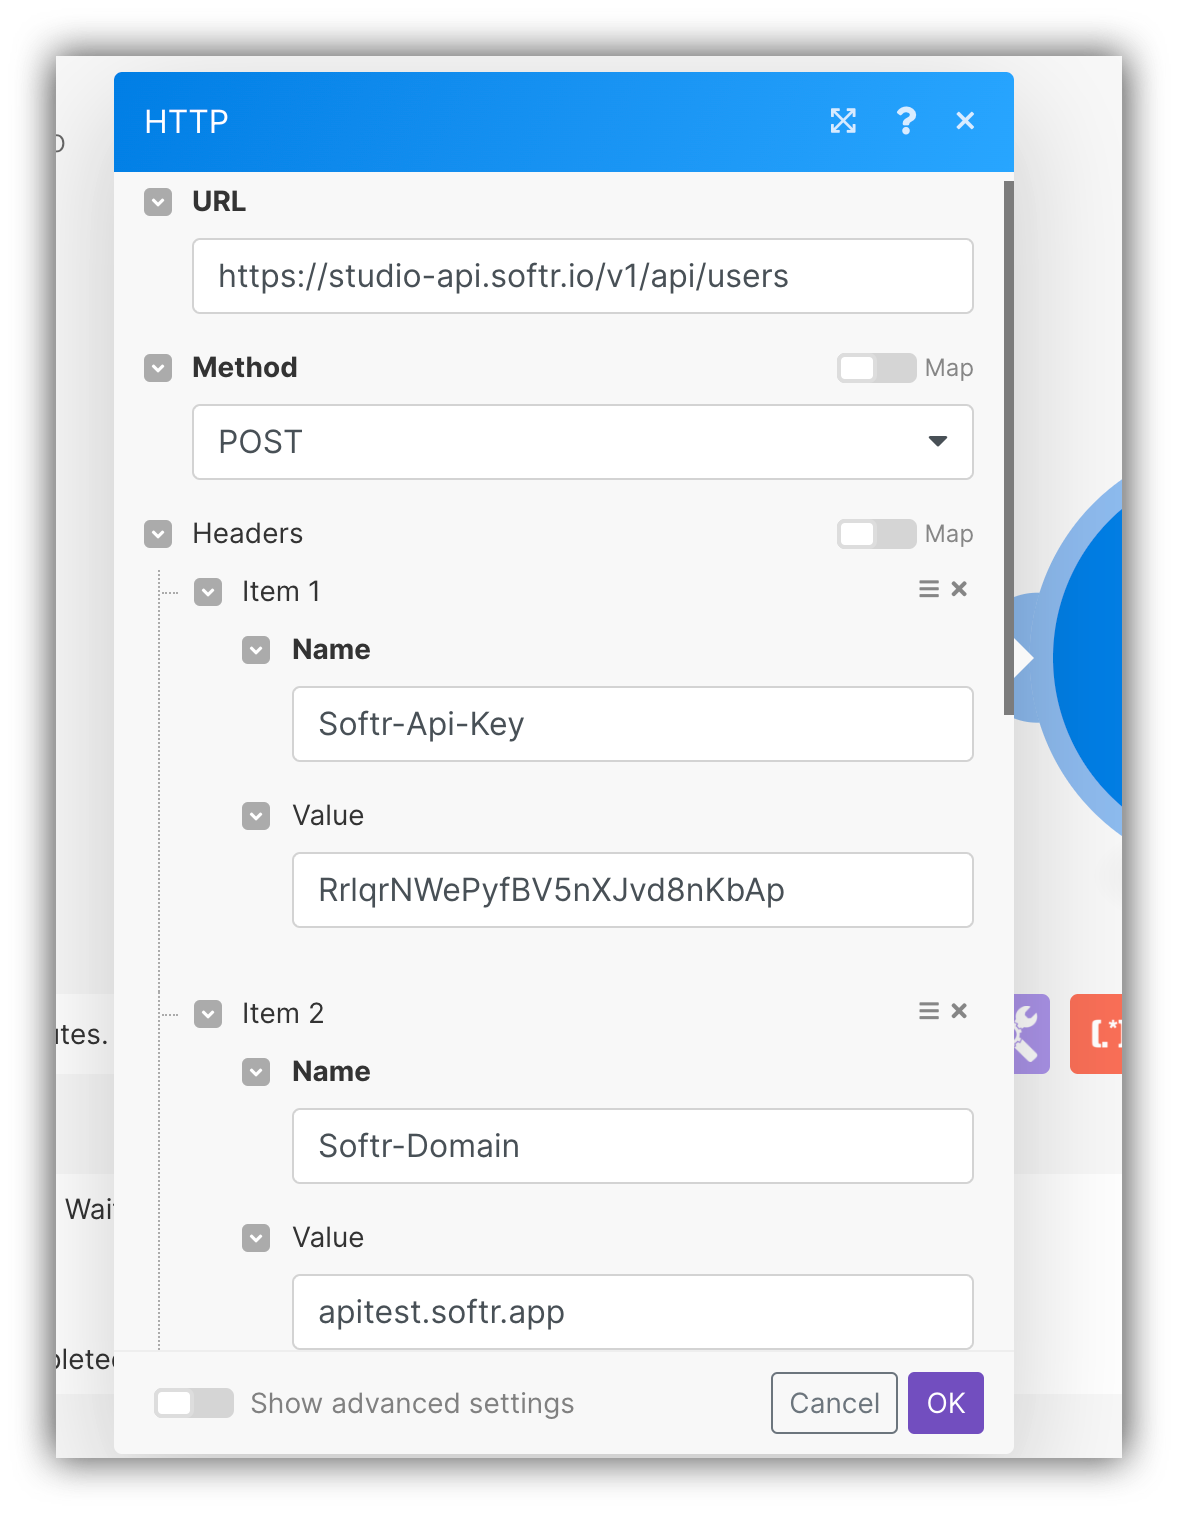
Now, let’s start configuring the module based on our endpoint. First we need to add our URL, then select the method (POST), and finally add the required headers. We don’t need to add the Content-Type header, as it’s going to be added in the next step. Below, you can see what it should look like.
Configuring URL, Method, and Headers
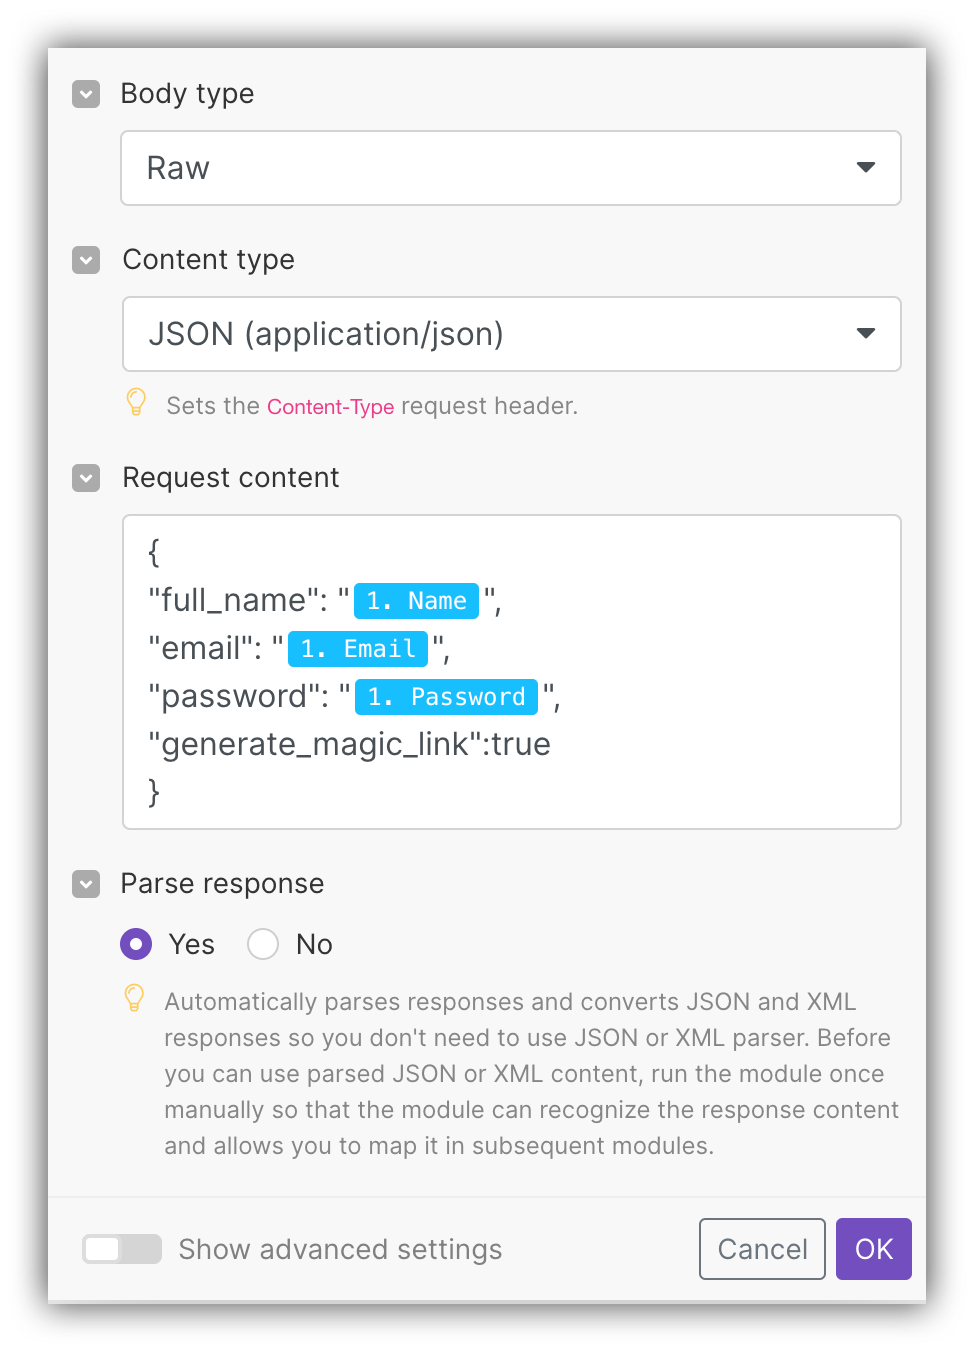
Further on, we need to set the Body Type to Raw and the Content Type to JSON. Lastly, we are going to fill in the Request Content using the format provided above. Please, note that the Parse response option should be set to Yes.
Configuring Body and Content types and adding Request content
3
Testing the Scenario
So, we’re almost there. Let’s just add a new record in our table and run the scenario to test it. As, you can see below, the user is successfully added to our Softr app.
This is optional, but we are also going to connect our Softr users base to the same Airtable base and table at the beginning to sync user data fromSoftr to Airtable as well. This way, the magiclink that’s been generated when fetching the user from Airtable to Softr will be stored in Softr and eventually synced back to Airtable.