- Store and retrieve structured data dynamically
- Use real-time updates in your Softr apps
- Securely manage and scale your backend
Supabase is available on Professional and higher plans.
1. Connect Supabase to Softr
To use Supabase in Softr, you need to connect your Supabase project as a data source.Select your Supabase project
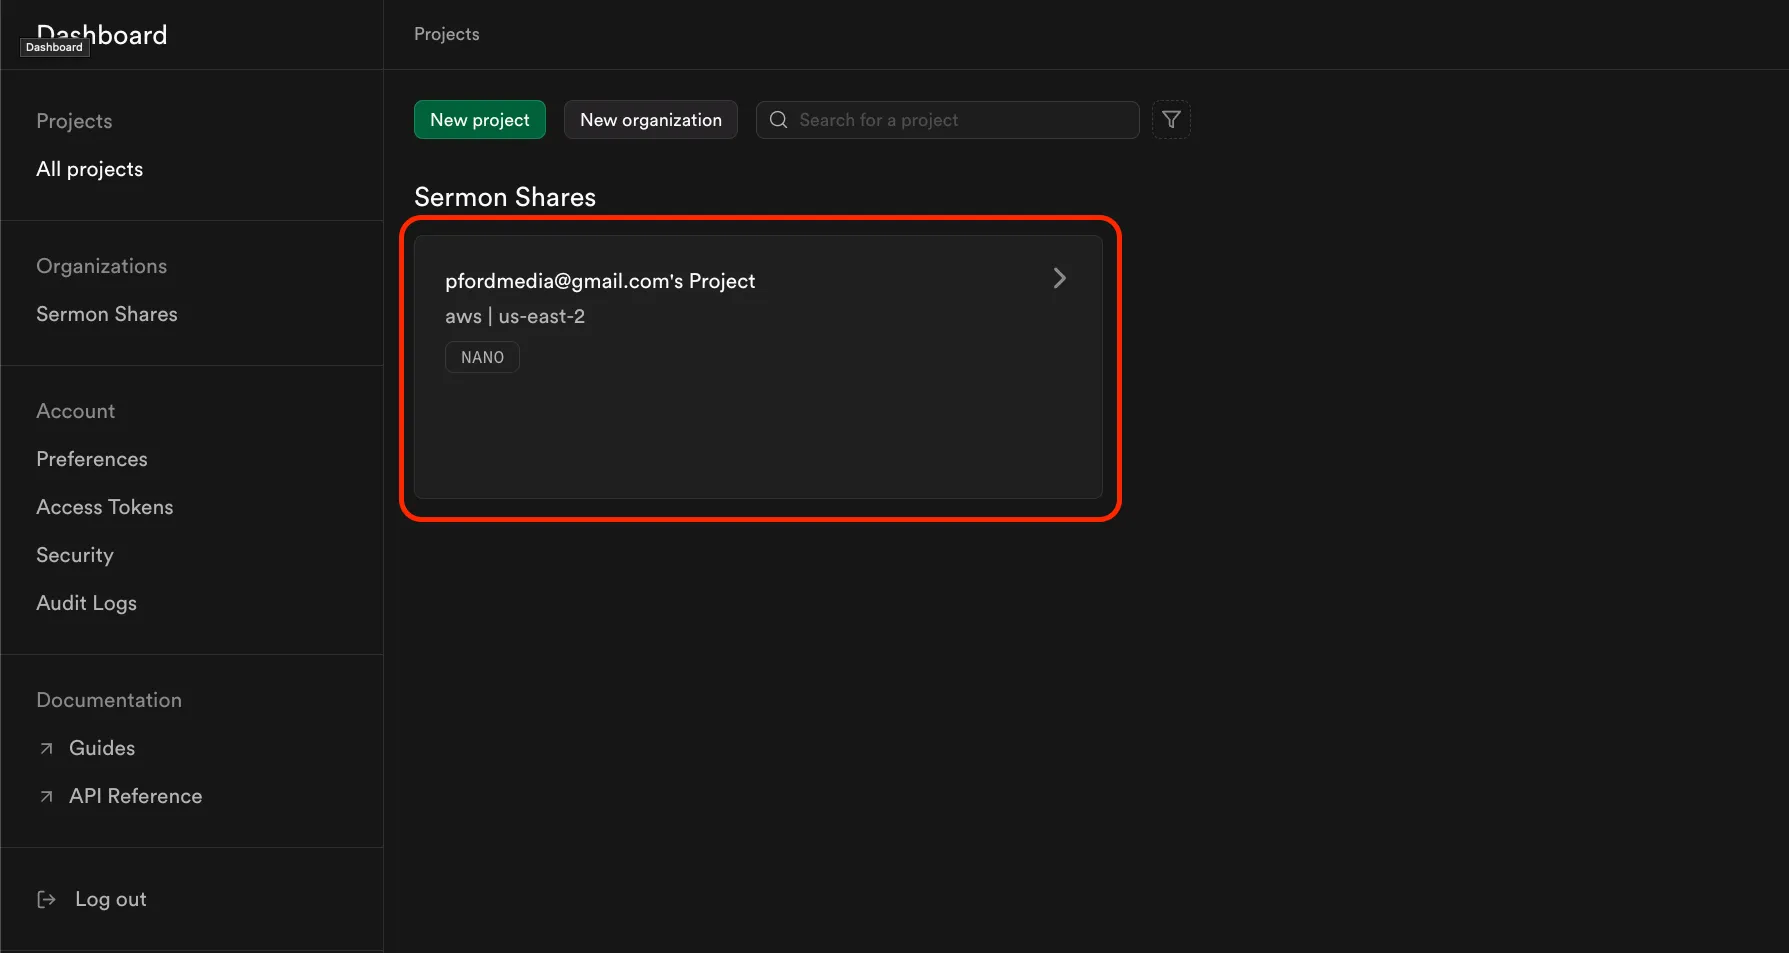
- Log in to Supabase and go to the dashboard.
-
Click on the project you want to connect to Softr.
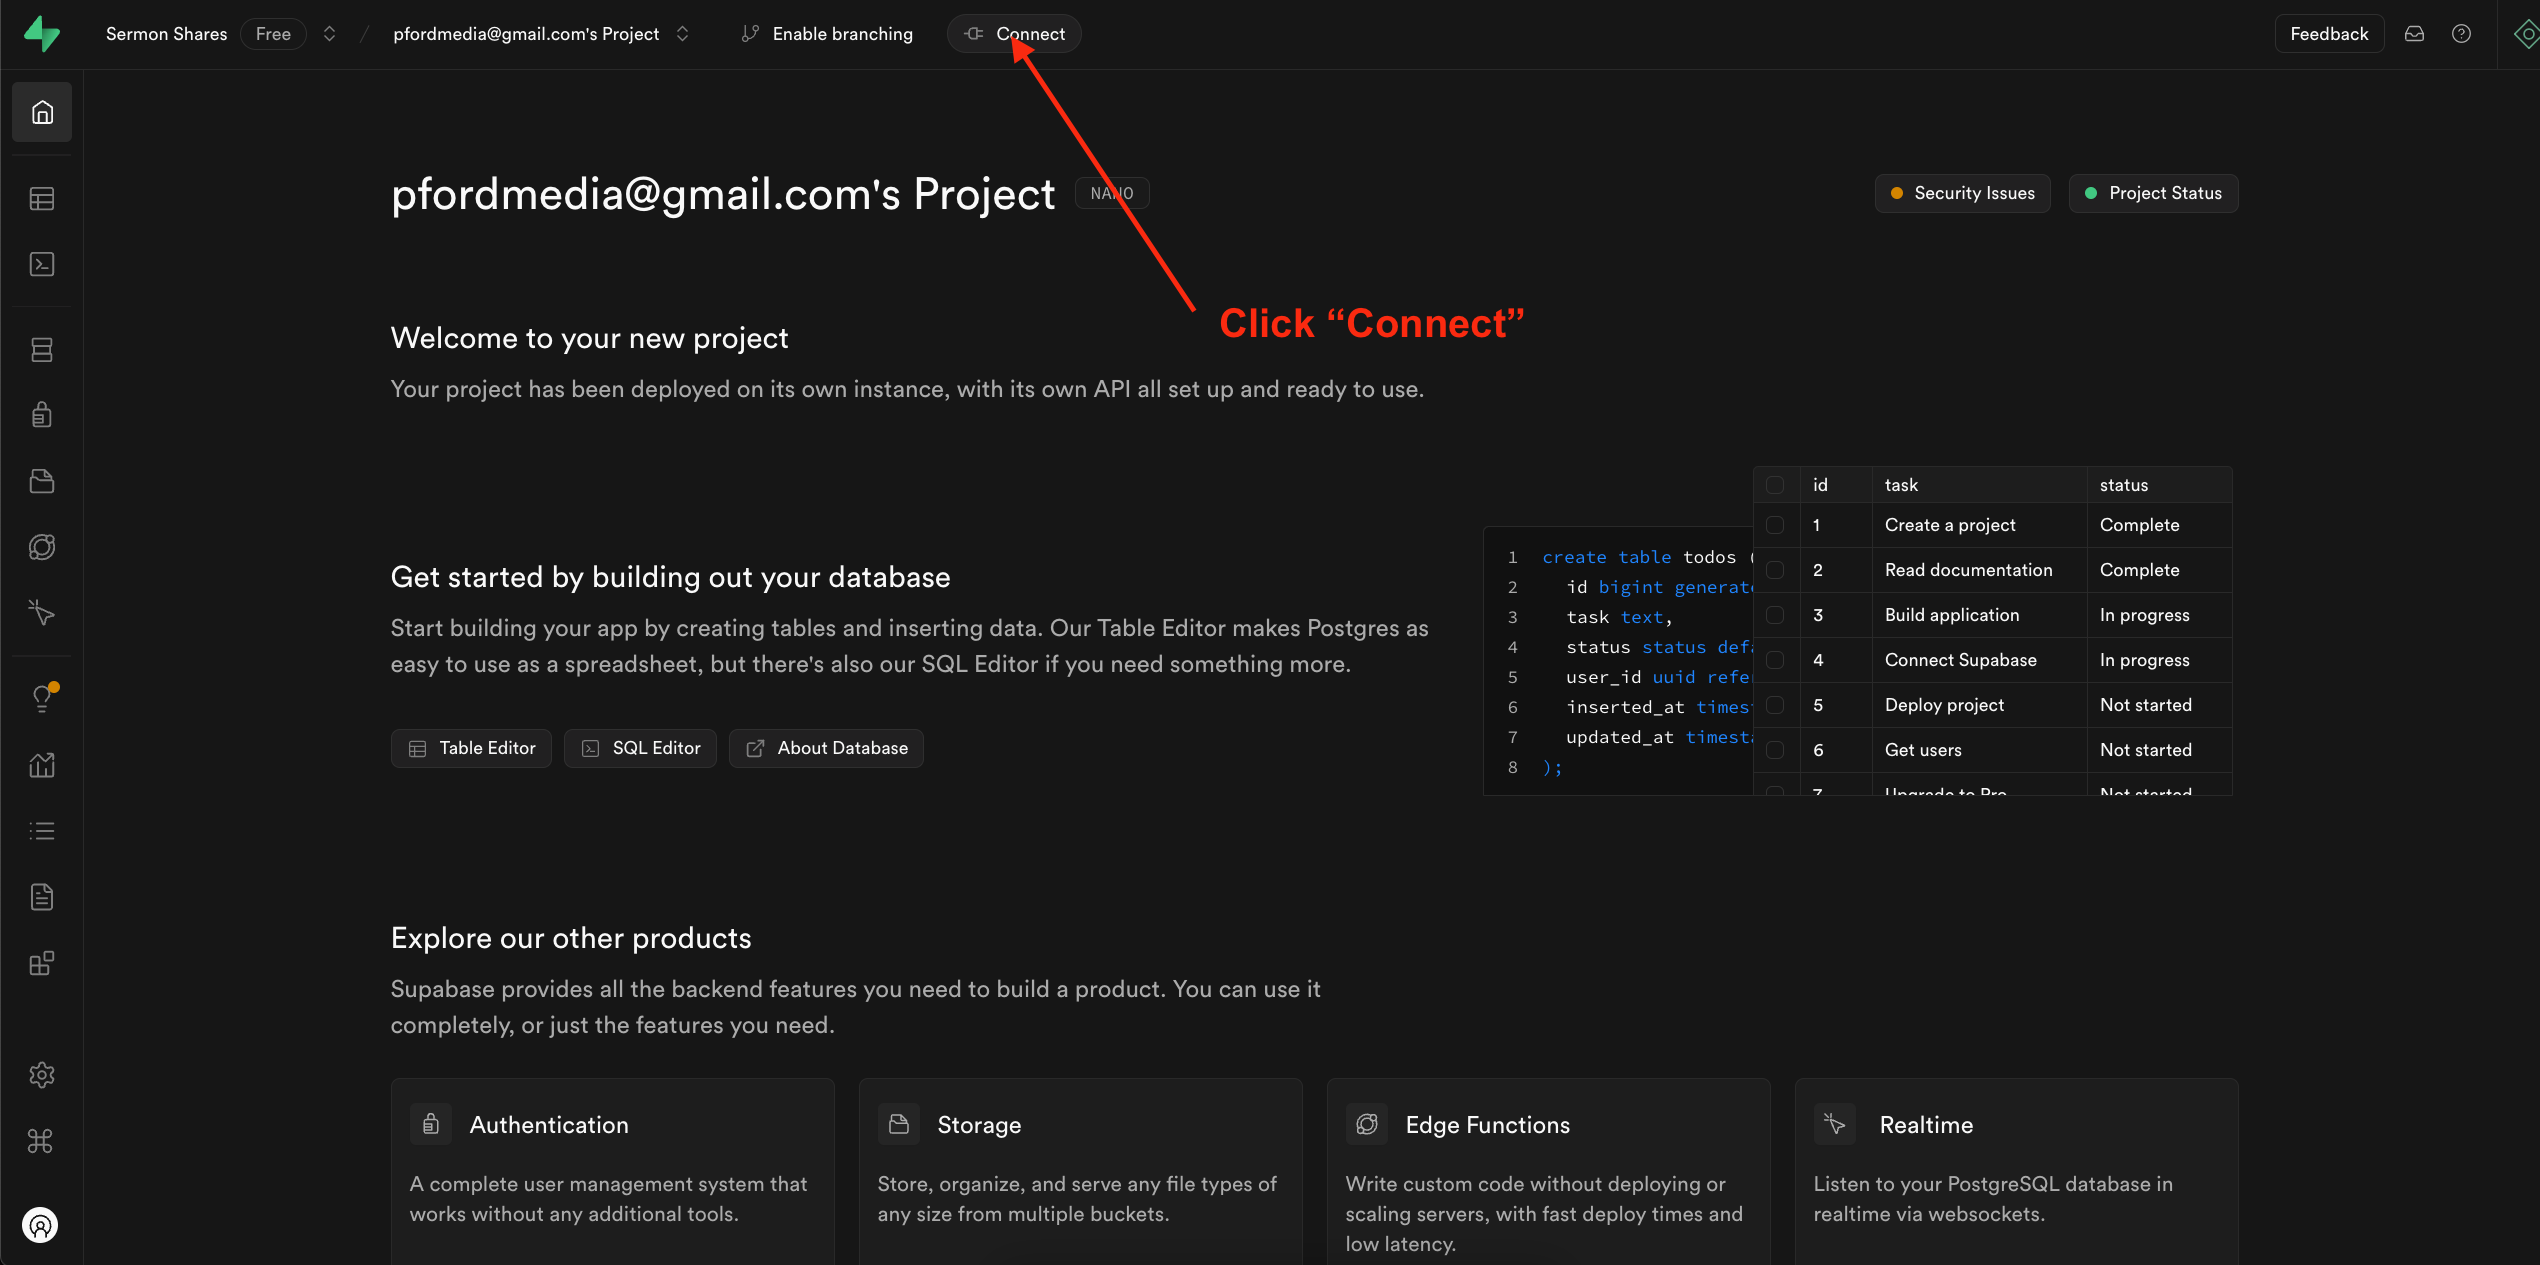
Configure project settings
-
Click the Connect button at the top of the project settings page.
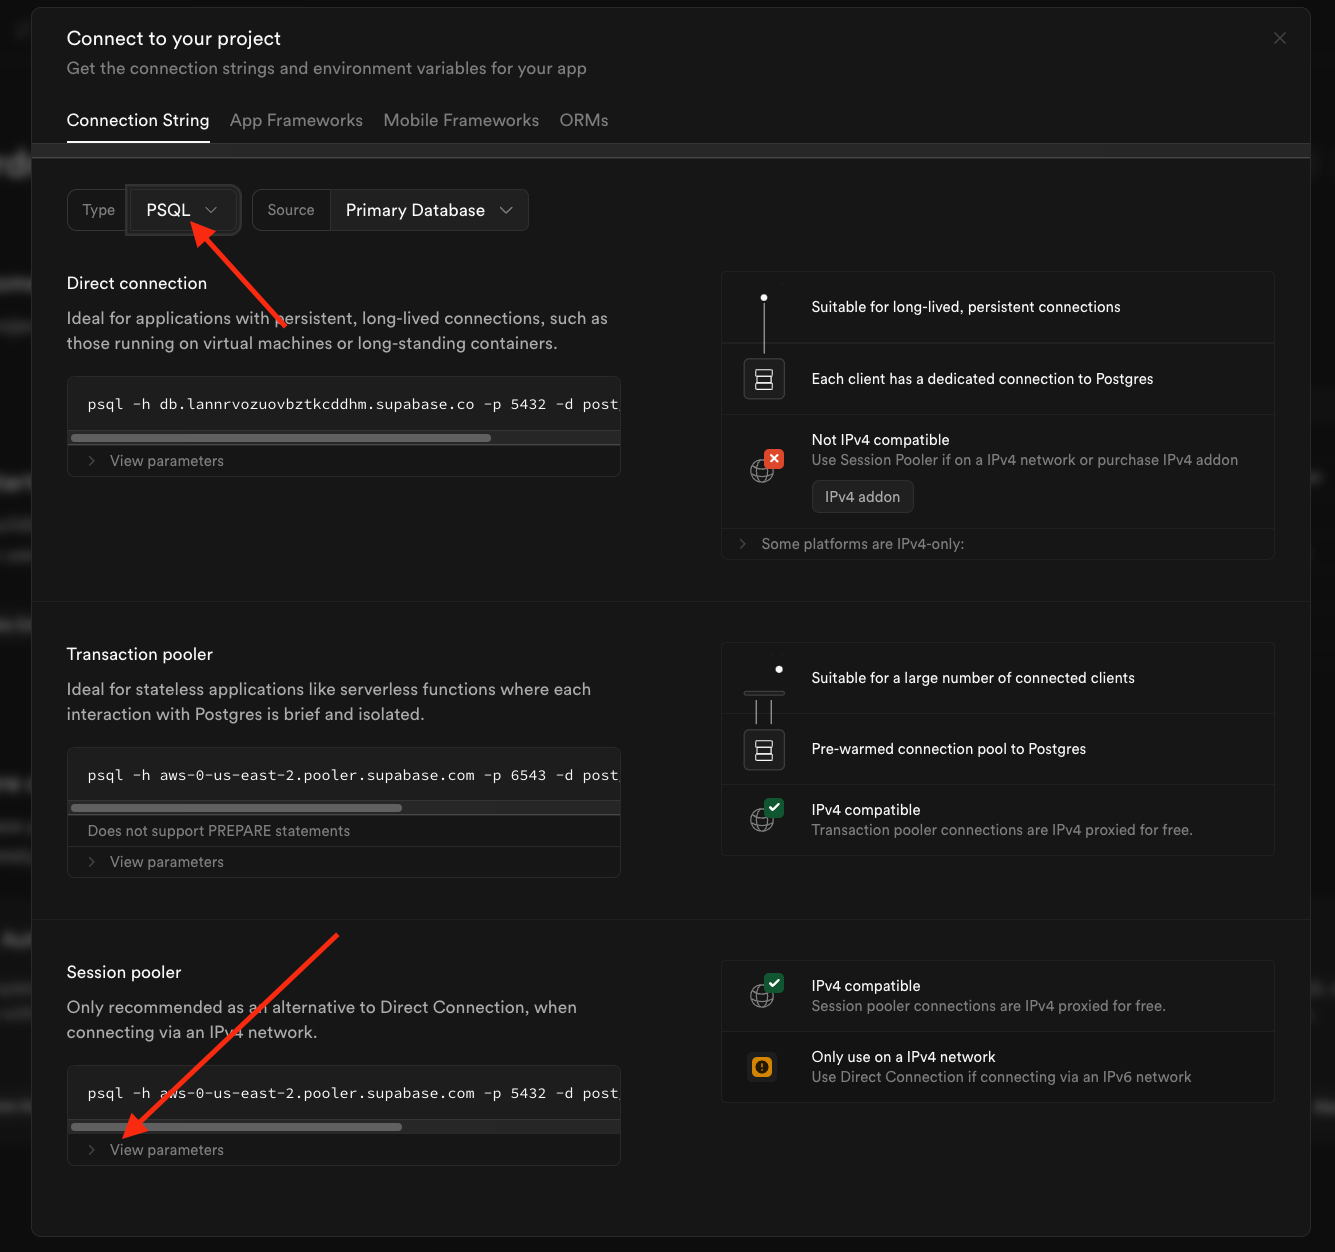
- Change the Type to PSQL.
-
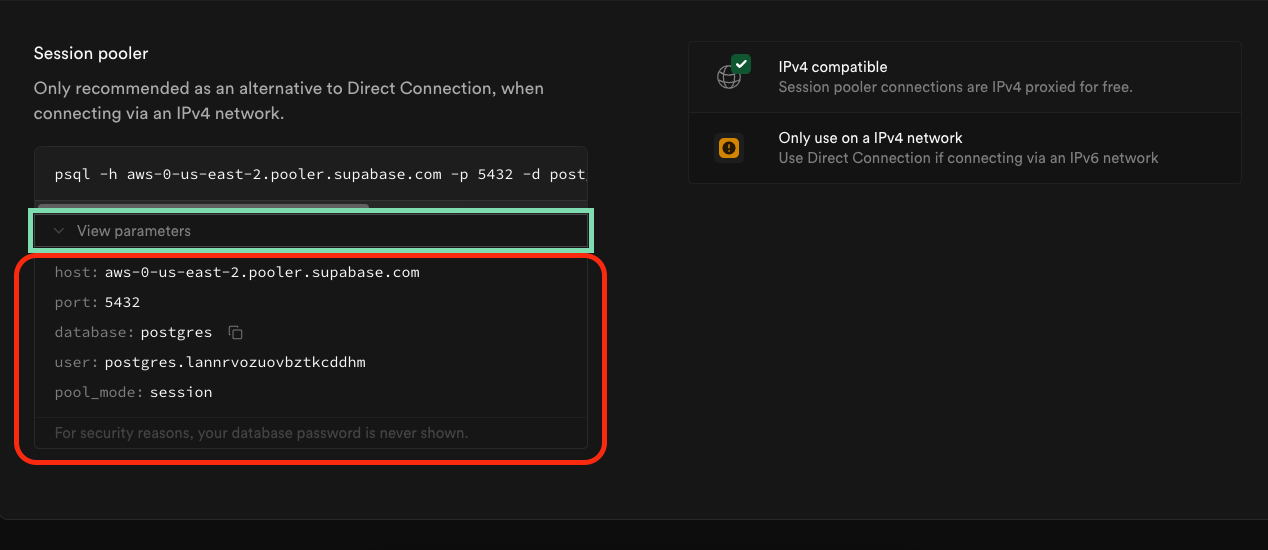
Open the View parameters dropdown under the Session Pooler section.
Copy your supabase credentials
- Locate the Configuration Parameters section.
-
Copy and securely store the following credentials:
- Host
- Database
- Port (default is
5432) - User
- Password (usually the project password)
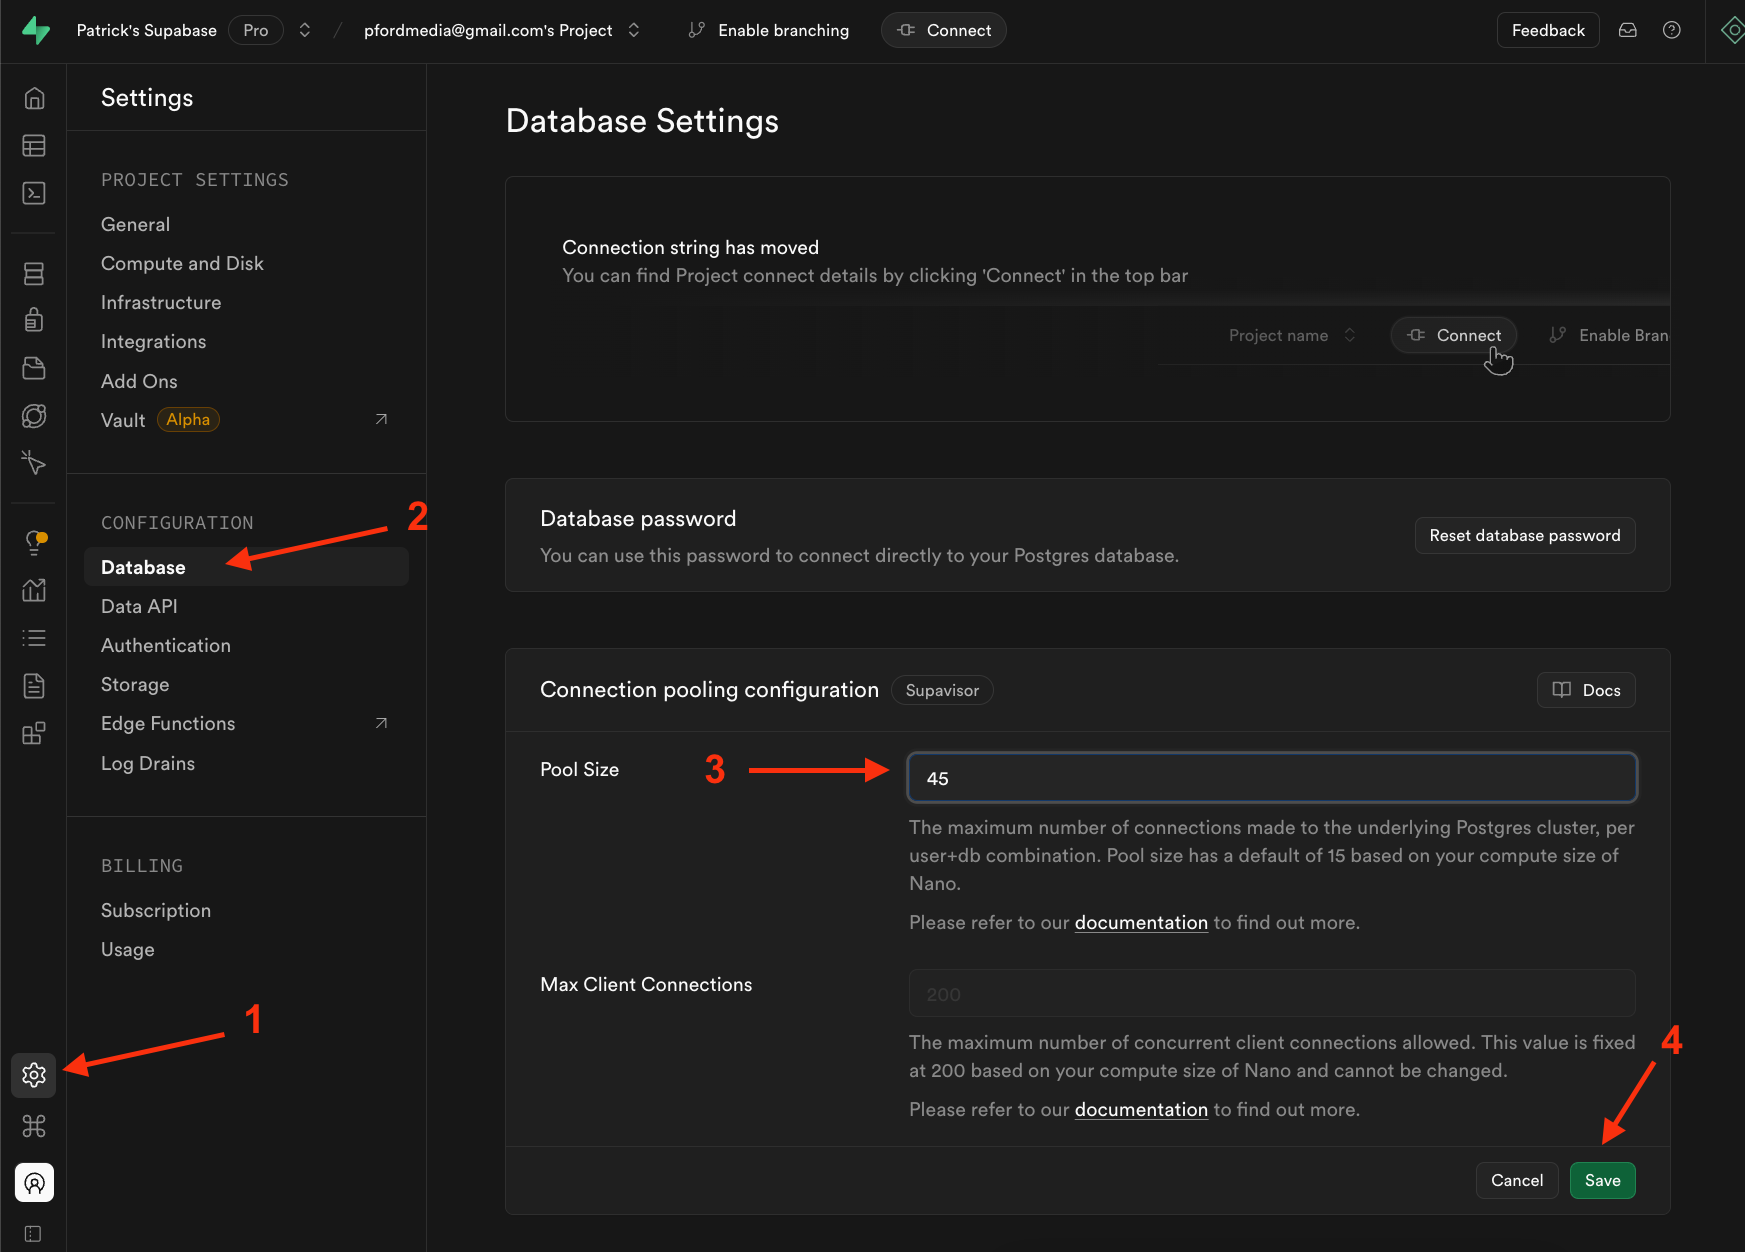
Set the Pool Size
Setting the pool size ensures your Supabase database can support multiple connections from Softr at the same time. You set this number to 45 or greater.
- Click on Project Settings
- Click on Database
- Type in the pool size number (should be 45 or greater)
-
Click Save
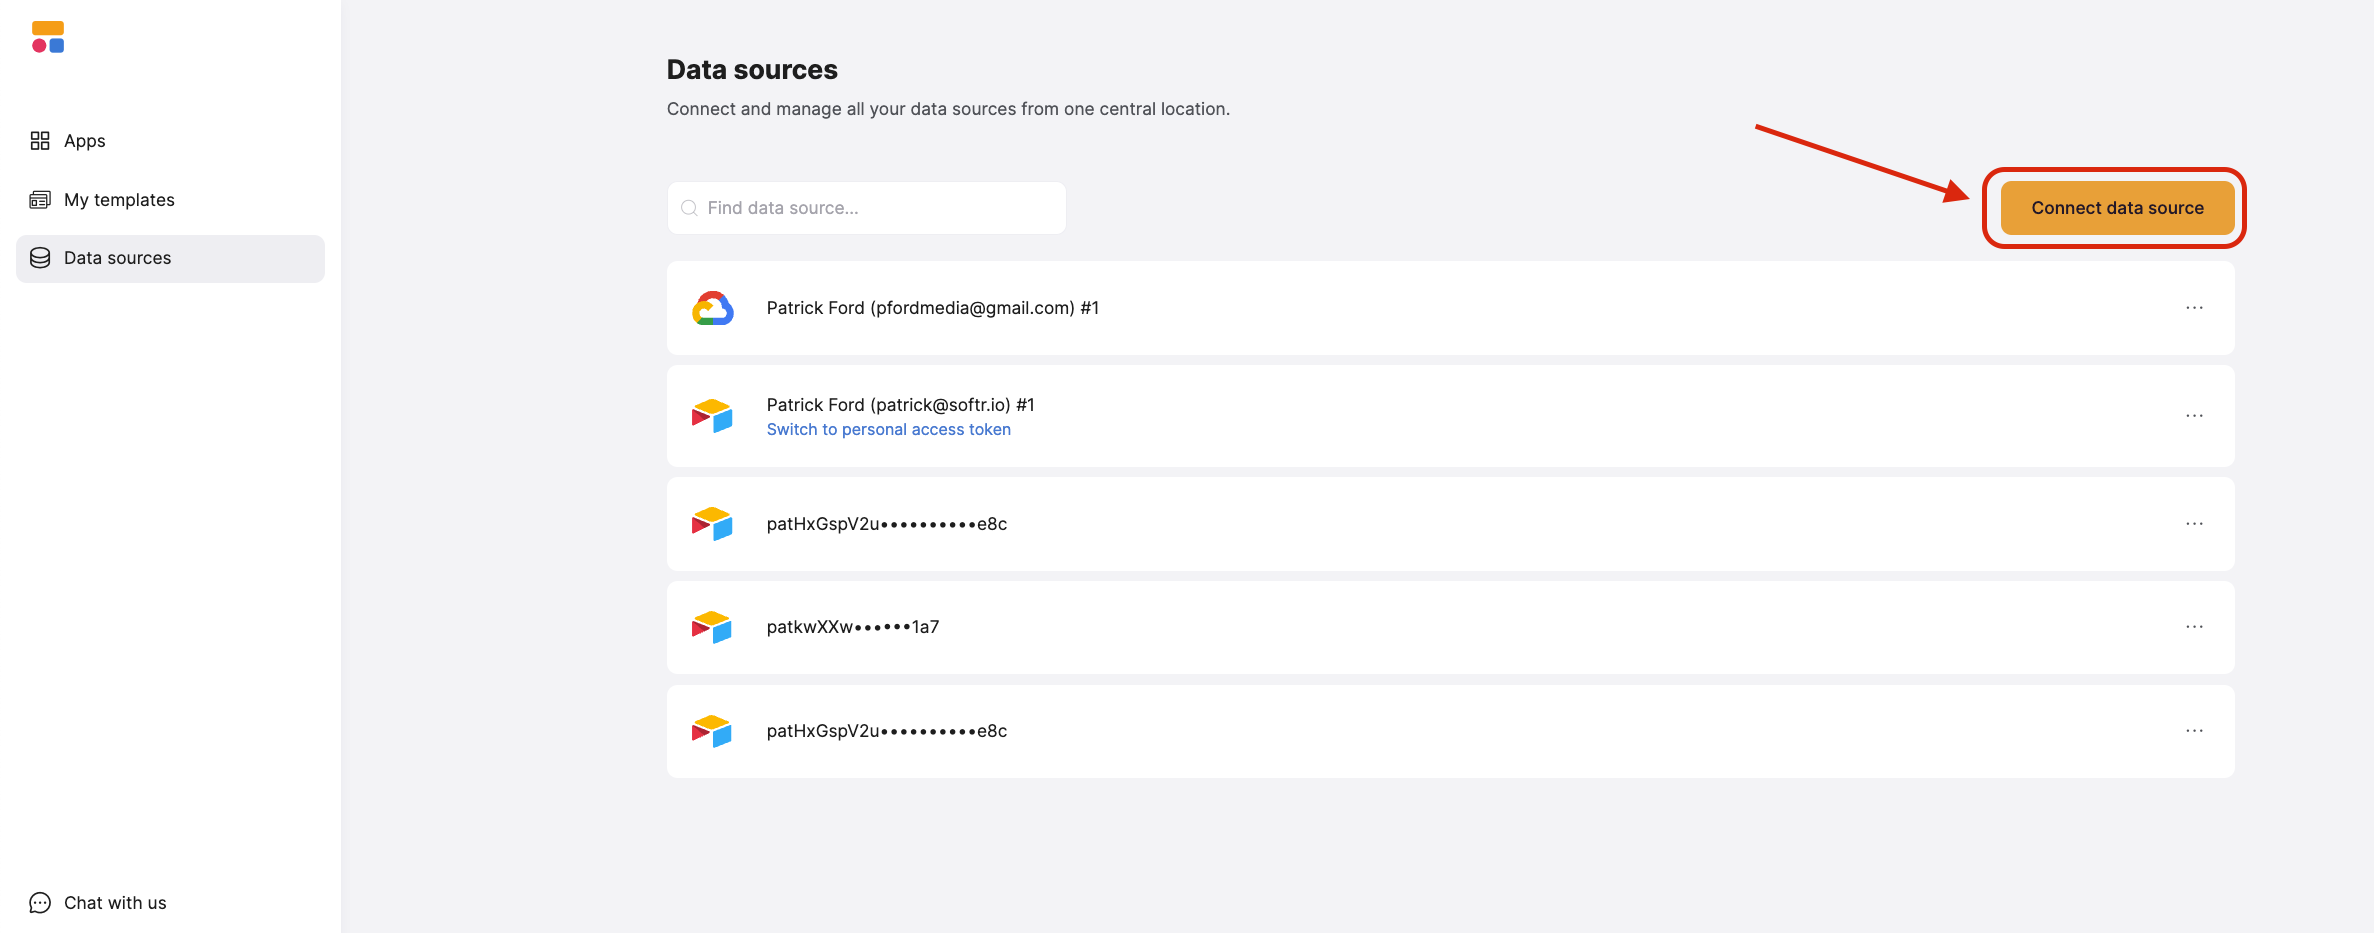
Connect Supabase to Softr
- Log in to Softr and go to Data Sources in the left-hand menu.
- Click the Connect Data Source button in the upper-right corner.
-
Select Supabase, then click Continue.
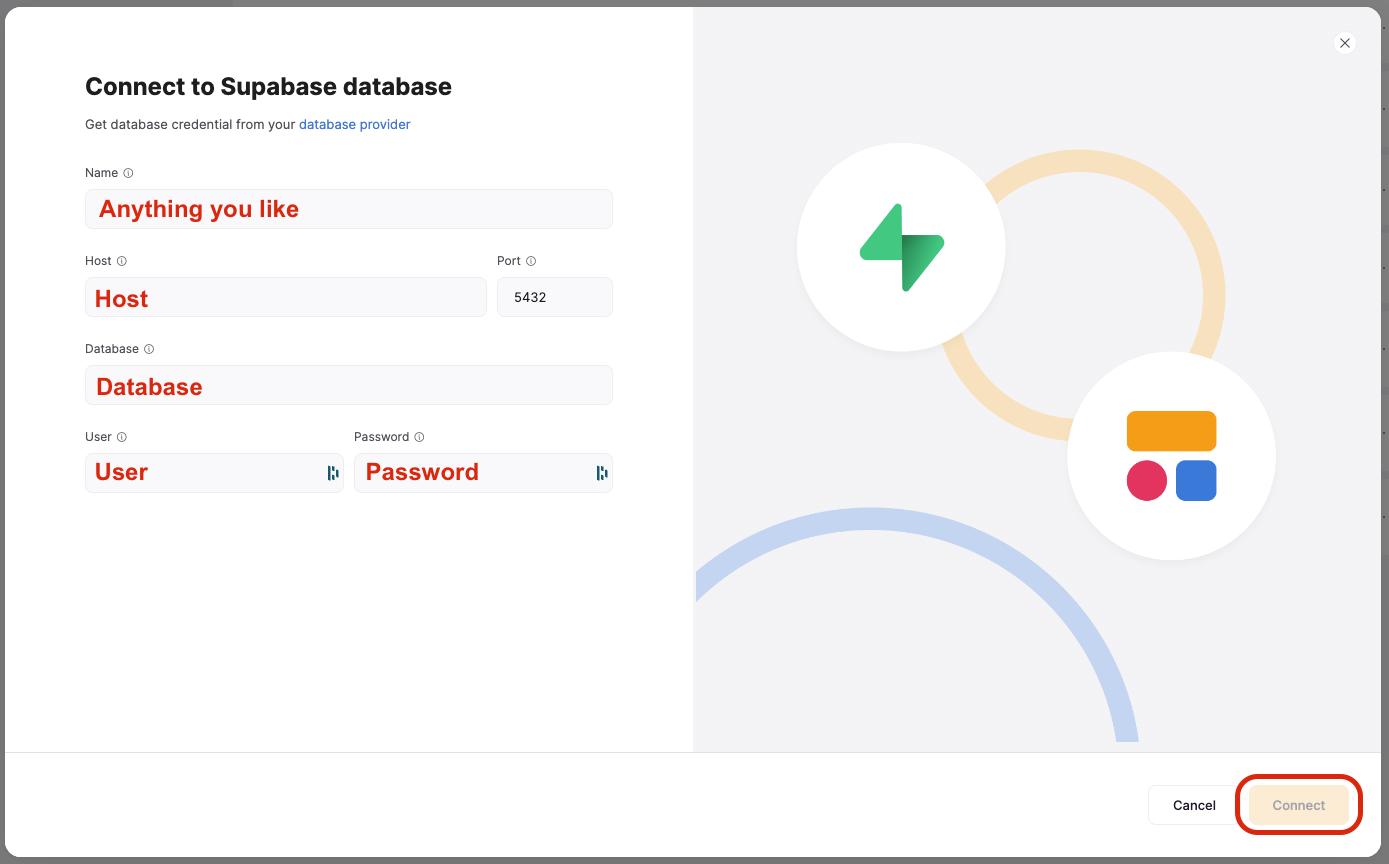
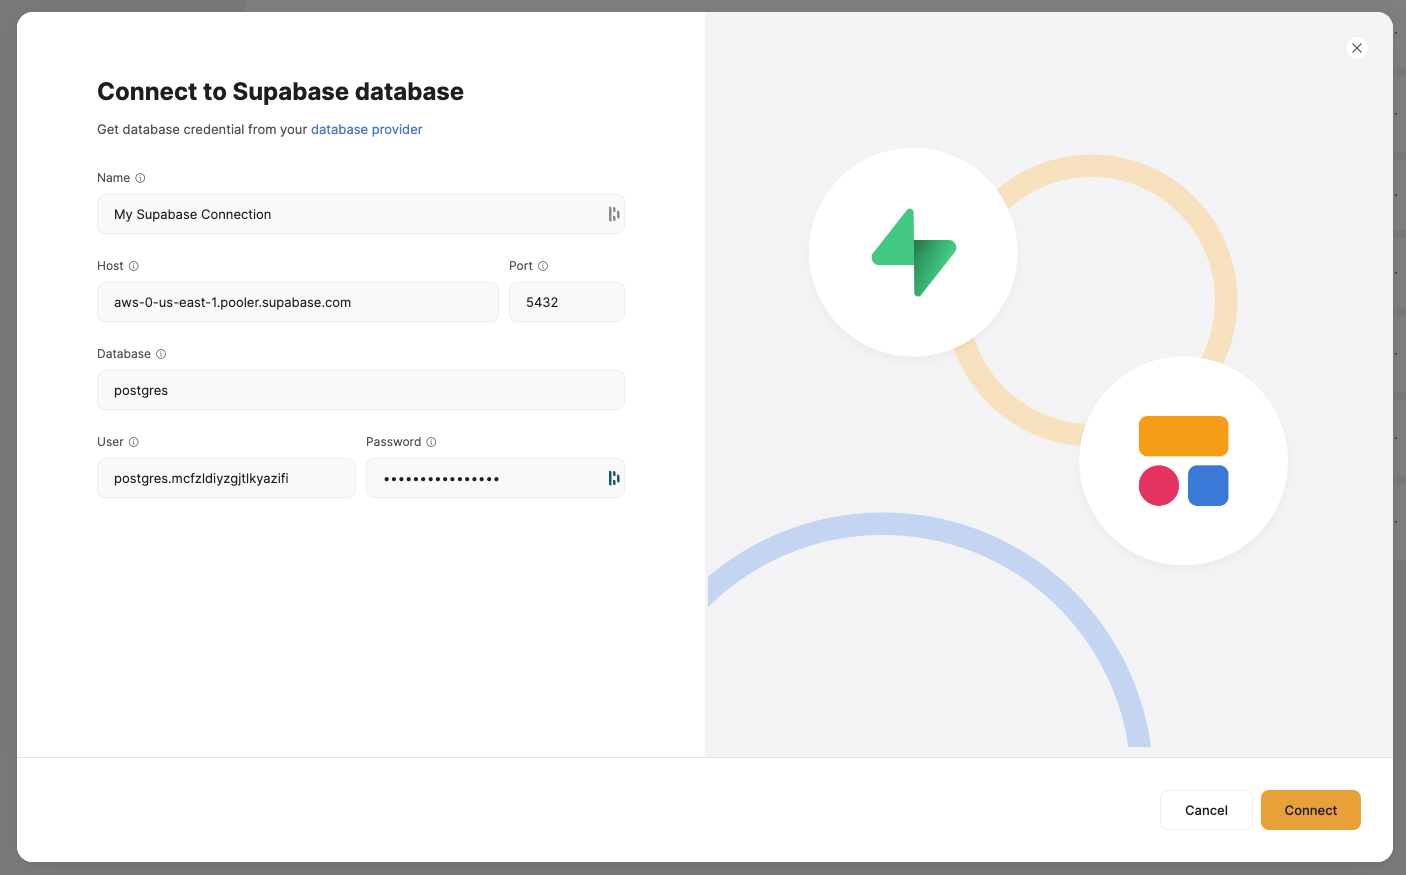
Enter your Supabase credentials in Softr
-
Copy and paste your Supabase credentials into the appropriate fields in Softr:
- Host
- Database
- Port (
5432by default) - User
- Password
- Enter a custom name for your connection (optional).
-
Click Connect to complete the setup.
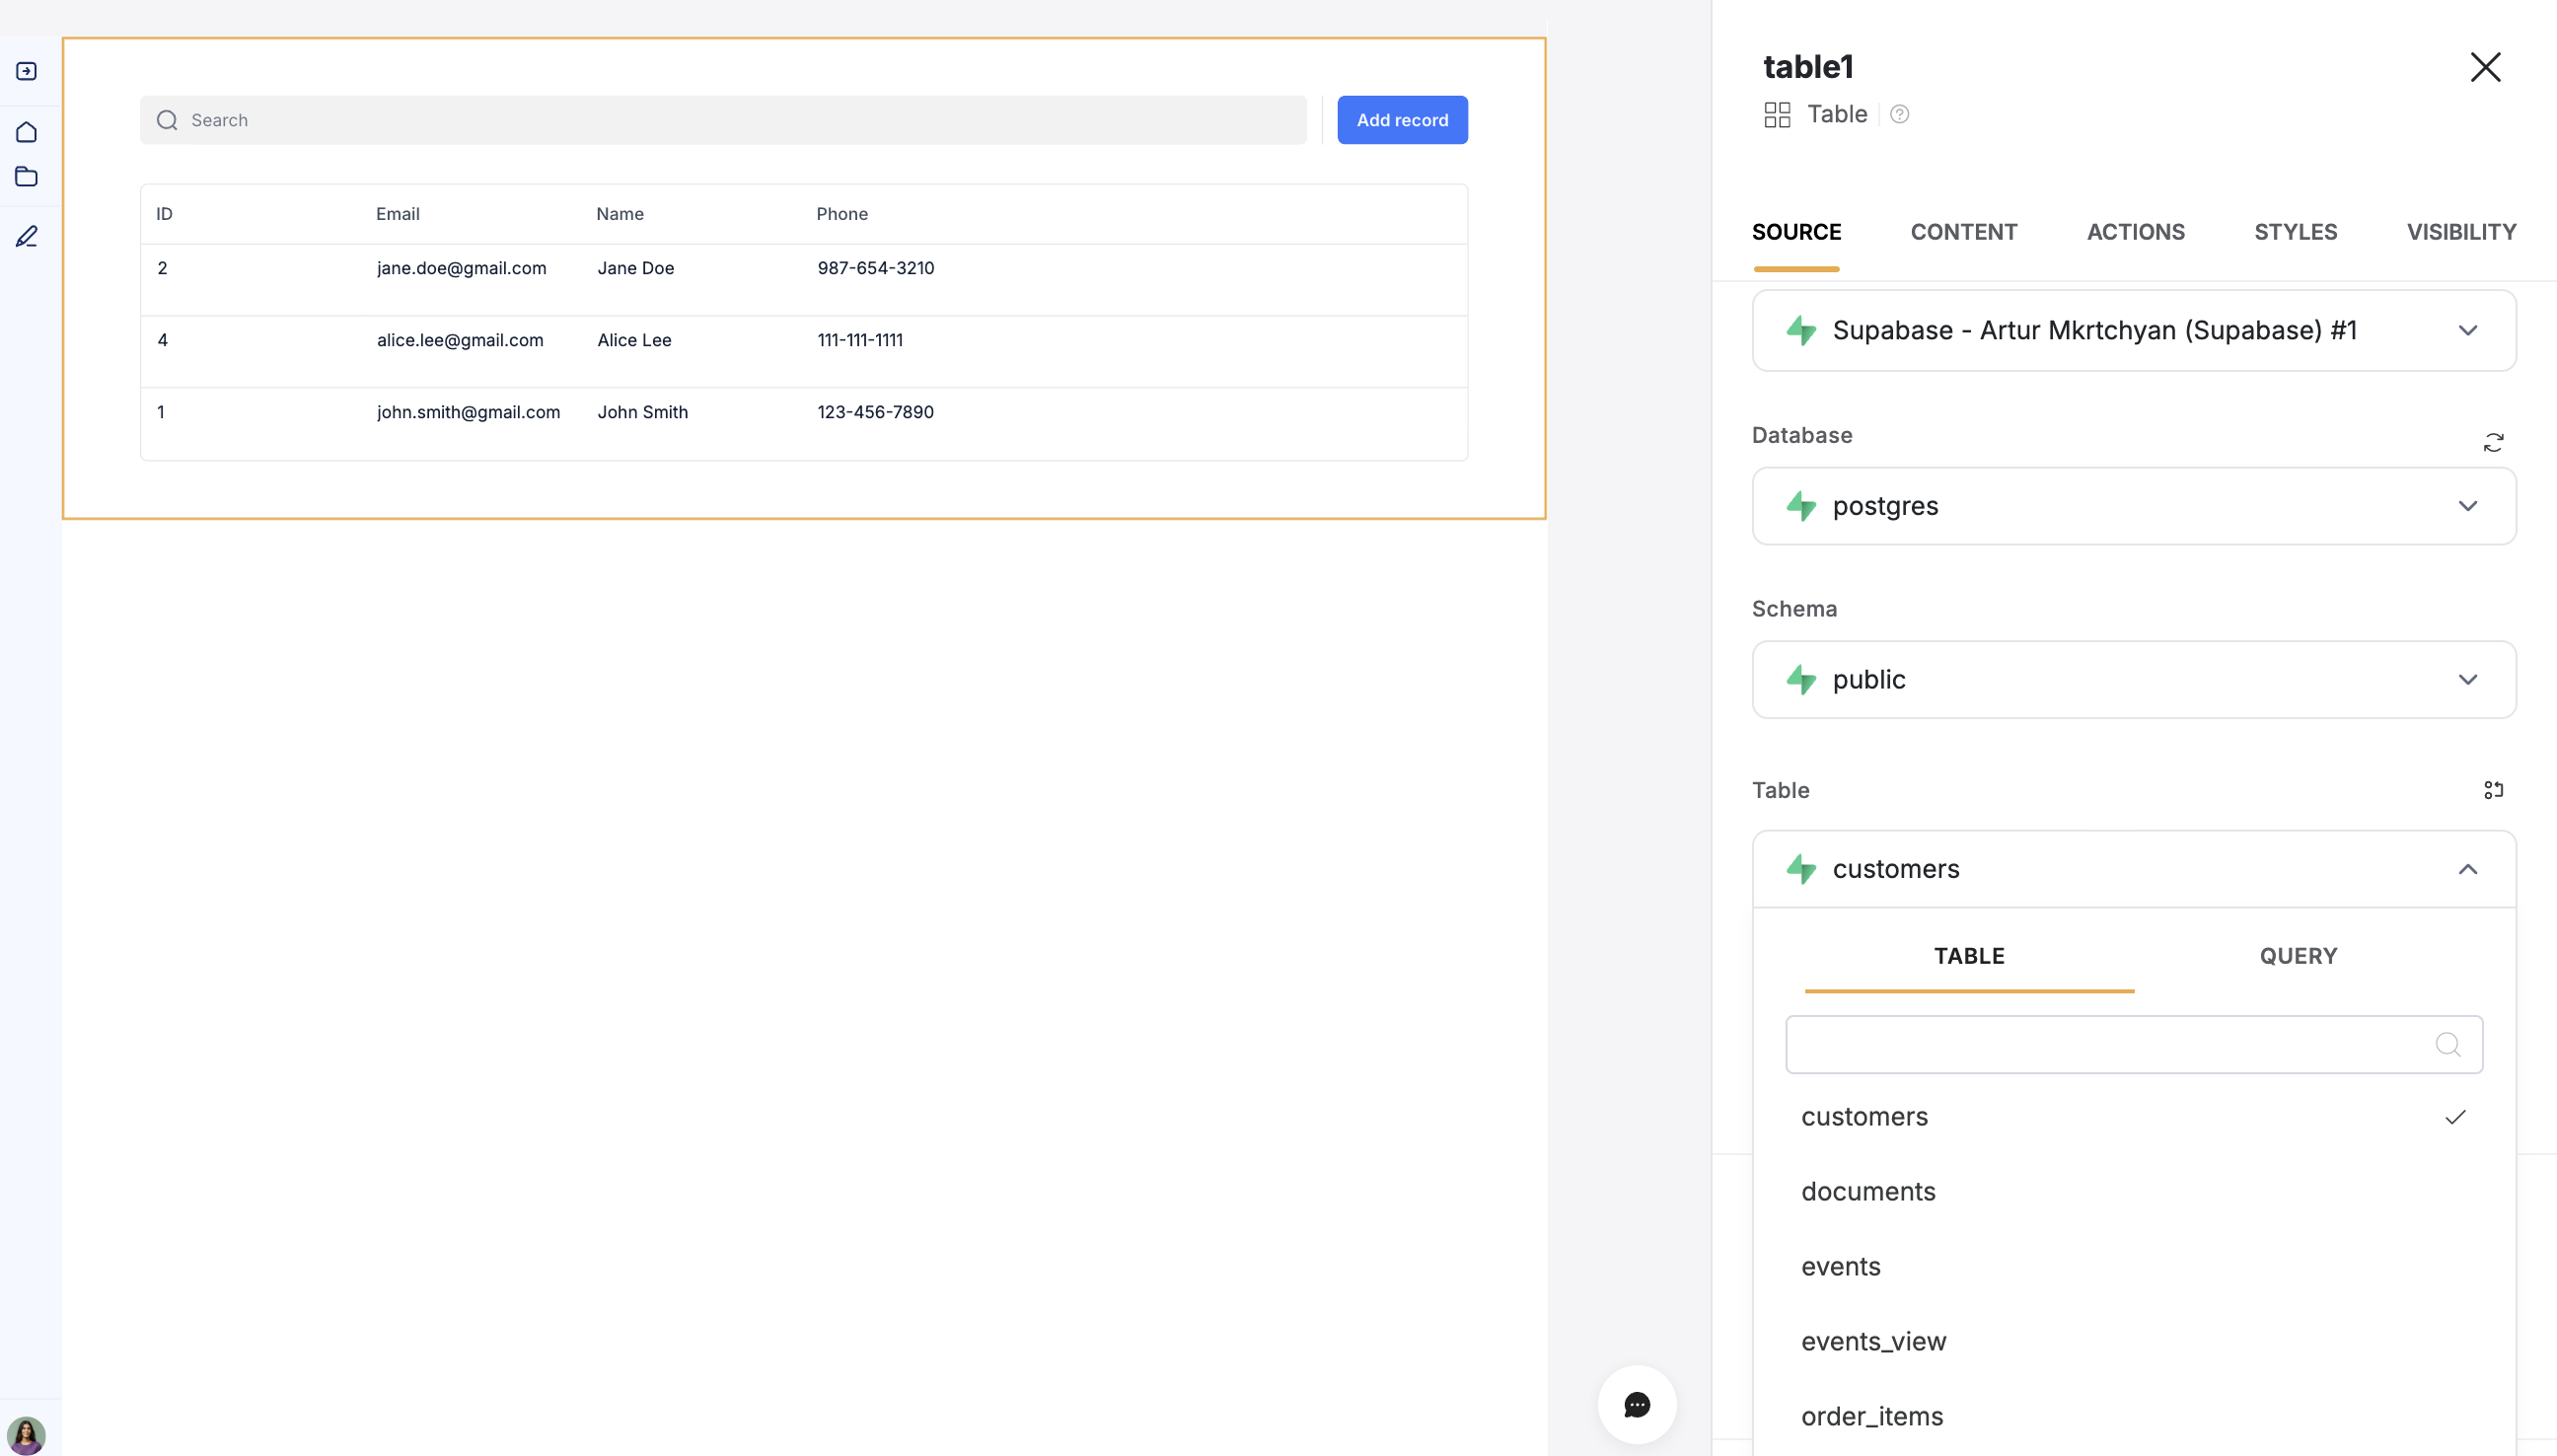
2. Connect your Supabase data to your Softr app
Once your Supabase account is connected, you can use it in any Softr application.Connect your data to a dynamic block
To display your data in the app, connect a dynamic block (e.g. List, Grid, Table) to your Supabase table:
- Go to the Block source tab and select your Supabase integration.
- Select the database and schema you want to connect.
- Pick the table you want to use or add a new query
-
Optionally, select the primary field.