Using Airtable as a data source for your Softr app.
Airtable is a powerful tool that combines theflexibility of spreadsheets with the power of a database. It allows you to store and organize different types of data, making it a great choice for managing data in your Softr app.With Airtable, you can:
Store text, images, checkboxes, and more
Create custom views to filter and sort your data
Control who can view or edit information
Use ready-made templates to speed up setup
Integrate with third-party tools
In this article, we’ll walk you through connecting your Airtable account to Softr and displaying your Airtable data in your app. For a quick overview, check out our video walkthrough. 👇
To use Airtable in Softr, you must first link your Airtable account. Here’s how:
1
Add an Airtable data source to your workspace
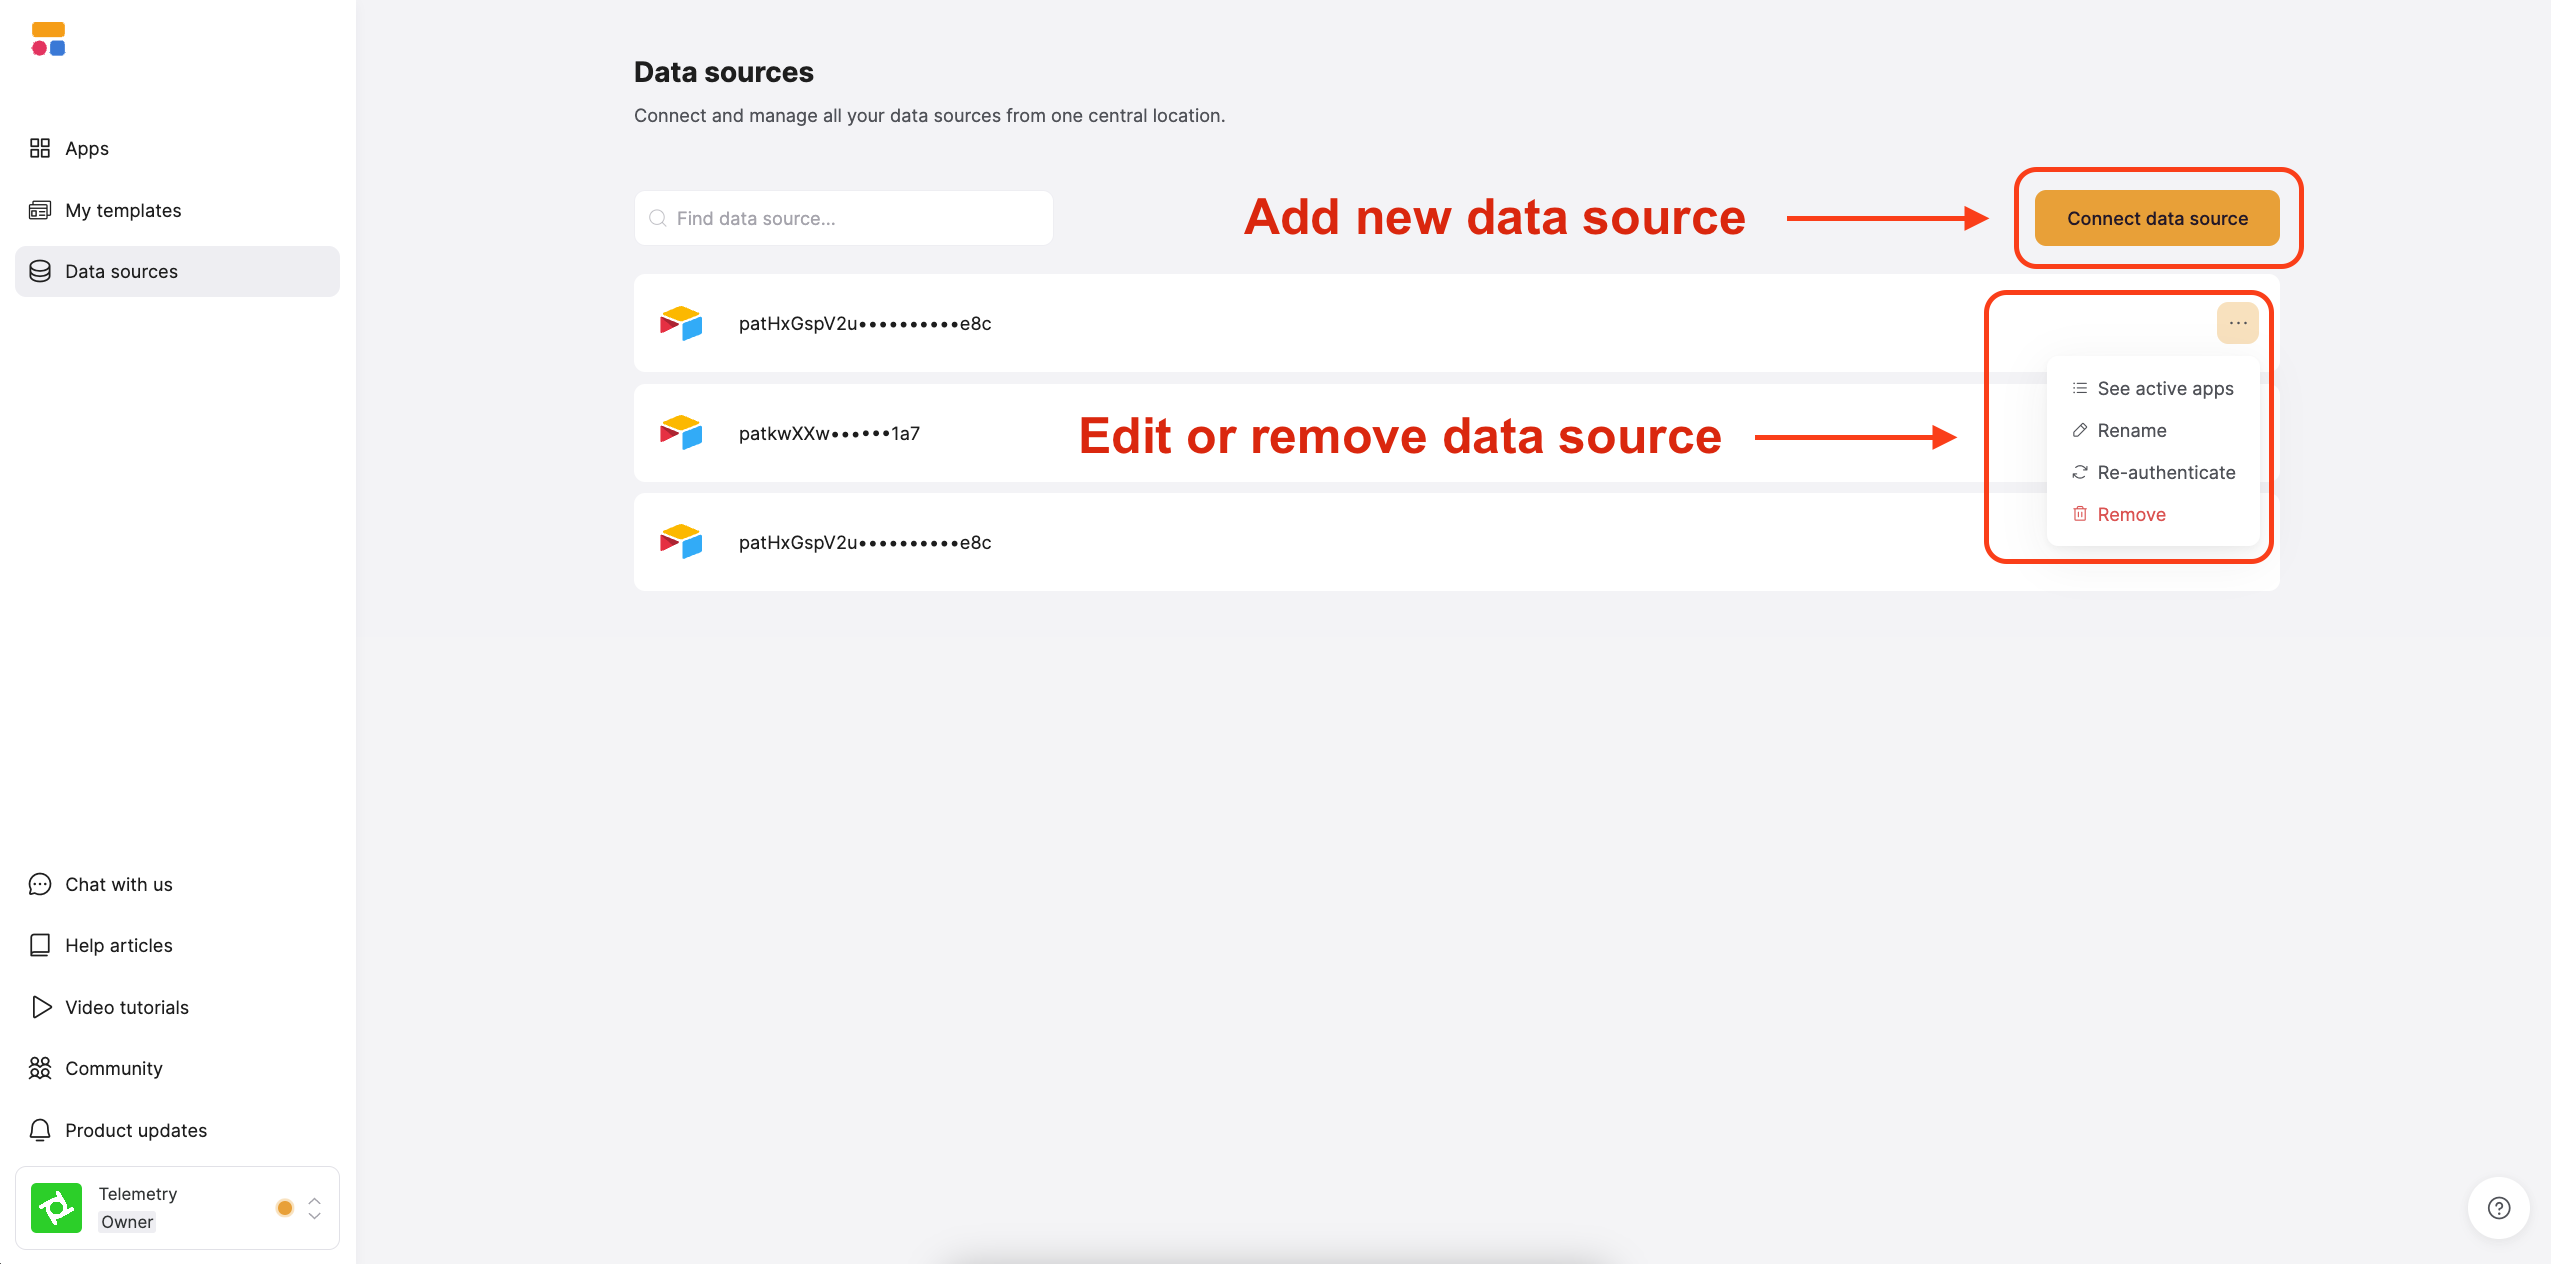
In your Softr Dashboard, navigate to Data Sources in the left menu and click Connect Data Source. Select Airtable and proceed to authenticate your account.
Add, edit, or remove a datasource using the buttons on the dashboard
2
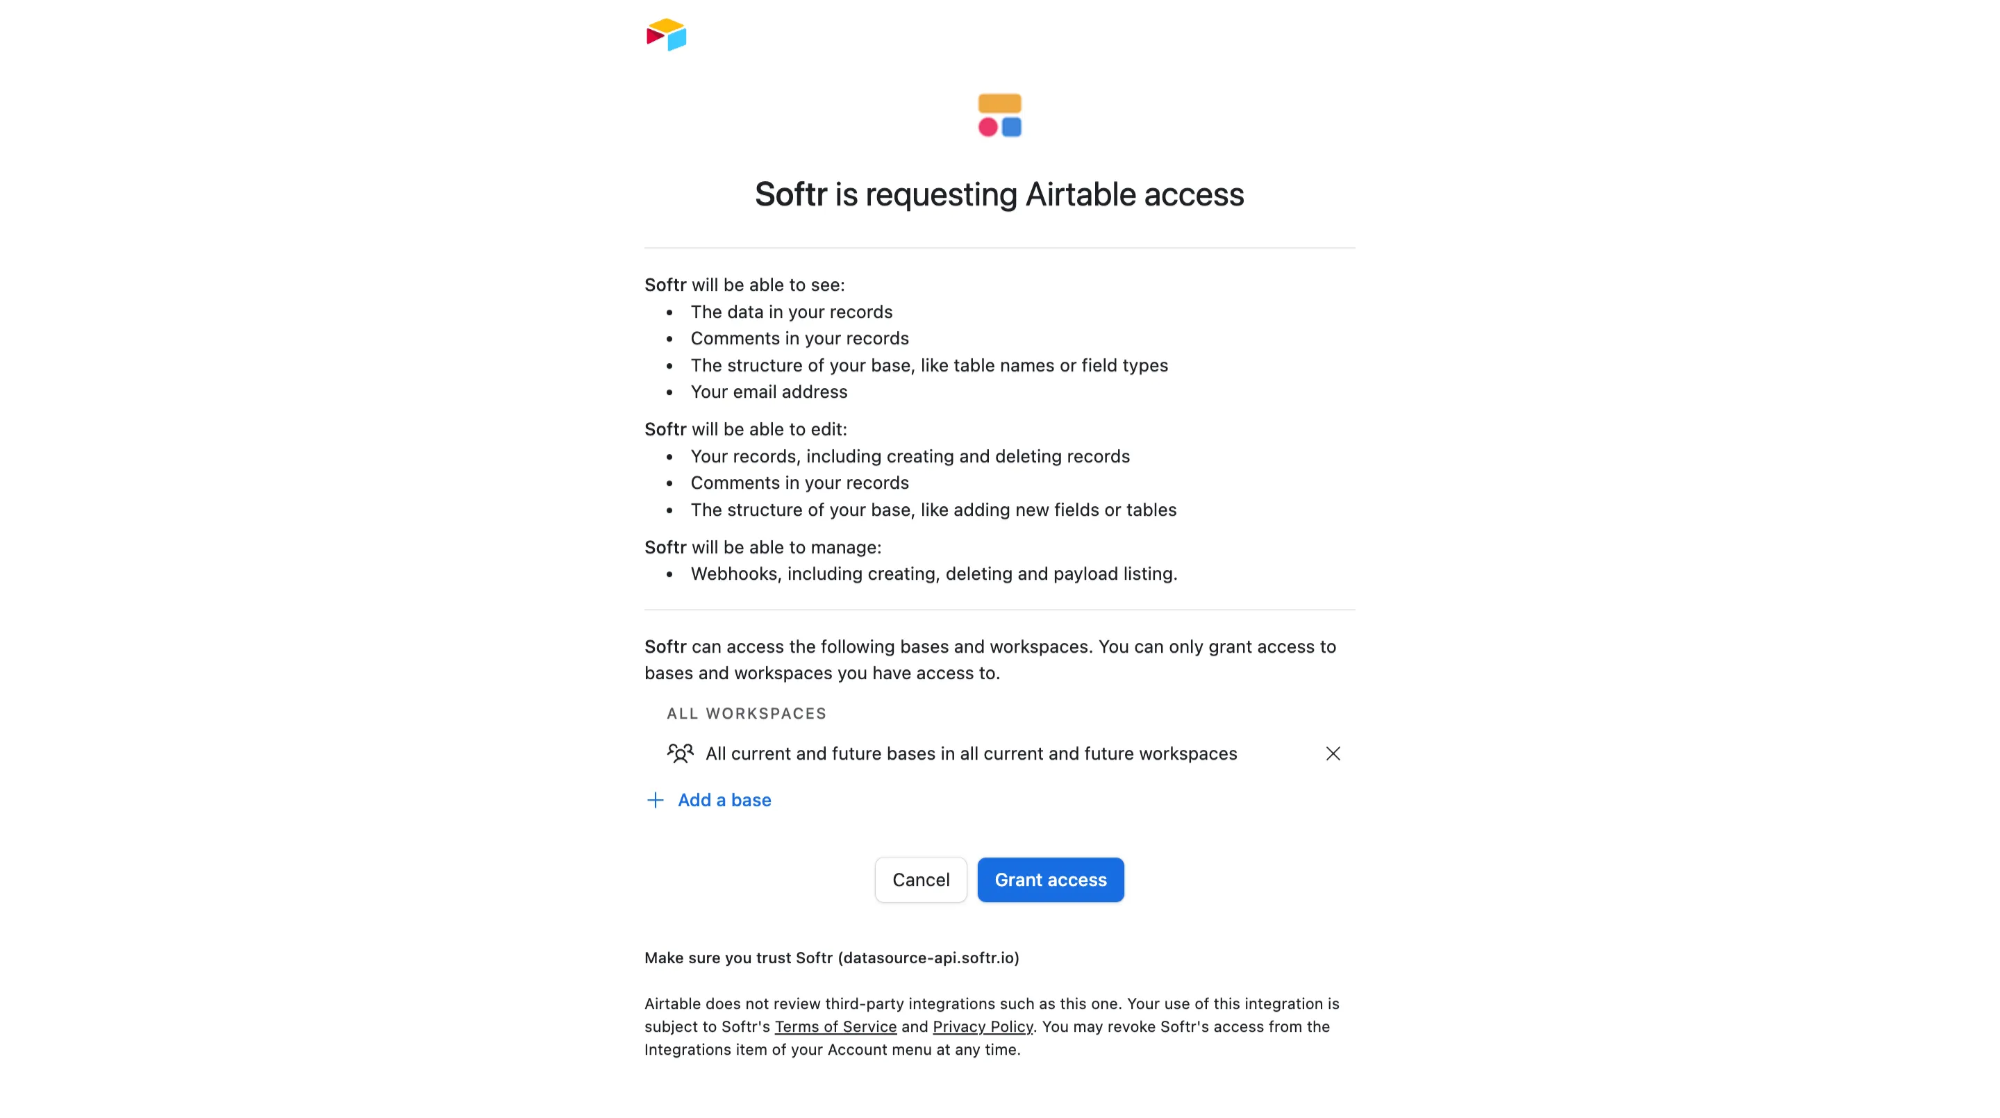
Grant access to the Airtable bases you want to use in your workspace.
Select all the bases you want to access in Softr and click Authorize.
When granting access, we strongly recommend choosing “All current and future bases in all current and future workspaces.”If you don’t, you’ll need to manually reselect bases every time you reconnect, which could break your apps.
Once your Airtable account is connected, you can use the authorized bases across one or multiple Softr applications.
1
Connect your data to a dynamic block
To display your data in the app, connect a dynamic block (e.g. List, Grid, Table) to your Airtable base:
Go to the Block sourcetab and select your Airtable integration.
Pick the base you want to use.
Choose the table with the records you want to show.
Important: Each Airtable table can only connect to one Softr block. For example, if you want to display Projects in a List block, you’ll need to map it to the Projects table in your base. If you also want to show Tasks, you’ll need to add a separate block and connect it to the Tasks table.
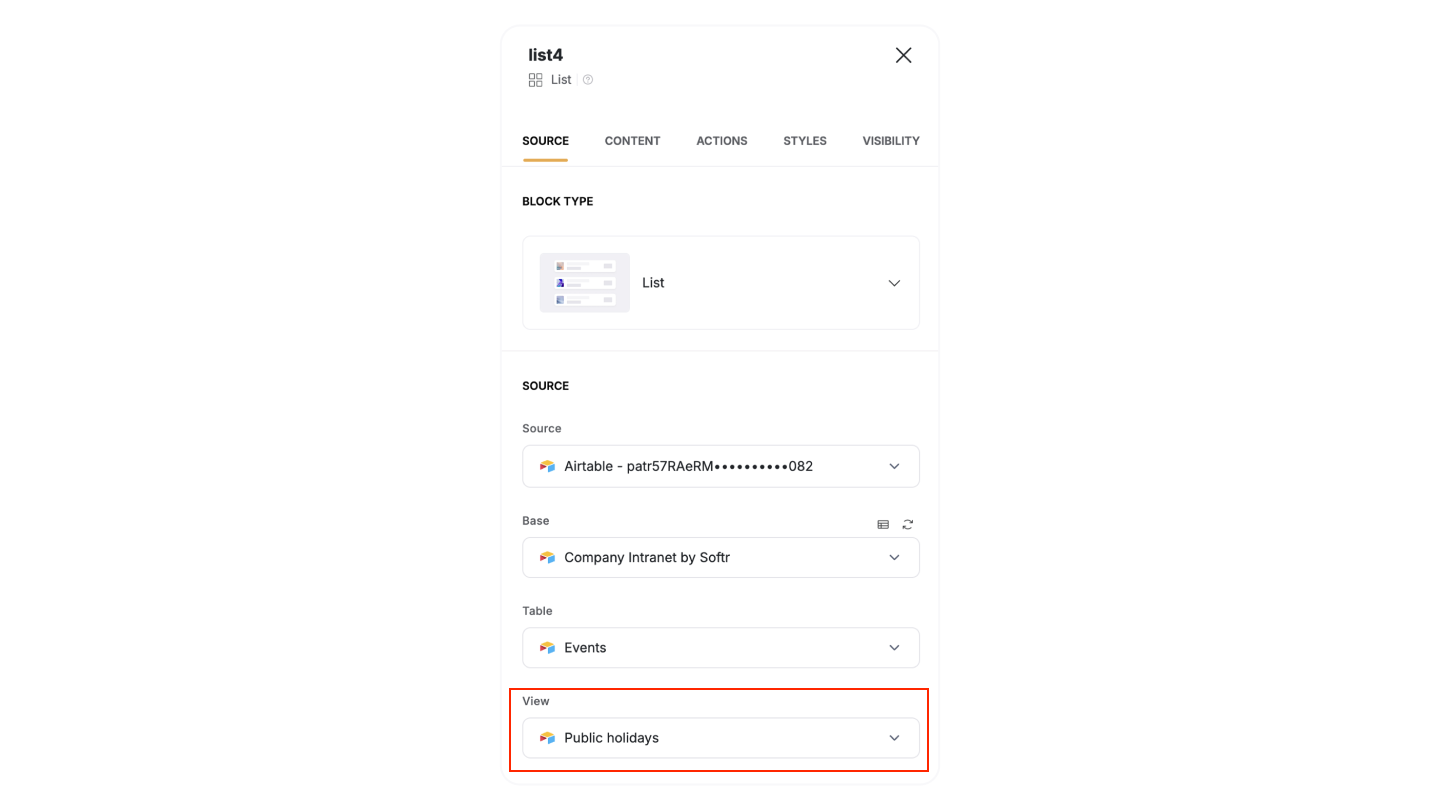
Selecting an Airtable view in Softr
Tip: You can also select an Airtable View to display. If a view is selected, any filters and sorting applied in Airtable will be preserved for the records shown in the Softr block (e.g., showing only completed tasks).
2
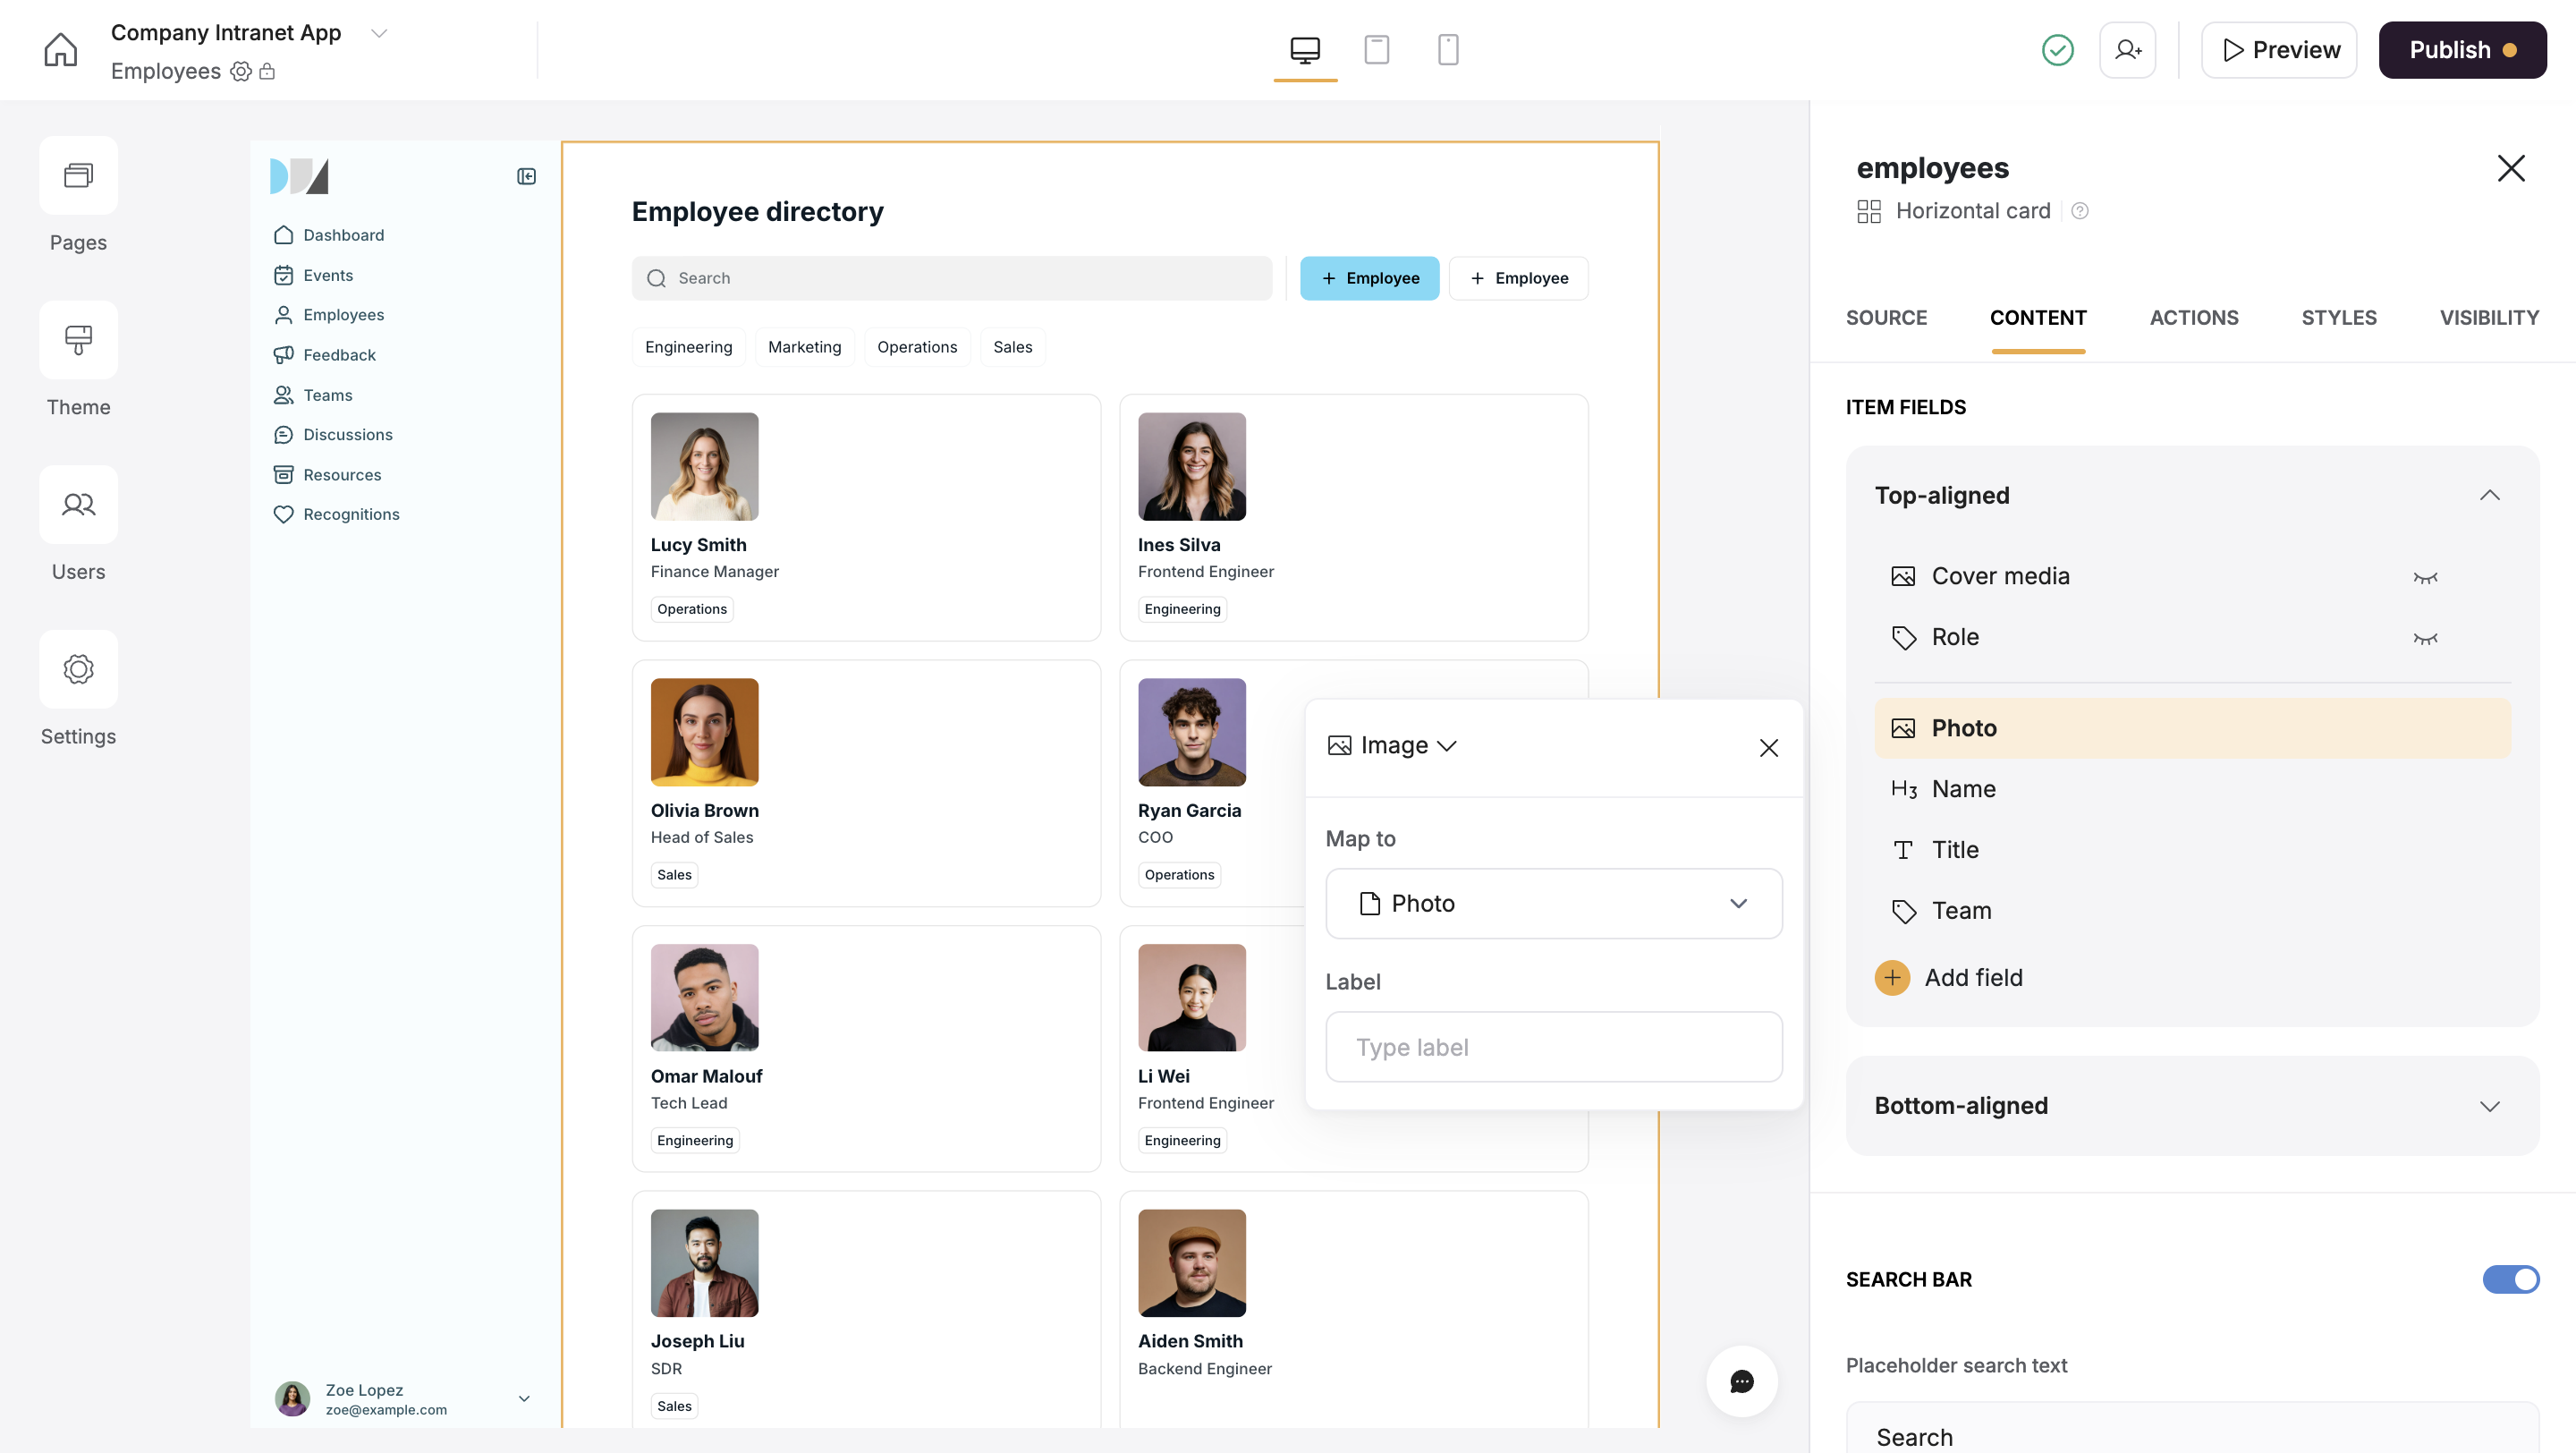
Map Airtable columns to item fields
When you connect your table to a block, you can choose which Airtable columns to display and map it to a Softr field. This lets you control how your Airtable data appears in Softr.Example: If your Airtable base has a Profile Picture (Attachment field), map it to an Image field in Softr so it displays correctly.
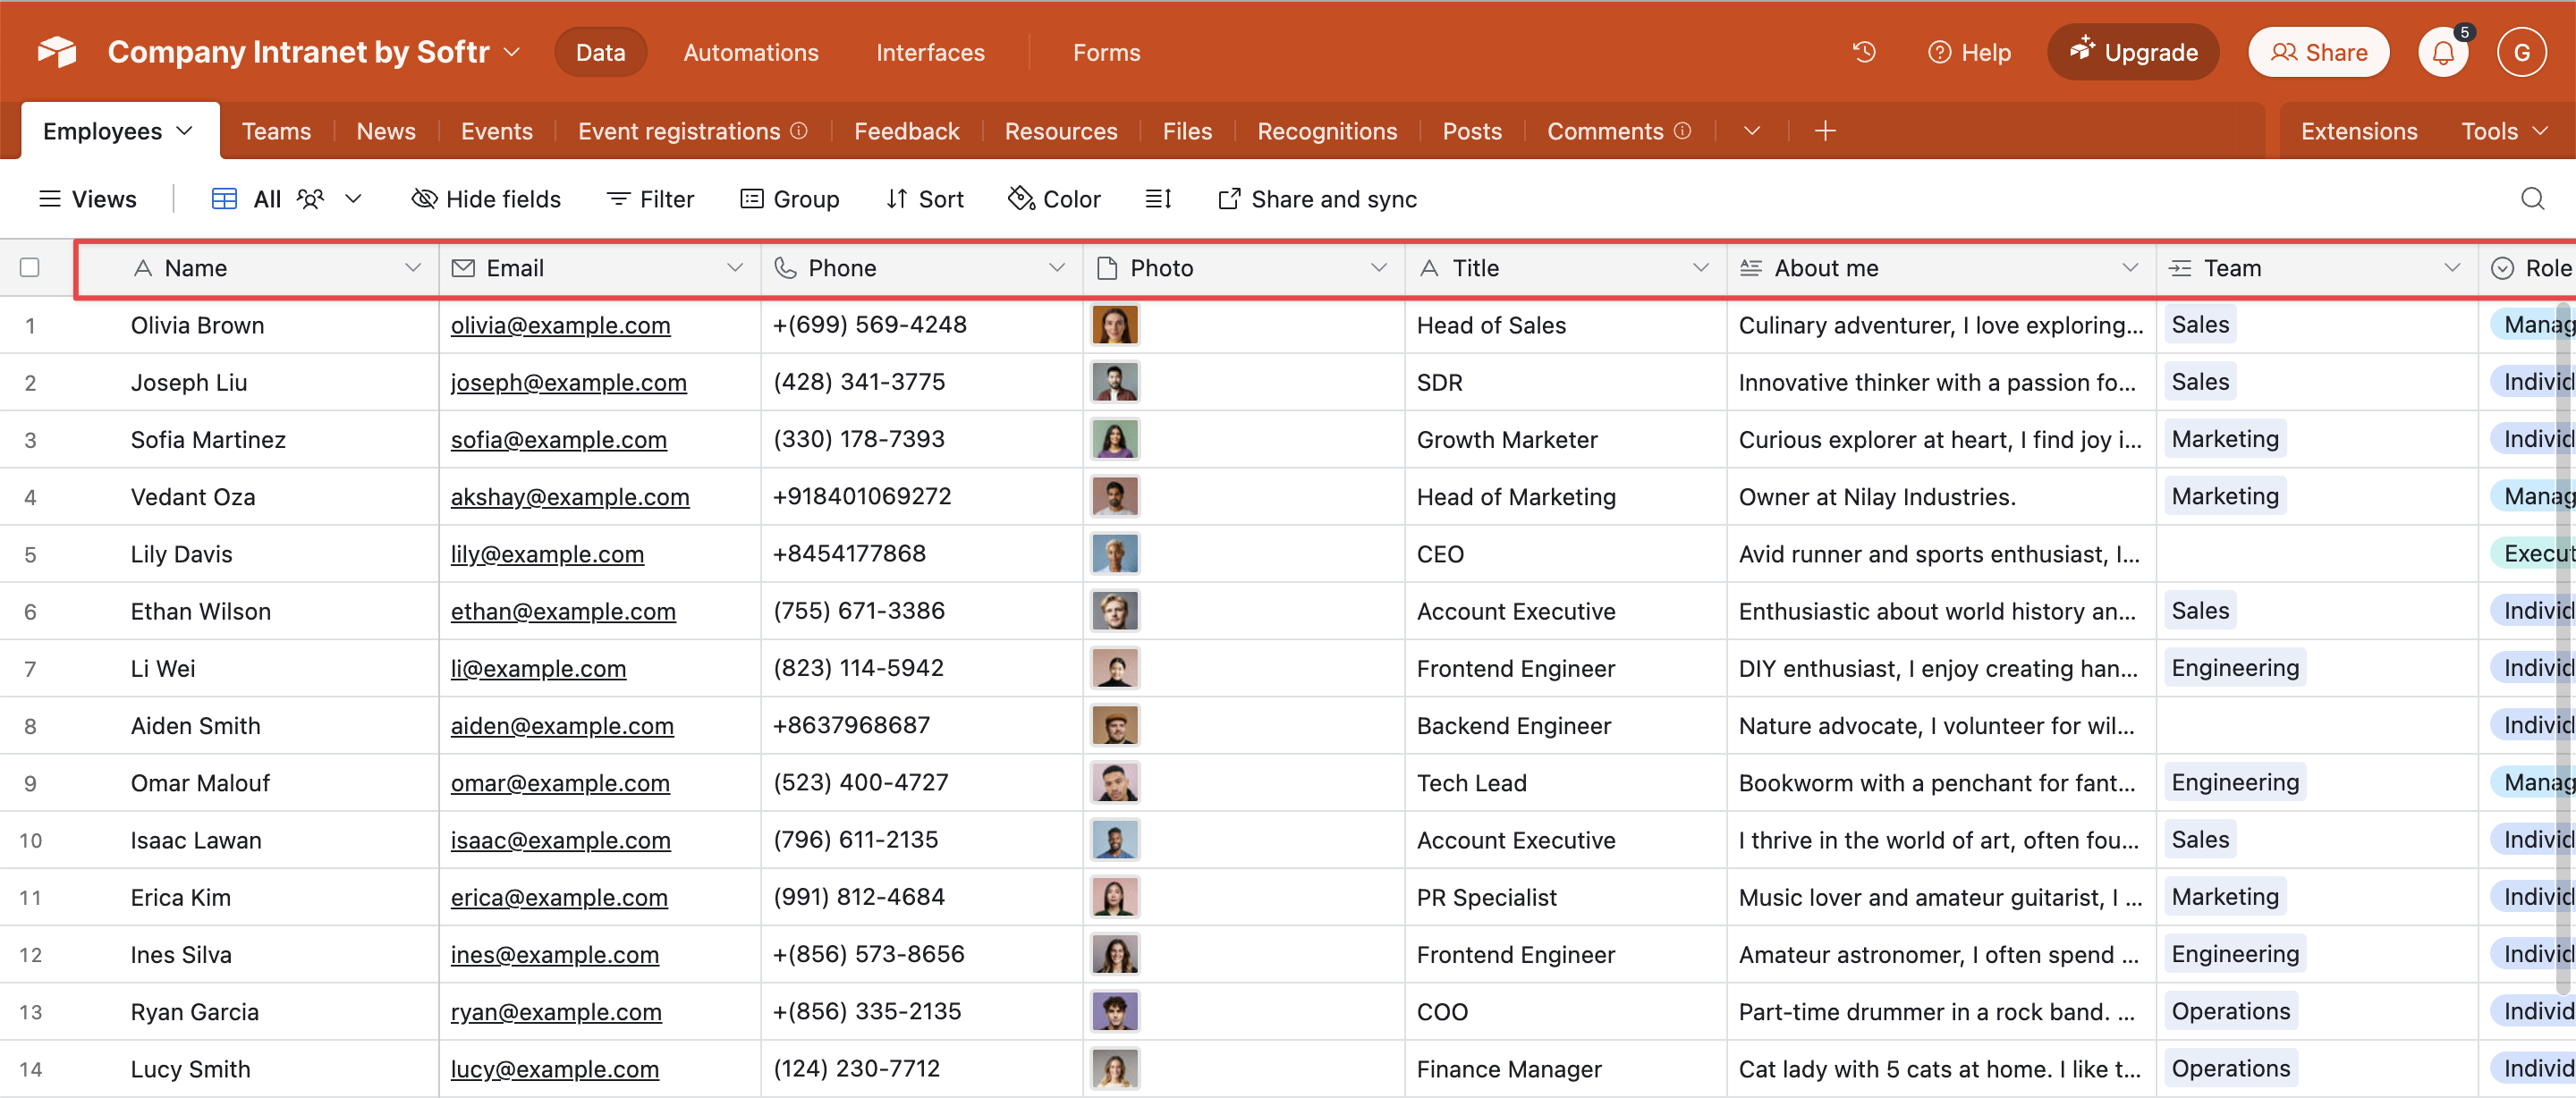
Airtable fields
Mapping an image field
Airtable fields work like spreadsheet columns, but each has a specific type (e.g., text, image, checkbox). To keep everything working smoothly, make sure to match field types correctly when setting up the connection.
Check that you’ve granted Softr access to all current and future bases in Airtable. If not, go back to Data Sources and re-authenticate.
Why aren’t my mapped fields showing?
If some fields aren’t displaying data even though they are mapped correctly, check if their titles in Airtable contain any special characters. Removing special characters can help resolve the issue.
Why is my data not updating in Softr?
Try refreshing Softr or reloading your data source. If the issue persists, check if your Airtable permissions are correctly set.
Can I use multiple Airtable bases in one Softr app?
Yes! You can connect multiple Airtable bases to the same app, but you have to use a separate Dynamic Block for each table.
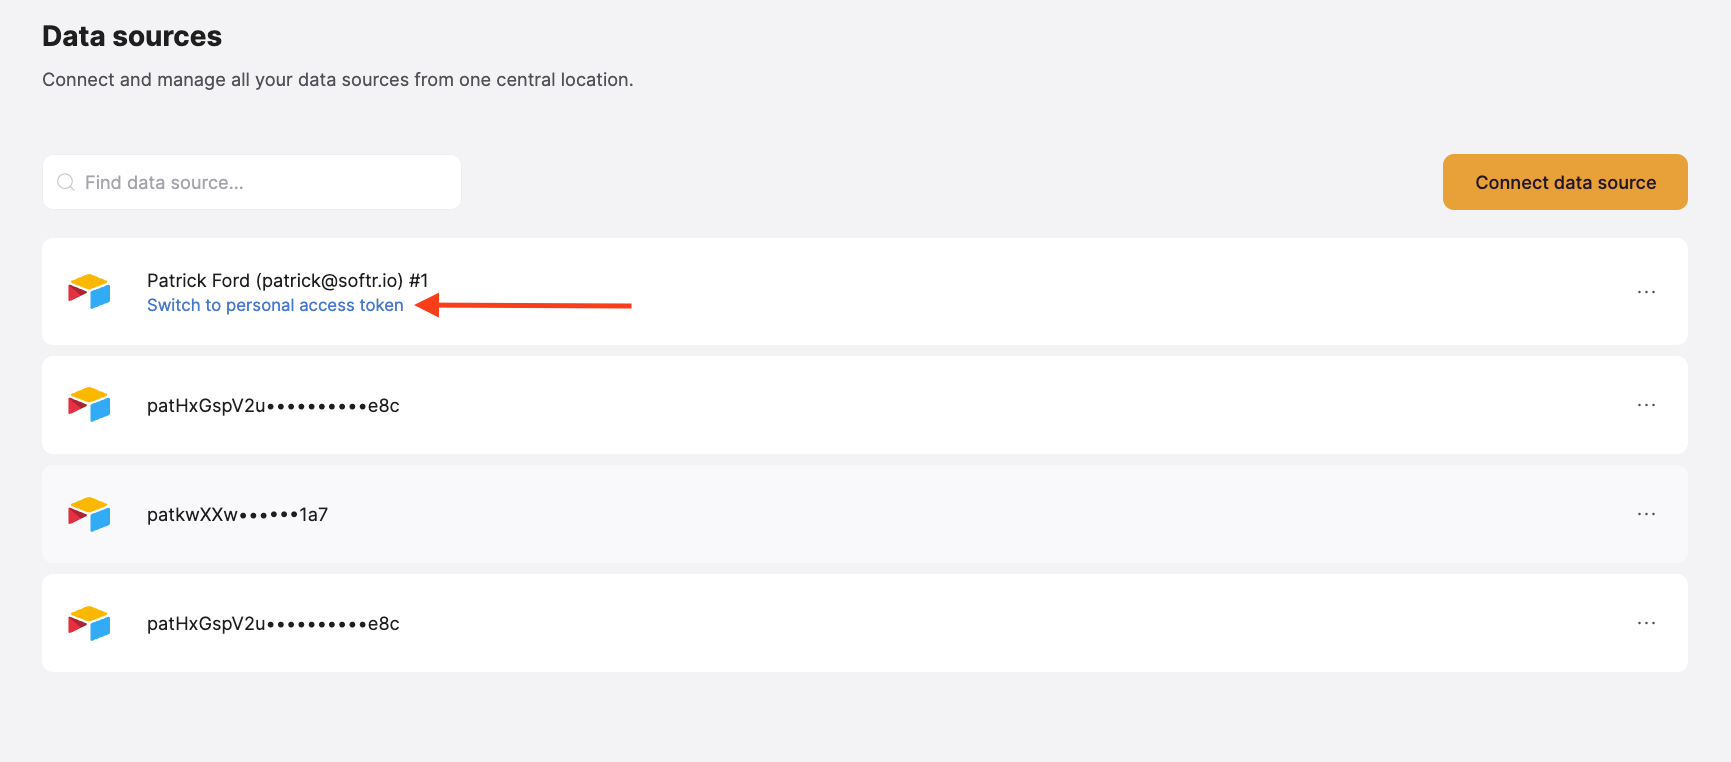
In Softr, you can switch your Airtable connection from OAuth (5 requests/sec) to Personal Access Tokens (50 requests/sec). While Personal Access Tokens allow up to 50 requests per second at the token level, Airtable still enforces a base-level limit of 5 requests per second. This means requests to a single base remain capped at 5 RPS, regardless of the authentication method.
Personal access tokens can help increase security on your account by only enabling Softr to access certain bases and scopes in your Airtable account. We recommend enabling all scopes, but the PAT setup screens will show which ones are required by Softr.If you have already authenticated your Airtable account, click “Switch to personal access token” below the data source name and paste your Airtable PAT.