> ## Documentation Index
> Fetch the complete documentation index at: https://docs.softr.io/llms.txt
> Use this file to discover all available pages before exploring further.
# Use Case: Adding Users through Zapier
> Using Softr API and Zapier to add user accounts.
Let's see how you can use the API to add users via Zapier. In this example, we are going to sync a Softr App with Google Sheets using Zapier's Softr app (this is solely for demonstration purposes, and we don't recommend storing user data on Google Sheets or similar sources). Let's proceed.
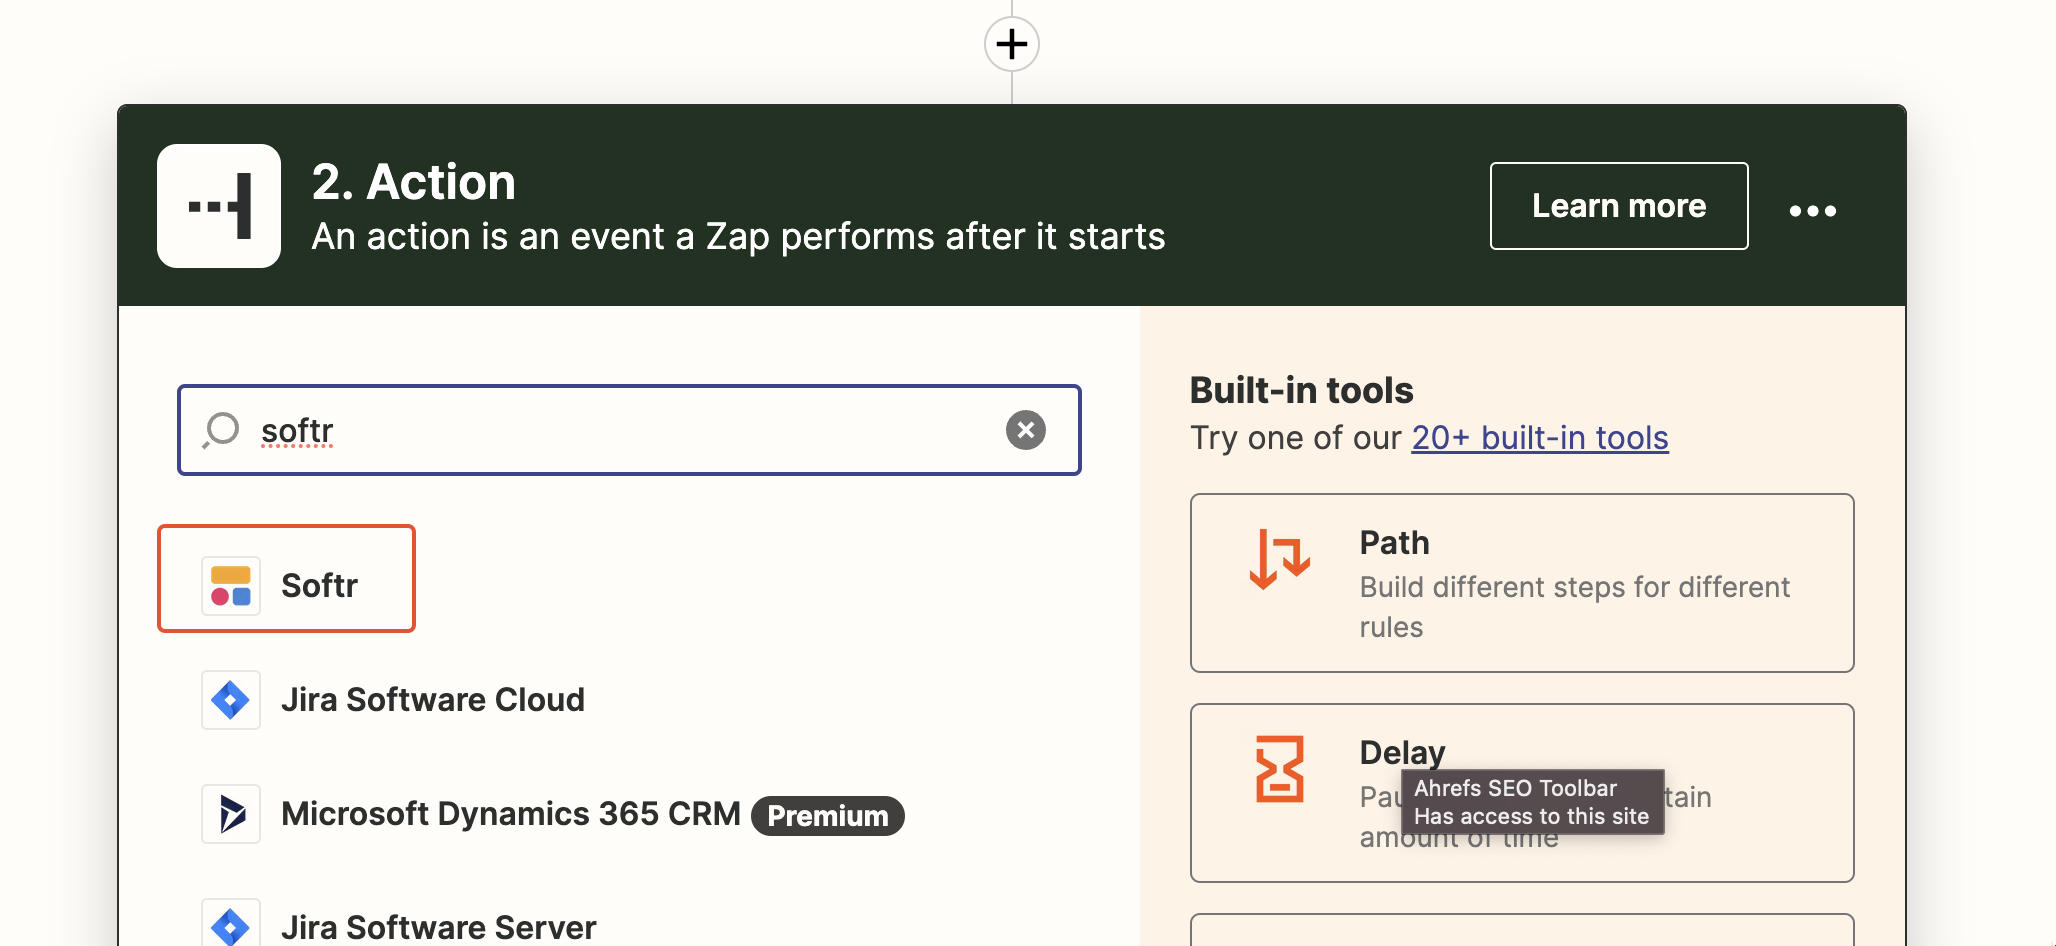
In the Action search bar enter "softr" and select the Softr action.
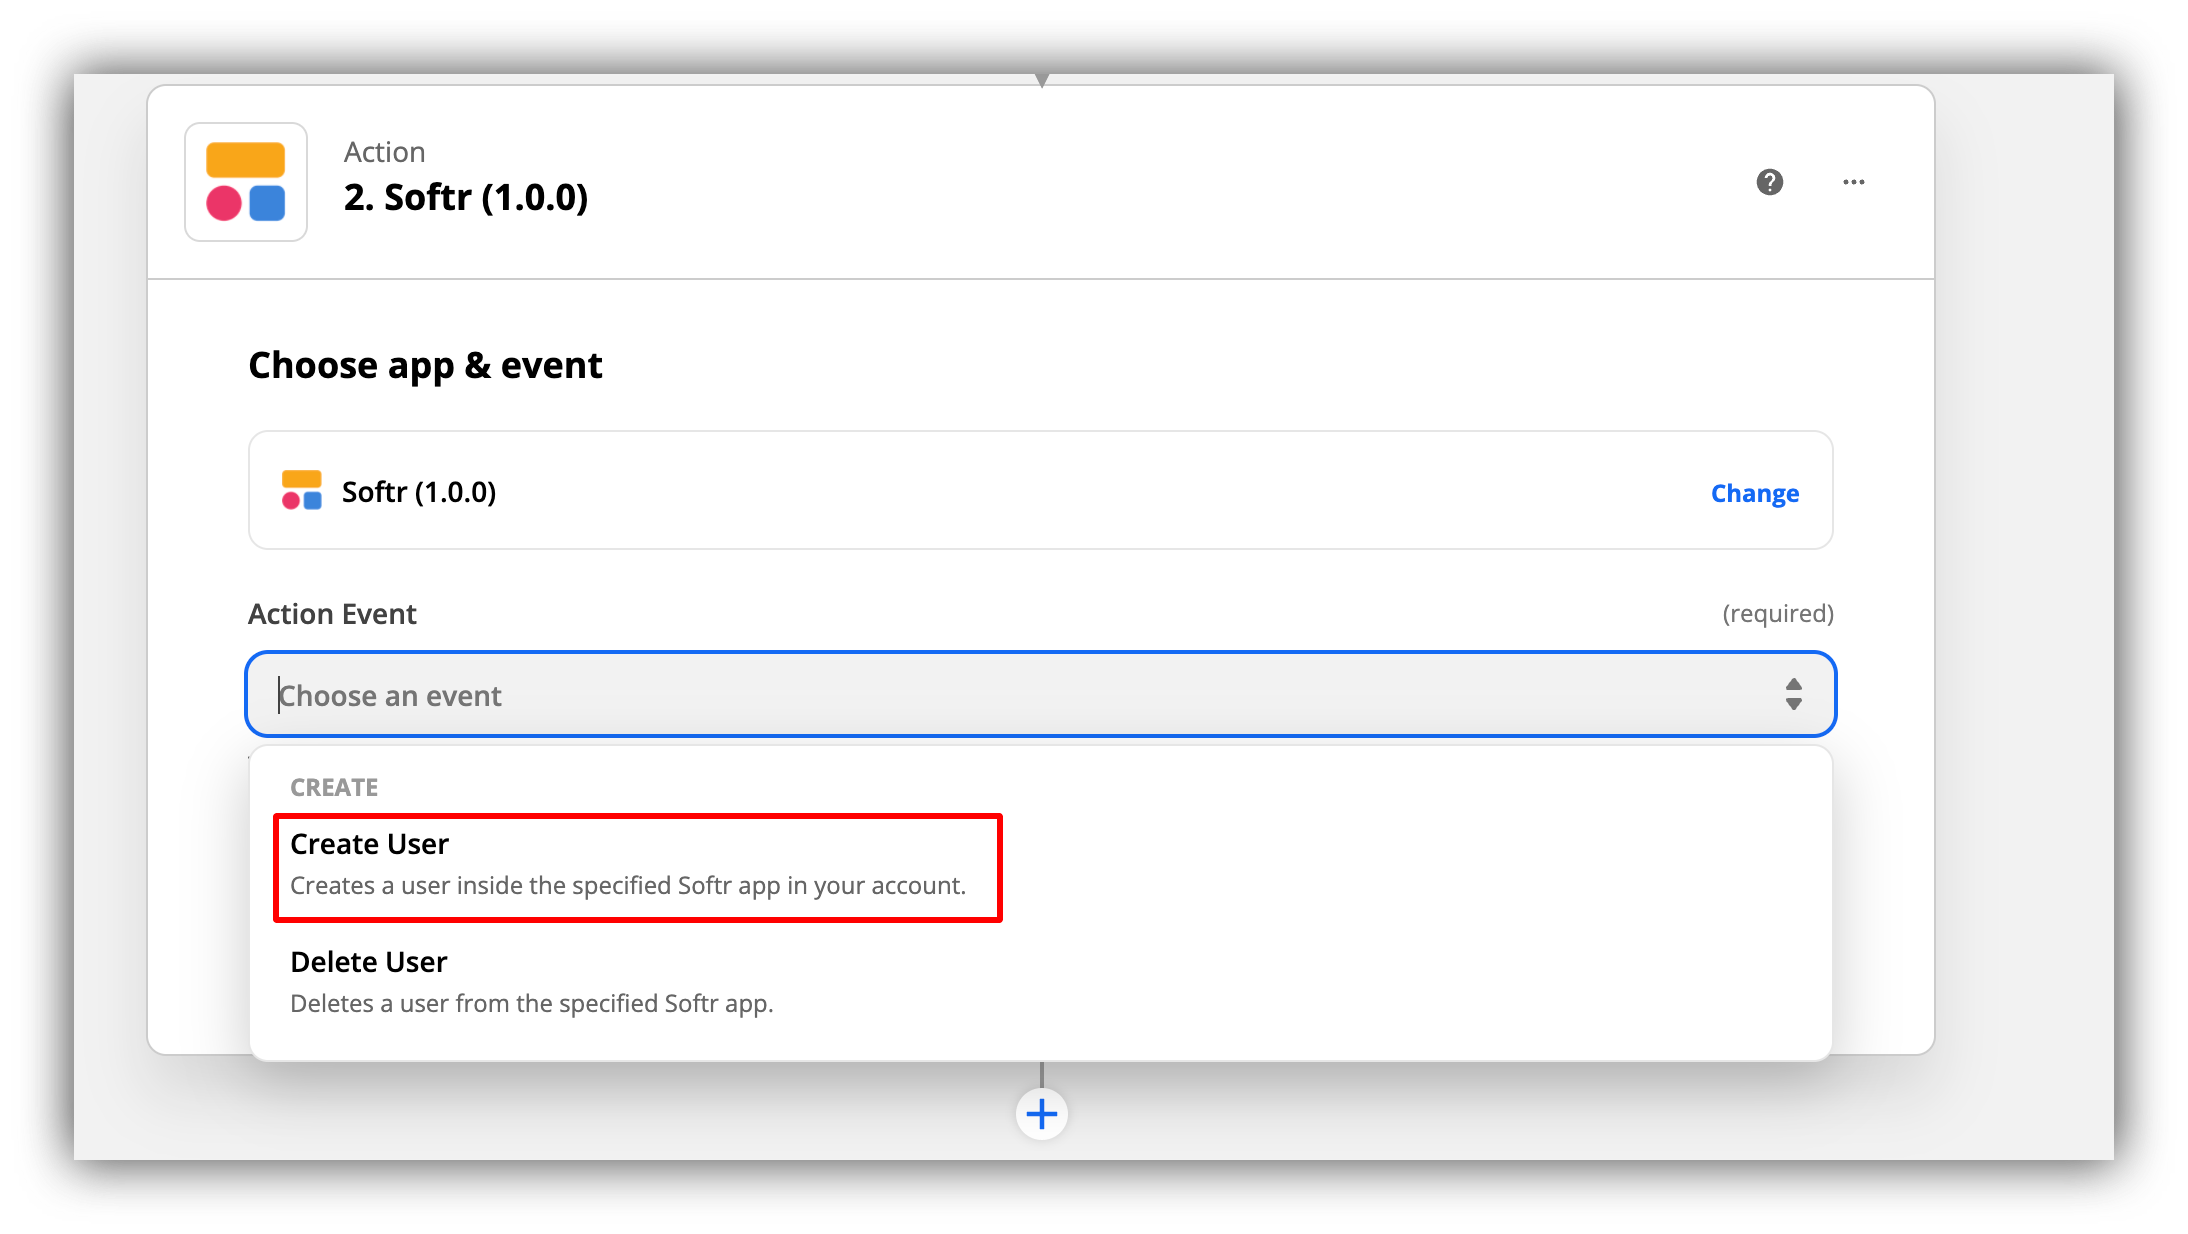
 Next, we are going to select the **Action Event**. In our case, we need to choose "**Create a user**."
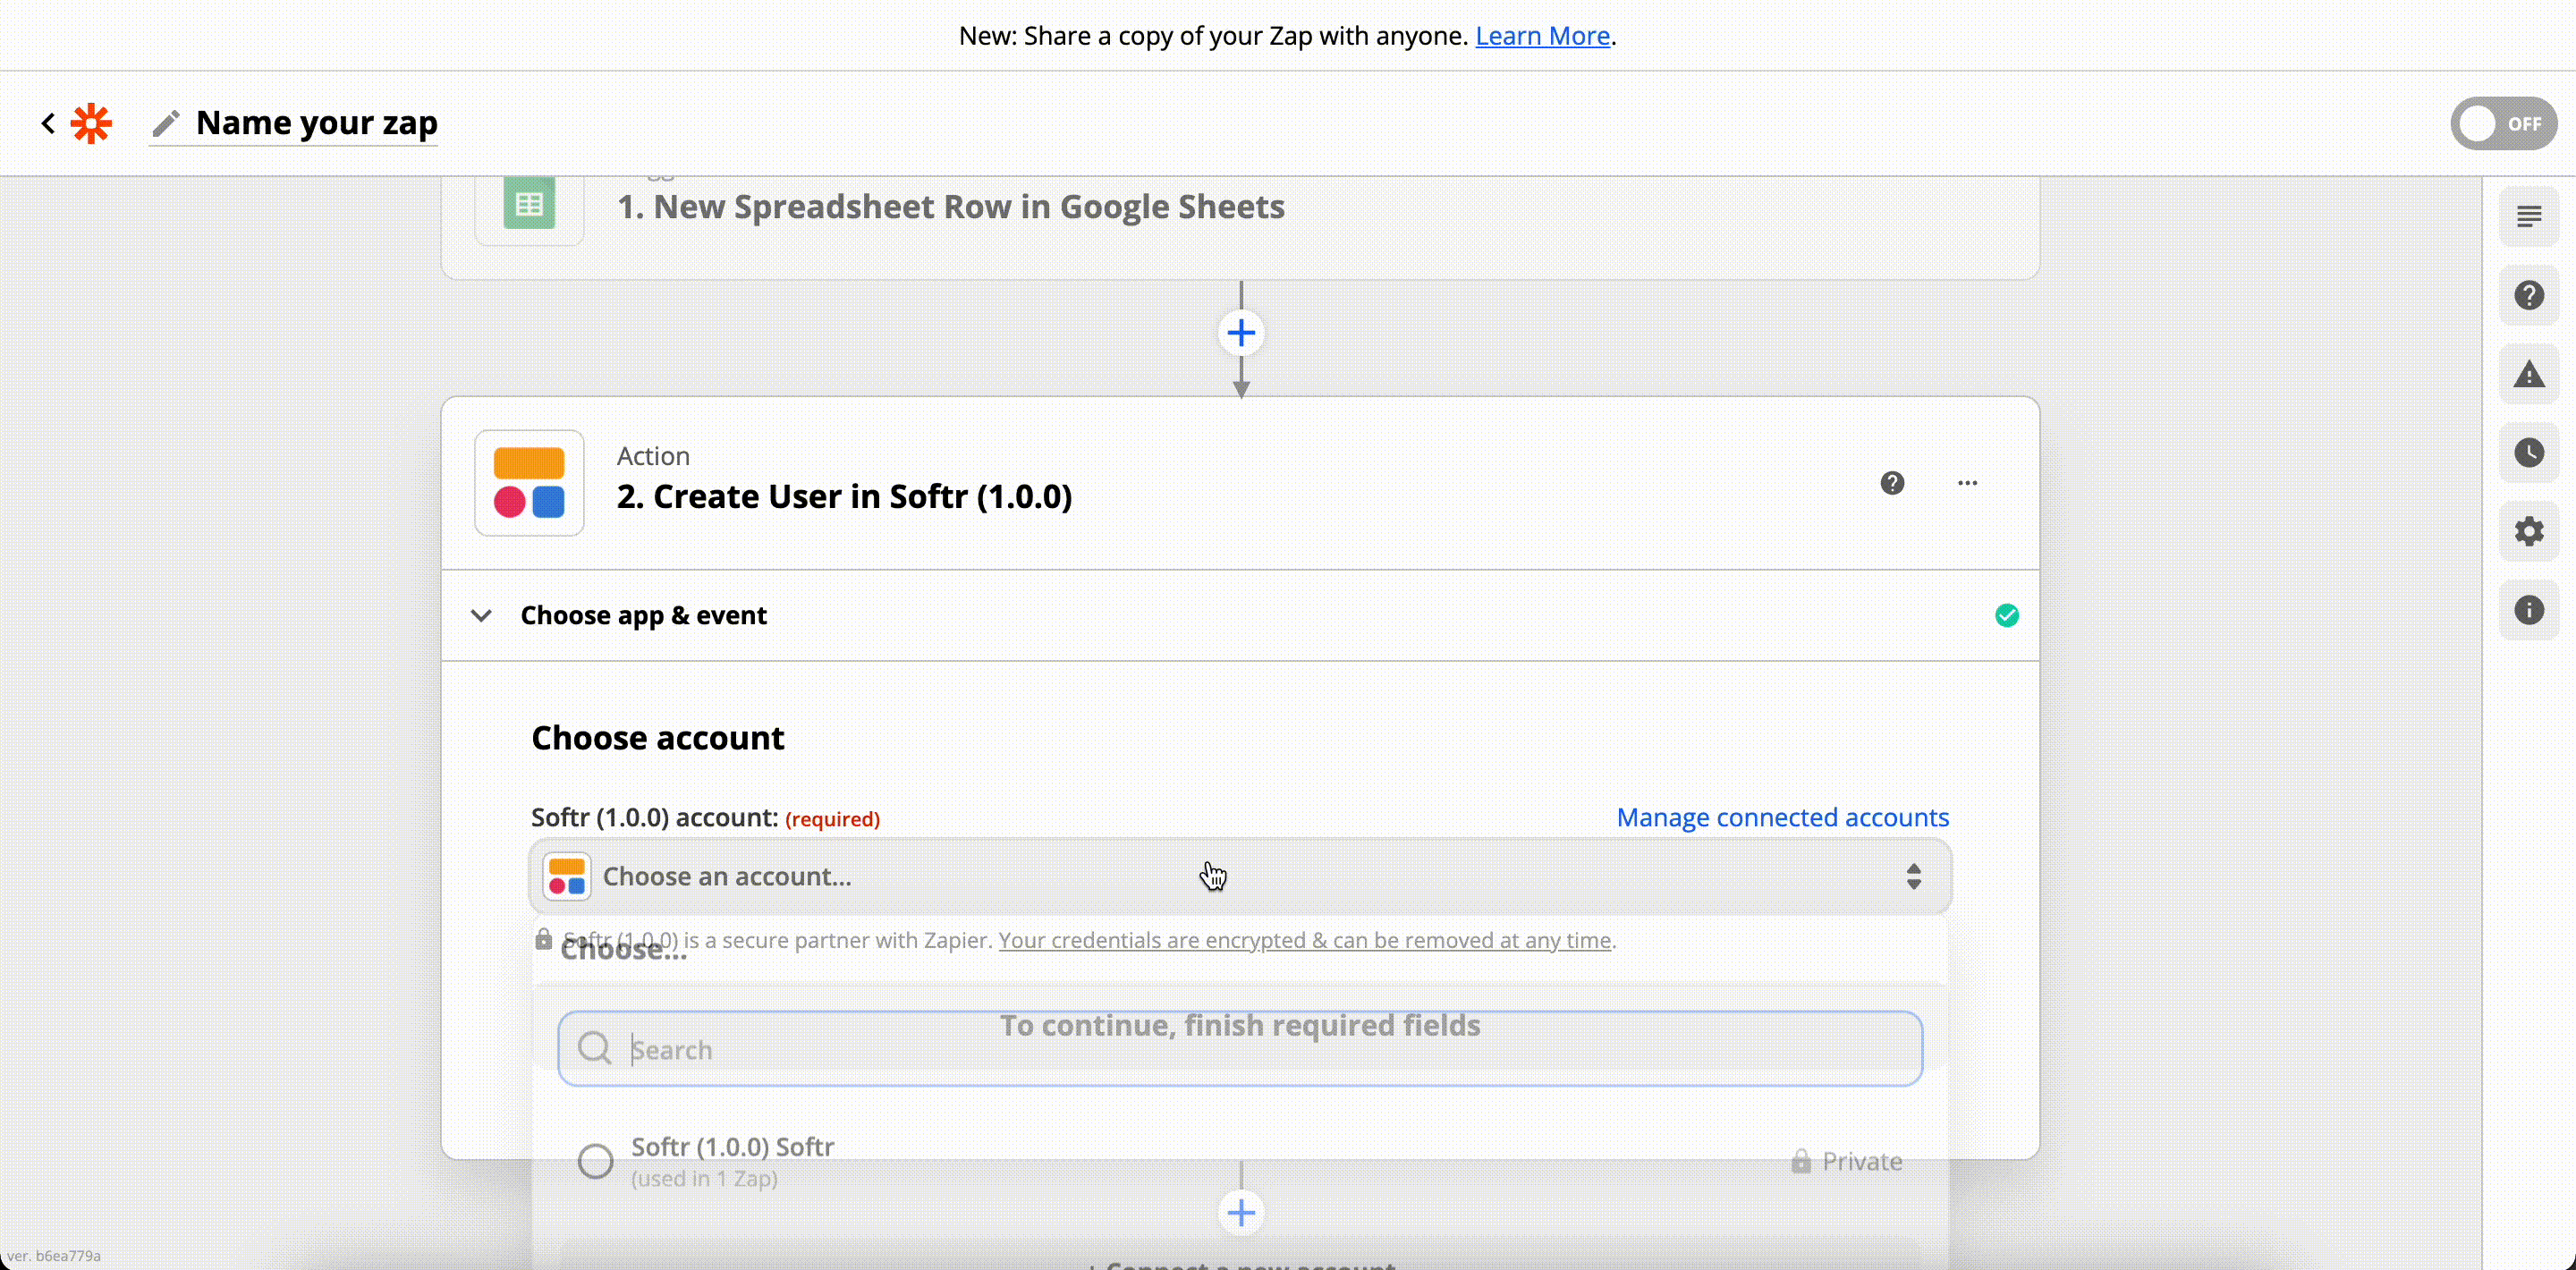
 Further on, we need to link our Softr account (by entering the API key, we generated previously), then add the Application domain, map the **Email**, **Name**, and **Password** fields. We can also set to generate a [Magic Link](/add-and-manage-users/pxnkp9H3qyEVMF6XUceqnj/add-or-import-users-manually/g5R1bGnBTFJ3sWLR8Mgdng), but we are going to set it to **False** in our case. See below.
 That's it. Now, as soon as you activate your Zap, all the new users added to your spreadsheet, will be added to your selected Softr app as well.
In this use case, we are going to add users to a Softr app using Zapier's **Custom Webhook**
instead of the Zapier Softr app. So, the first step (**Setting the Trigger**) is going to be similar to that of **Option 1**.
That's it. Now, as soon as you activate your Zap, all the new users added to your spreadsheet, will be added to your selected Softr app as well.
In this use case, we are going to add users to a Softr app using Zapier's **Custom Webhook**
instead of the Zapier Softr app. So, the first step (**Setting the Trigger**) is going to be similar to that of **Option 1**.
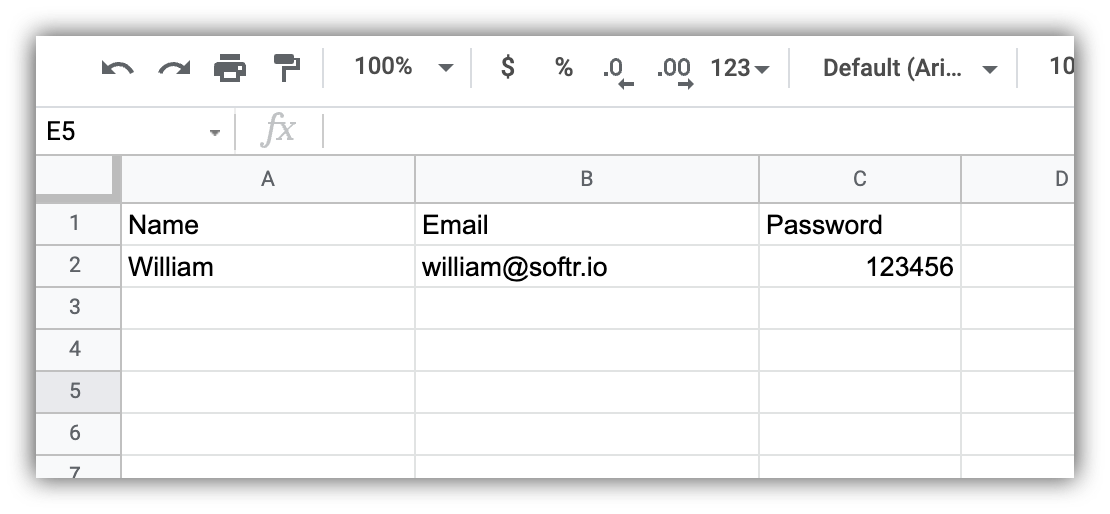
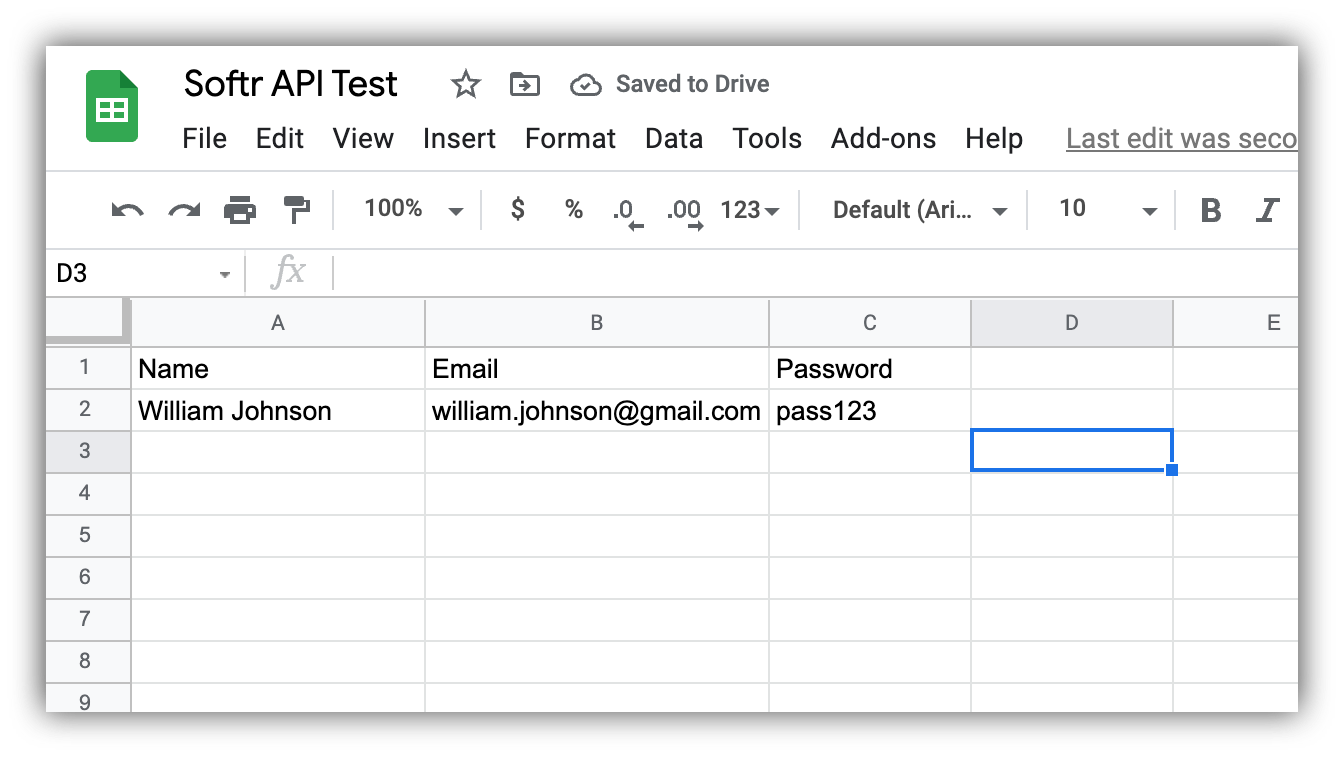 First of all, we're going to create a spreadsheets with **Name**, **Email**, and **Password** columns to store user data.
 Further on, we'll create a Zap on Zapier and set the **trigger** for each new row creation in our Google sheet. See below.
 Next, we'll test the trigger and proceed to configuring the **Action** to define what's going to happen when the initial event is triggered.
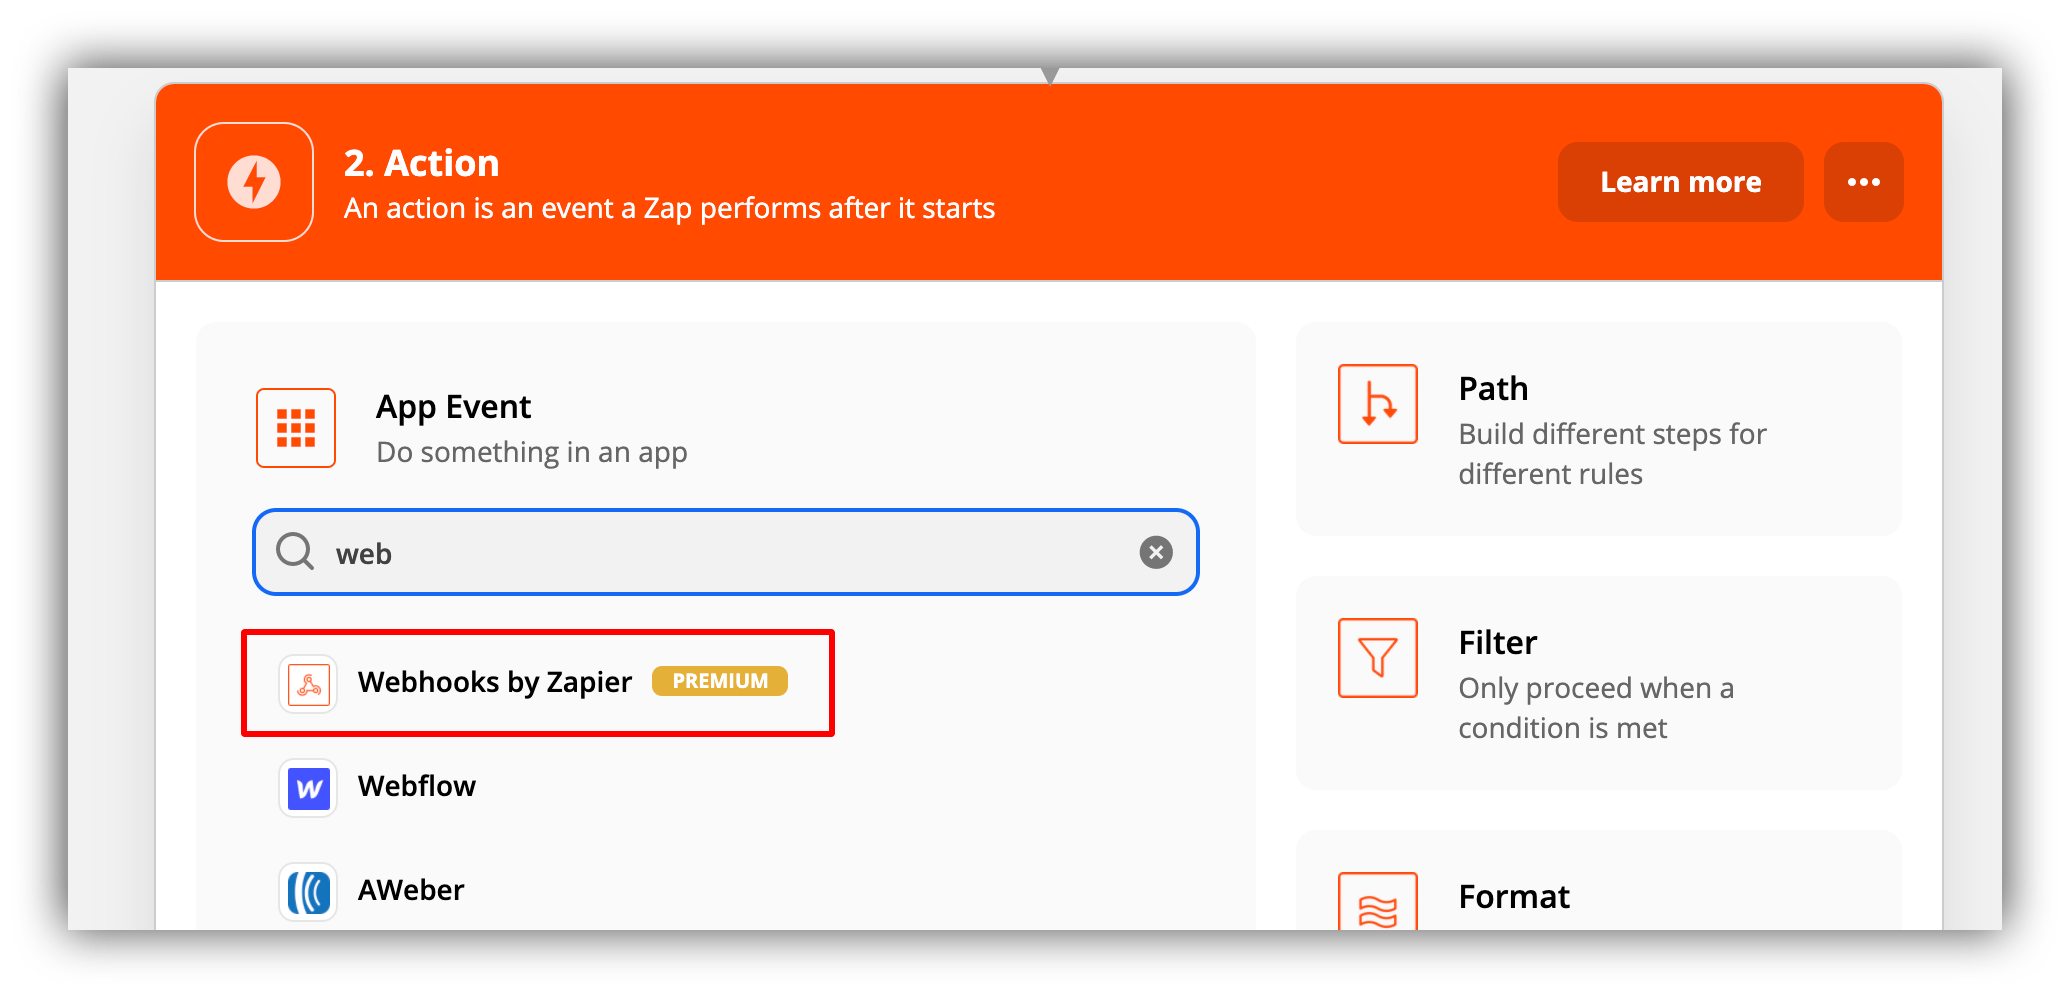
In the Action search bar enter "webhook" and select **Webhooks by Zapier** (please note that this is a **paid** feature).
Next, we'll test the trigger and proceed to configuring the **Action** to define what's going to happen when the initial event is triggered.
In the Action search bar enter "webhook" and select **Webhooks by Zapier** (please note that this is a **paid** feature).
 In the following screen, we need to select **POST** as the **Action event** since we need to create a user using the POST request as described above.
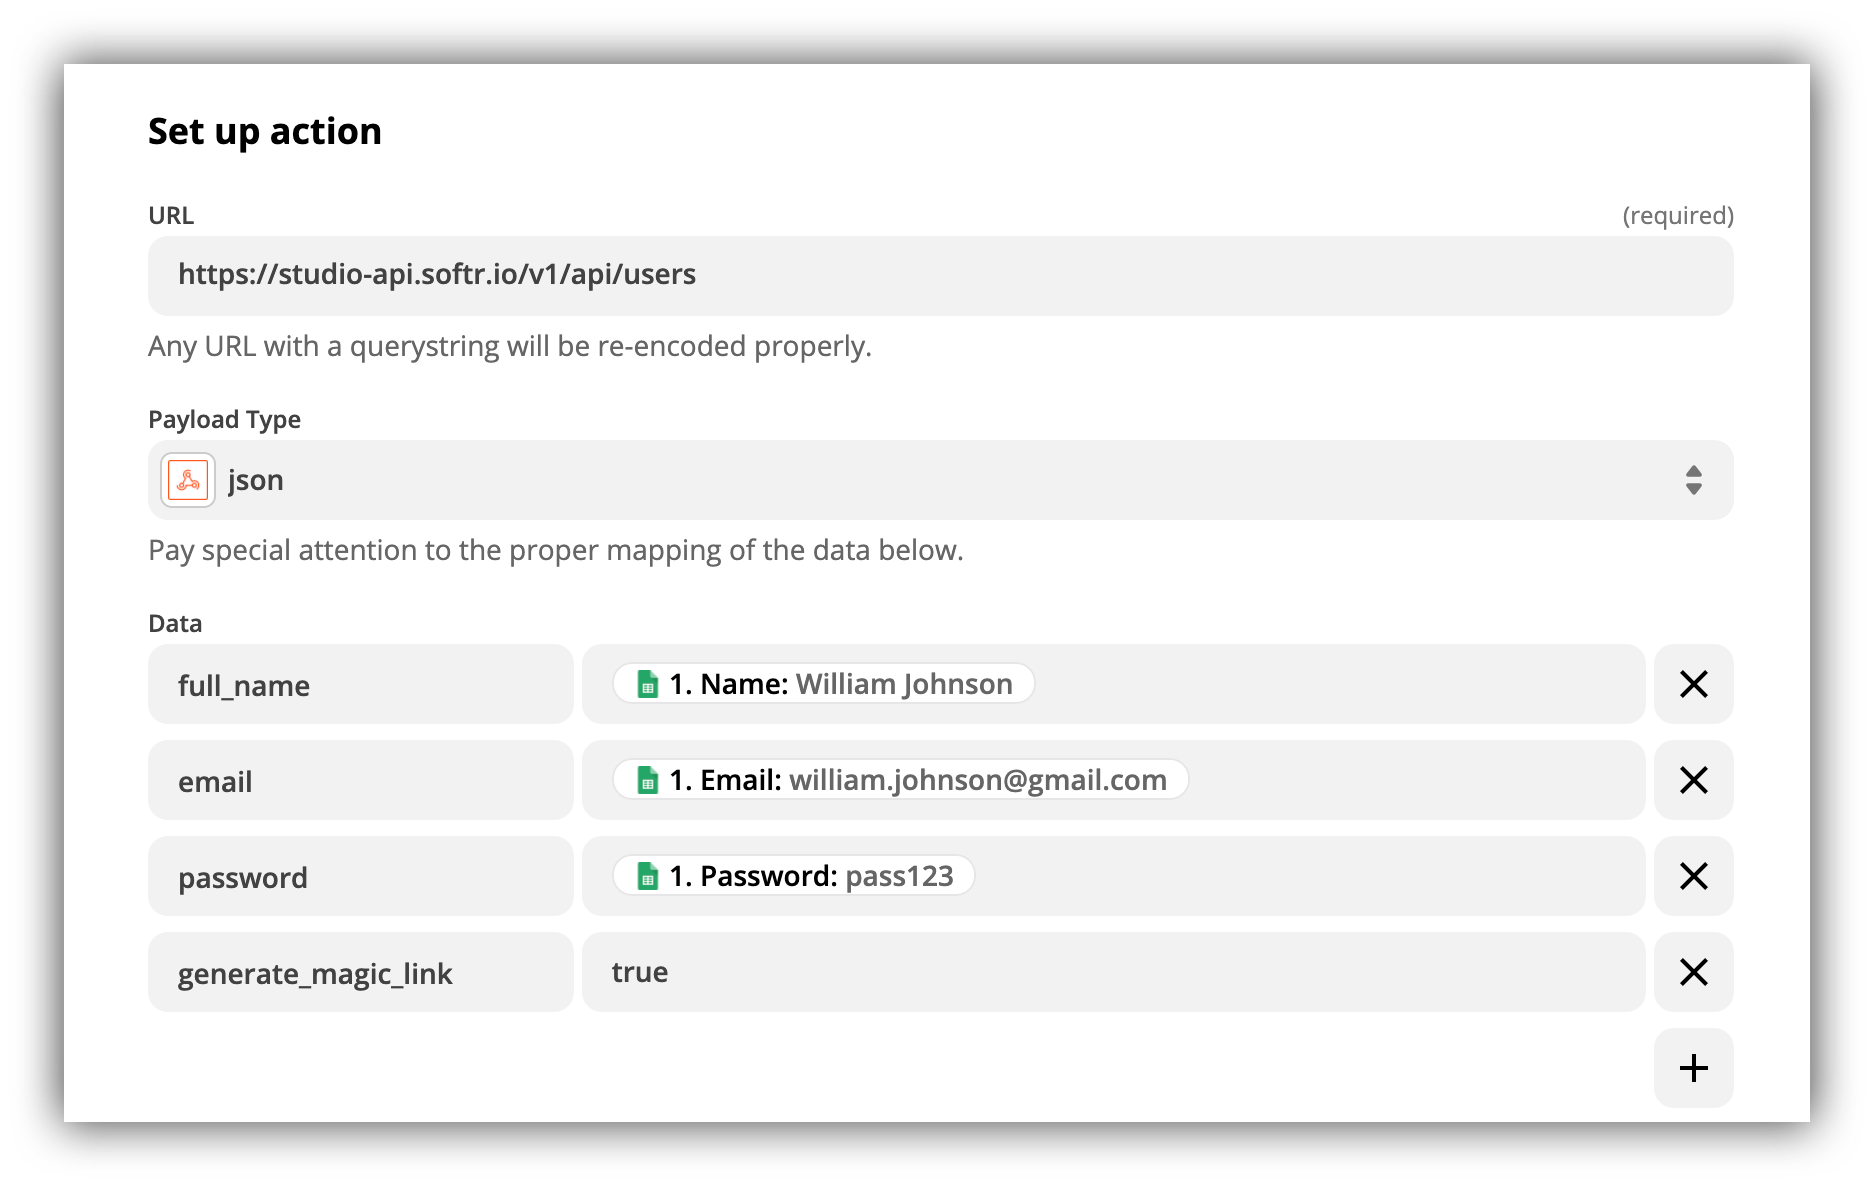
In the next screen, we need to fill in all the necessary details based on the [create user endpoint](/softr-api/tTFQ5vSAUozj5MsKixMH8C/api-setup-and-endpoints/j1PrTZxt7pv3iZCnZ5Fp19). Thus, we need to set the **URL** to "[https://studio-api.softr.io/v1/api/users](https://studio-api.softr.io/v1/api/users)", set the **Payload Type** to "json", and map the **data** as shown below.
In the following screen, we need to select **POST** as the **Action event** since we need to create a user using the POST request as described above.
In the next screen, we need to fill in all the necessary details based on the [create user endpoint](/softr-api/tTFQ5vSAUozj5MsKixMH8C/api-setup-and-endpoints/j1PrTZxt7pv3iZCnZ5Fp19). Thus, we need to set the **URL** to "[https://studio-api.softr.io/v1/api/users](https://studio-api.softr.io/v1/api/users)", set the **Payload Type** to "json", and map the **data** as shown below.
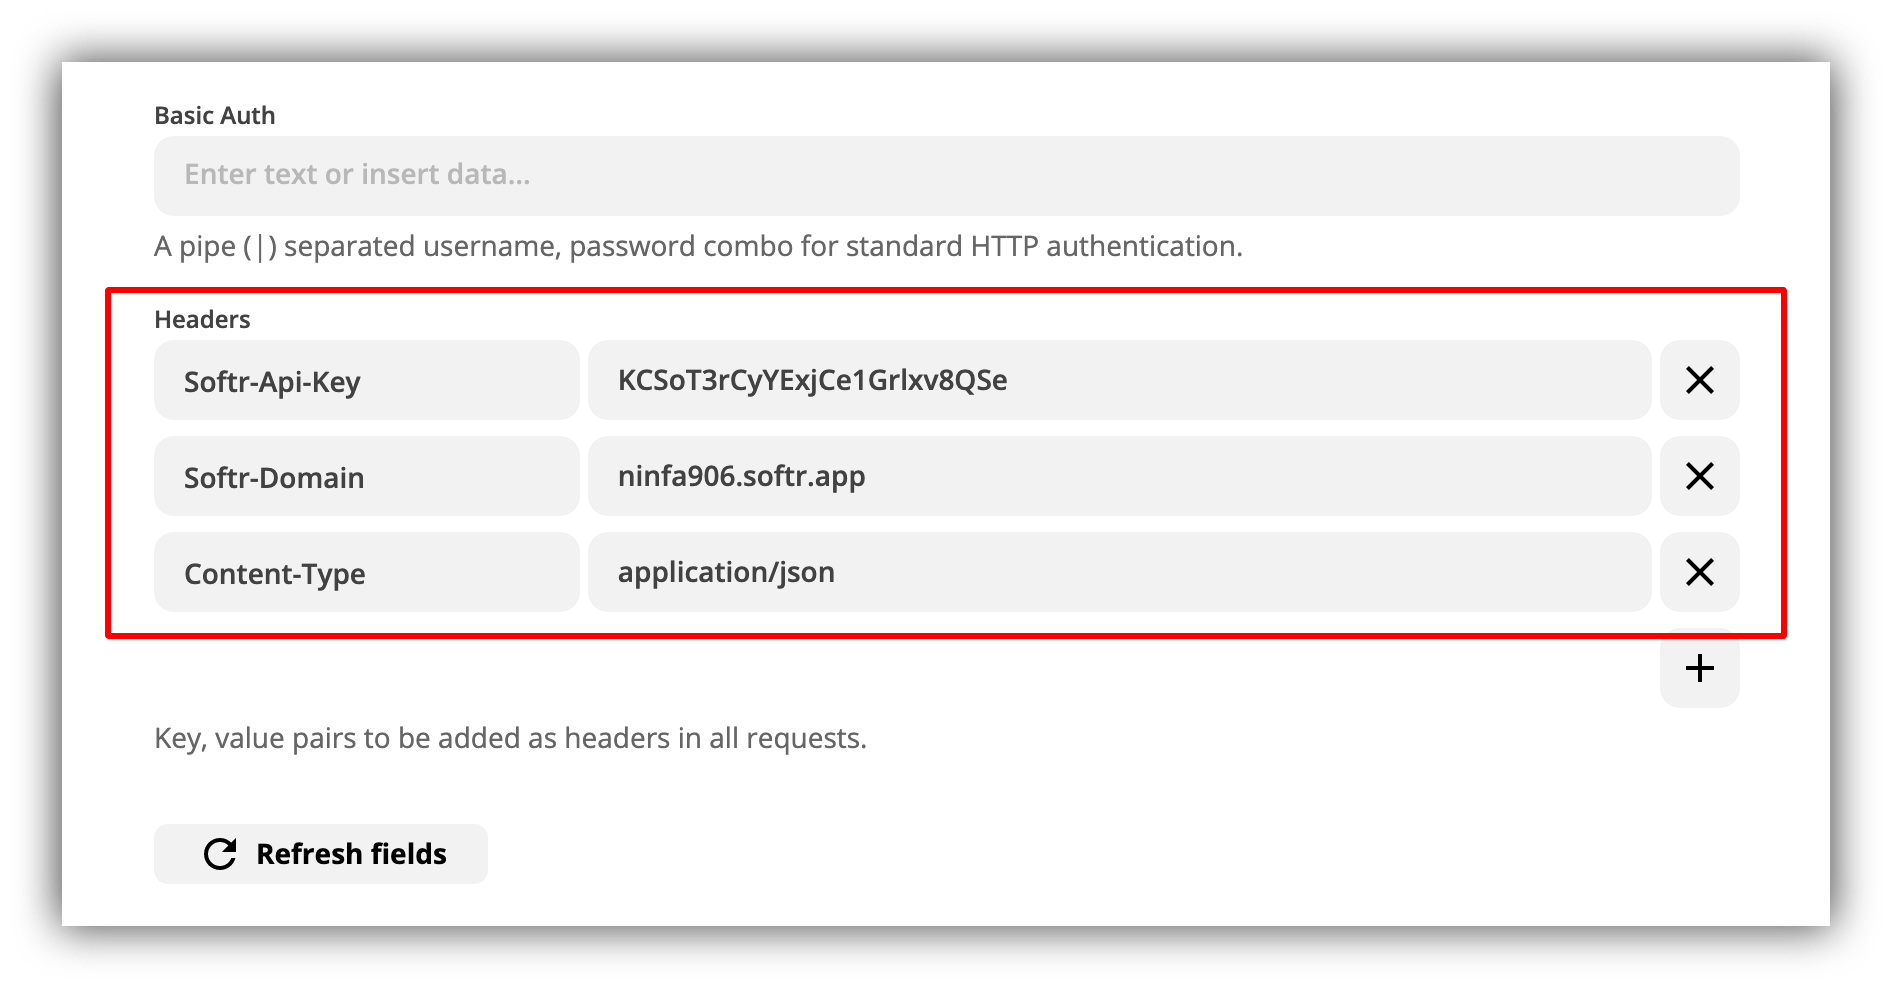
 The following configs can be left intact, and we just need to add the **headers** using our **API key**
and **domain** as shown below.
The following configs can be left intact, and we just need to add the **headers** using our **API key**
and **domain** as shown below.
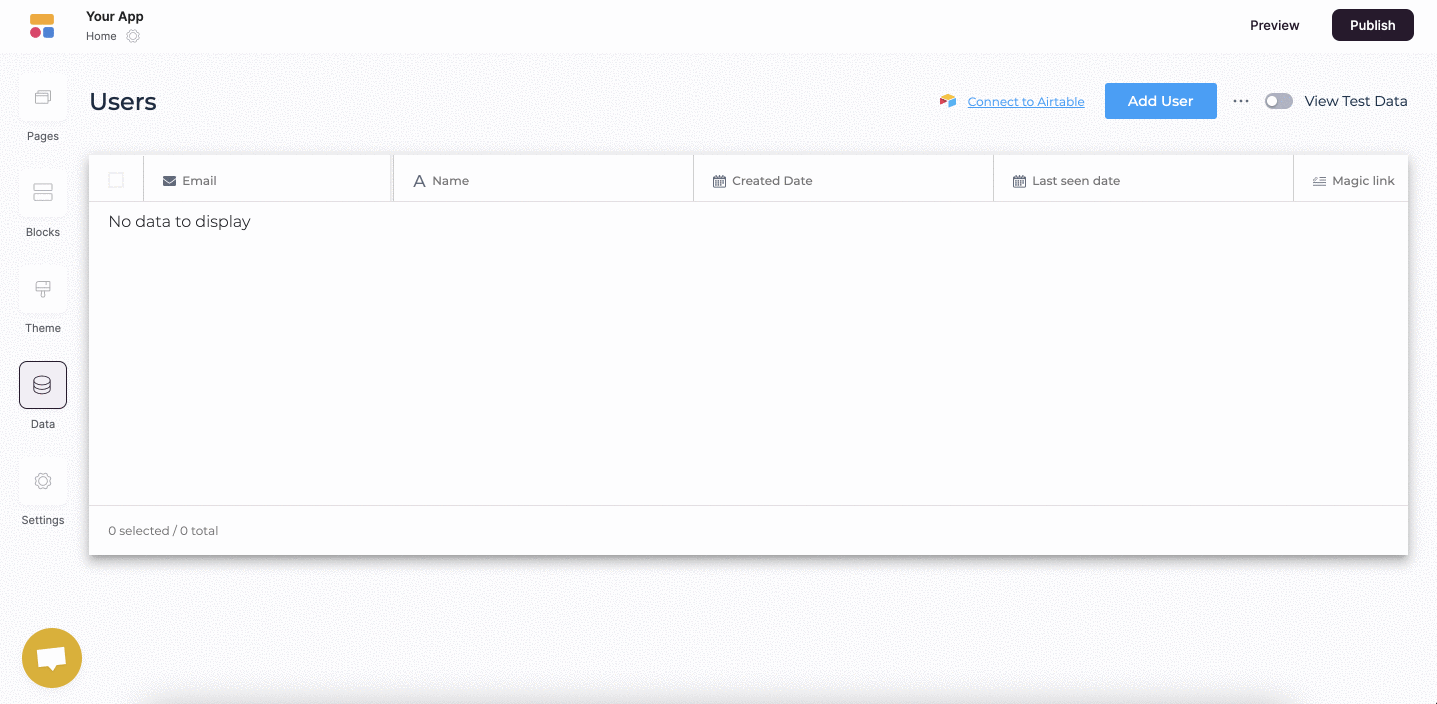
 That's it. Now, we just need to hit Continue and test the action. As you can see below, as soon as we do the test, the user we had added earlier on Google Sheets is added to our Softr app. So, as soon as you make sure it's working correctly, you can turn on the Zap to start the automation.
 ## **Deleting a User**
The [delete request](/softr-api/tTFQ5vSAUozj5MsKixMH8C/api-setup-and-endpoints/j1PrTZxt7pv3iZCnZ5Fp19) can be implemented in a similar way through a custom webhook.
## Zapier templates for Softr
Zapier offers a number of ready-made templates for Softr (the list is available [here](https://zapier.com/apps/softr/integrations)) that let you select from a variety of use cases and get started easily. So, let’s see what kind of templates are available
## **Deleting a User**
The [delete request](/softr-api/tTFQ5vSAUozj5MsKixMH8C/api-setup-and-endpoints/j1PrTZxt7pv3iZCnZ5Fp19) can be implemented in a similar way through a custom webhook.
## Zapier templates for Softr
Zapier offers a number of ready-made templates for Softr (the list is available [here](https://zapier.com/apps/softr/integrations)) that let you select from a variety of use cases and get started easily. So, let’s see what kind of templates are available
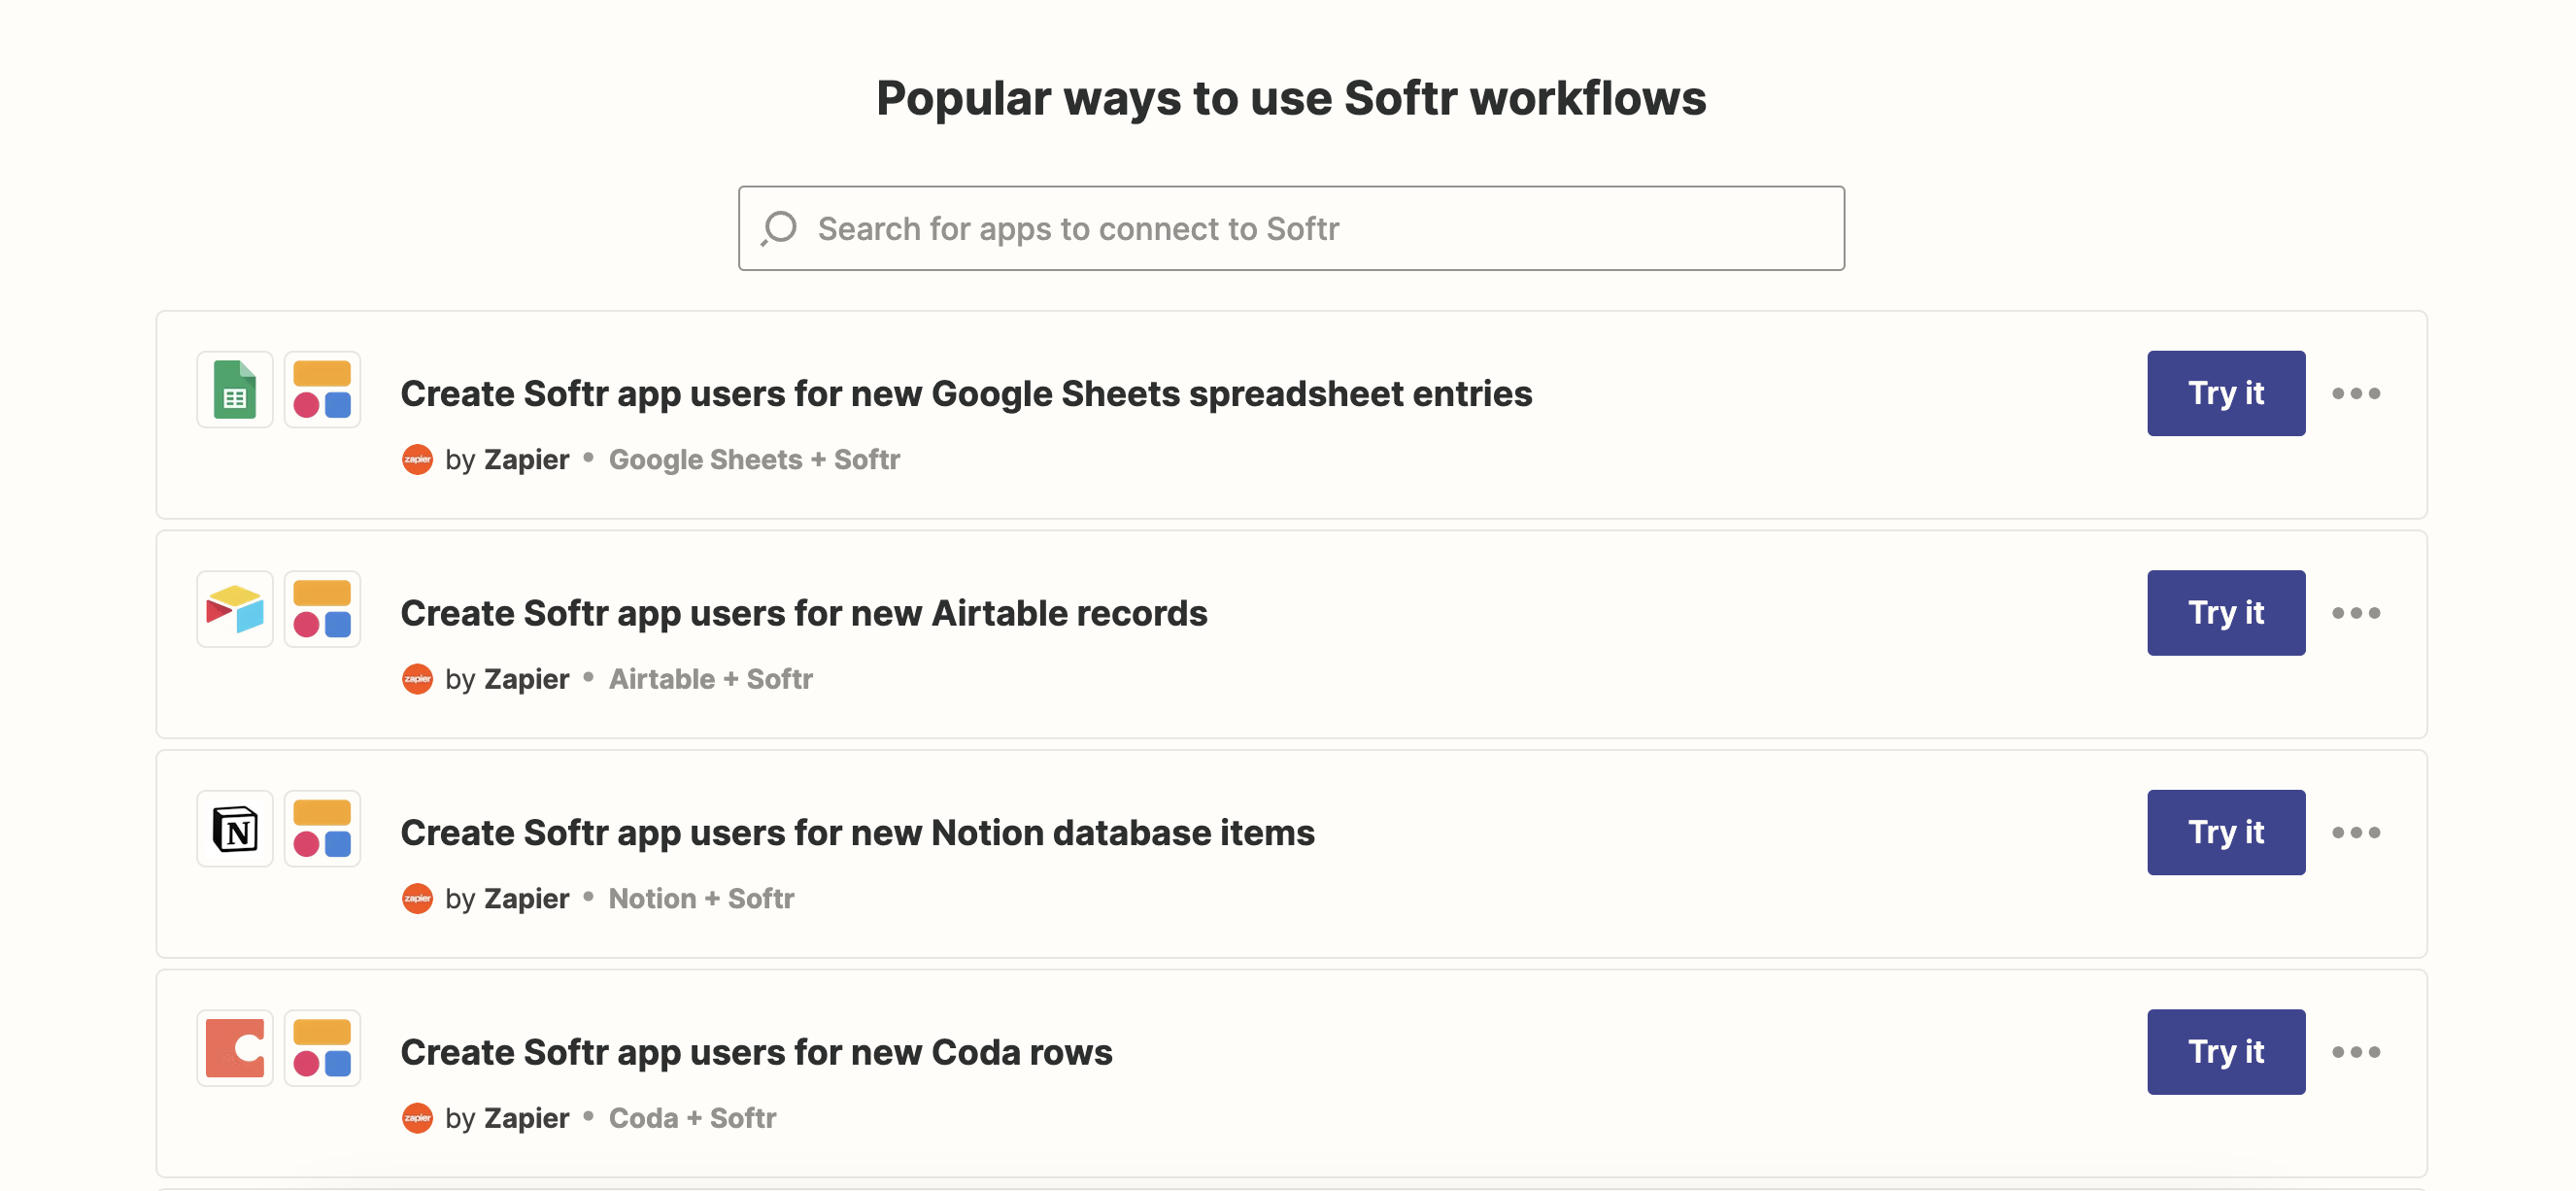 ### Database/spreadsheet templates
Most of the templates involve spreadsheet or database tools such as Google Sheets, Airtable, or Coda. Those work the following way: every time a new record/row is added to the database, a new user is automatically created on Softr based on that record/row.
### Form templates
This category involves form builder platforms such as Google Form, Jotform, and TypeForm. The templates create a new Softr user for each new form submission. Let’s say you’ve built an online community with Softr, and there are several community moderators. Using one of these templates, you can provide a way for your moderators to add new users directly from the app user interface instead of giving them access to your Softr app’s [studio](/5315870b0eb4473fb49dd13c97635d67).
### Stripe template
This template connects [Stripe](/integrations/etS18kJqm1fuD58KCsjC3z/stripe-checkout/iBomMEucRZtM2y6HuutYVC) to your Softr app, creating a new Softr user for each new Stripe customer you get. Let’s say you have an online shop that processes payments using Stripe, and you’ve also created a Softr application for your shop customers to interact with one another and also get access to perks. Using this template, you can automatically sync all your customers along with their details with your Softr-built app.
### Webhook template
This template just connects Softr with a [Zapier webhook](https://zapier.com/features/webhooks), which lets you receive data from any service even if it’s not available in Zapier.
### Database/spreadsheet templates
Most of the templates involve spreadsheet or database tools such as Google Sheets, Airtable, or Coda. Those work the following way: every time a new record/row is added to the database, a new user is automatically created on Softr based on that record/row.
### Form templates
This category involves form builder platforms such as Google Form, Jotform, and TypeForm. The templates create a new Softr user for each new form submission. Let’s say you’ve built an online community with Softr, and there are several community moderators. Using one of these templates, you can provide a way for your moderators to add new users directly from the app user interface instead of giving them access to your Softr app’s [studio](/5315870b0eb4473fb49dd13c97635d67).
### Stripe template
This template connects [Stripe](/integrations/etS18kJqm1fuD58KCsjC3z/stripe-checkout/iBomMEucRZtM2y6HuutYVC) to your Softr app, creating a new Softr user for each new Stripe customer you get. Let’s say you have an online shop that processes payments using Stripe, and you’ve also created a Softr application for your shop customers to interact with one another and also get access to perks. Using this template, you can automatically sync all your customers along with their details with your Softr-built app.
### Webhook template
This template just connects Softr with a [Zapier webhook](https://zapier.com/features/webhooks), which lets you receive data from any service even if it’s not available in Zapier.