> ## Documentation Index
> Fetch the complete documentation index at: https://docs.softr.io/llms.txt
> Use this file to discover all available pages before exploring further.
# Make
> Make allows you to visually create, build, and automate workflows.
## "Send to Make" Action
The Make integration is available through a **Send to Make** action, which is available as a [Form](/4876cbed455842aebe38e0612d2da96e) submit button action. When you create a form, set the destination of the form response to be Make.
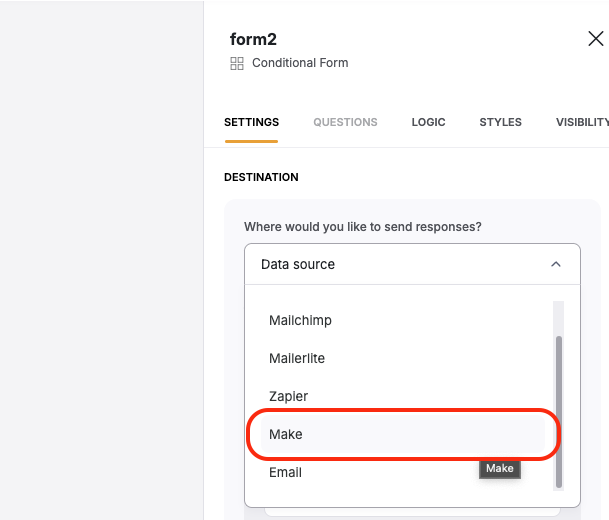 After selecting Make from the dropdown, another field will appear where you will place a Make Webhook URL. More on that below:
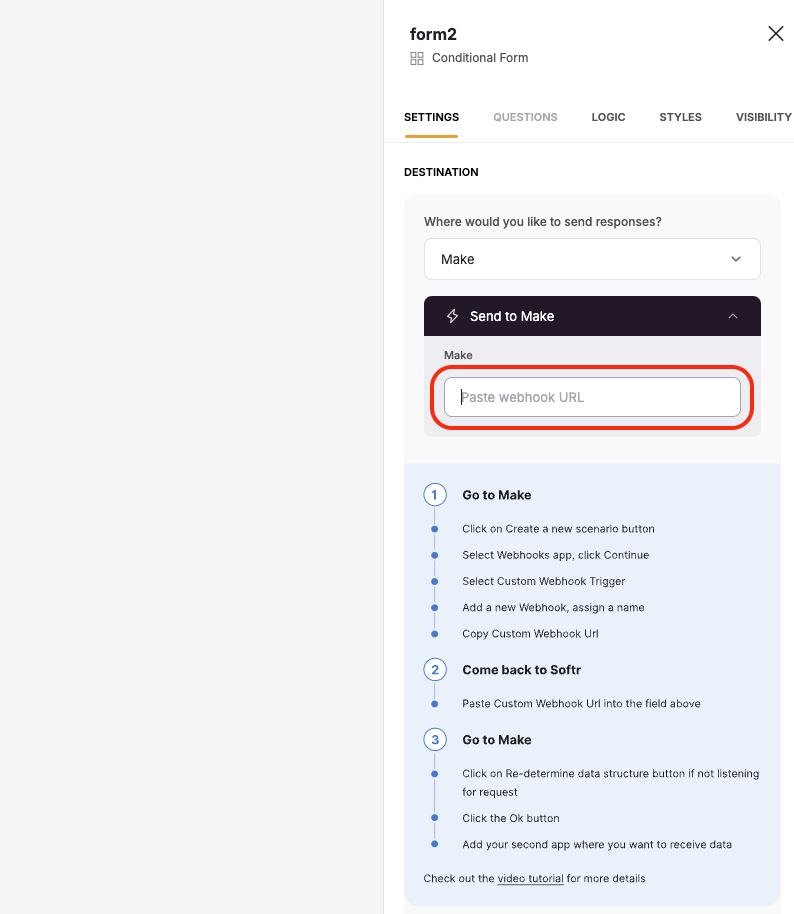 Here, you need to fill in a **Custom Webhook URL** to connect to Make. So, let's switch to Make to configure our automation and get the **Webhook URL**.
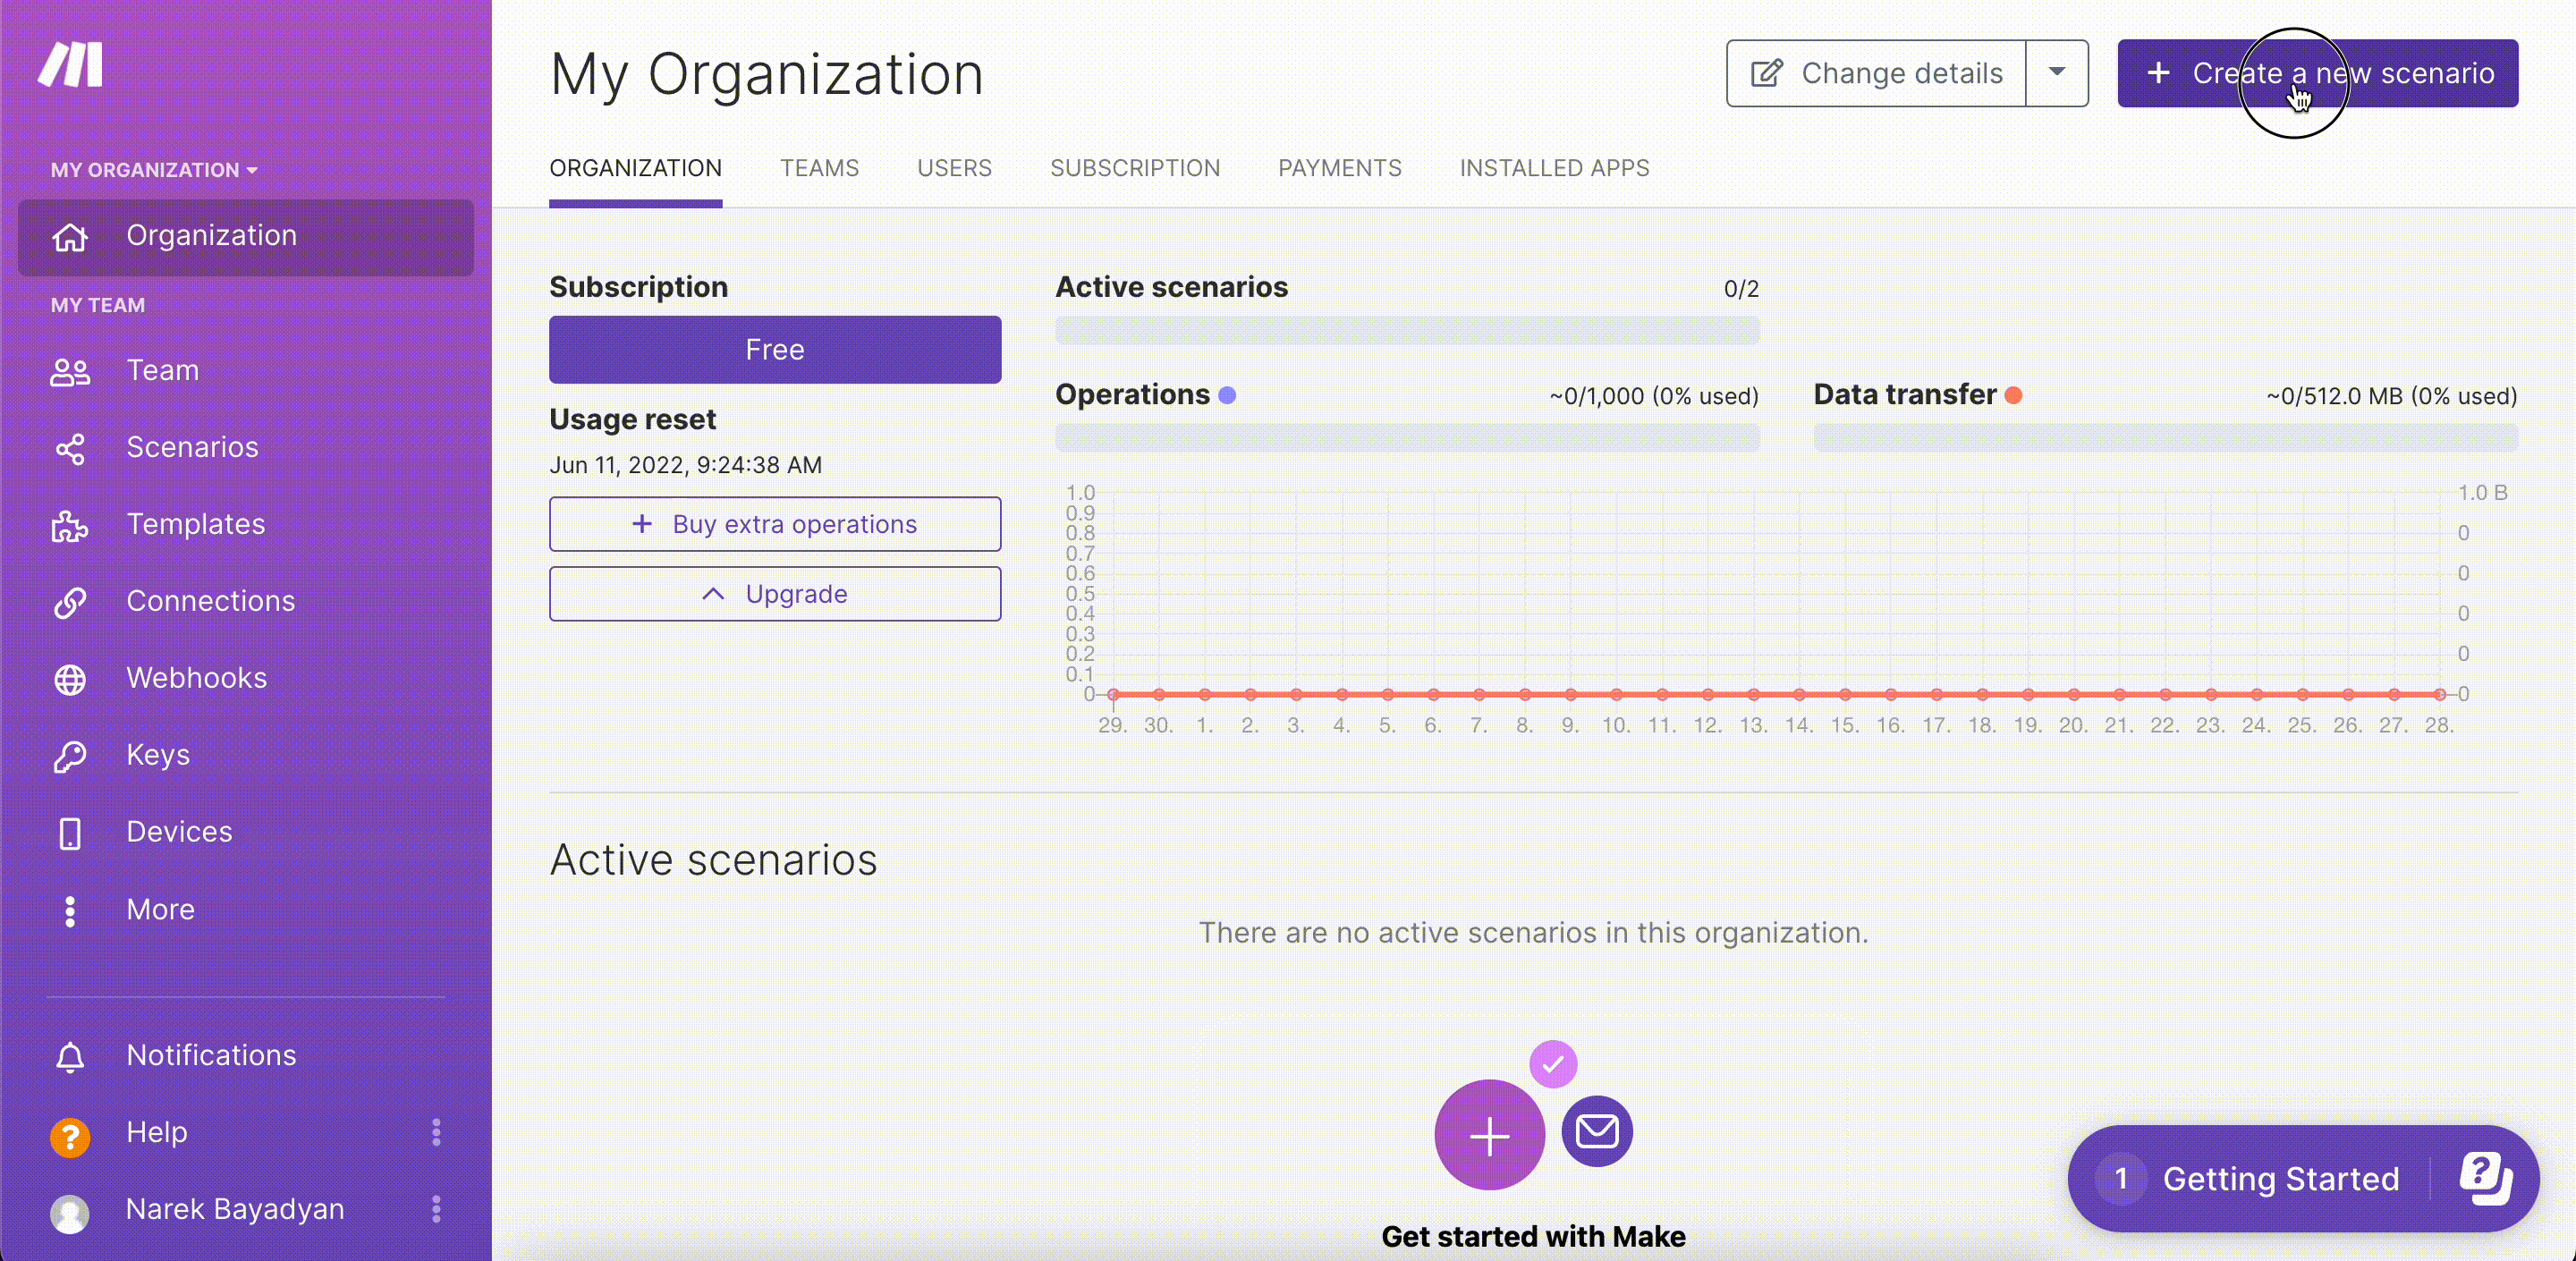
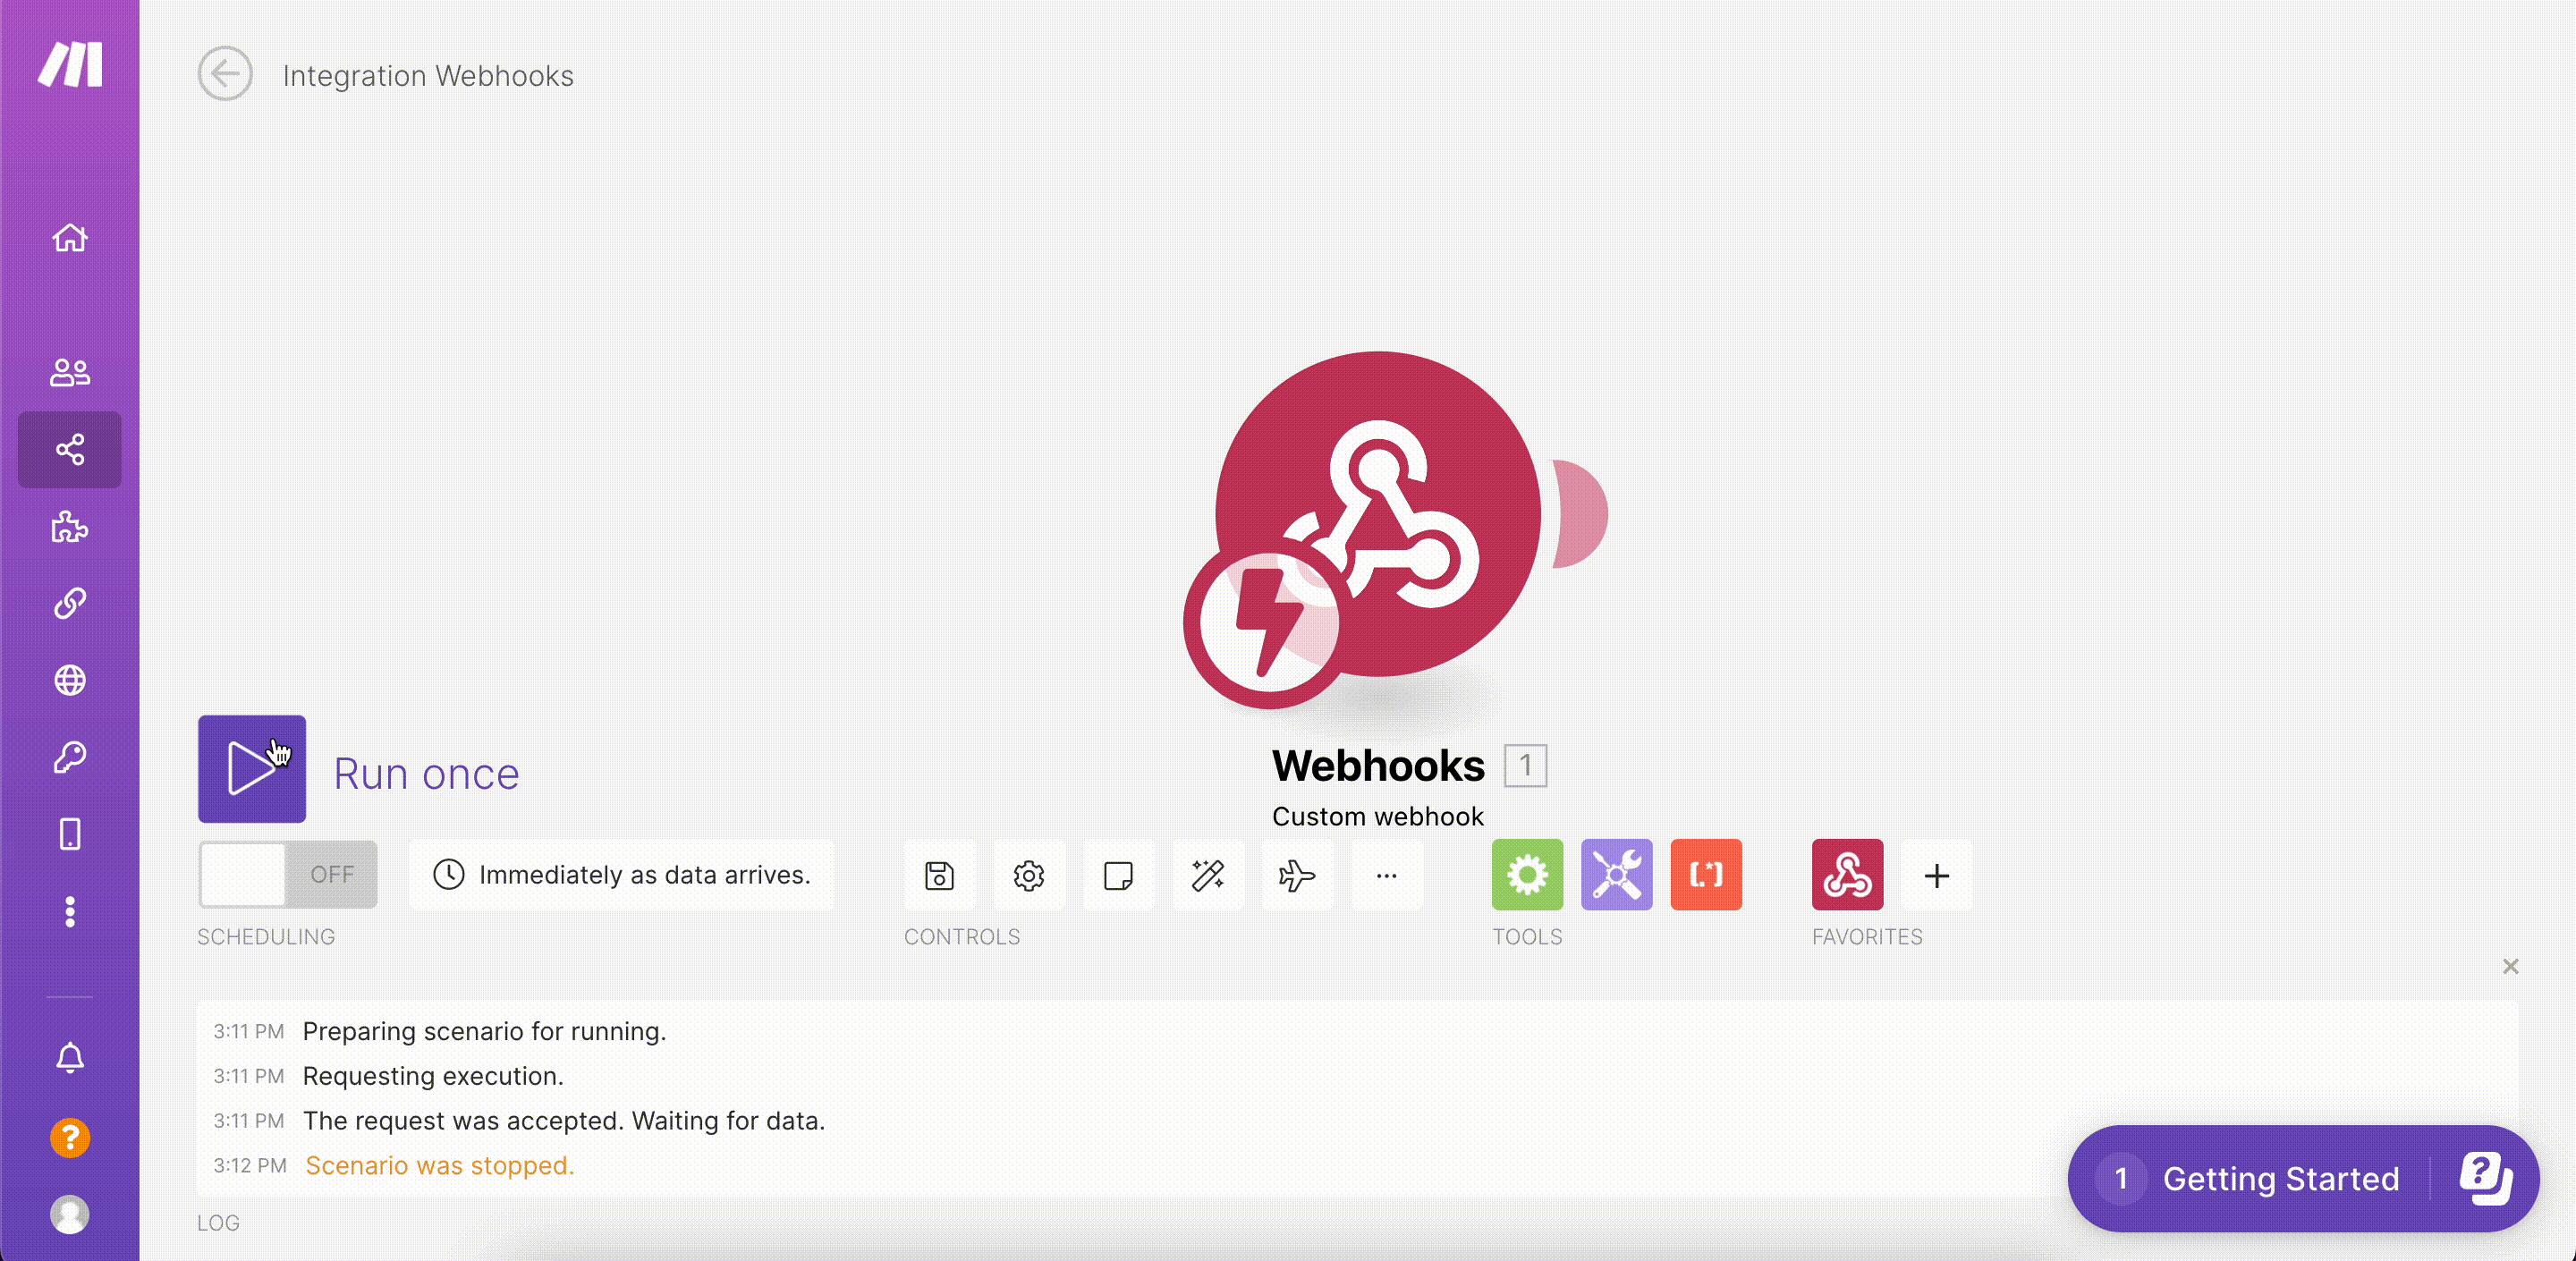
## Creating a Scenario in Make
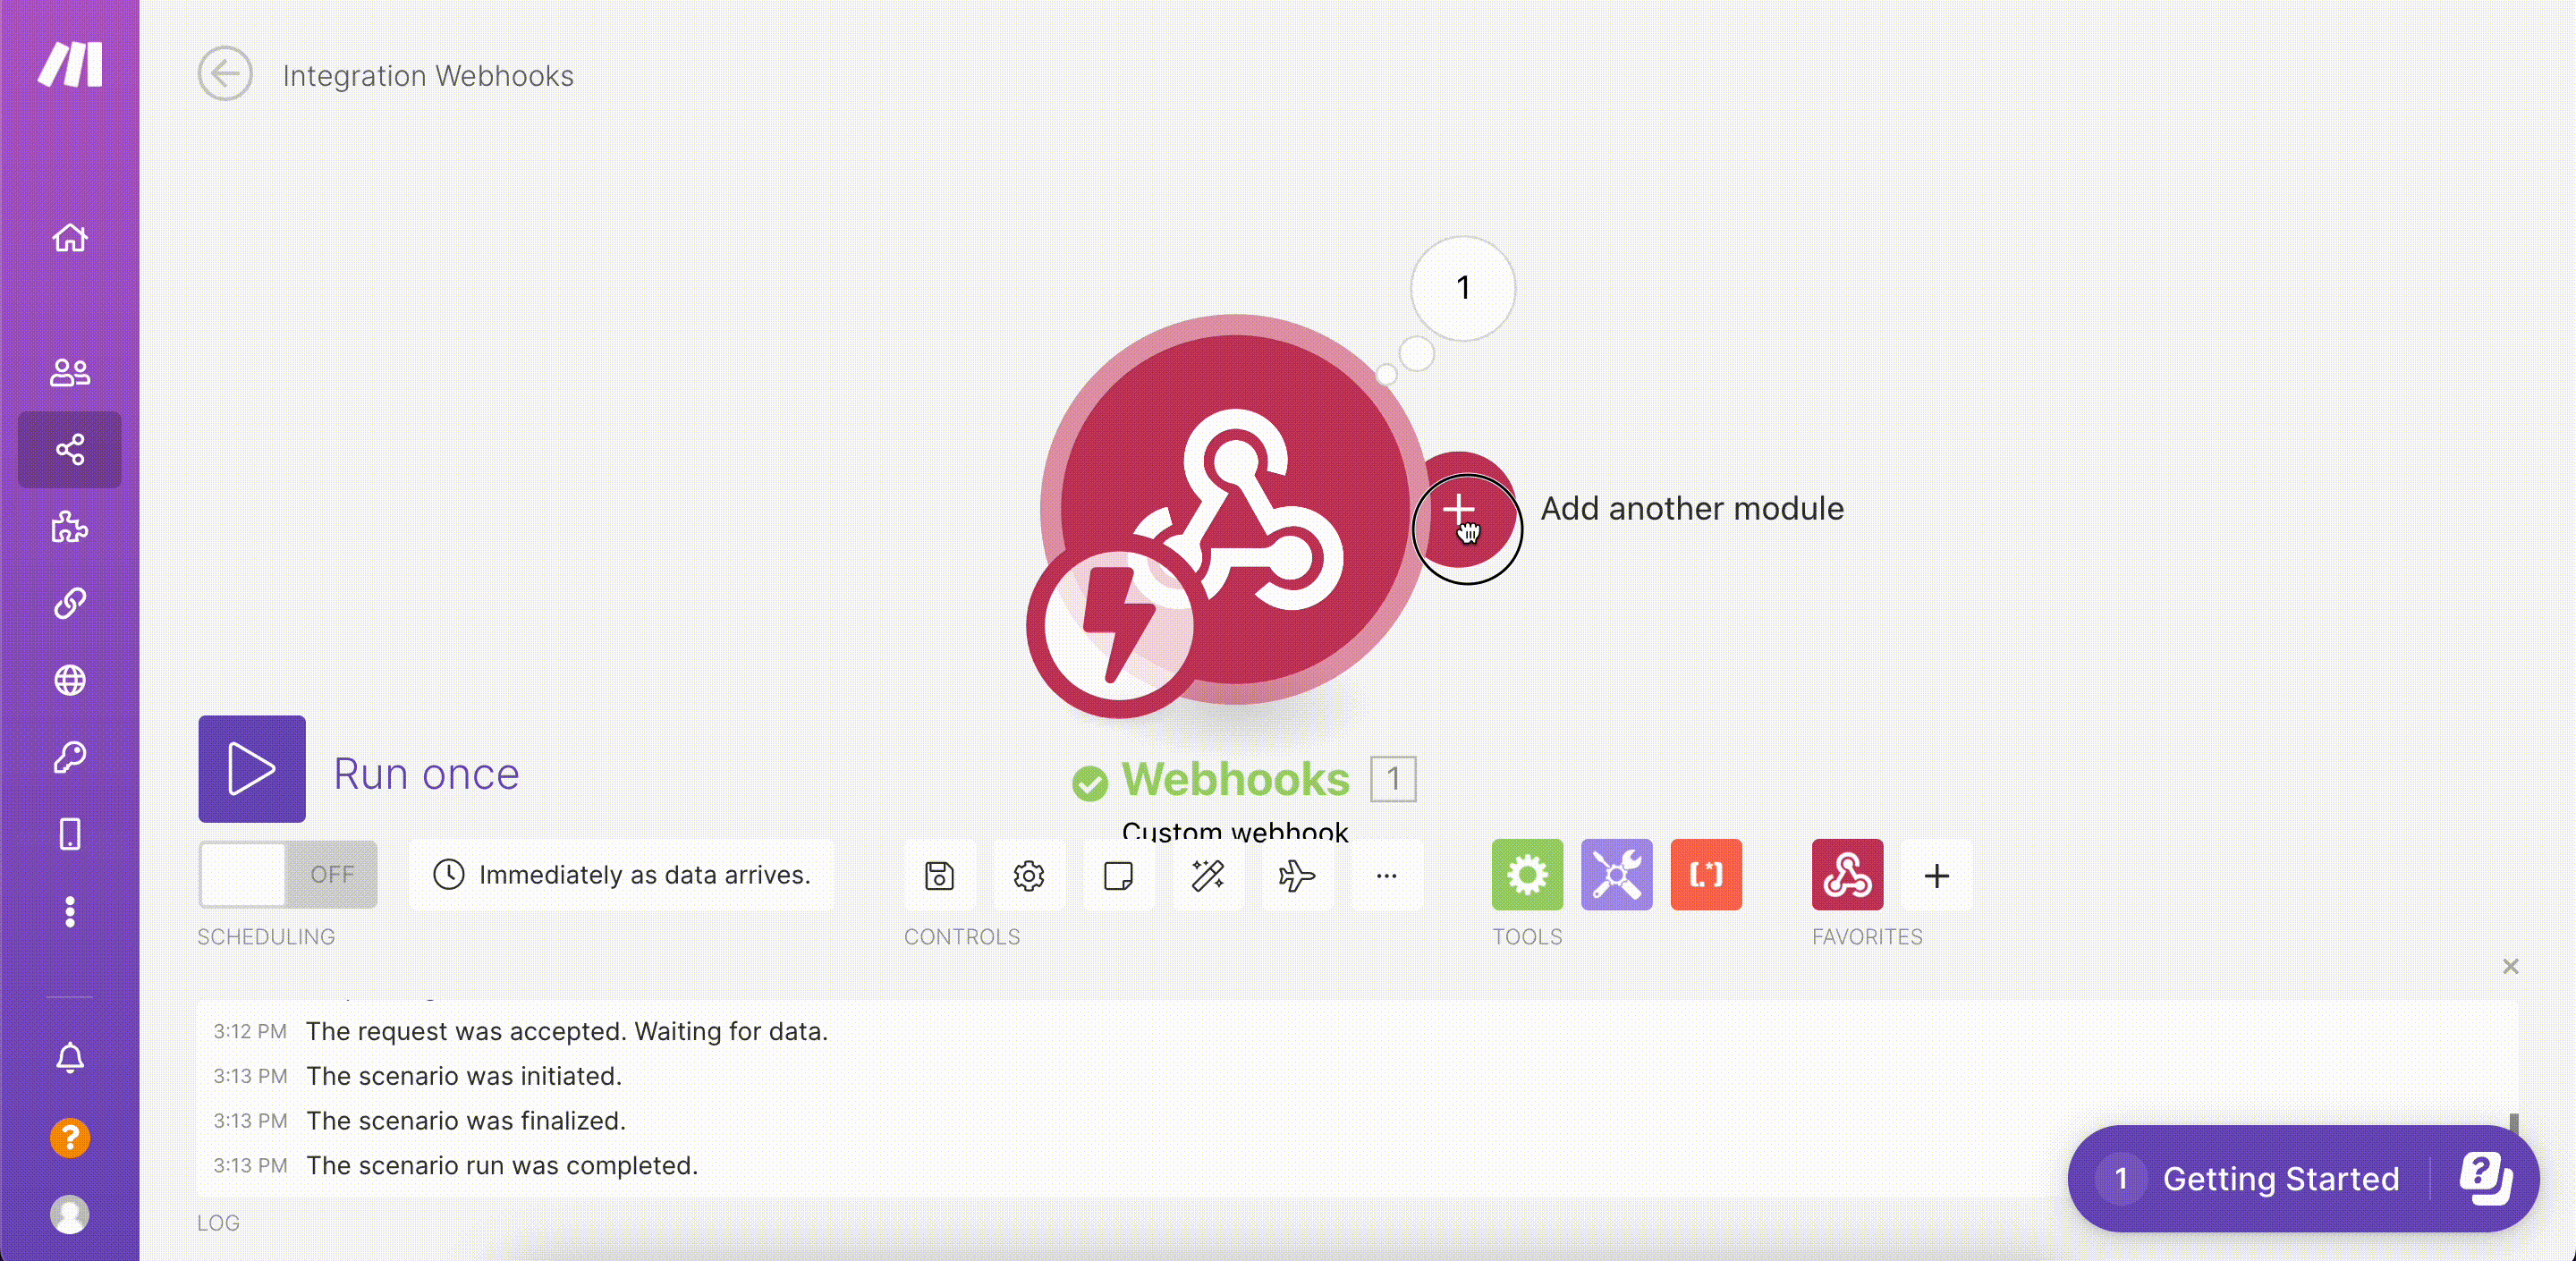
In your Make account, you should create a new **Scenario**, set up a **Webhooks** app, and choose the **Custom Webhook** trigger. As soon as the **Custom Webhook** is ready, you need to hit **Copy address to clipboard** to get the **Webhook URL**. Below you can see how that's done.
Here, you need to fill in a **Custom Webhook URL** to connect to Make. So, let's switch to Make to configure our automation and get the **Webhook URL**.
## Creating a Scenario in Make
In your Make account, you should create a new **Scenario**, set up a **Webhooks** app, and choose the **Custom Webhook** trigger. As soon as the **Custom Webhook** is ready, you need to hit **Copy address to clipboard** to get the **Webhook URL**. Below you can see how that's done.
 ## Adding the Webhook URL in Form Settings
Now, you need to run your Make scenario and go back to your Softr form to enter the **Webhook URL**. After entering the URL, use the link below to **Send test data**. Further on, if you go back to your Make scenario, you should see a notification on top of your webhook icon. Click on it to see the content of the bundle that has been received. If your test data has arrived successfully, you can now add new modules to your webhook to receive the data on other services.
## Adding the Webhook URL in Form Settings
Now, you need to run your Make scenario and go back to your Softr form to enter the **Webhook URL**. After entering the URL, use the link below to **Send test data**. Further on, if you go back to your Make scenario, you should see a notification on top of your webhook icon. Click on it to see the content of the bundle that has been received. If your test data has arrived successfully, you can now add new modules to your webhook to receive the data on other services.
 IMPORTANT: When sending a test call to the webhook from Softr Studio, not all fields will be sent from the Softr form to the Webhook - only some test fields will be sent. In order for Make to properly identify the correct data structure you will use in production, you should submit a form response from the live app or app preview while the webhook is listening.
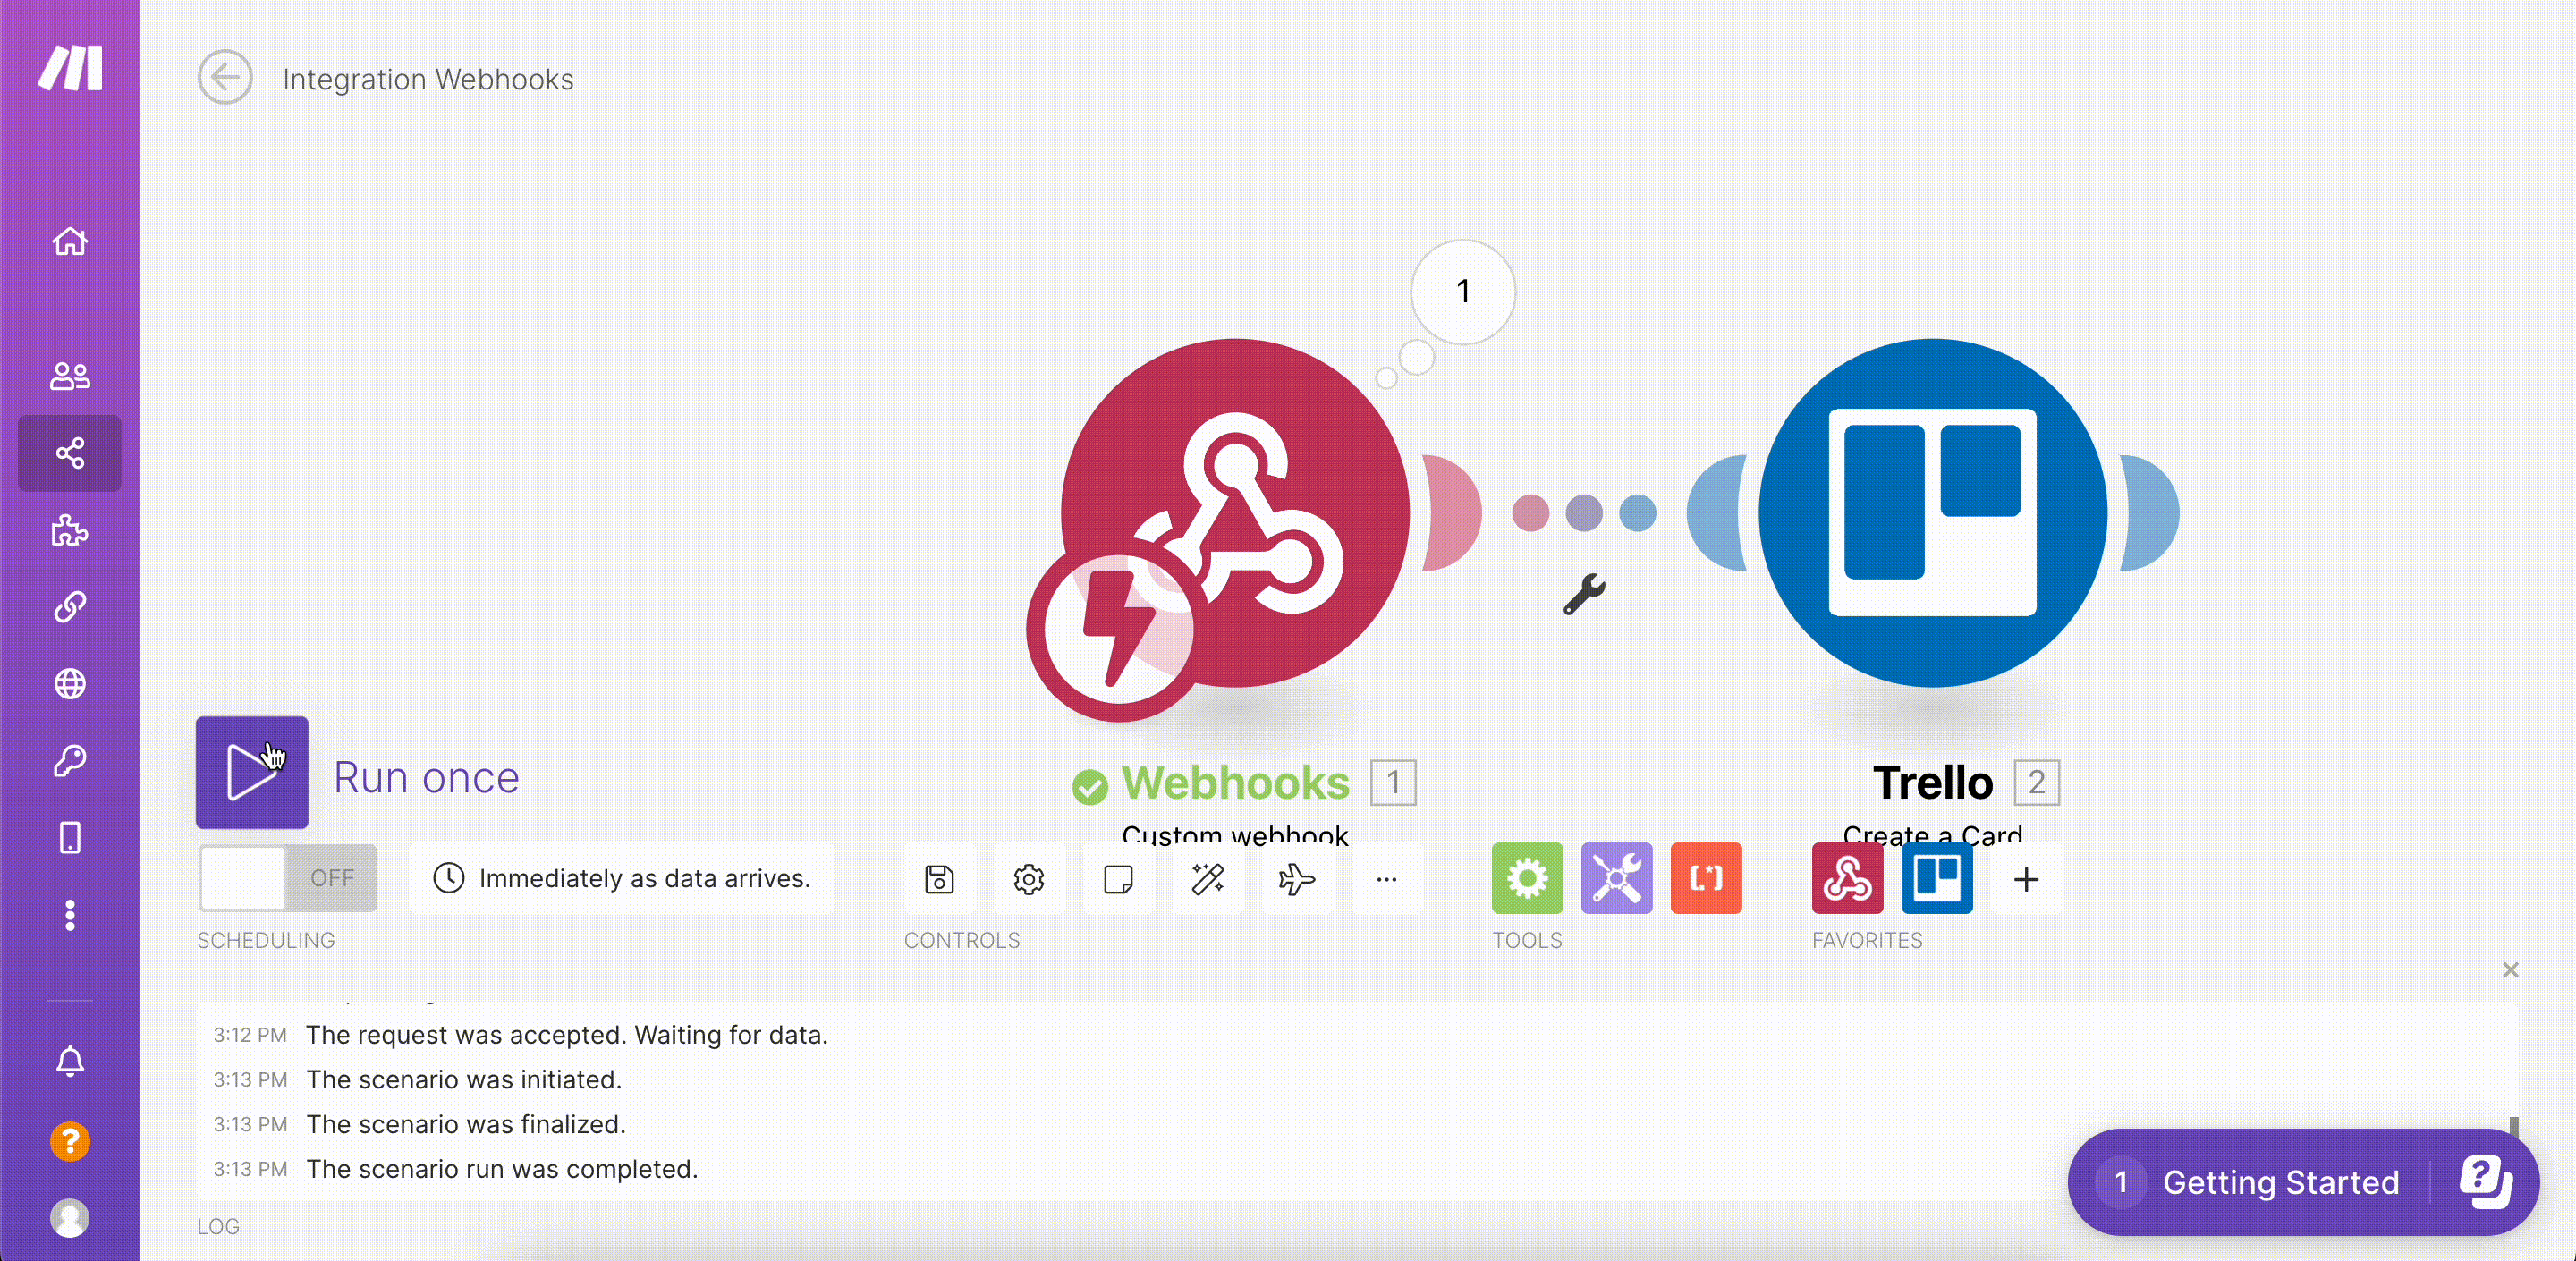
## Sending Data to Trello
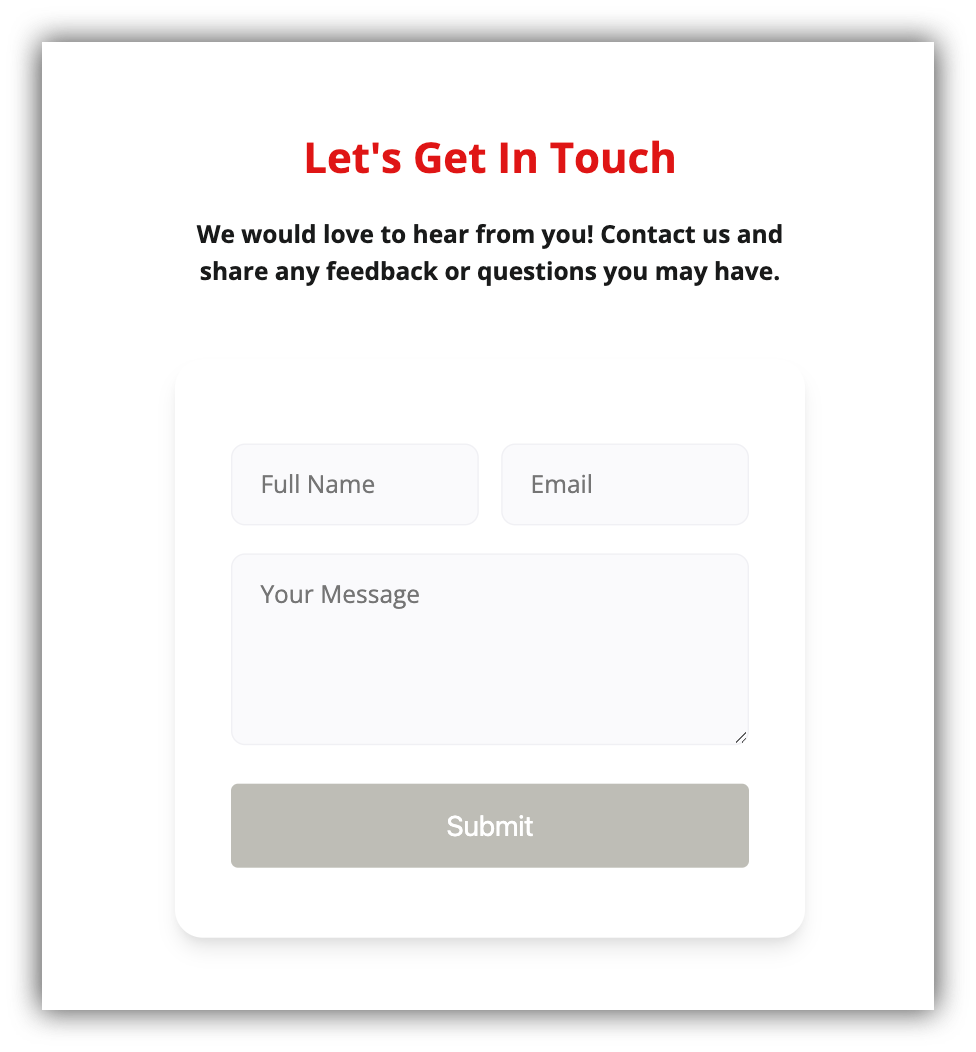
Now, you need to connect another service to send the data to. Let's assume you've set up a simple contact form and want to send the form submissions to the [Trello](https://trello.com/) task management tool, creating a new card on the board for each submission.
IMPORTANT: When sending a test call to the webhook from Softr Studio, not all fields will be sent from the Softr form to the Webhook - only some test fields will be sent. In order for Make to properly identify the correct data structure you will use in production, you should submit a form response from the live app or app preview while the webhook is listening.
## Sending Data to Trello
Now, you need to connect another service to send the data to. Let's assume you've set up a simple contact form and want to send the form submissions to the [Trello](https://trello.com/) task management tool, creating a new card on the board for each submission.
 Therefore, you need to click **Add another module** on your custom webhook and search for **Trello** within the new module.
 Configuring Trello Account and Mapping the Fields
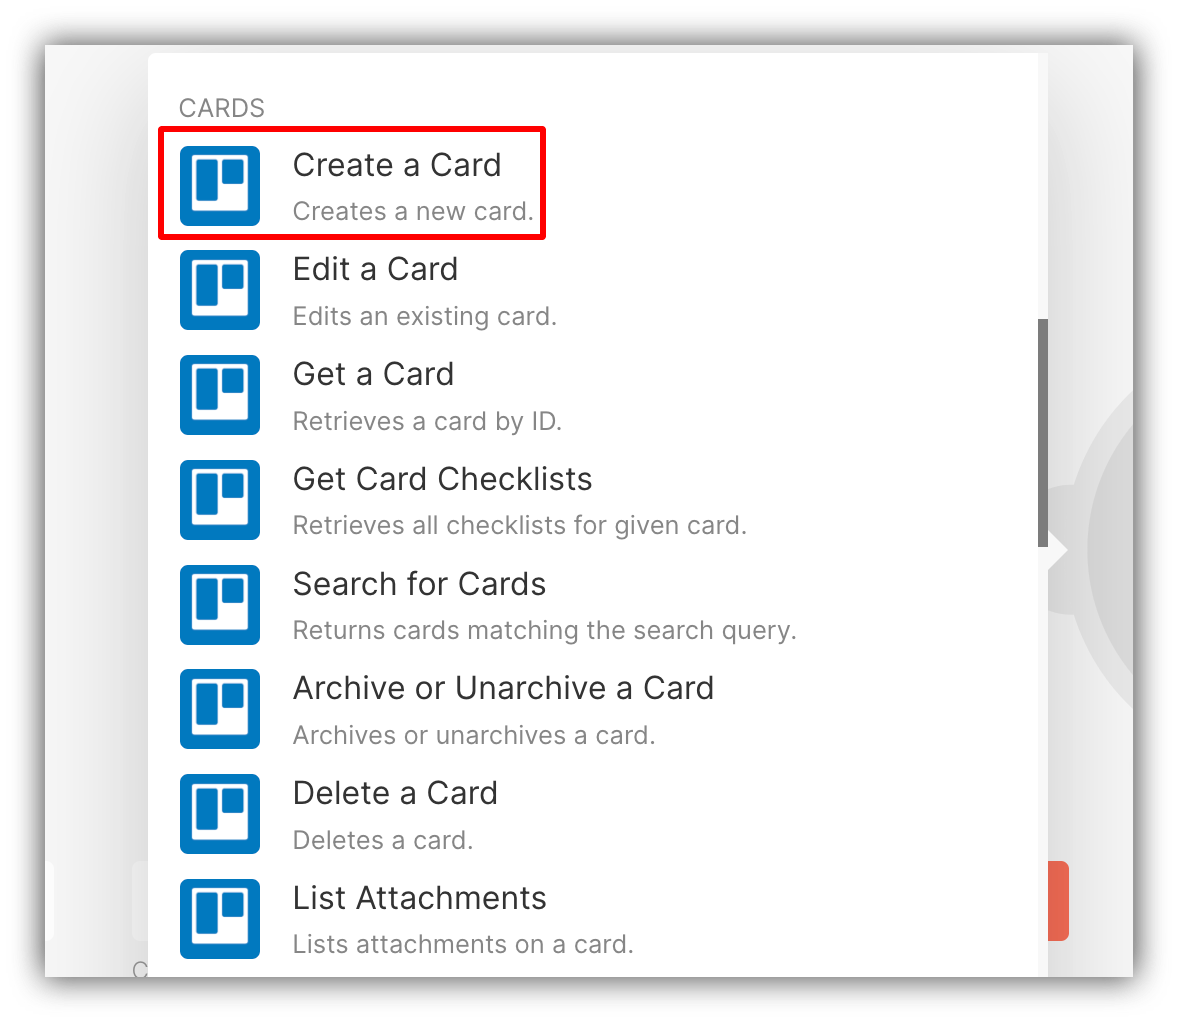
After selecting Trello in the list, scroll down and choose **Create a Card** action.
Configuring Trello Account and Mapping the Fields
After selecting Trello in the list, scroll down and choose **Create a Card** action.
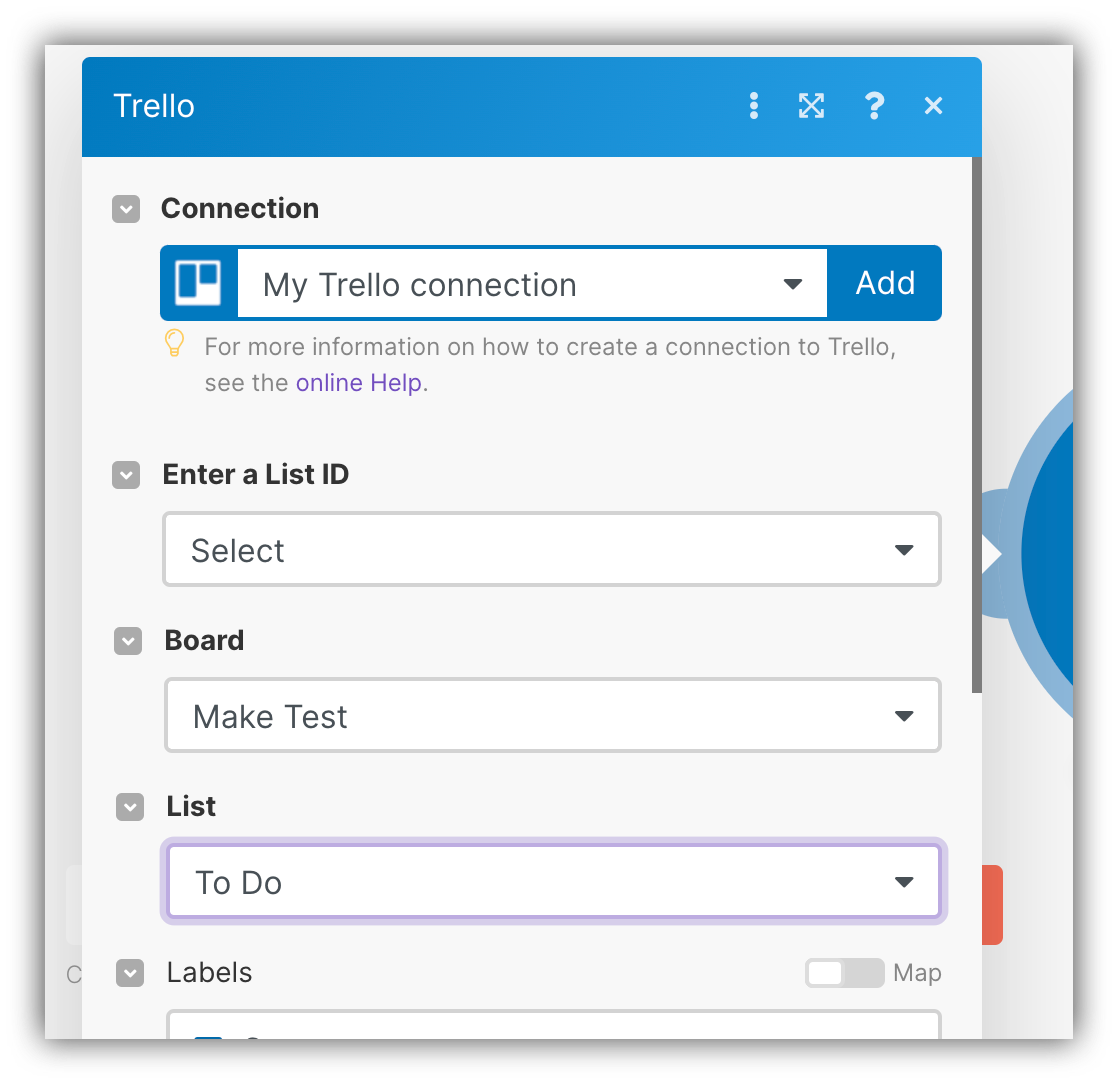
 In the next step, you need to connect your Trello account, clicking the **Add** button under **Connection**. Afterwards, under **Enter a List ID** you can either enter your Trello **List ID** manually or choose **Select** to be provided with the list of your current boards and their lists to choose from.
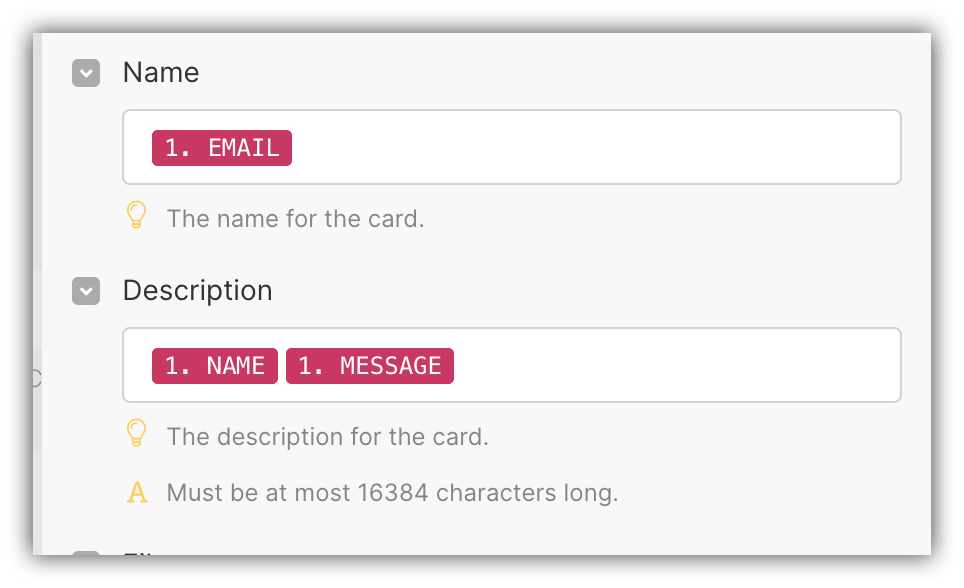
 After setting the board and list you want the cards to be created on, you need to scroll down and map the form fields. In the example below, we've mapped the **Email** field to the card **Name**, and the form **Name** and **Message** fields to the card's **Description**.
 ## Testing the integration
That's it. Now, let's run our Scenario and do a test submission from our Softr form to make sure the data is being received on Trello.
## Testing the integration
That's it. Now, let's run our Scenario and do a test submission from our Softr form to make sure the data is being received on Trello.
 Note: When sending a test call to the webhook from Softr Studio, not all fields will be sent from the Softr form to the Webhook - only some test fields will be sent. In order for Make to properly identify the correct data structure you will use in production, you should submit a form response from the live app or app preview while the Webhook is listening.