> ## Documentation Index
> Fetch the complete documentation index at: https://docs.softr.io/llms.txt
> Use this file to discover all available pages before exploring further.
# Mailchimp
> Collecting form submissions with Mailchimp.
Using Mailchimp you can collect email addresses from your audience, who fill out email capture forms on your website. All email addresses will be sent to and stored in your Mailchimp account.
## **Configuration**
When you use a building block with email capture form (e.g. [Hero section with email capture](/59b829b4b58f417fa4b6cff5f7c6a658)), you will see the following options in the sidebar to choose from.
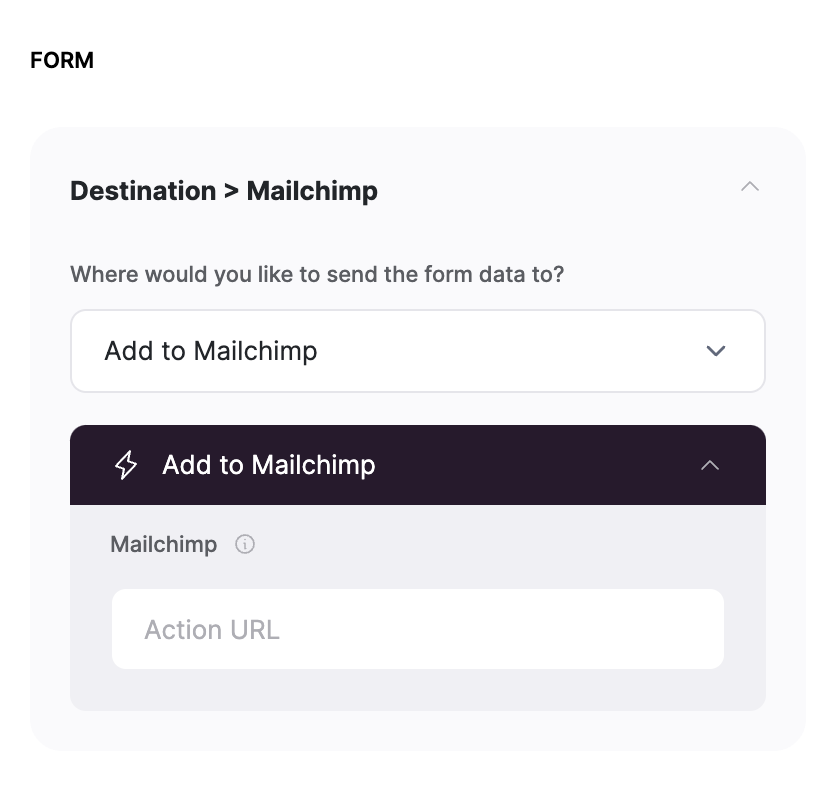
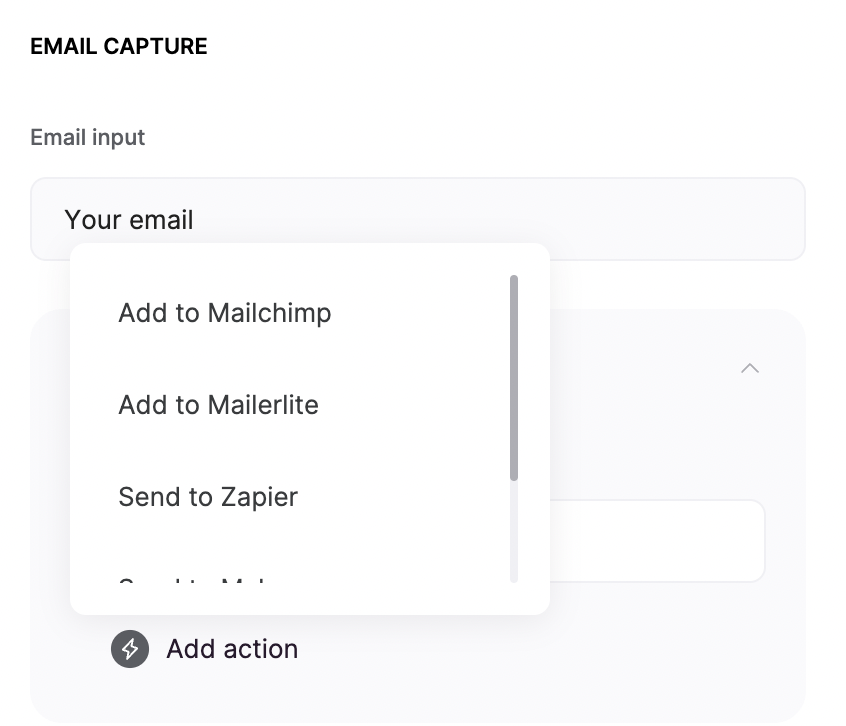 Choose the **Add to Mailchimp** option to collect emails via Mailchimp. After selection, you will see the **Action Url** field appear.
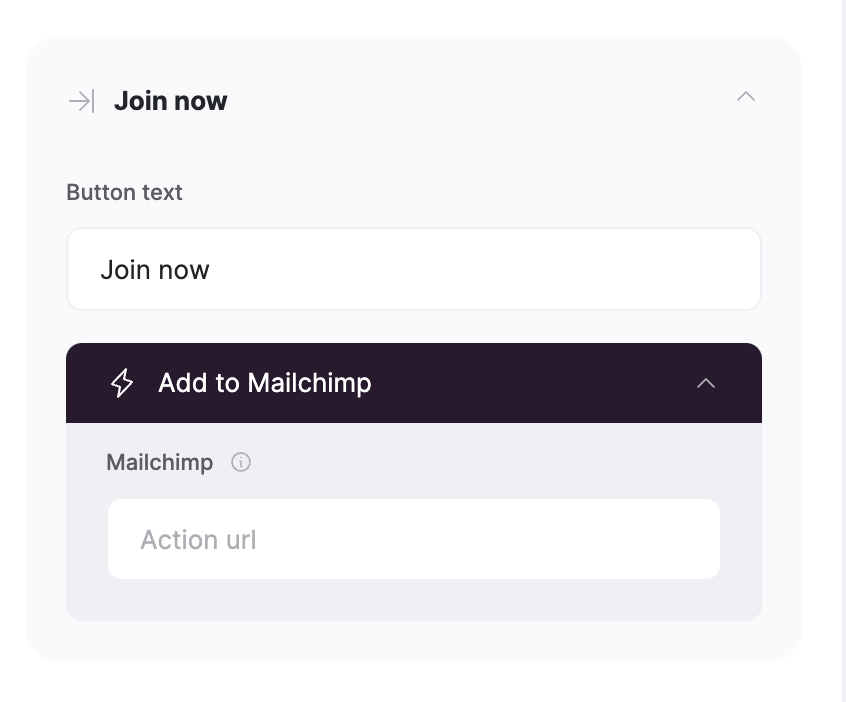 You need to locate the **Action Url** from your Mailchimp account, and copy paste it in this field.
## **How to locate Mailchimp Form Action Url**
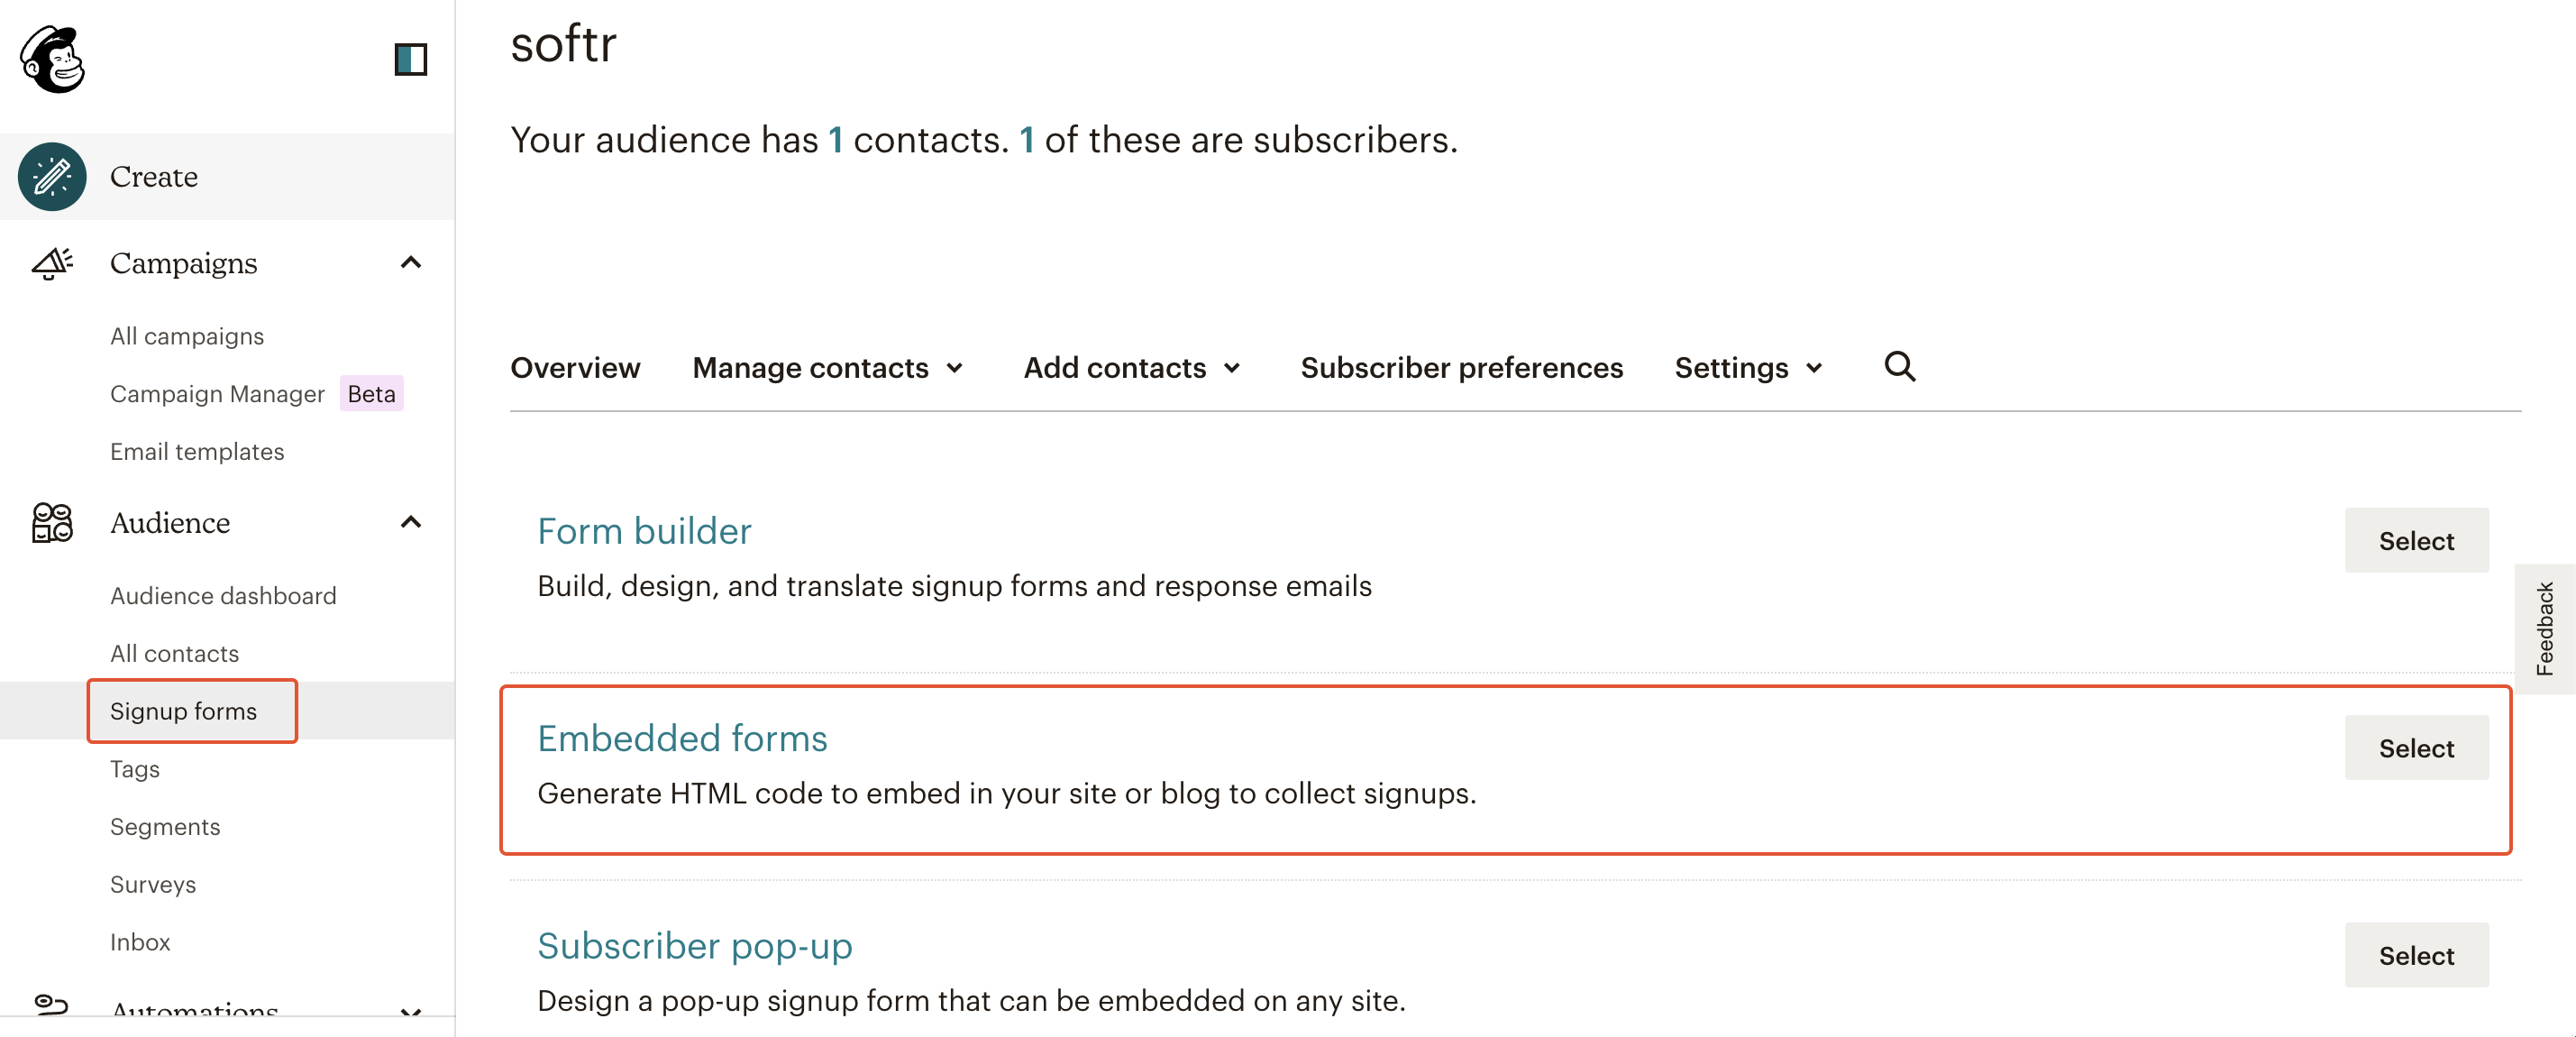
In order to get an Action URL and start collecting subscriptions, you need to log into your Mailchimp account and navigate to **Signup Forms ⇒ Embedded Forms**.
You need to locate the **Action Url** from your Mailchimp account, and copy paste it in this field.
## **How to locate Mailchimp Form Action Url**
In order to get an Action URL and start collecting subscriptions, you need to log into your Mailchimp account and navigate to **Signup Forms ⇒ Embedded Forms**.
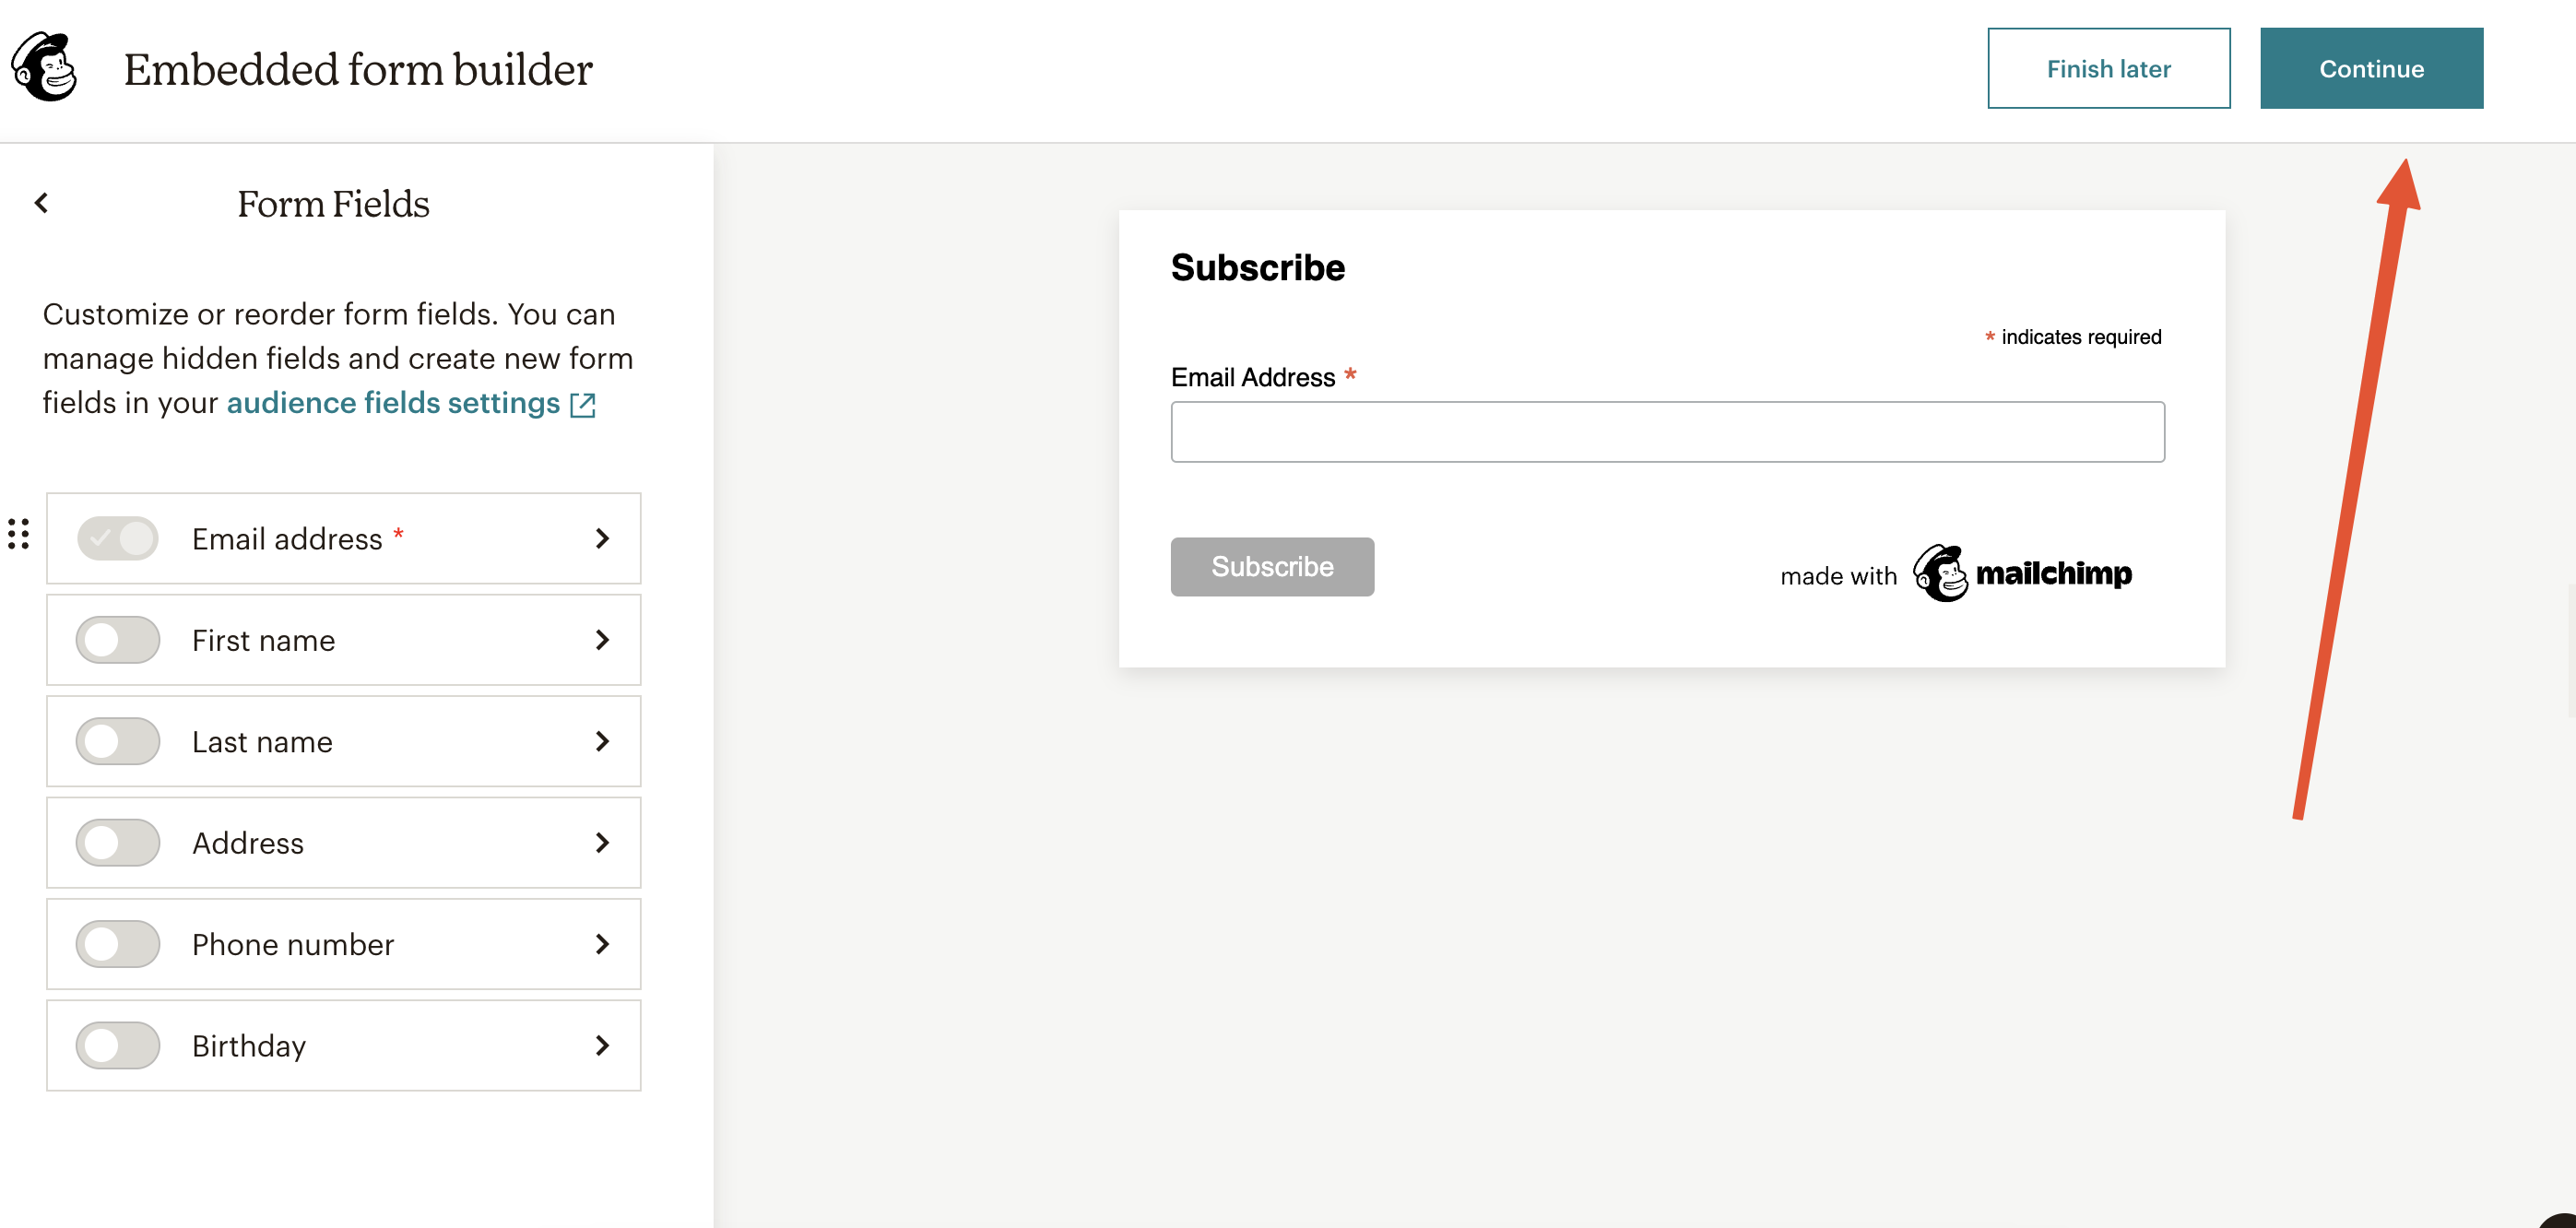
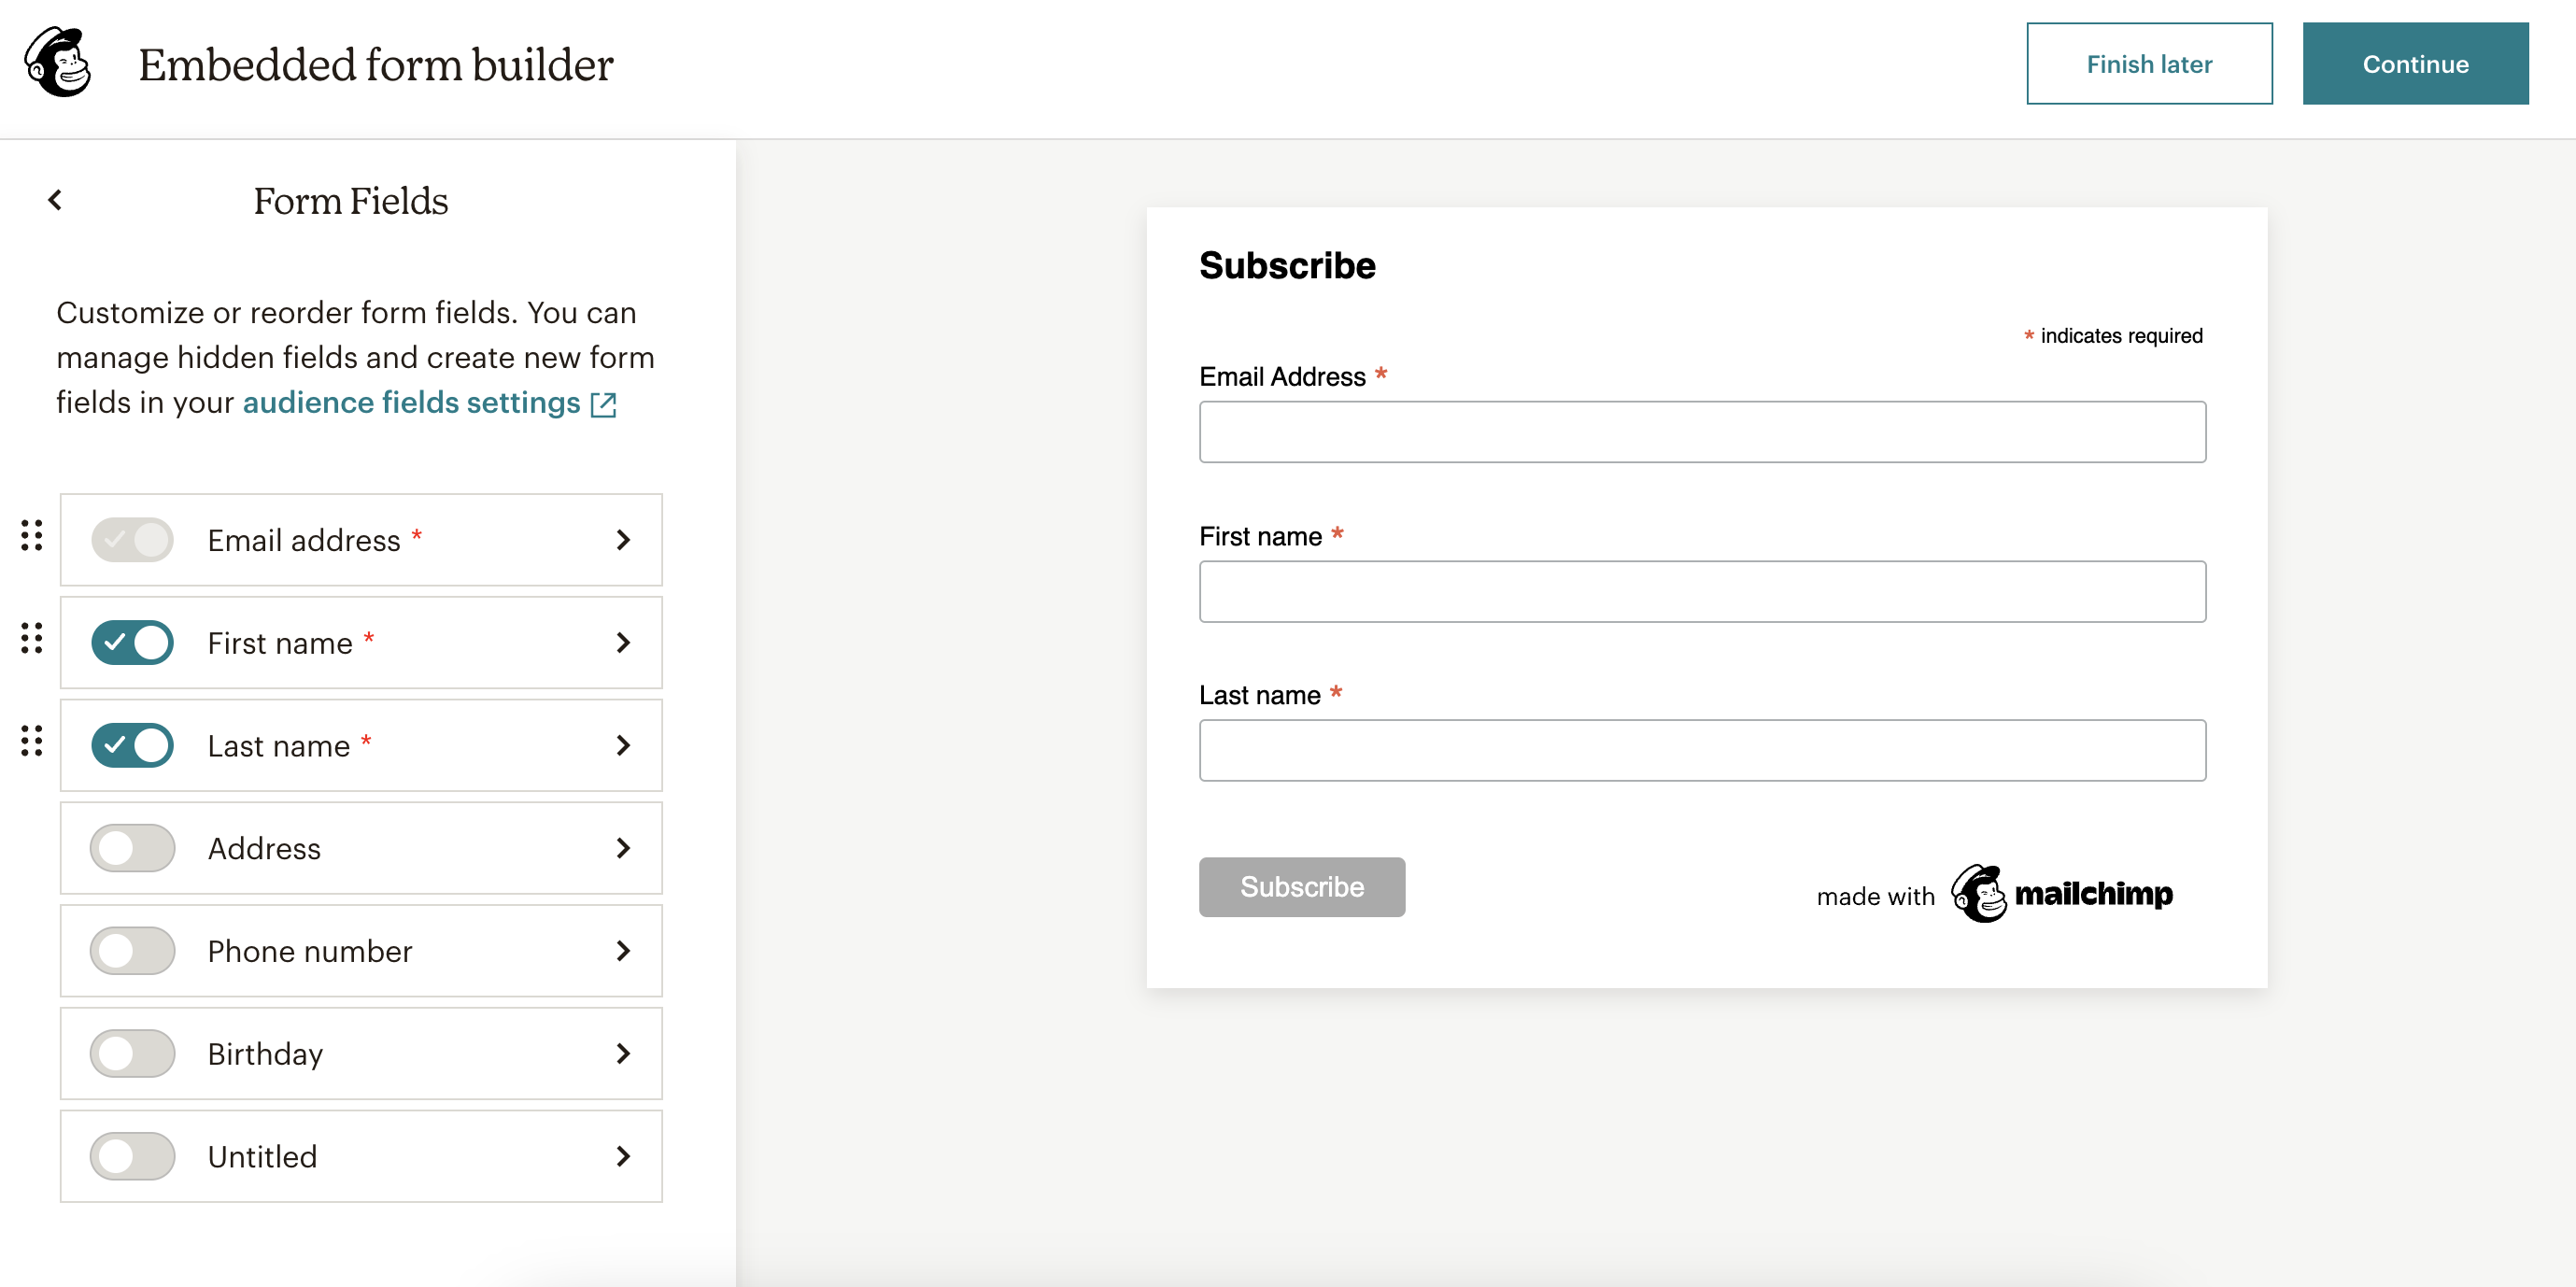
 The embedded form will only have the email field enabled by default, so, if you’re just collecting emails, you don’t need to change anything (we’ll discuss setting up forms with multiple fields in the next section). Just hit **Continue** to proceed to the final step.
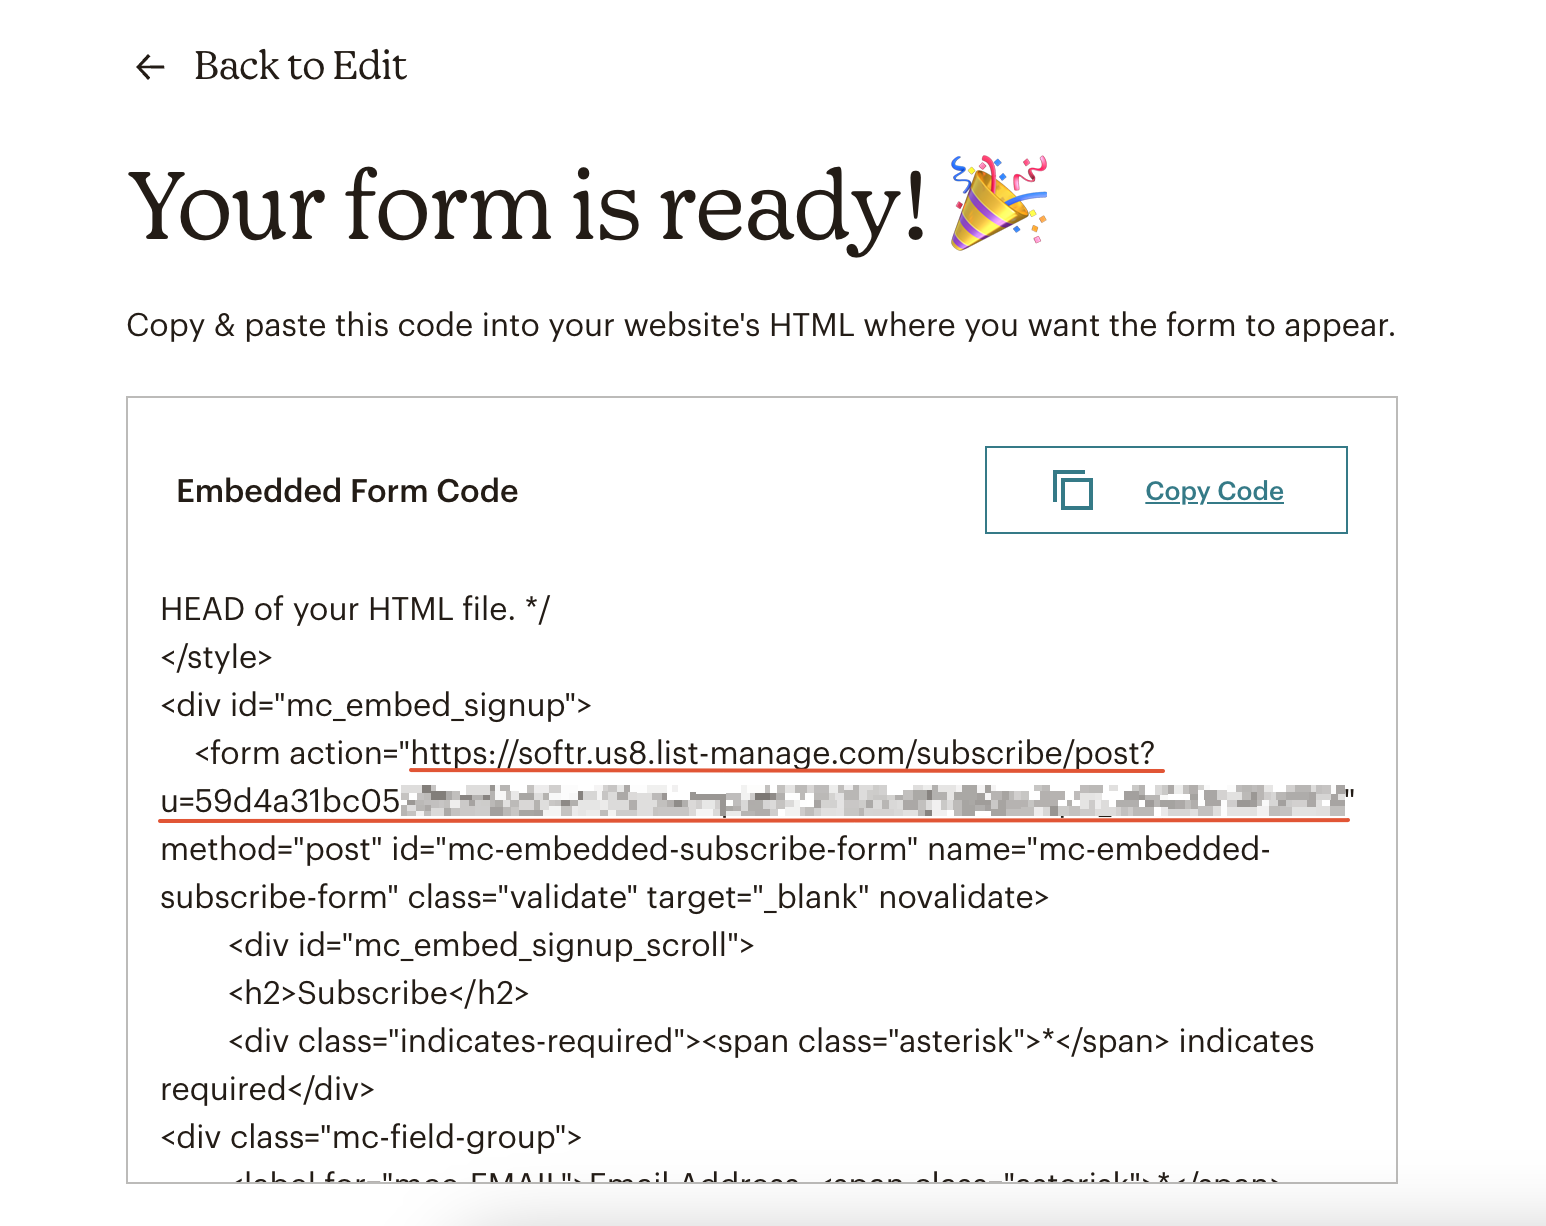
 In the next screen, copy the form **Action URL** (as shown below), then go back to your Softr application and paste it in the **Action URL field** of your form. That’s it. Now, all the emails submitted from your Softr app will be collected in your Mailchimp account under **Contacts**.
 If you're testing the form submission and not getting anything on Mailchimp, that could be due to **Double Opt-In** being enabled in your Mailchimp settings. When it's enabled, the user that submits the form receives a confirmation email. Only after the submission is confirmed by the user, it is sent to Mailchimp. You can find more details [here](https://mailchimp.com/help/about-double-opt-in/).
## Connecting custom forms to Mailchimp
Let’s create a [Customizable Form](/building-blocks/vikC2AWEpQGkZd4jGyoVxo/advanced-form-features/jCim5VWZePgZuaRsUZBnpG) on Softr with multiple fields and see how we can connect it to Mailchimp to collect all the submissions there.
If you're testing the form submission and not getting anything on Mailchimp, that could be due to **Double Opt-In** being enabled in your Mailchimp settings. When it's enabled, the user that submits the form receives a confirmation email. Only after the submission is confirmed by the user, it is sent to Mailchimp. You can find more details [here](https://mailchimp.com/help/about-double-opt-in/).
## Connecting custom forms to Mailchimp
Let’s create a [Customizable Form](/building-blocks/vikC2AWEpQGkZd4jGyoVxo/advanced-form-features/jCim5VWZePgZuaRsUZBnpG) on Softr with multiple fields and see how we can connect it to Mailchimp to collect all the submissions there.
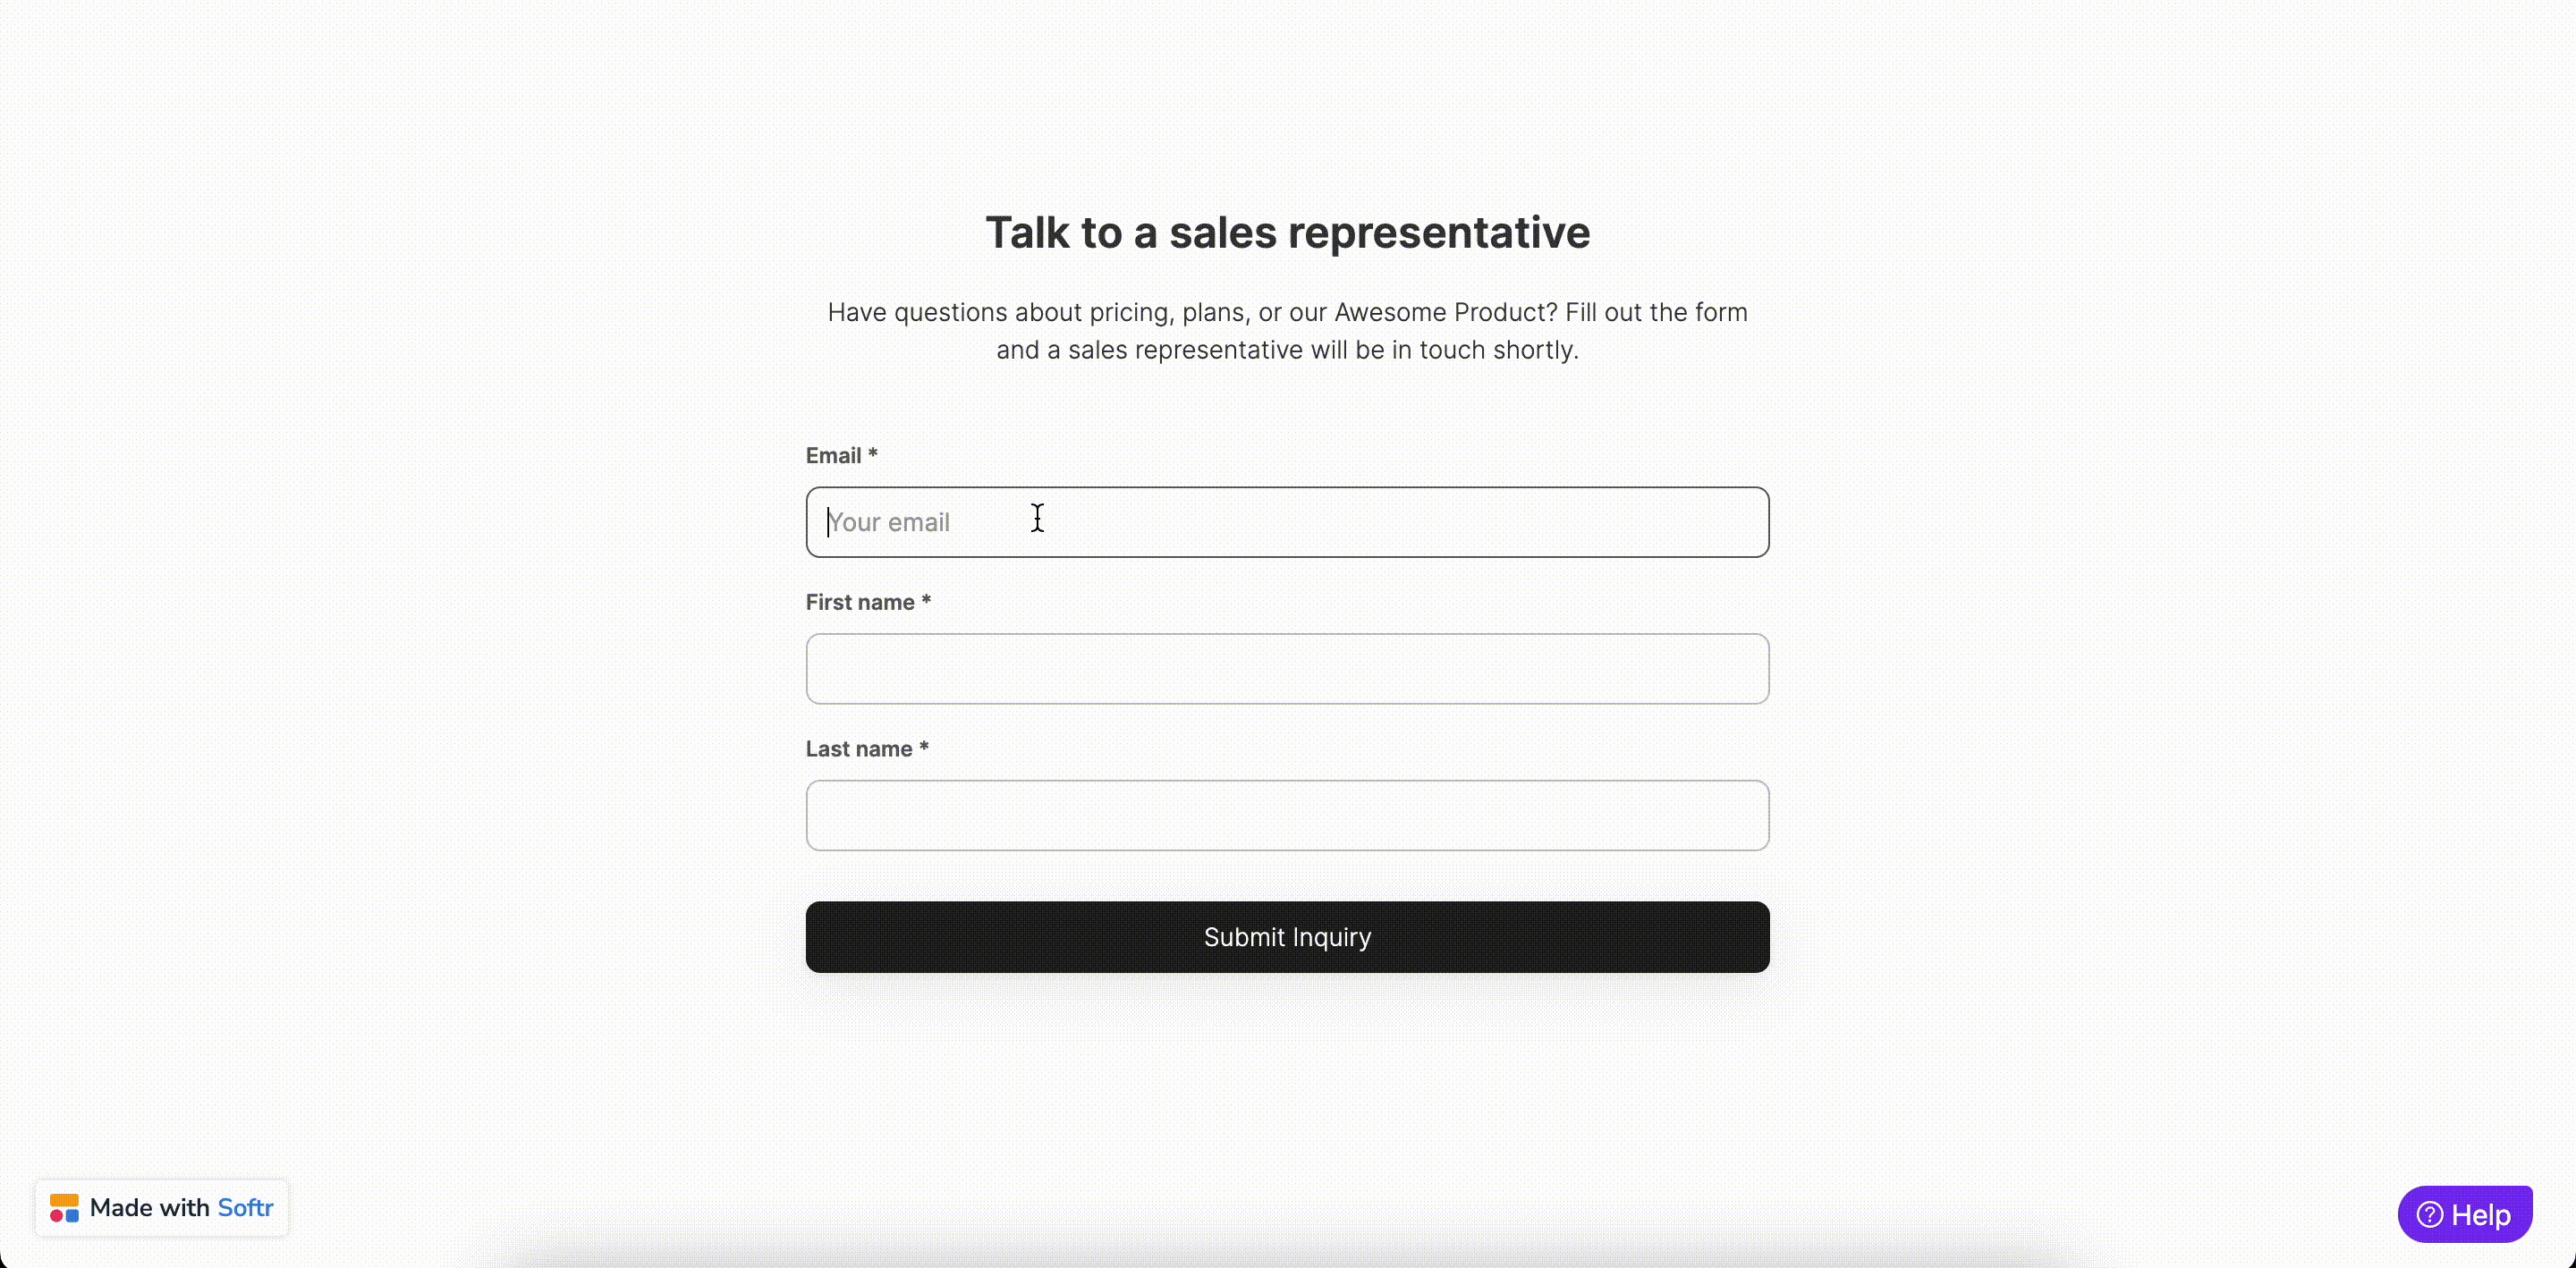
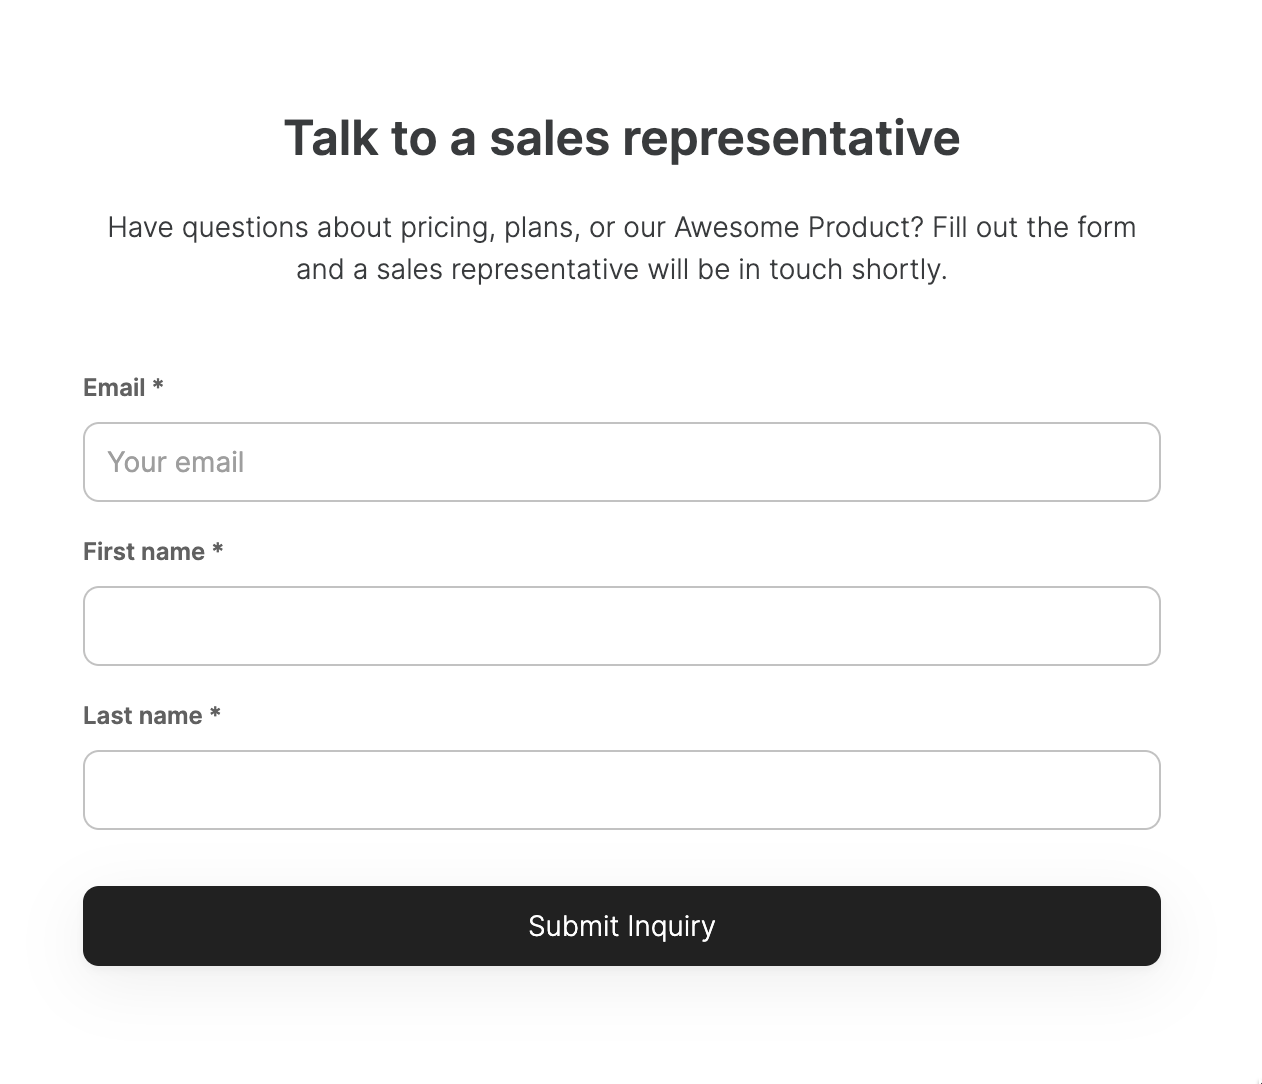 So, we are going to create a form with three fields (**Email**, **First name**, and **Last name)** and set the destination to Mailchimp.
 Now, we need to add the **Action URL**. To get the action URL and receive form submissions on Mailchimp, we need to create a similar form in our Mailchimp account. First, we need to create an **Embedded Form.**
 Next, in form settings, we are going to navigate to **Form Fields** and enable two additional fields apart from **Email**. Below, you can see how we’ve enabled three fields, creating a form similar to what we have in our Softr app.
 Lastly, we are going to hit **Continue** and copy the **Action URL** on the next screen, which we’ll need to paste in our form settings on Softr.
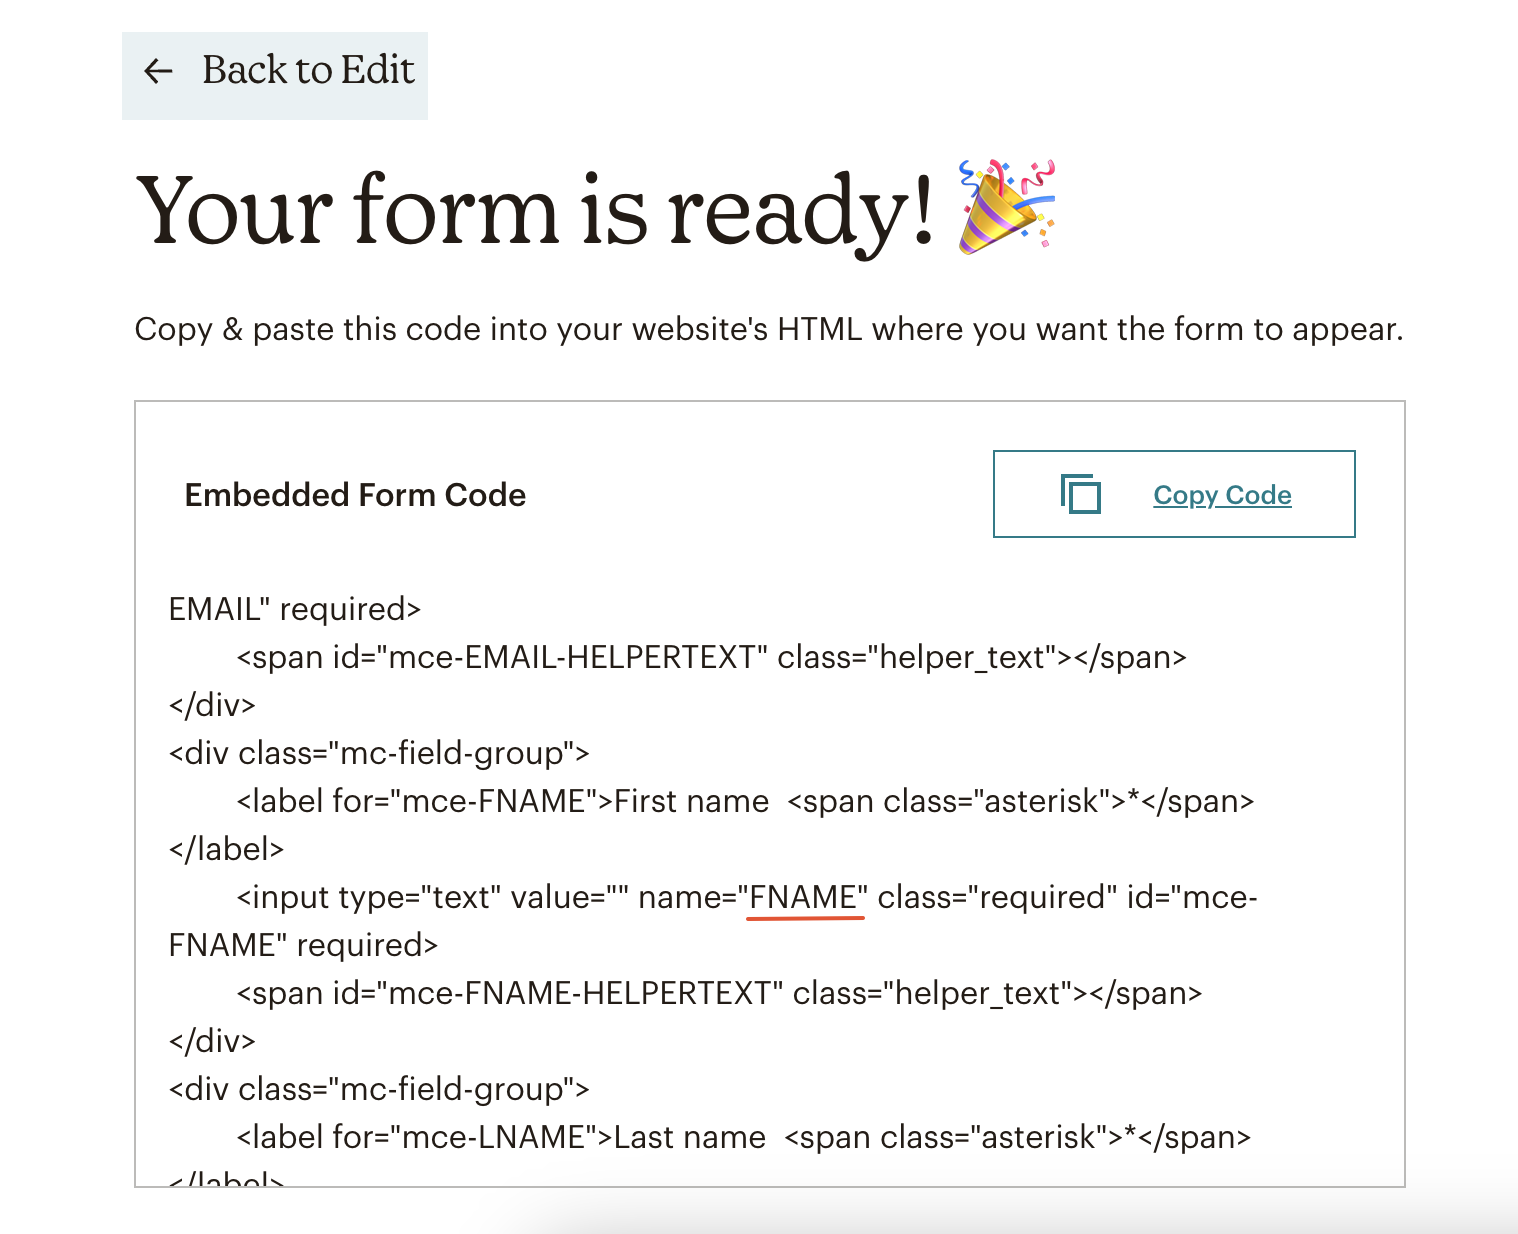
 But that’s not all. In order to map all the form fields correctly from Softr to Mailchimp, we also need to specify a **Map to** value for each field. Those values can be found in the same embedded form code under **name**. Below, we’ve located the name of the **First name** field.
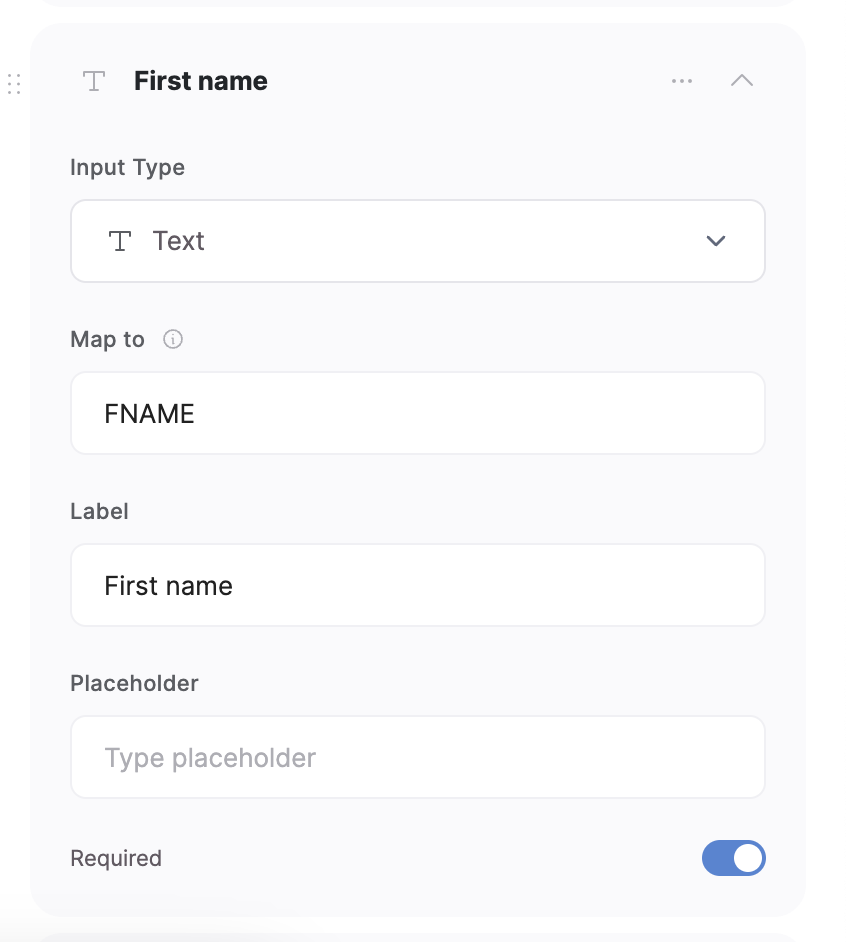
 You should copy the values for all your fields (including the **Email** field) and add them to your Softr form for each field under **Map to**.
 And we’re done. Let’s do a test submission to make sure it works correctly.