> ## Documentation Index
> Fetch the complete documentation index at: https://docs.softr.io/llms.txt
> Use this file to discover all available pages before exploring further.
# Layout: Pricing in card view with details
> Display the pricing of your product or service.
Using this block, you can display the different pricing options of your product or service. You can also link each option to a corresponding checkout page (internal or external), which we'll discuss a bit later.
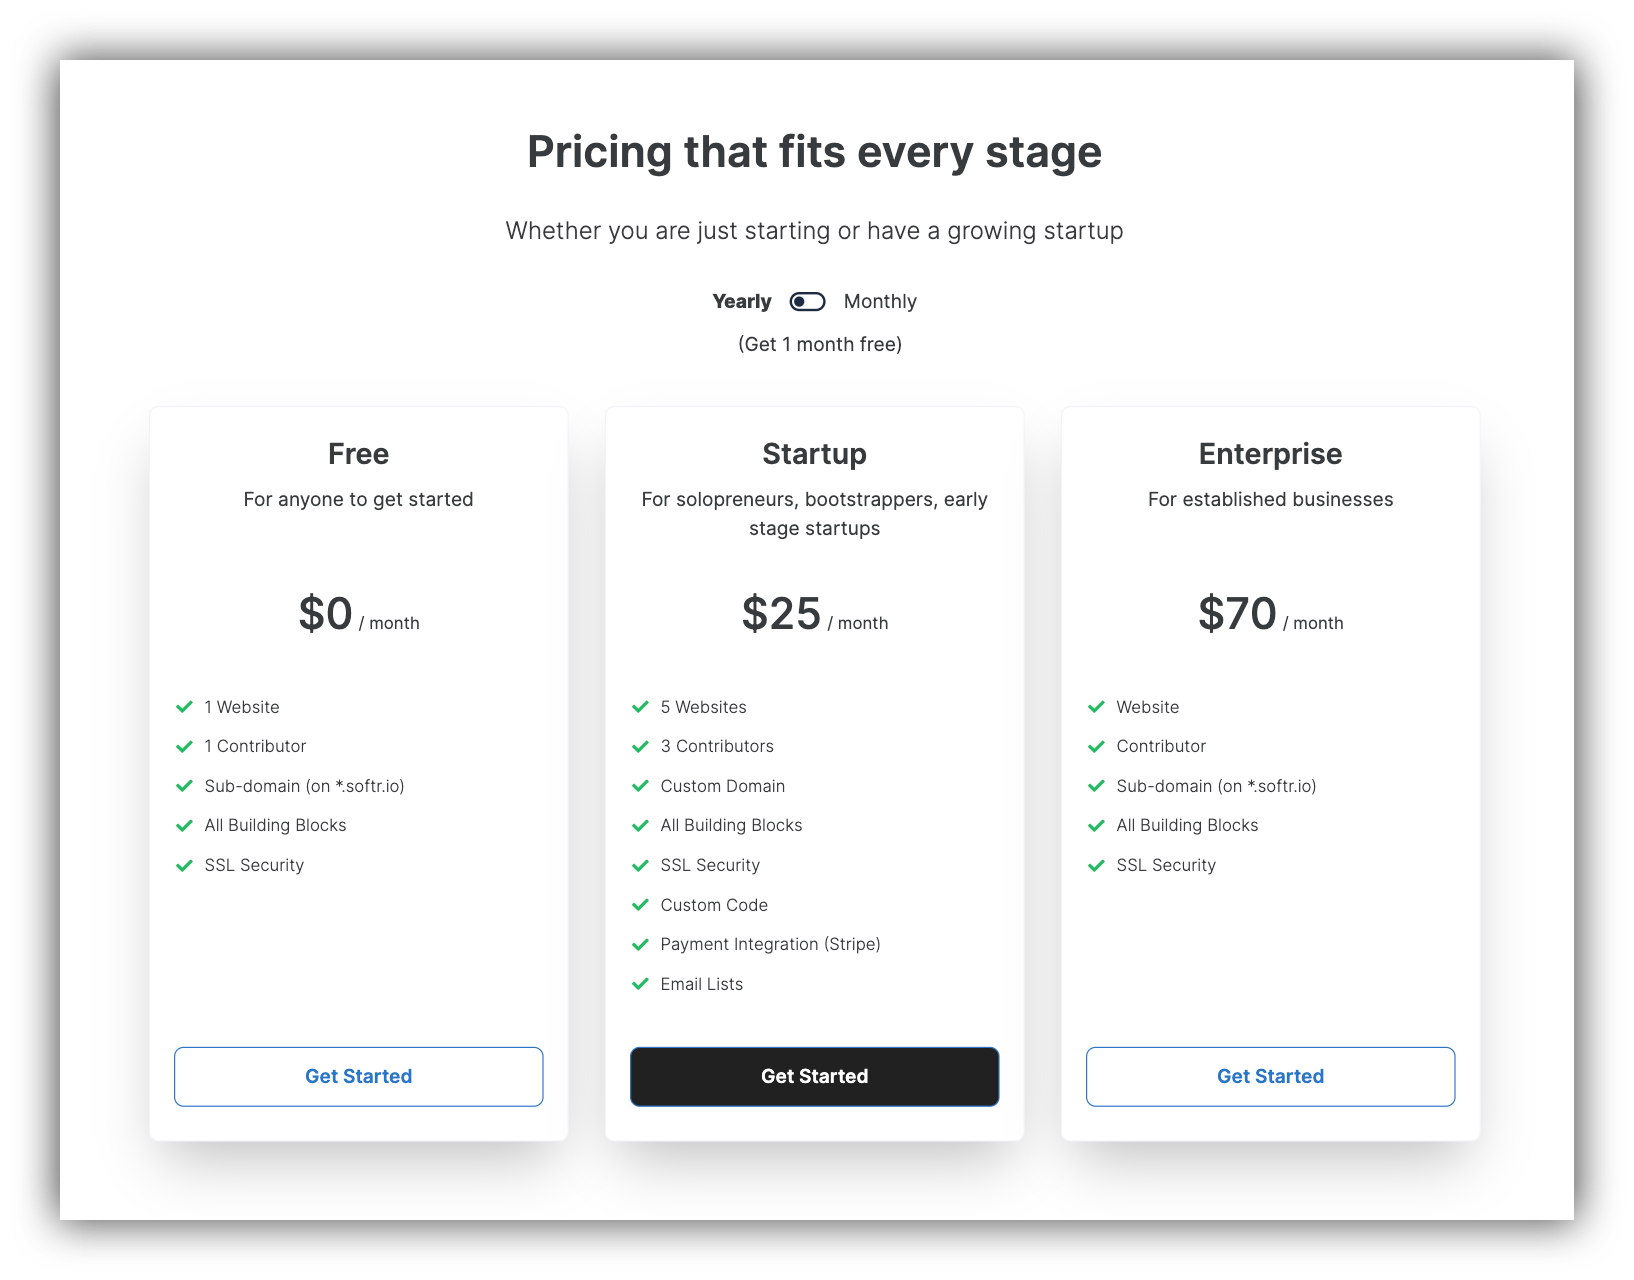 Let's review the block settings, which are located under the **Features** tab.
## **Title and Subtitle**
Here, you can customize the **Title** and **Subtitle** of the block.
## **Multiple billing cycles**
You can enable this option if, for instance, you want to show different prices for **yearly** and **monthly** billing. Under **Cycle description**, you can add a custom text for your Yearly option.
## **Pricing Tiers**
Here, you add the details for each of your pricing tiers (Title, Yearly and Monthly prices, Features, etc.).
## **Button**
Each tier has a button that can be used to take the users to the checkout page. If you're using a payment service other than Stripe, you can use the **Redirect to url** option under **Add action** to take the users to your external checkout page.
To use the Stripe Checkout option, your first need to [connect your Stripe account](/integrations/etS18kJqm1fuD58KCsjC3z/stripe-checkout/iBomMEucRZtM2y6HuutYVC) to your Softr app.
Let's review the block settings, which are located under the **Features** tab.
## **Title and Subtitle**
Here, you can customize the **Title** and **Subtitle** of the block.
## **Multiple billing cycles**
You can enable this option if, for instance, you want to show different prices for **yearly** and **monthly** billing. Under **Cycle description**, you can add a custom text for your Yearly option.
## **Pricing Tiers**
Here, you add the details for each of your pricing tiers (Title, Yearly and Monthly prices, Features, etc.).
## **Button**
Each tier has a button that can be used to take the users to the checkout page. If you're using a payment service other than Stripe, you can use the **Redirect to url** option under **Add action** to take the users to your external checkout page.
To use the Stripe Checkout option, your first need to [connect your Stripe account](/integrations/etS18kJqm1fuD58KCsjC3z/stripe-checkout/iBomMEucRZtM2y6HuutYVC) to your Softr app.
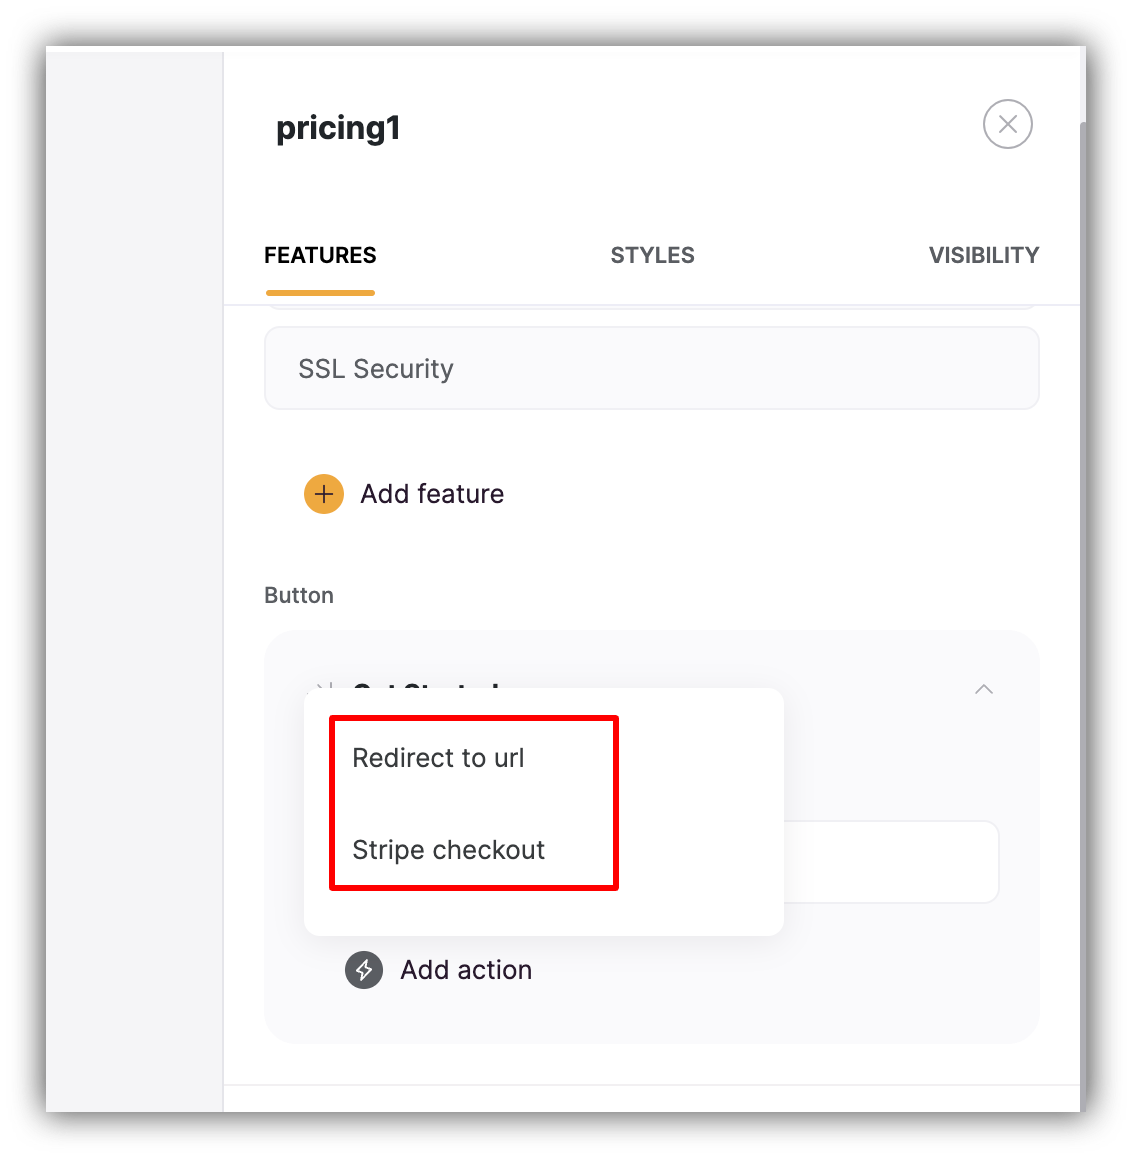 **So, let's select the Stripe Checkout option and start configuring the checkout settings.**
## **Recurring payments**
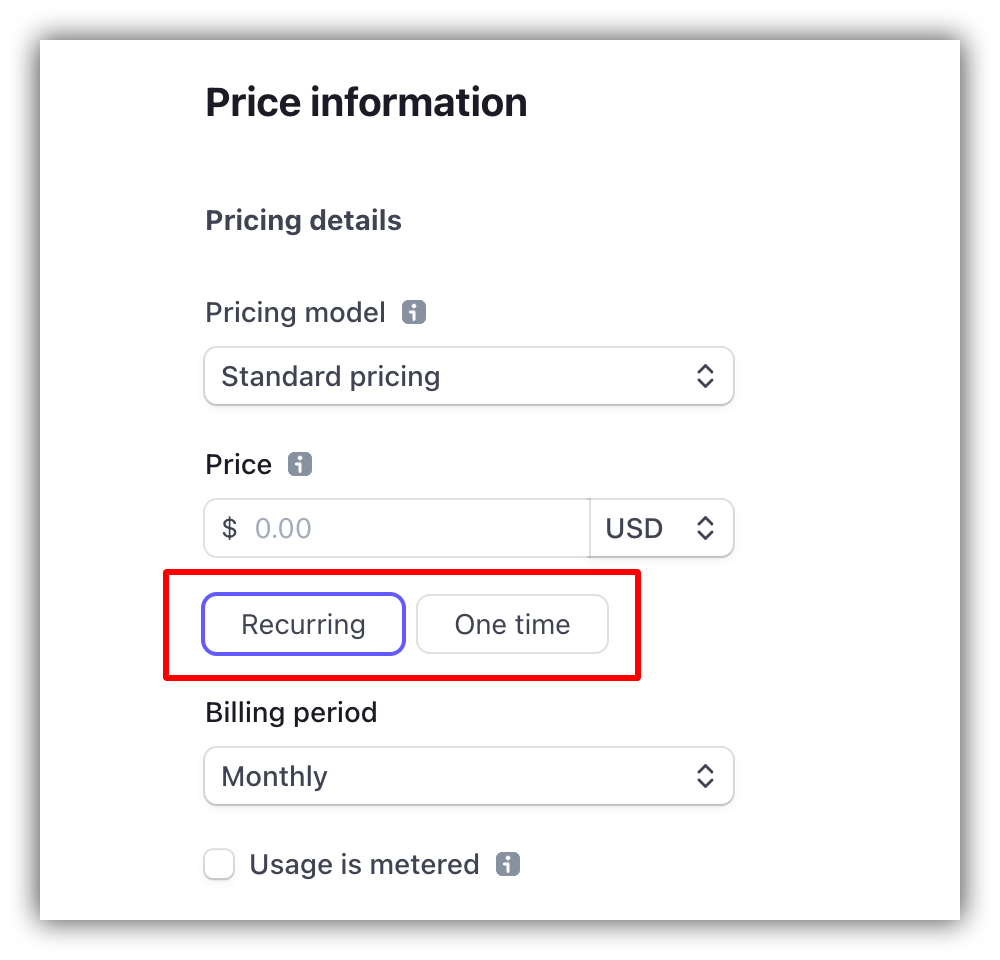
Enable this if you want to charge your customers periodically based on a specific schedule (e.g. for a monthly subscription). When configuring a product on Stripe, you have the option to set it as **One time** or **Recurring**.
**So, let's select the Stripe Checkout option and start configuring the checkout settings.**
## **Recurring payments**
Enable this if you want to charge your customers periodically based on a specific schedule (e.g. for a monthly subscription). When configuring a product on Stripe, you have the option to set it as **One time** or **Recurring**.
 ## **Allow promotion codes**
Here, you need to choose if you're going to accept [promotion codes](https://stripe.com/docs/billing/subscriptions/coupons/codes) on your Stripe checkout.
## **Enable automatic tax**
You can select to apply automatic taxes on checkout, which needs to be configured on Stripe.
### **Adding the Tax feature on Stripe**
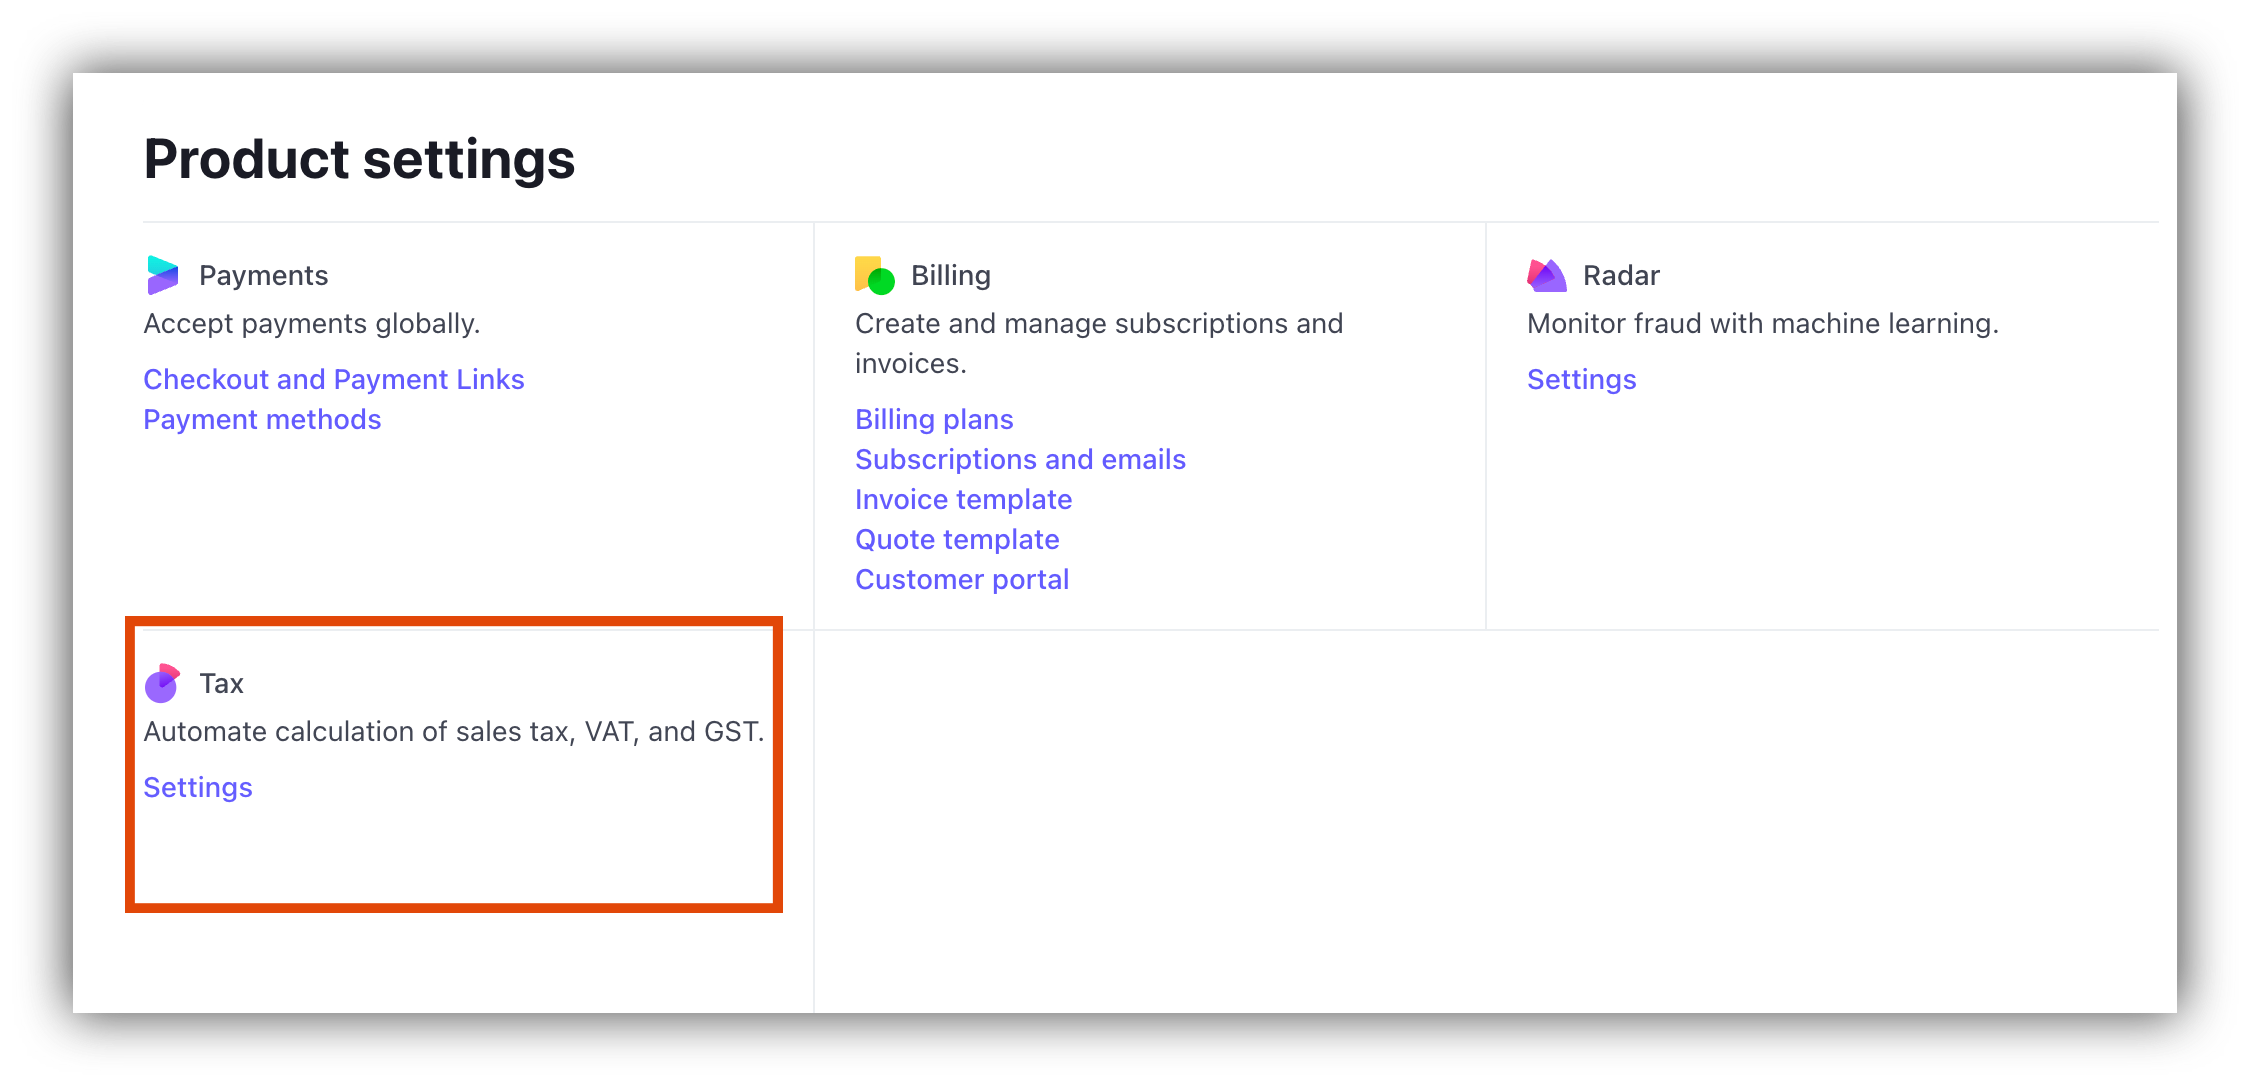
First of all, if you don't have the Tax feature enabled on Stripe, you can add it from the Features and Products list as shown below.
## **Allow promotion codes**
Here, you need to choose if you're going to accept [promotion codes](https://stripe.com/docs/billing/subscriptions/coupons/codes) on your Stripe checkout.
## **Enable automatic tax**
You can select to apply automatic taxes on checkout, which needs to be configured on Stripe.
### **Adding the Tax feature on Stripe**
First of all, if you don't have the Tax feature enabled on Stripe, you can add it from the Features and Products list as shown below.
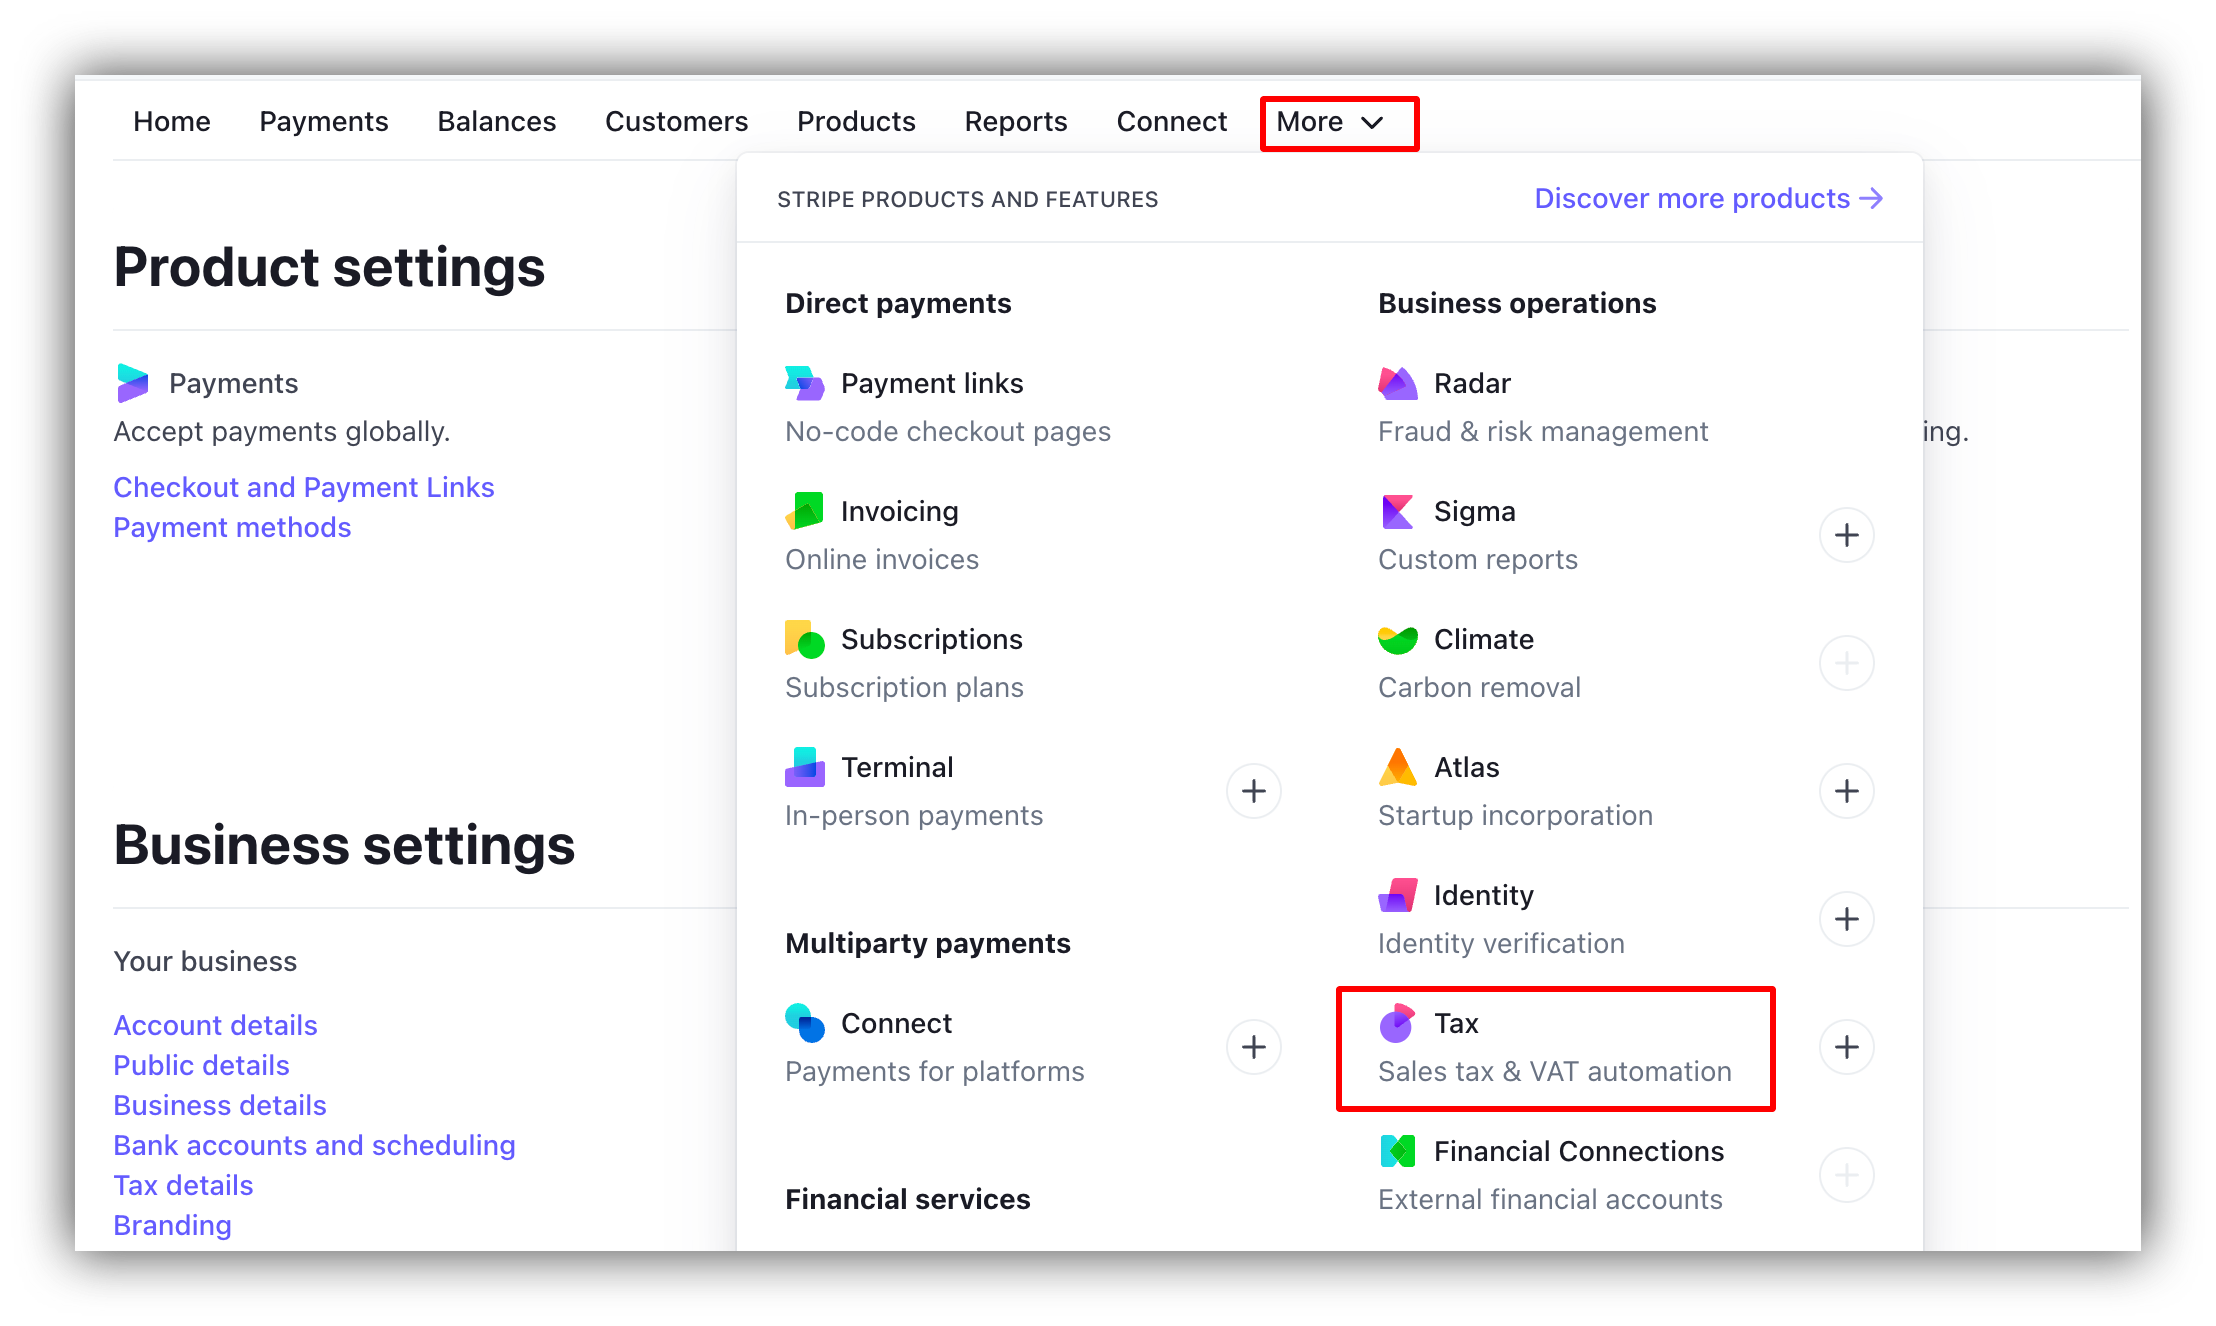 Now, the Tax settings will become available from your Stripe settings.
 ### **Configuring tax settings**
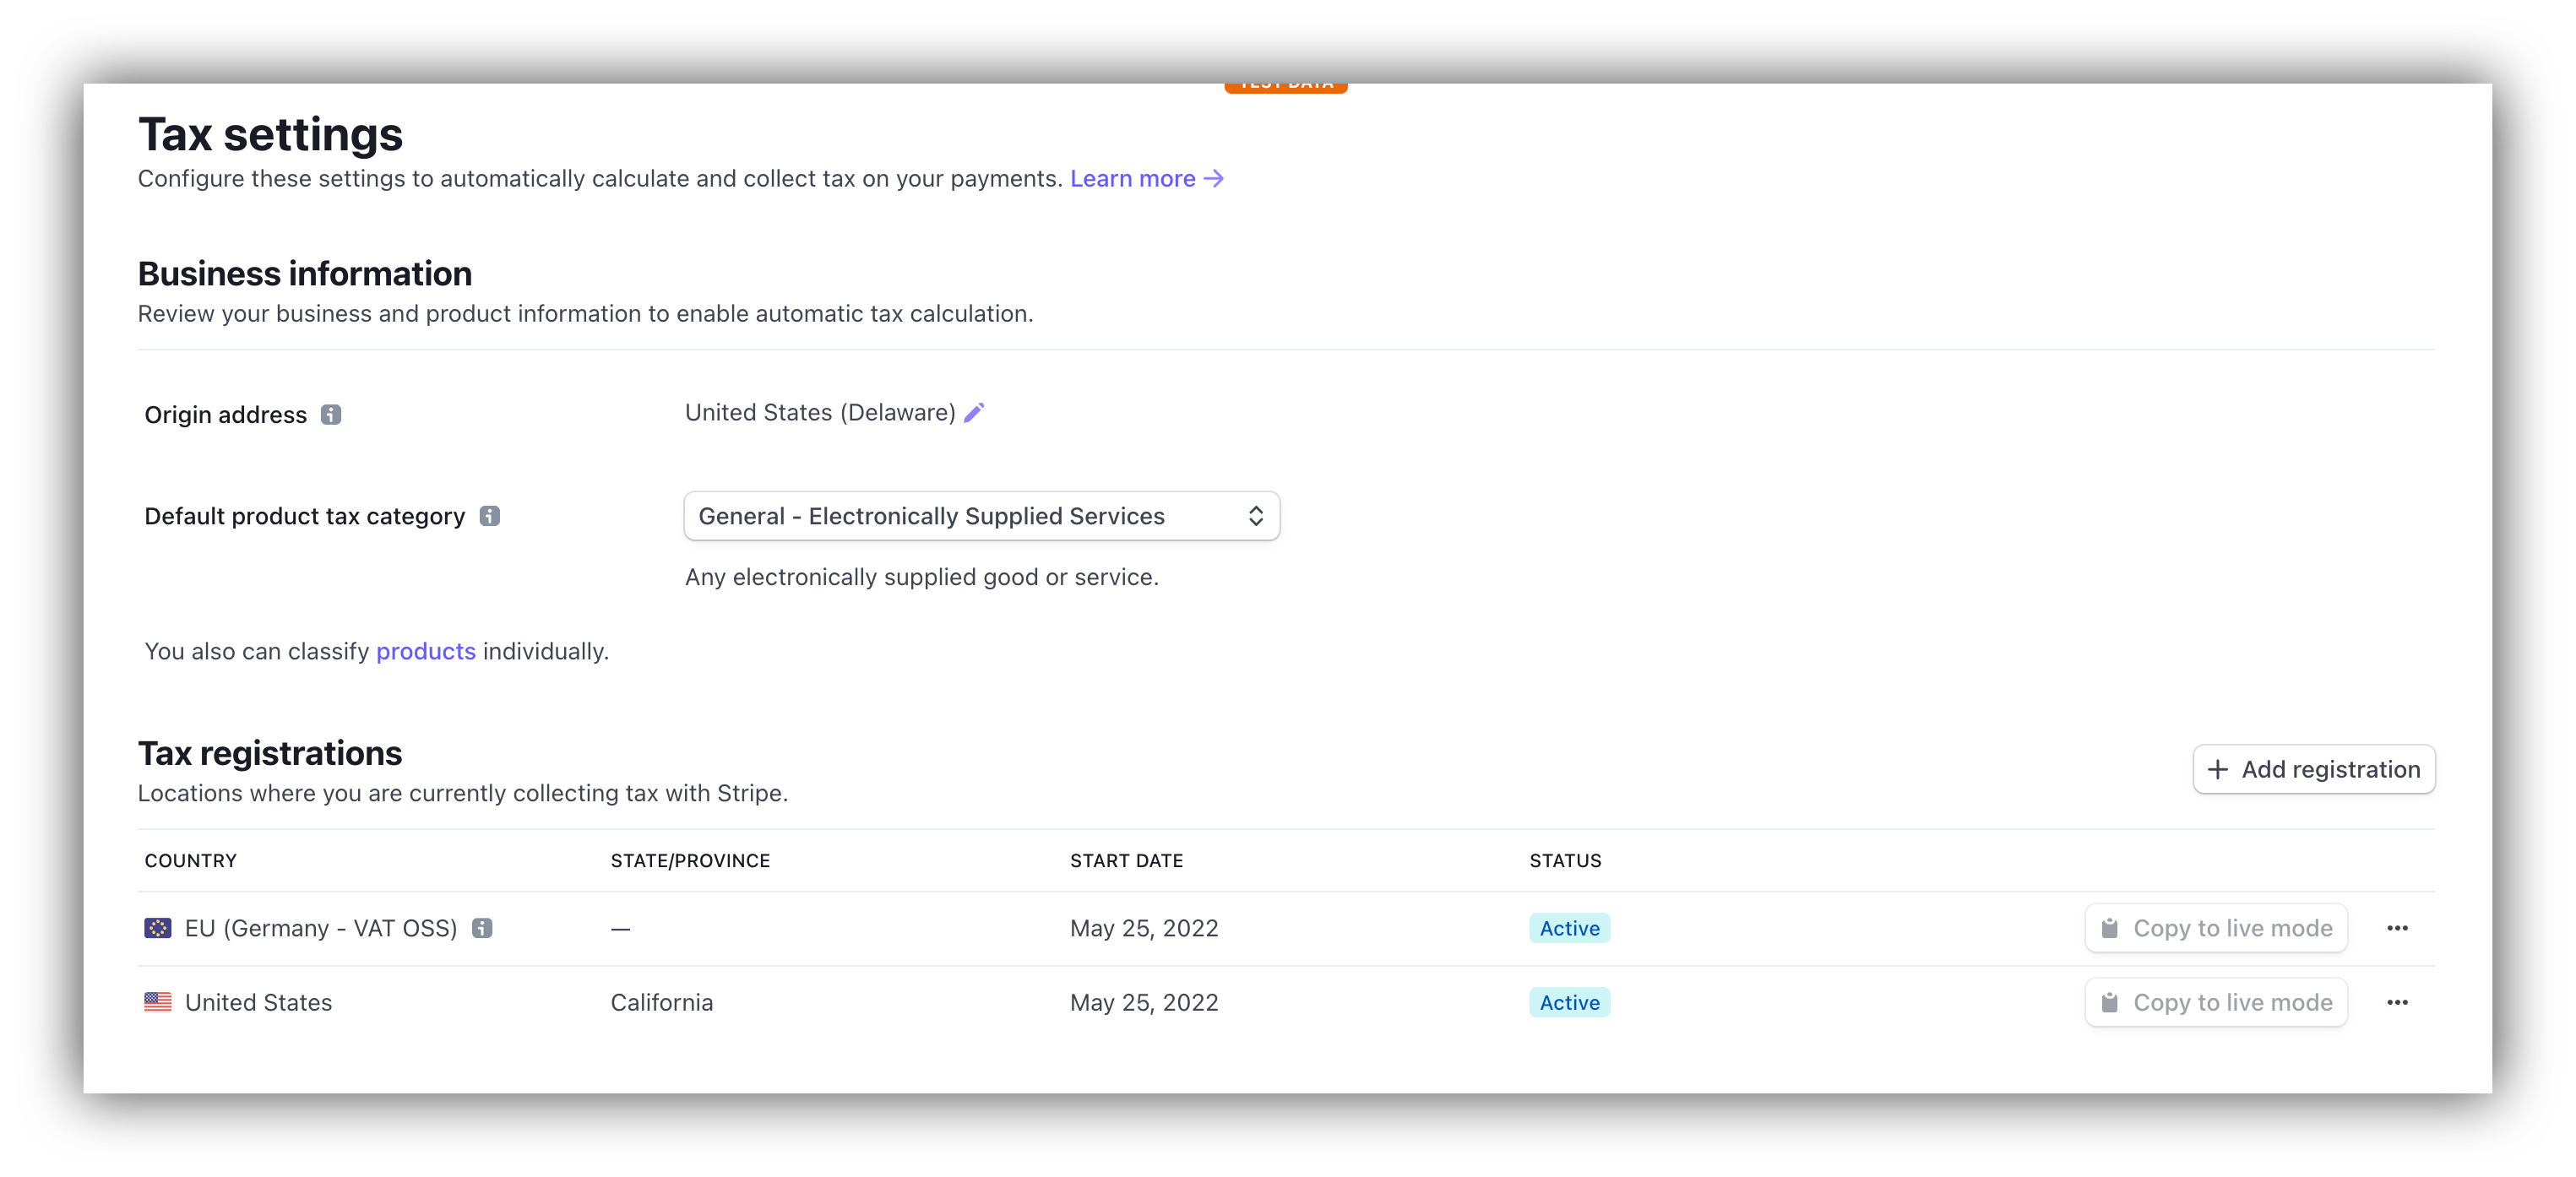
Further on, you need to configure your tax settings, setting up **Default product tax category**, **Tax registration locations**, and others.
### **Configuring tax settings**
Further on, you need to configure your tax settings, setting up **Default product tax category**, **Tax registration locations**, and others.
 ### **Testing taxes**
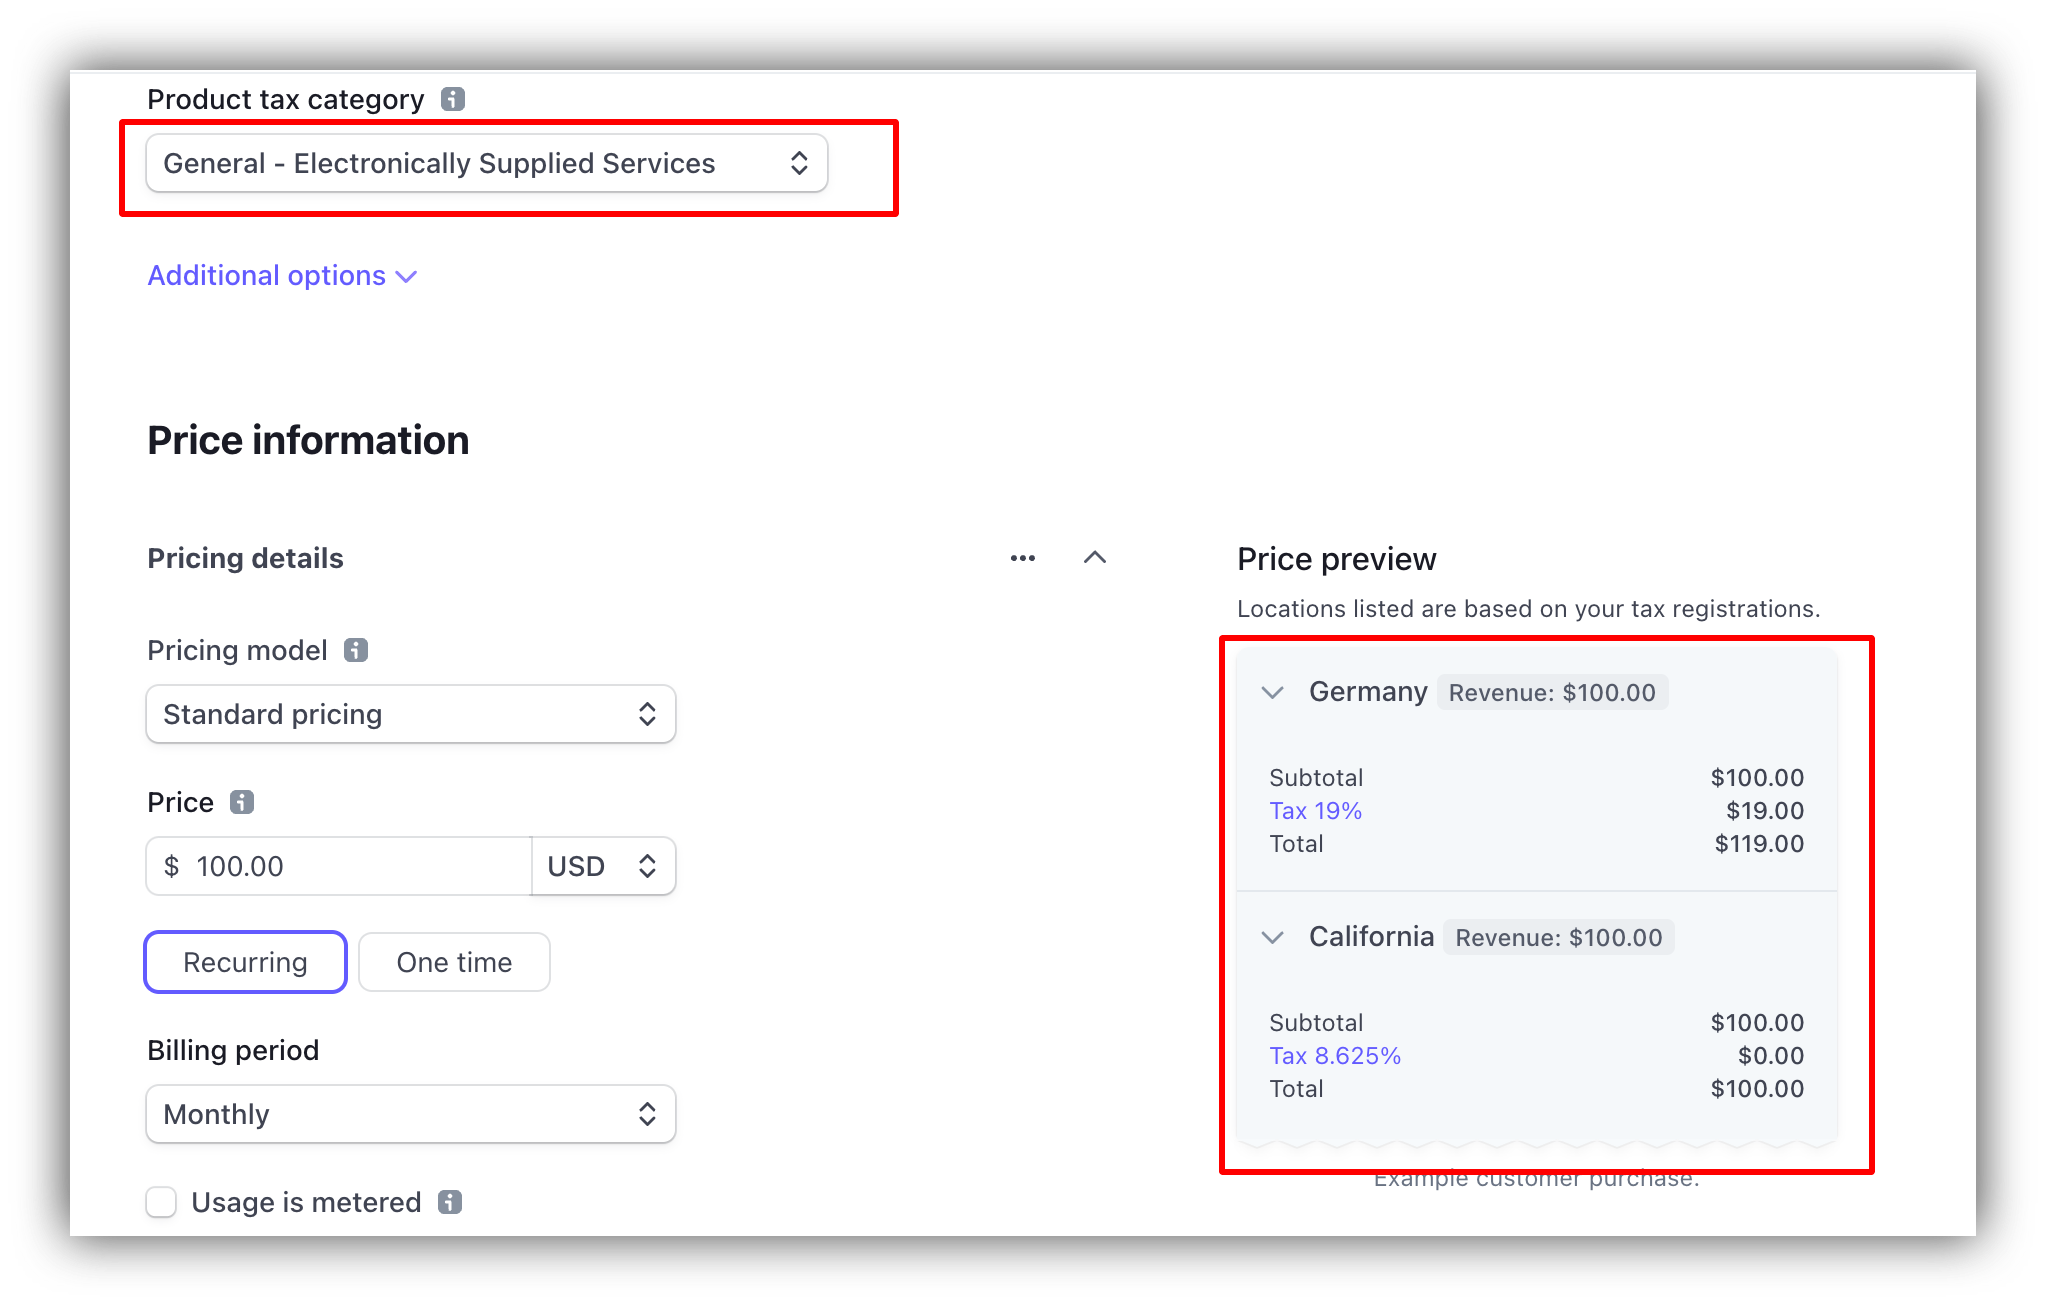
That's it. Now when you create a new product (or edit an existing one) on Stripe, taxes will be applied automatically for your selected locations based on the **Product tax category**.
### **Testing taxes**
That's it. Now when you create a new product (or edit an existing one) on Stripe, taxes will be applied automatically for your selected locations based on the **Product tax category**.
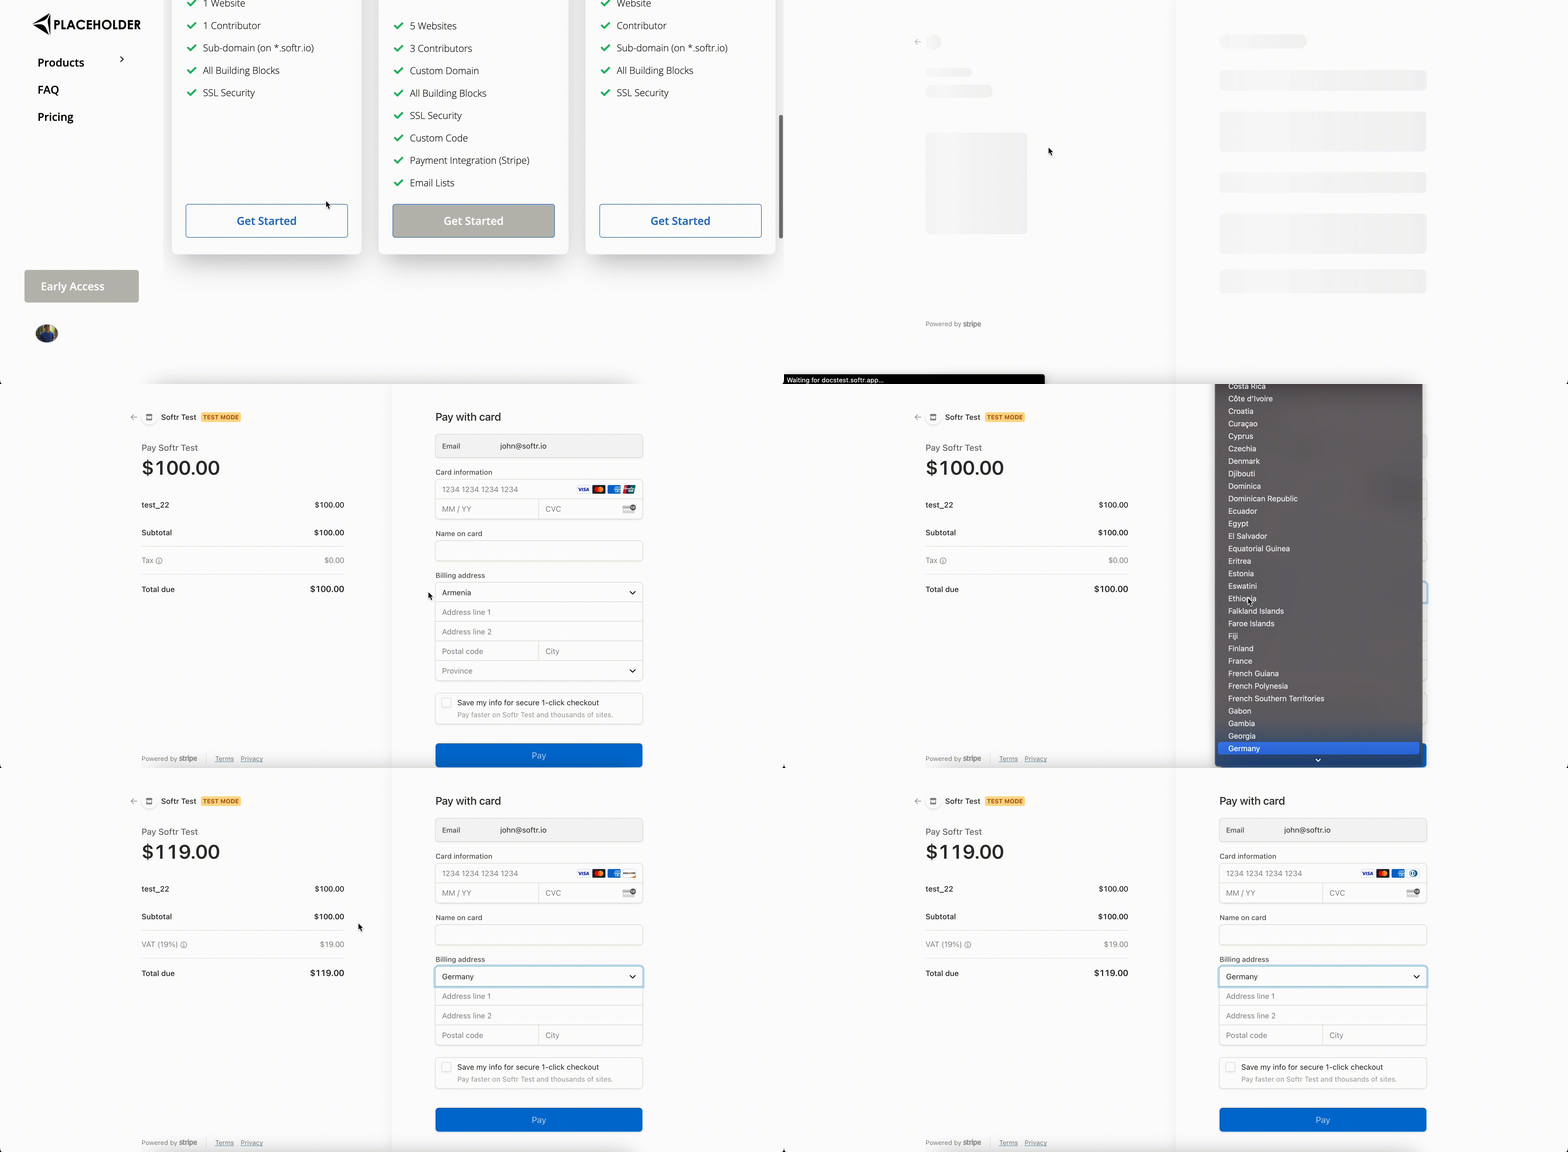
 Let's also see what this looks like from the perspective of your Softr app users.
 ## **Plan IDs and Success/Cancel URL**
Now you just need to configure each plan corresponding to your Stripe products. If you have multiple billing cycles, you need to configure "**Monthly Plan"** & "**Yearly Plan"** fields in Softr. In case of a single billing cycle, you will configure only one **"Plan"** field.
## **Plan IDs and Success/Cancel URL**
Now you just need to configure each plan corresponding to your Stripe products. If you have multiple billing cycles, you need to configure "**Monthly Plan"** & "**Yearly Plan"** fields in Softr. In case of a single billing cycle, you will configure only one **"Plan"** field.
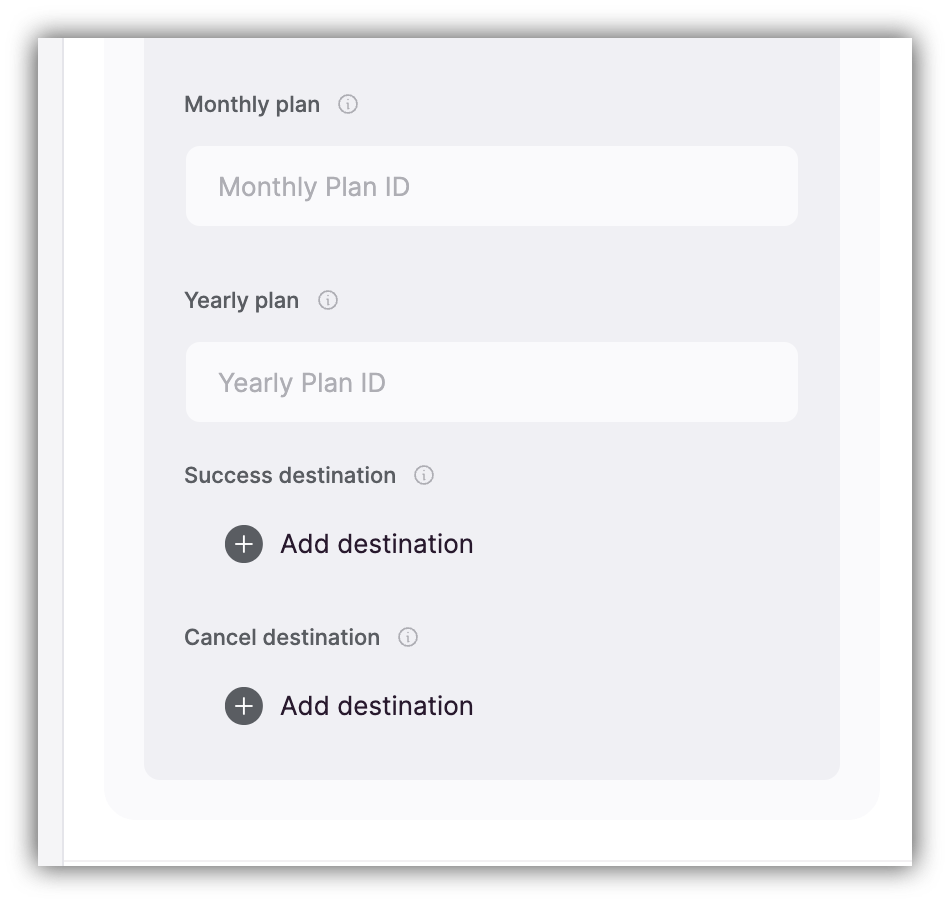 You can find the **Monthly/Yearly Plan ID** by navigating to your [Stripe Dashboard](https://dashboard.stripe.com/). On the dashboard, open **Products Menu**, select a specific product, and choose the corresponding Plan ID from the Pricing plans list. In case your Products list or Pricing list is empty, please make sure to follow the [Stripe documentation](https://stripe.com/docs/billing/subscriptions/set-up-subscription#without-code) to create Products & Plans first.
And finally, you need to fill out **"Success Url"** and **"Error Url"** fields, which show correspondingly where will customers be redirected upon completion (or cancellation/error scenario) of the checkout process.
The **"Success Url"** and **"Error Url"** fields are mandatory and Stripe checkout won't work if they are empty or don't start with either http\:// or https\://.
You can find the **Monthly/Yearly Plan ID** by navigating to your [Stripe Dashboard](https://dashboard.stripe.com/). On the dashboard, open **Products Menu**, select a specific product, and choose the corresponding Plan ID from the Pricing plans list. In case your Products list or Pricing list is empty, please make sure to follow the [Stripe documentation](https://stripe.com/docs/billing/subscriptions/set-up-subscription#without-code) to create Products & Plans first.
And finally, you need to fill out **"Success Url"** and **"Error Url"** fields, which show correspondingly where will customers be redirected upon completion (or cancellation/error scenario) of the checkout process.
The **"Success Url"** and **"Error Url"** fields are mandatory and Stripe checkout won't work if they are empty or don't start with either http\:// or https\://.