> ## Documentation Index
> Fetch the complete documentation index at: https://docs.softr.io/llms.txt
> Use this file to discover all available pages before exploring further.
# Google Sign In
> Adding an authentication option with Google Sign In.
To enable Google Sign In on the [Signup](/add-and-manage-users/pxnkp9H3qyEVMF6XUceqnj/signup-form/tPe3uxmdcUNeFYuaLTR1o9) and [Sign In](/add-and-manage-users/pxnkp9H3qyEVMF6XUceqnj/signin-form/gYwm7wWsqb2bRyJFUreSzN) forms, you first need to integrate **Google Sign In** by adding **Google App Client ID** and **Secret** credentials here. Let's go through the steps of getting the credentials.
## Creating a Project
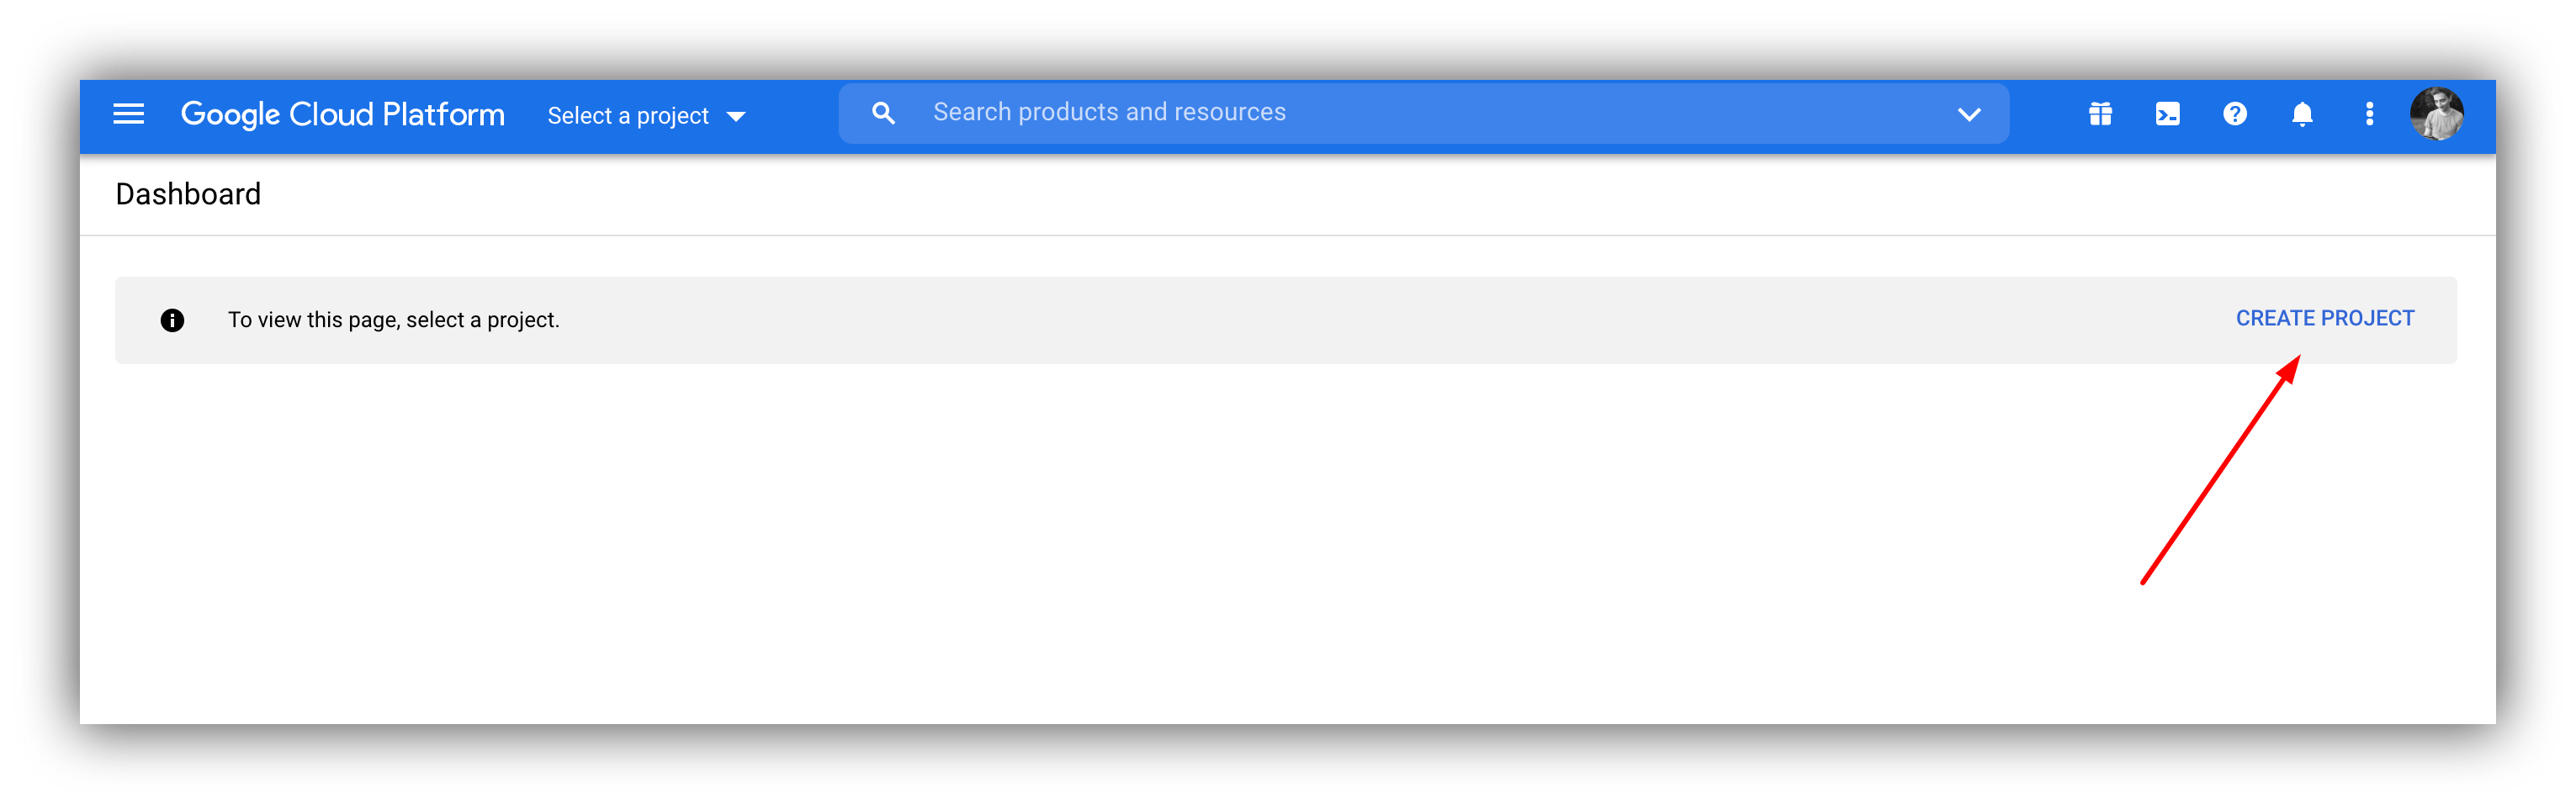
To start with, you need to create a project (if you don't have one yet) in your Google Cloud Platform.
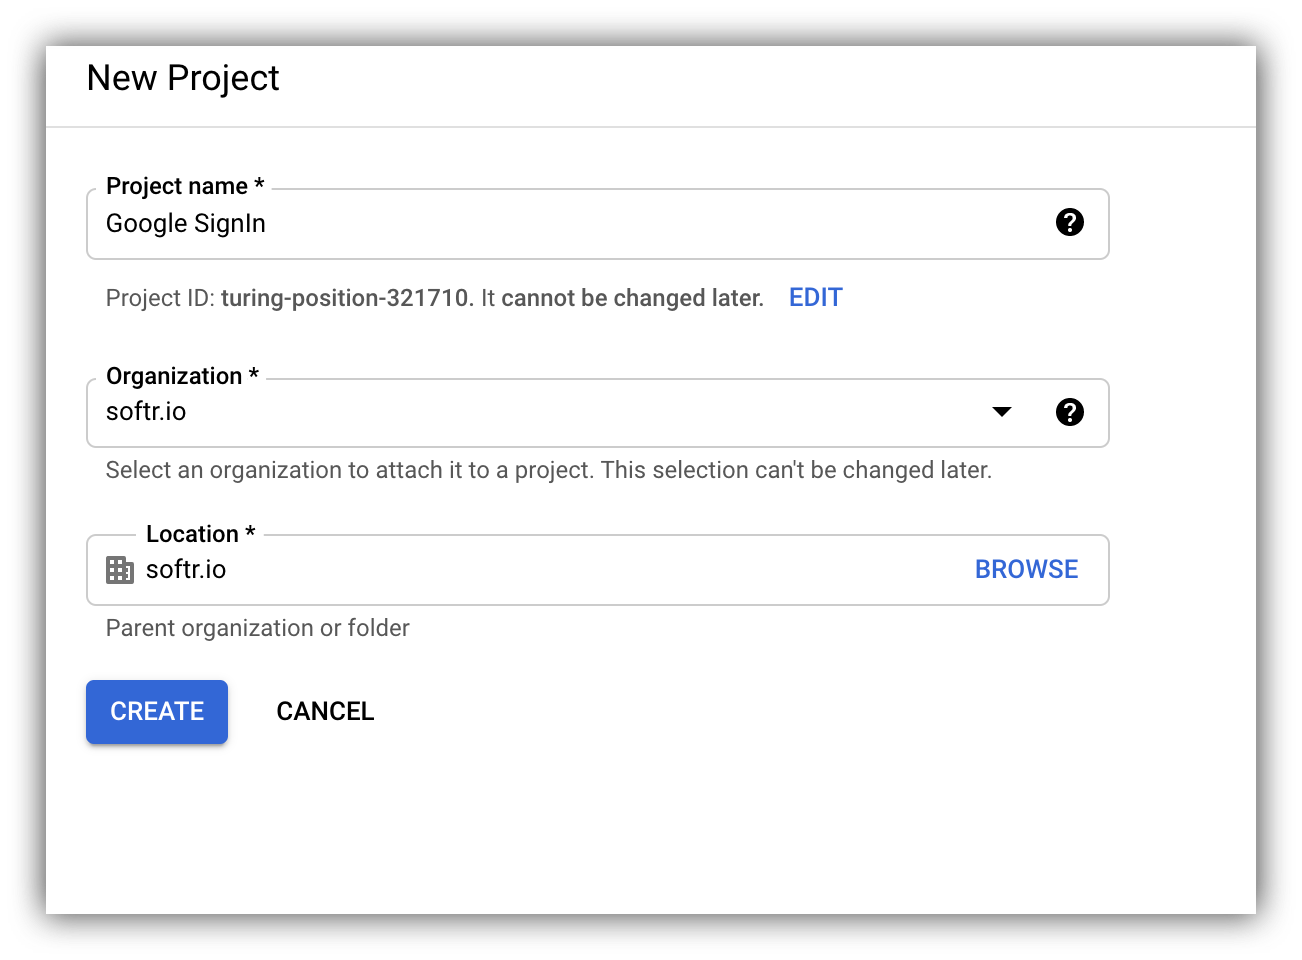
 In the next screen, add the project details (organization and location will be autofilled based on your email, but you can change them) and hit **Create** to create the project.
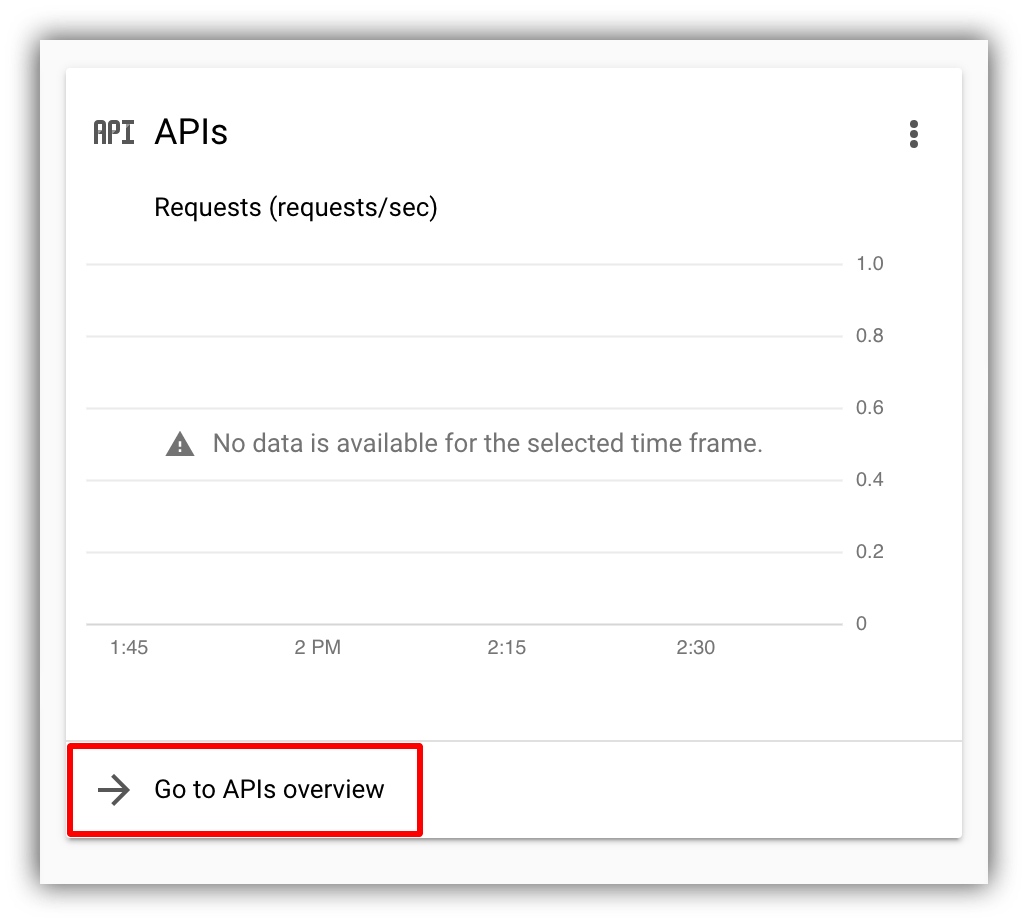
 From your project dashboard, go to **APIs & Services** section.
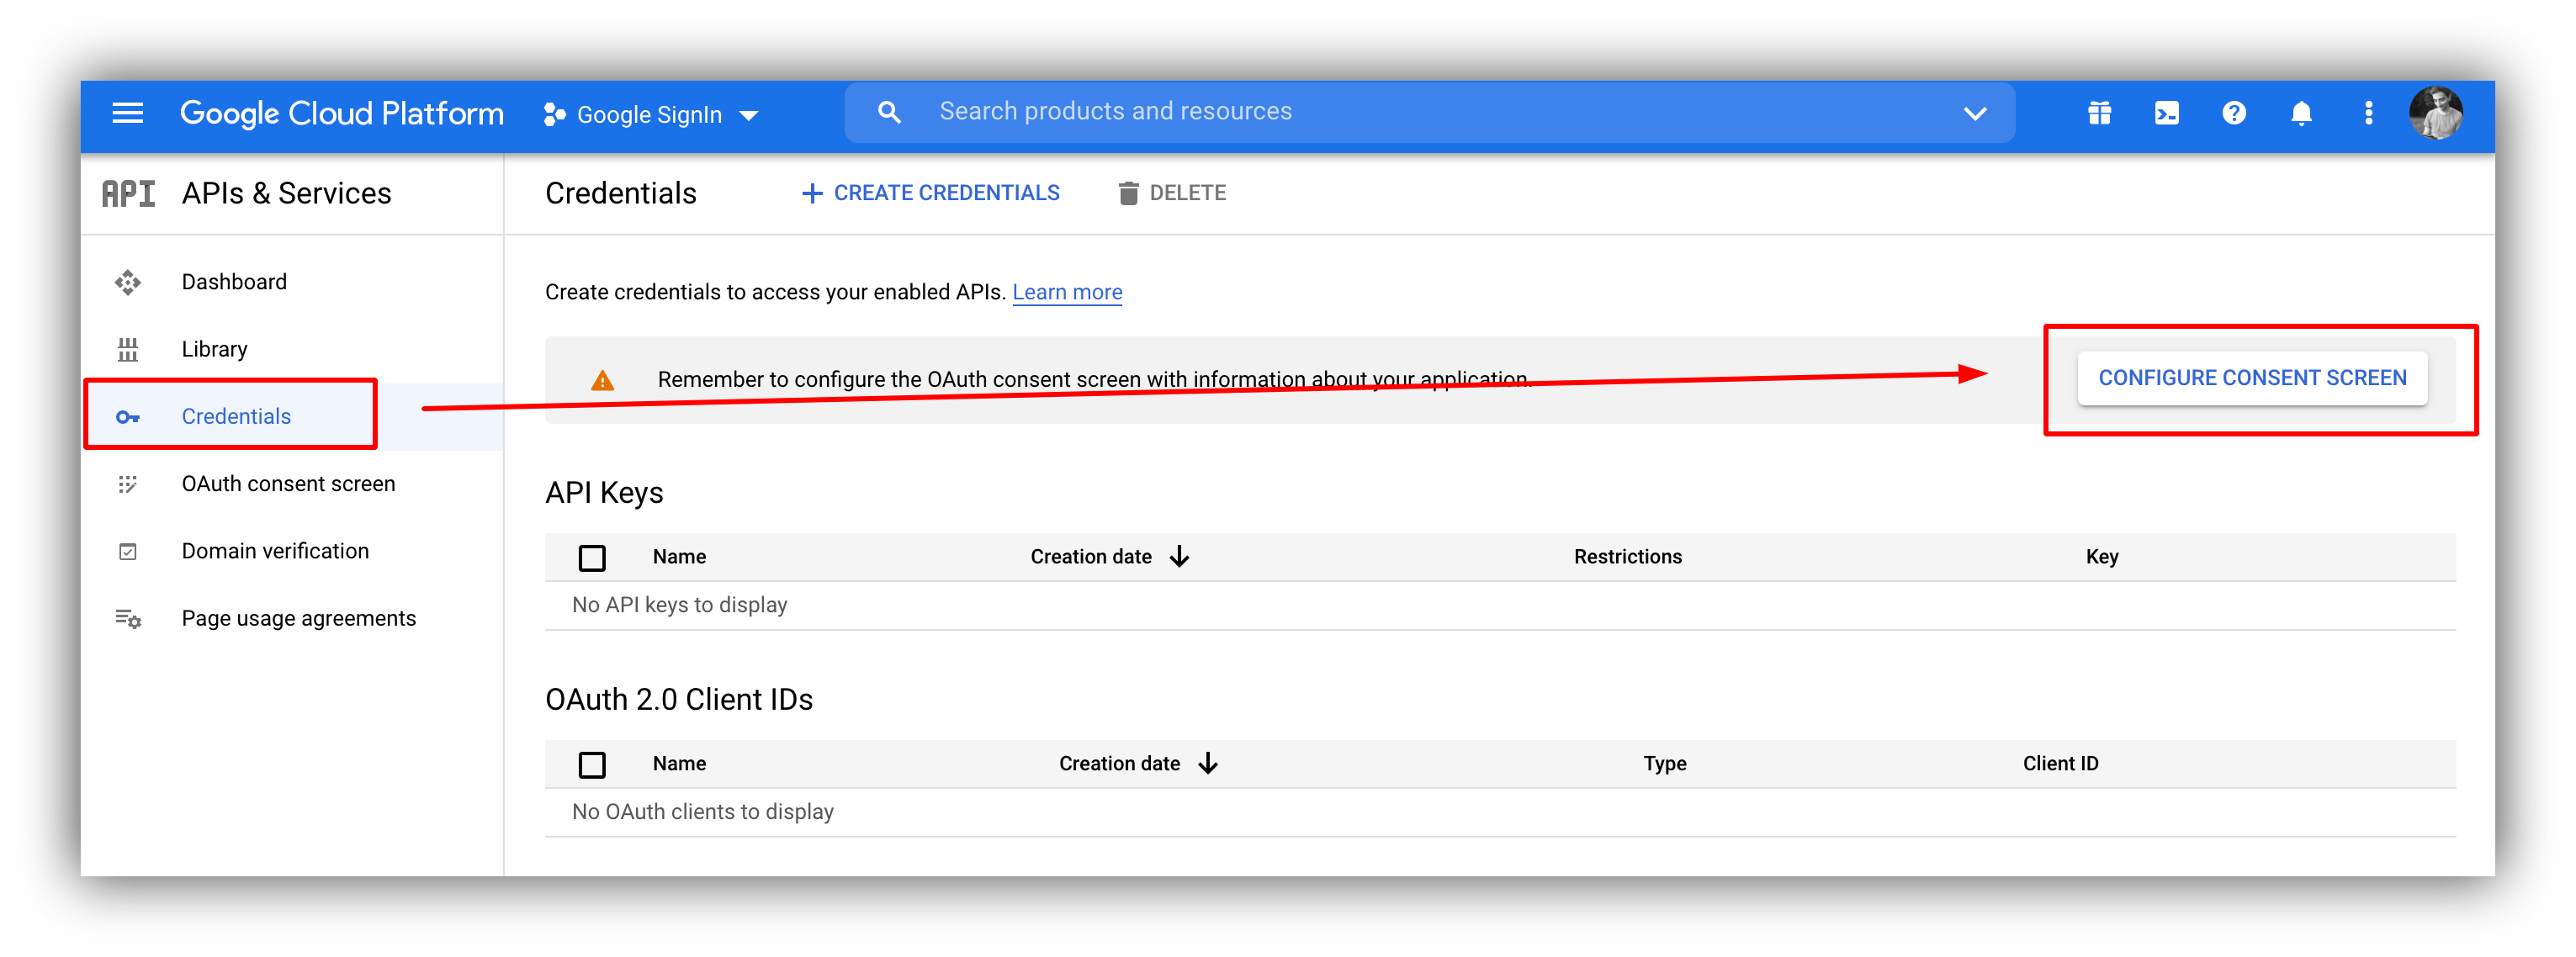
 This is where you create your credentials, but before that, you need to configure the [Consent Screen](https://developers.google.com/workspace/marketplace/configure-oauth-consent-screen). Let's see how.
## Configuring the Consent Screen
In the **APIs & Services section**, navigate to **Credentials** and click on **CONFIGURE CONSENT SCREEN**.
This is where you create your credentials, but before that, you need to configure the [Consent Screen](https://developers.google.com/workspace/marketplace/configure-oauth-consent-screen). Let's see how.
## Configuring the Consent Screen
In the **APIs & Services section**, navigate to **Credentials** and click on **CONFIGURE CONSENT SCREEN**.
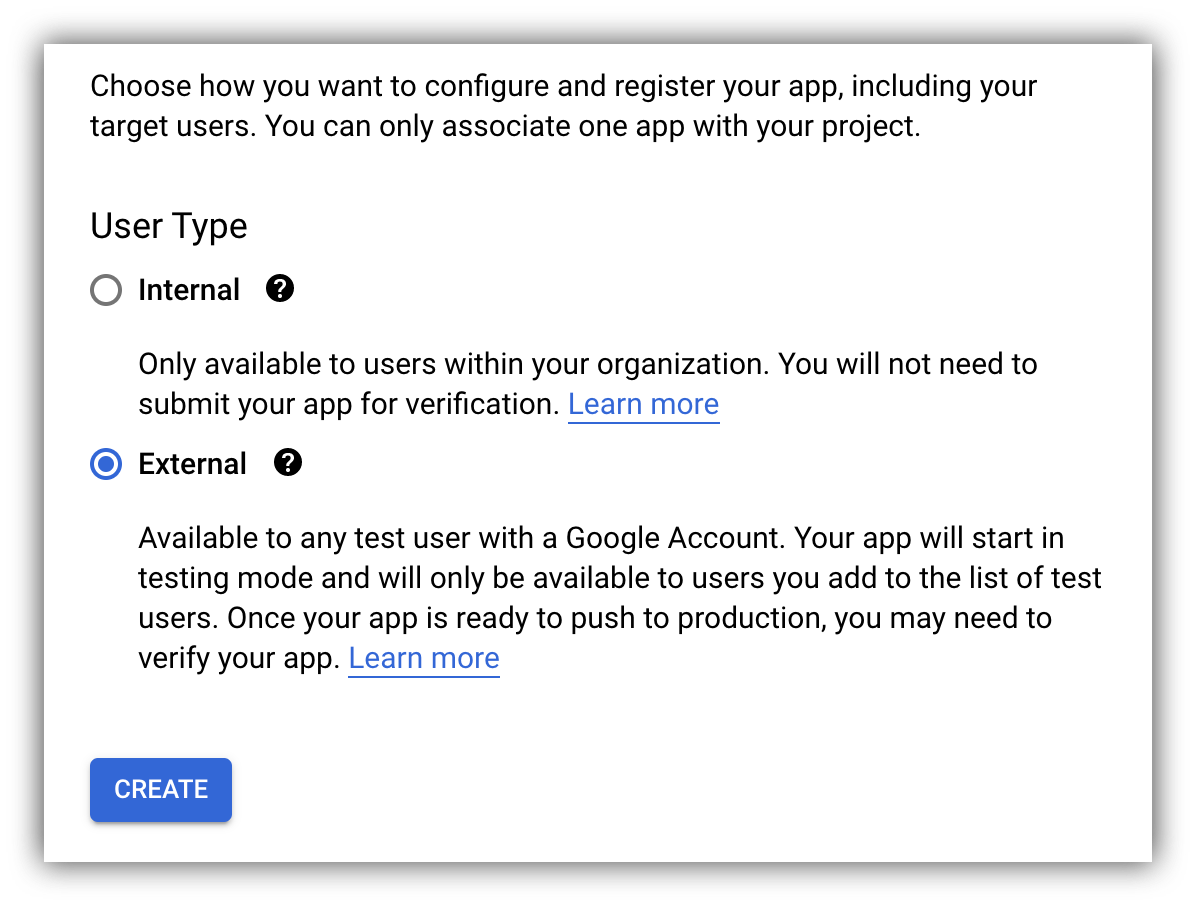
 Next, choose **External** for the **User Type** and click **Create**.
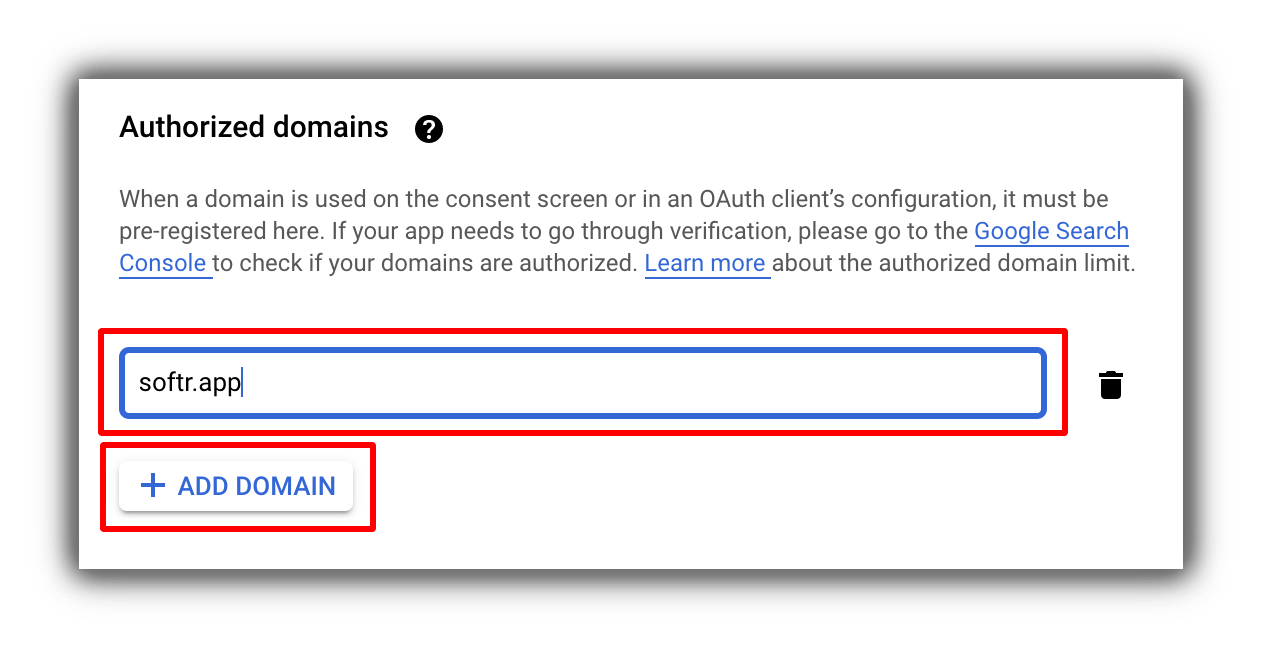
 In the next page, you need to fill in your app details. Here, it's important to add your Softr domain to the **Authorized Domains**. To do that, you need to click **Add Domain** under the corresponding section and fill in your domain as shown below.
If your Softr app is on a Softr subdomain (e.g. john.softr.app), then you need to add "softr.app" as the authorized domain. If you've connected a custom domain (e.g. [yourdomain.com](http://yourdomain.com/)), just add your domain as it is.
In the next page, you need to fill in your app details. Here, it's important to add your Softr domain to the **Authorized Domains**. To do that, you need to click **Add Domain** under the corresponding section and fill in your domain as shown below.
If your Softr app is on a Softr subdomain (e.g. john.softr.app), then you need to add "softr.app" as the authorized domain. If you've connected a custom domain (e.g. [yourdomain.com](http://yourdomain.com/)), just add your domain as it is.
 In the next steps, you can define **Scopes**, add **Test Users**, and finalize the setup. As soon as you're, done, click **Back to Dashboard** at the bottom of the screen. Now, let's proceed to creating the credentials to connect your app from Softr.
## Creating Credentials
From the **Credentials** section click on **Create Credentials** and choose **OAuth client ID**.
In the next steps, you can define **Scopes**, add **Test Users**, and finalize the setup. As soon as you're, done, click **Back to Dashboard** at the bottom of the screen. Now, let's proceed to creating the credentials to connect your app from Softr.
## Creating Credentials
From the **Credentials** section click on **Create Credentials** and choose **OAuth client ID**.
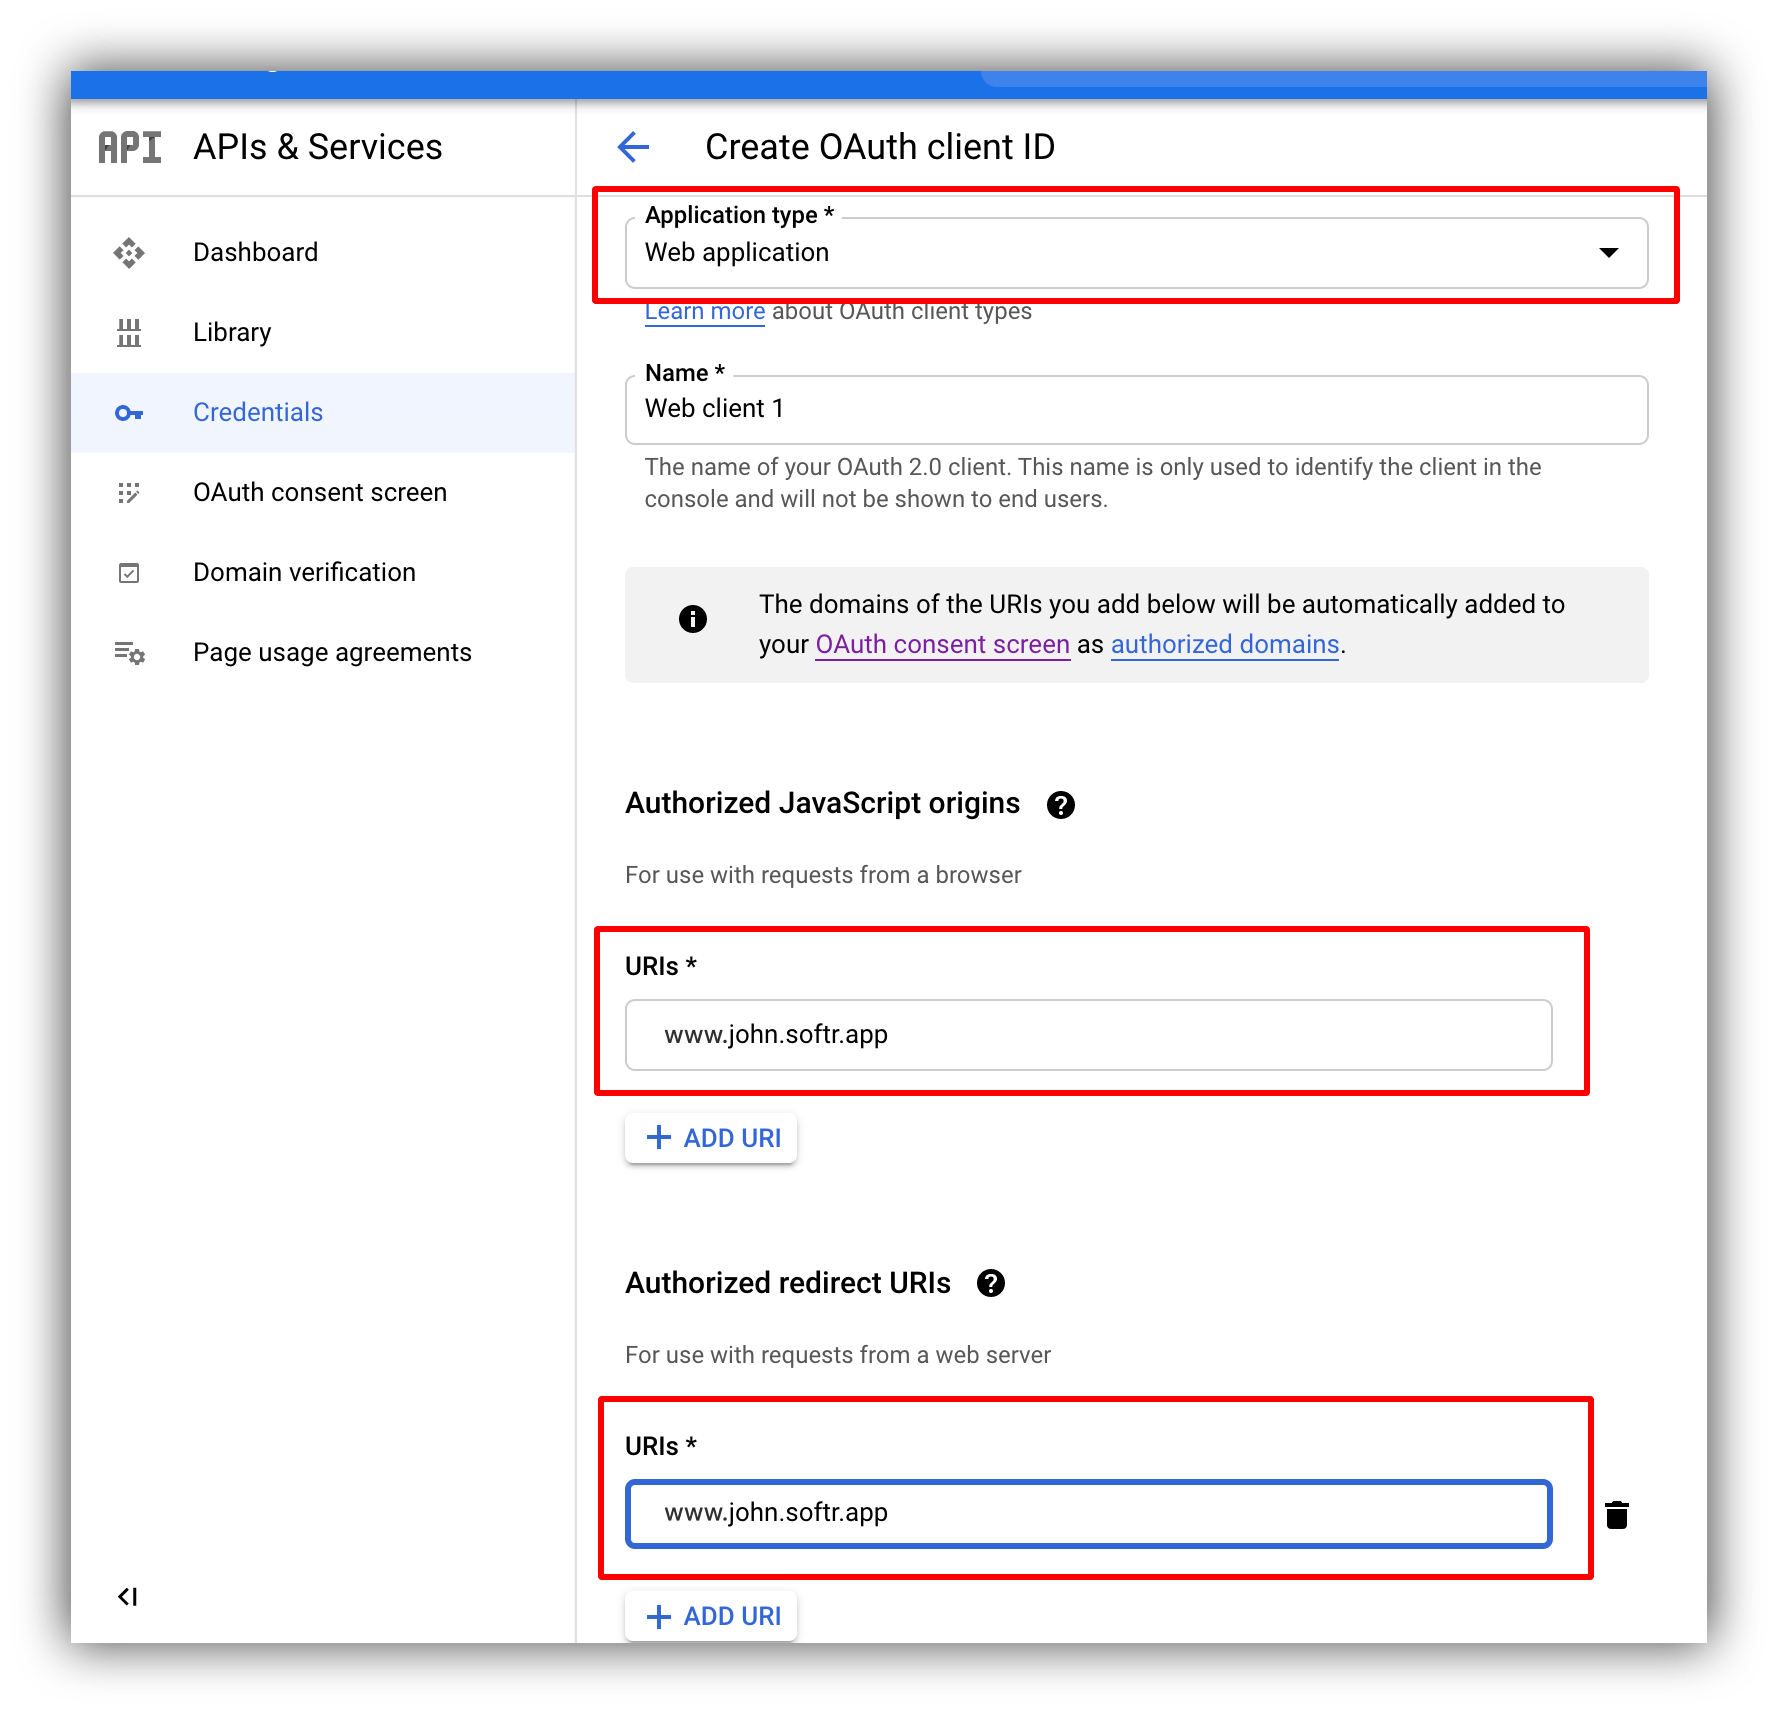
 In the next screen, you need to select the **Application type** as **Web application** and add your full domain (e.g. [www.john.softr.app](http://www.john.softr.app) or [www.yourdomain.com](http://www.yourdomain.com)) under **Authorized JavaScript origins** **URIs** and **Authorized redirect URIs**.
Make sure to have `www` in the URIs.
In the next screen, you need to select the **Application type** as **Web application** and add your full domain (e.g. [www.john.softr.app](http://www.john.softr.app) or [www.yourdomain.com](http://www.yourdomain.com)) under **Authorized JavaScript origins** **URIs** and **Authorized redirect URIs**.
Make sure to have `www` in the URIs.
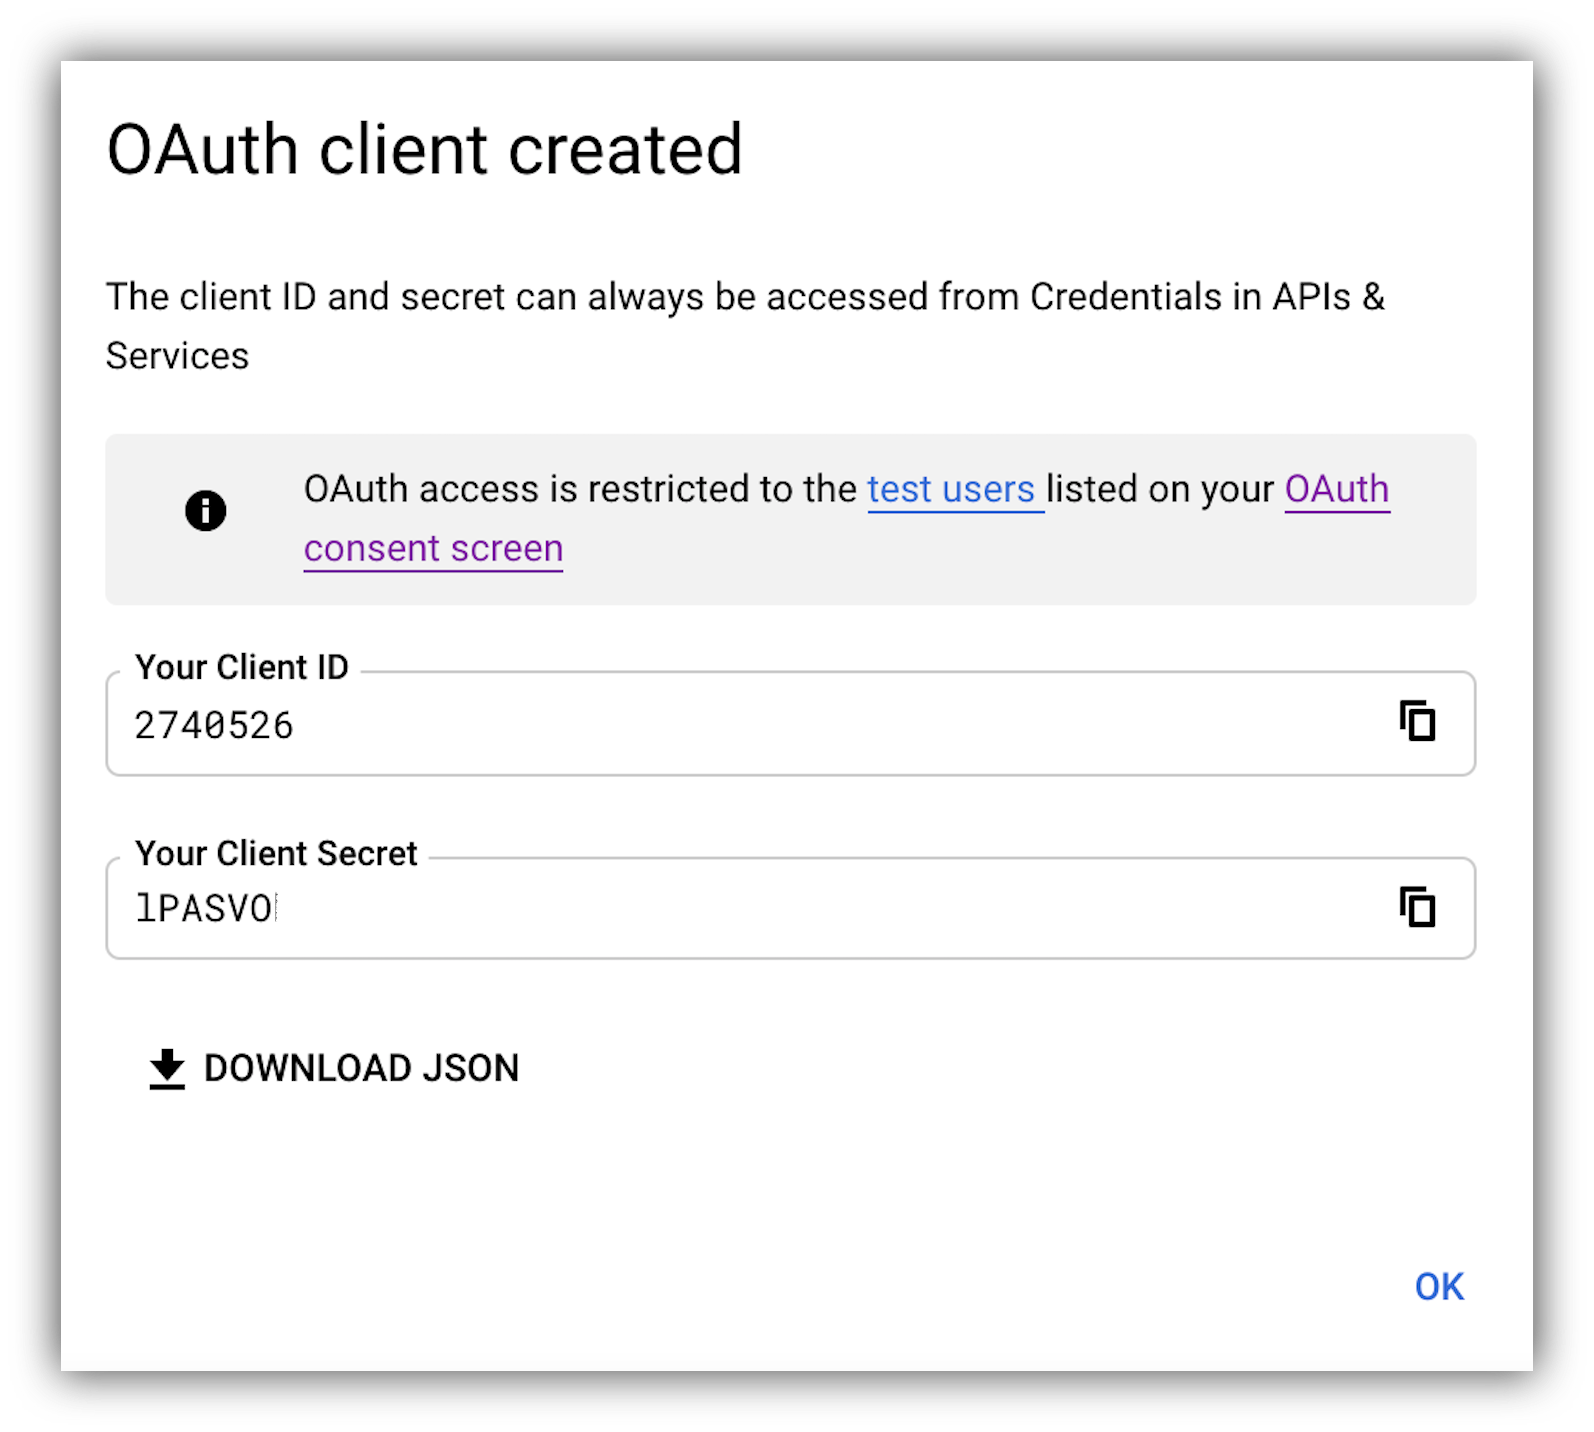
 As soon as you complete the setup, a pop-up will appear with your **Client ID** and **Client Secret**.
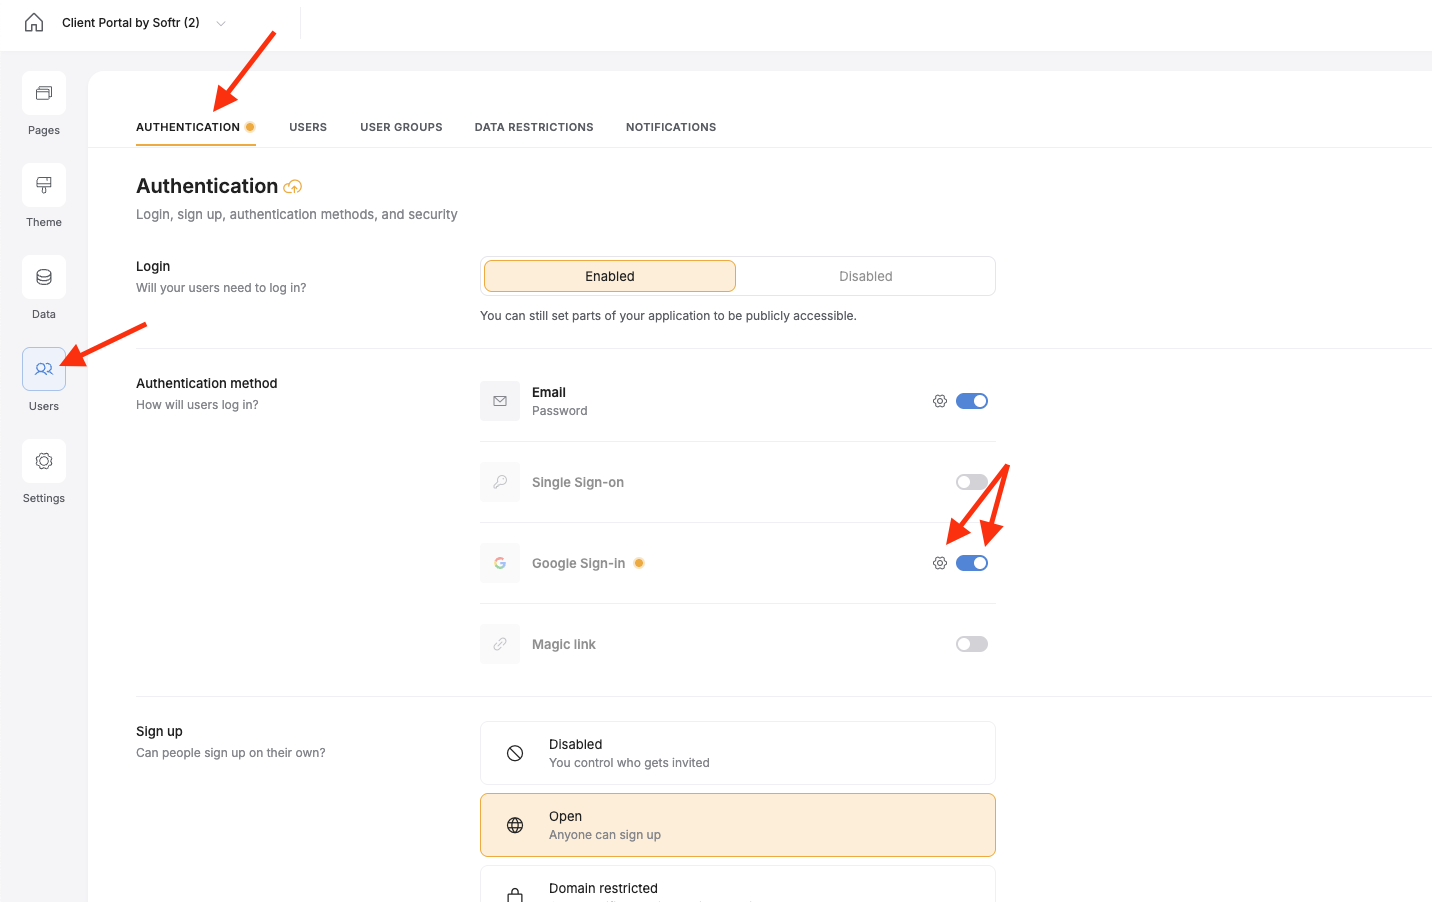
 Just copy those values in the Authentication Tab of the Users menu. Turn on the Google Sign-in toggle, then click the gear icon to open the setup dialog.
 Paste the client ID and secret into the respective fields. Be sure to select Internal or External users like you did on the Google cloud console side. If you select internal, you need to define the allowed domains for signup/login.
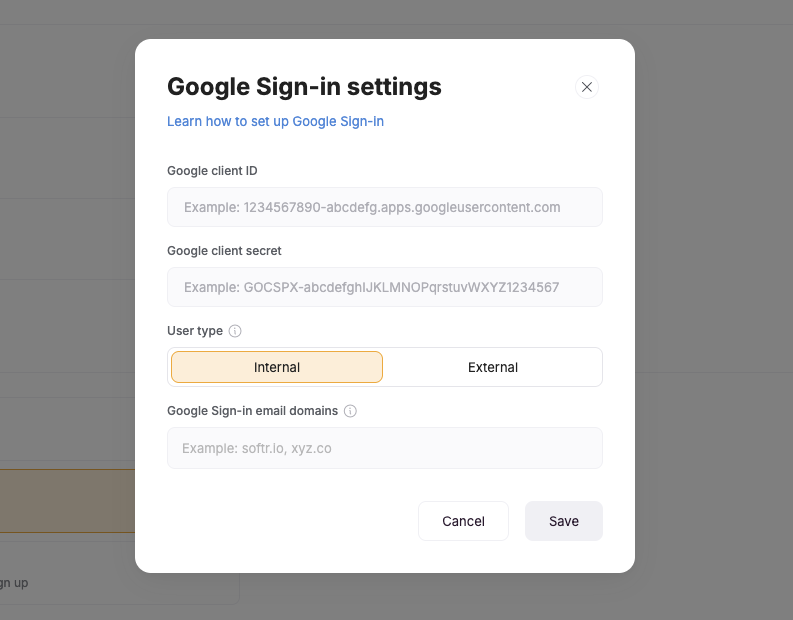 Once these are pasted in, click Save and you’re done!