> ## Documentation Index
> Fetch the complete documentation index at: https://docs.softr.io/llms.txt
> Use this file to discover all available pages before exploring further.
# Facebook Pixel
> Integrating Facebook Pixel on your Softr app.
The [Facebook Pixel](https://www.facebook.com/business/tools/meta-pixel) is a code snippet placed on your website or web app that lets you track and optimize the audience that visits your site as a result of your Facebook ad campaigns (paid) or organically (unpaid). For instance, if someone lands on your website and then makes a purchase or performs some other action, you can track that activity through Facebook Pixel and tie it to a Facebook Ad. Thus, Pixel tracks all the actions that users make on your website but then ties that traffic directly to an ad if you are running Facebook ads. Then, you can, for instance, retarget your Facebook ads to show them only to your website visitors.
In order to activate the Pixel on your Softr app, you need to locate your **Pixel ID** and add it in **Settings⇒Integrations⇒Facebook Pixel**. Let’s see where you can find the ID.
## Connecting Facebook Pixel
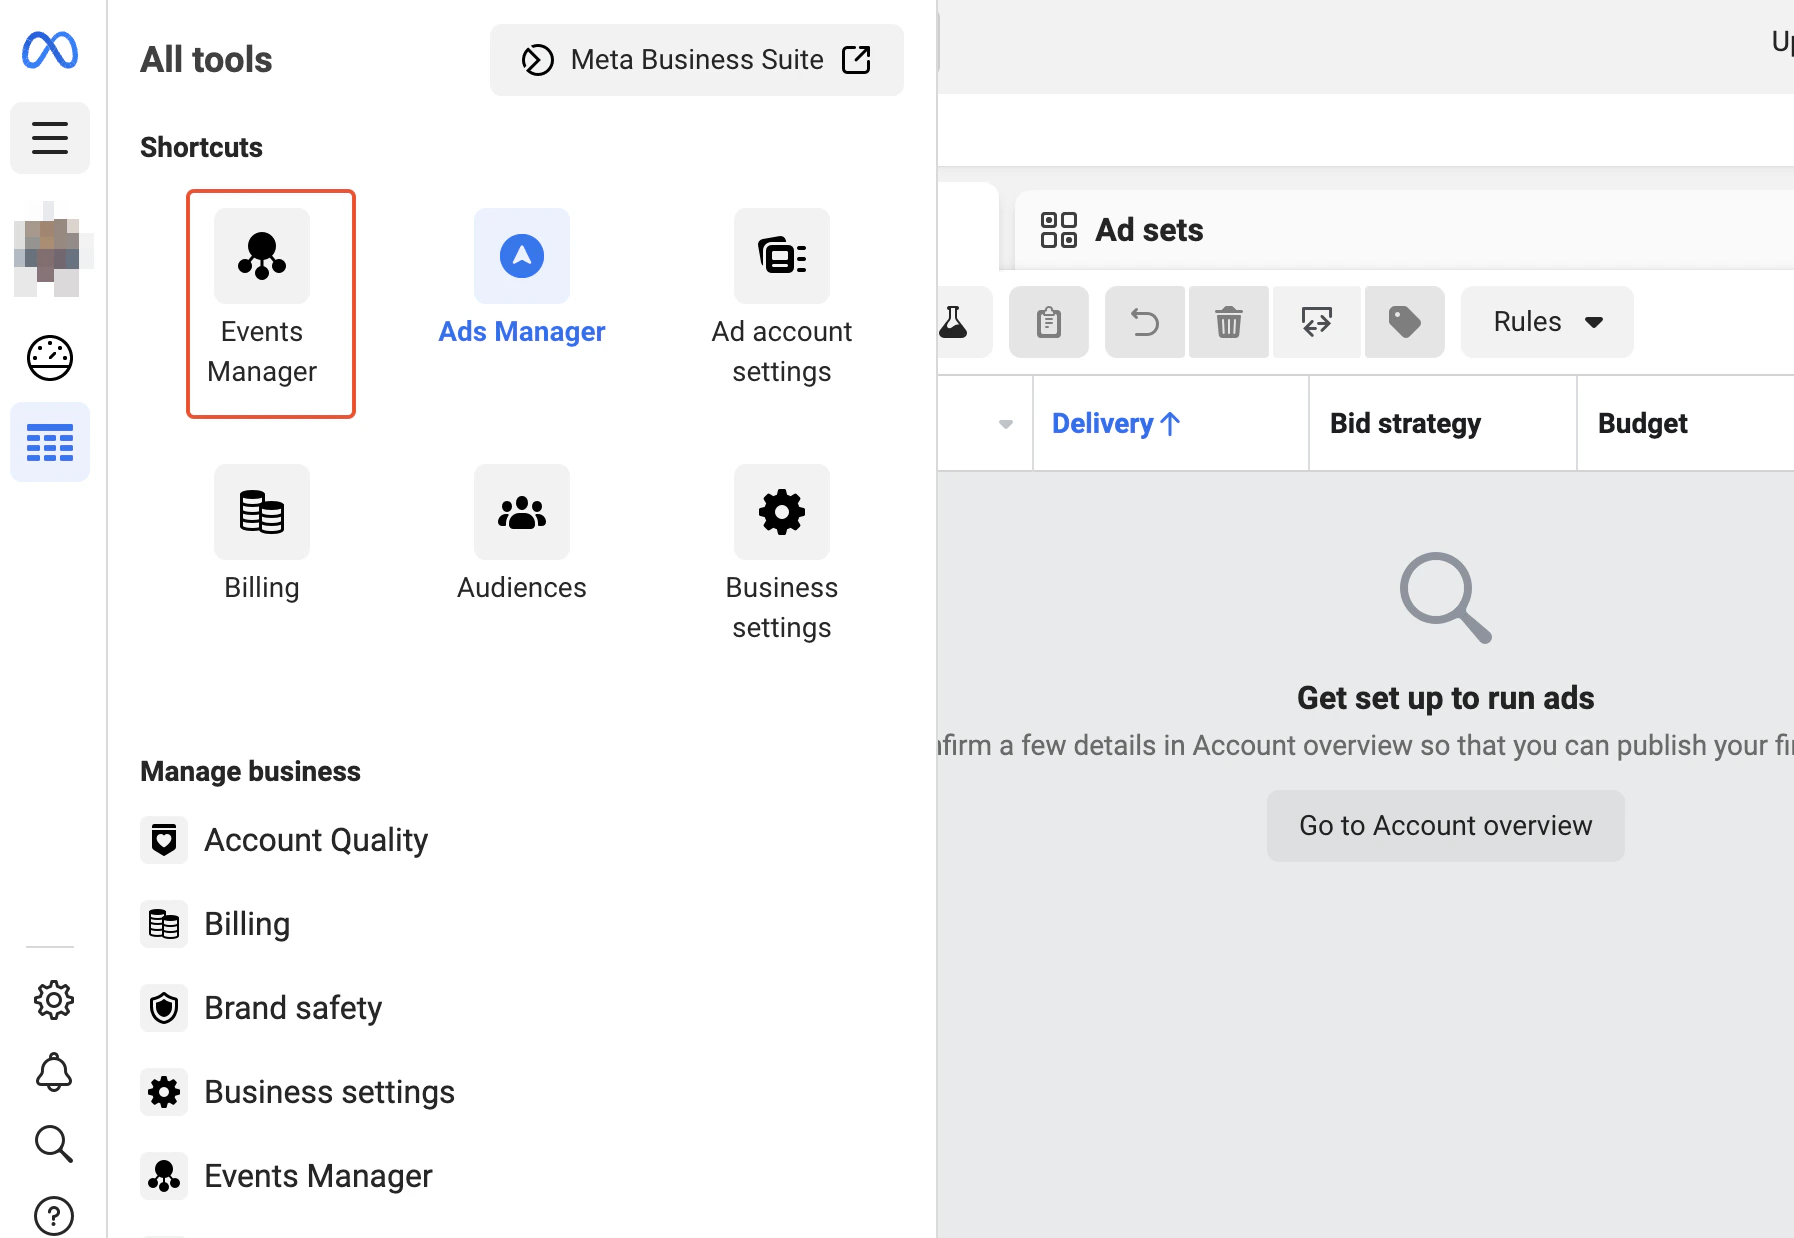
Navigate to Facebook [Ads Manager](https://www.facebook.com/business/tools/ads-manager) and, in the left-hand navigation menu, locate the **Events Manager** tool.
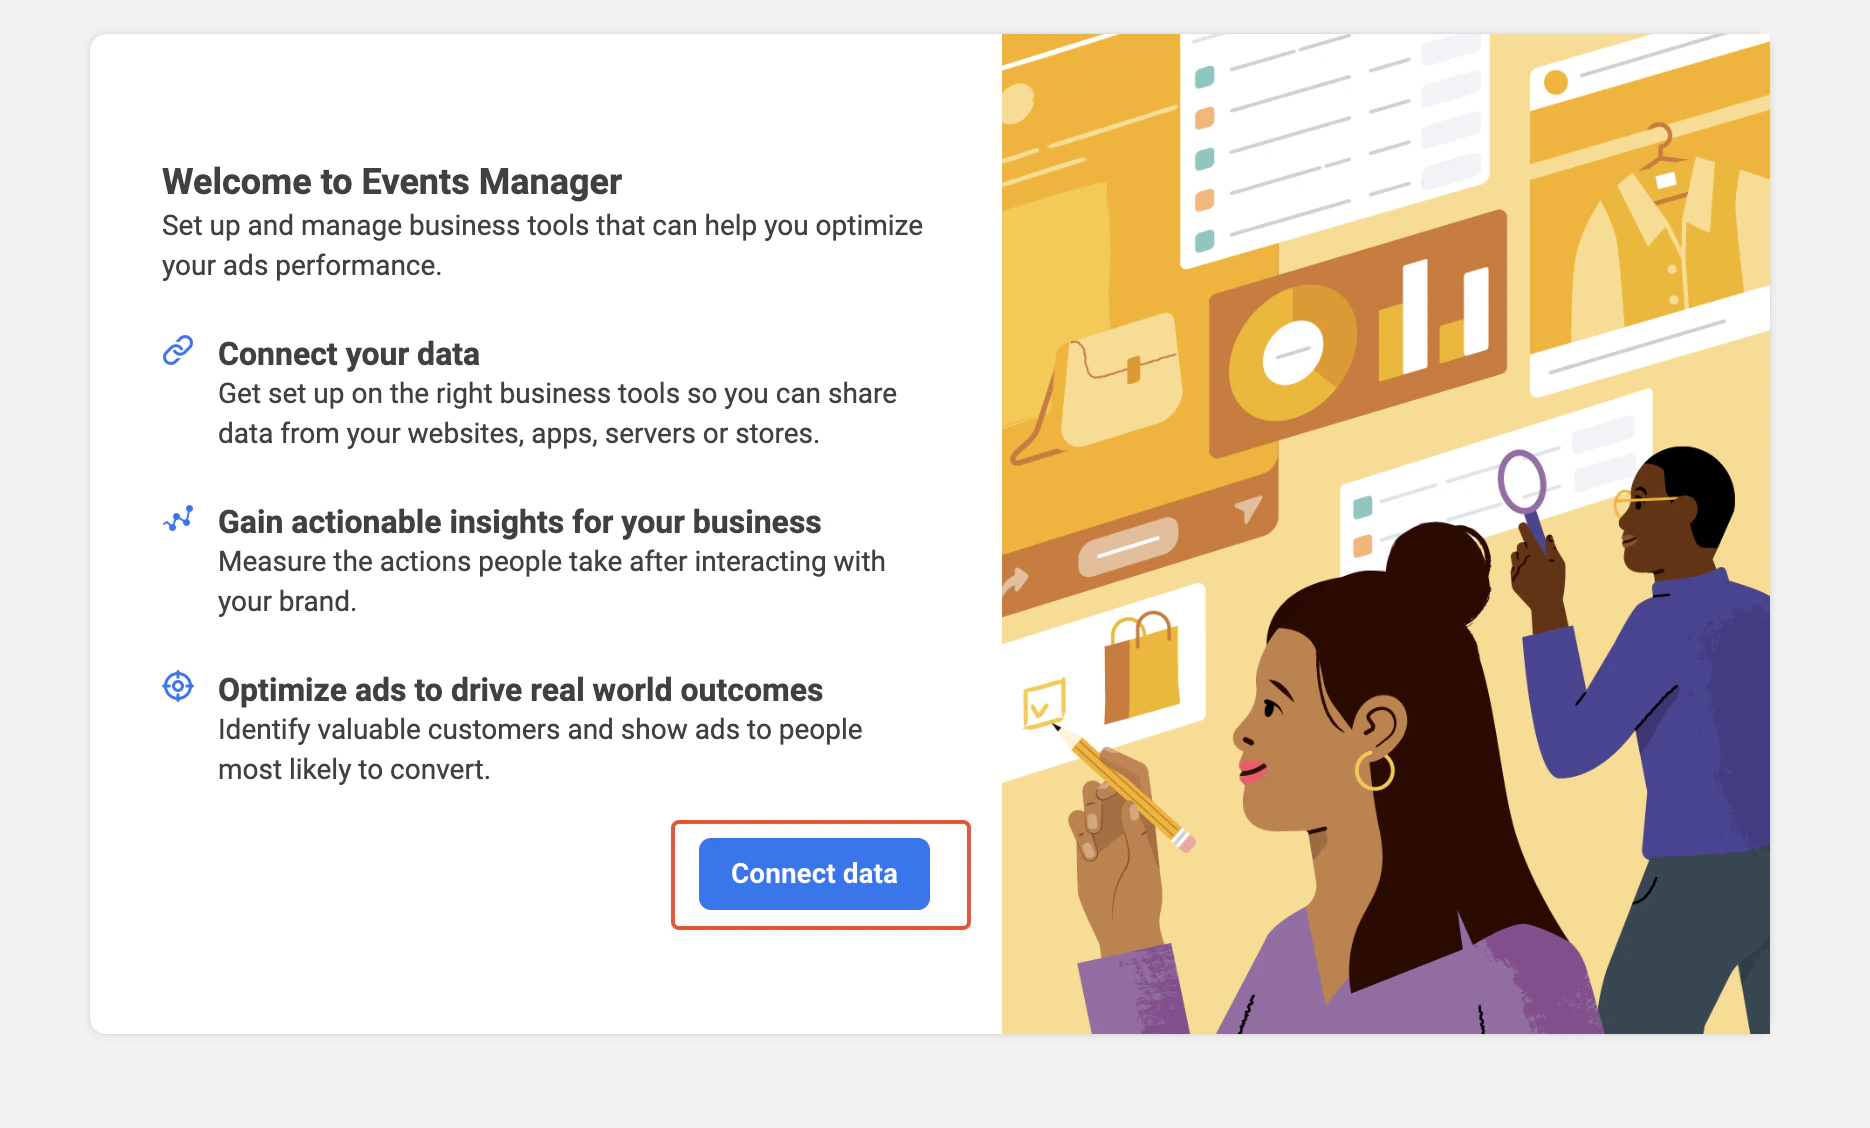
 Next, if you don’t yet have any data connected, a pop-up will appears, prompting you to connect your data. Hit **Connect Data** to continue.
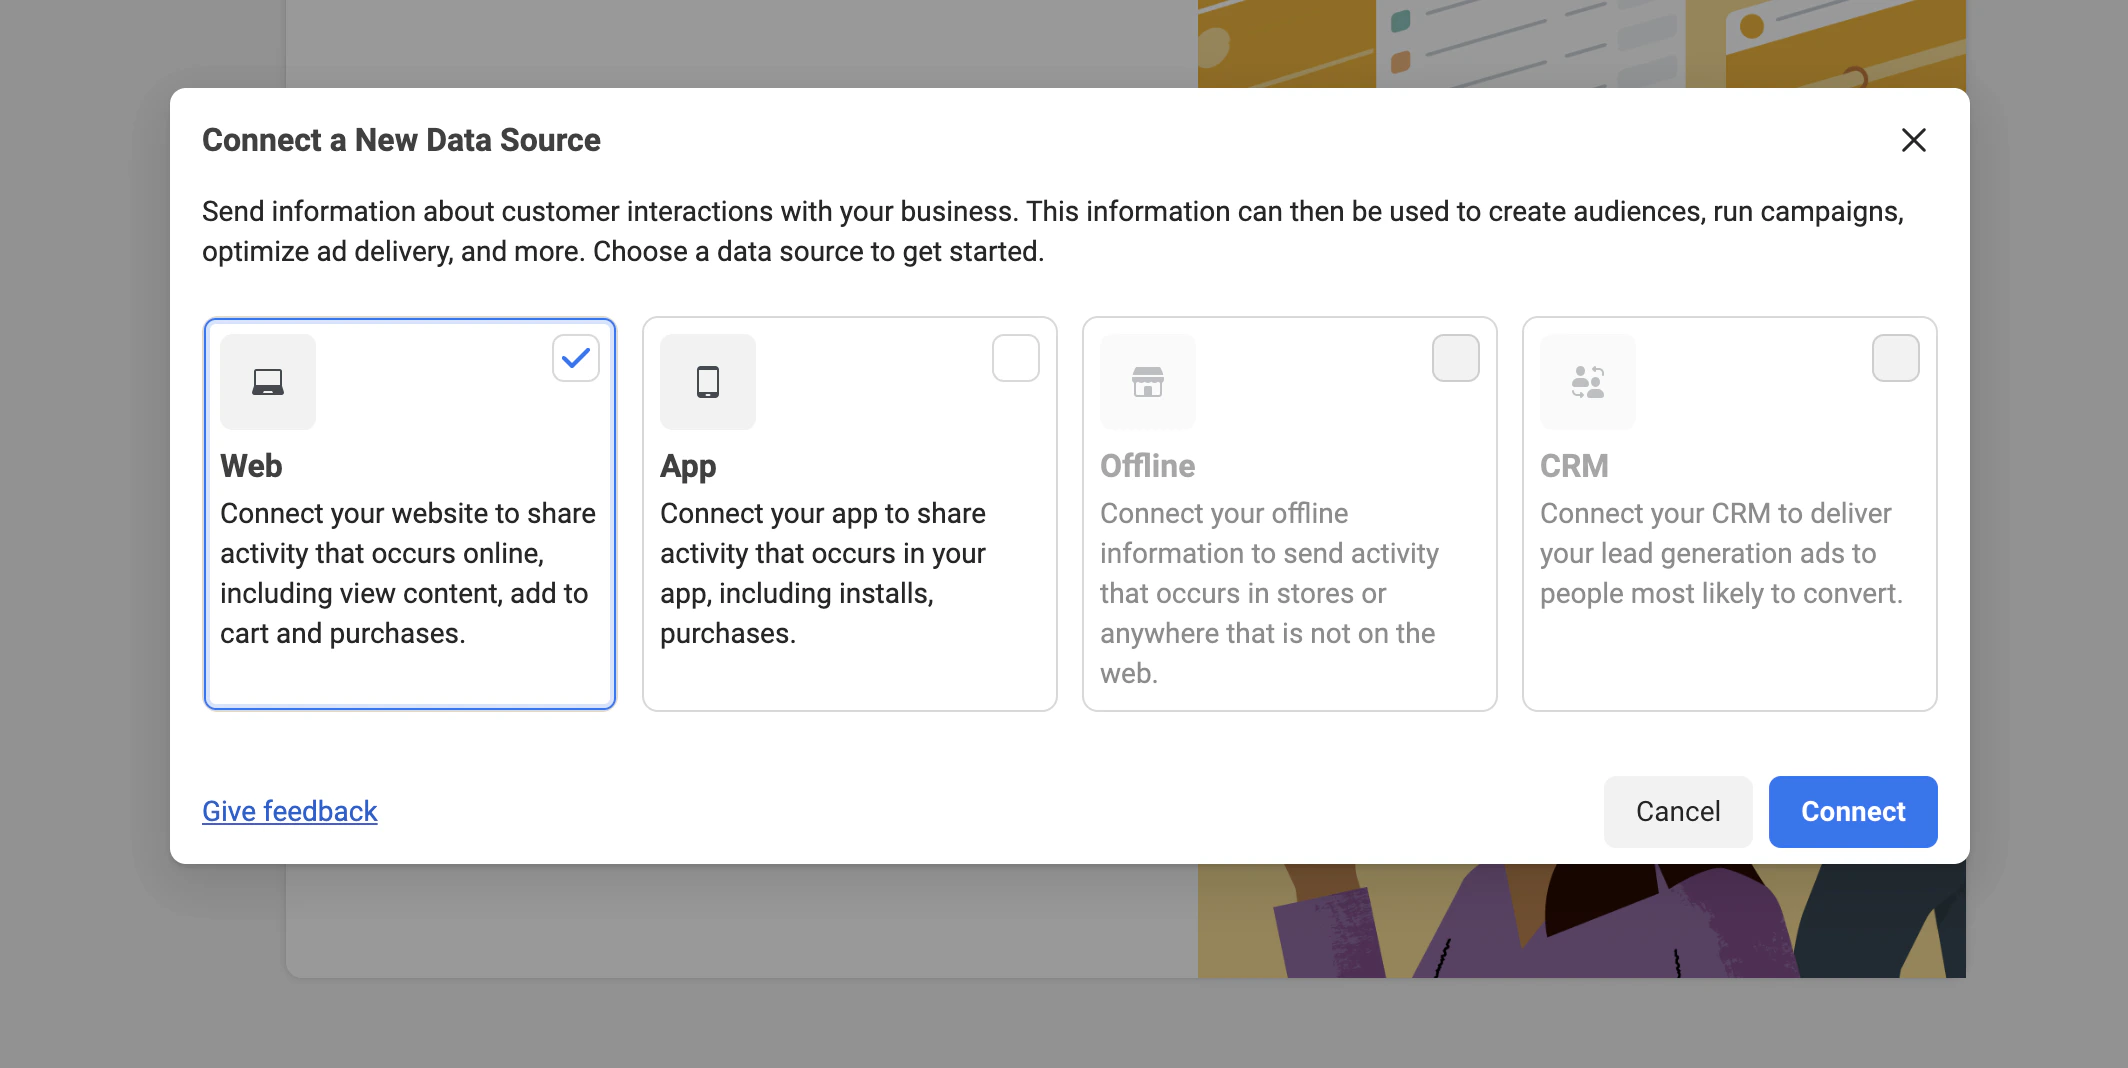
 Choose the **Web** option and hit **Connect**.
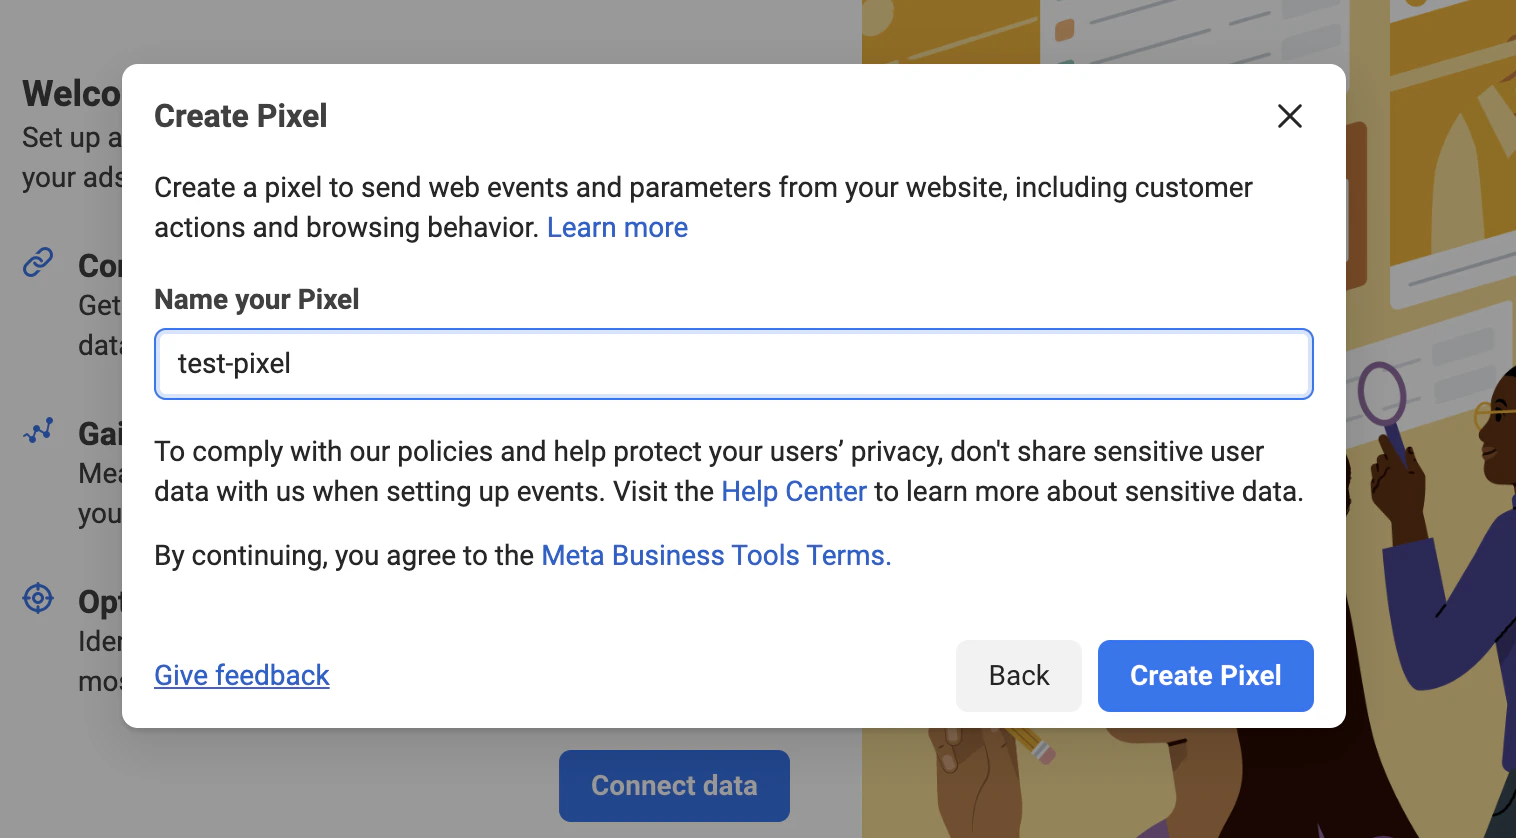
 Further on, you need to name your Pixel.
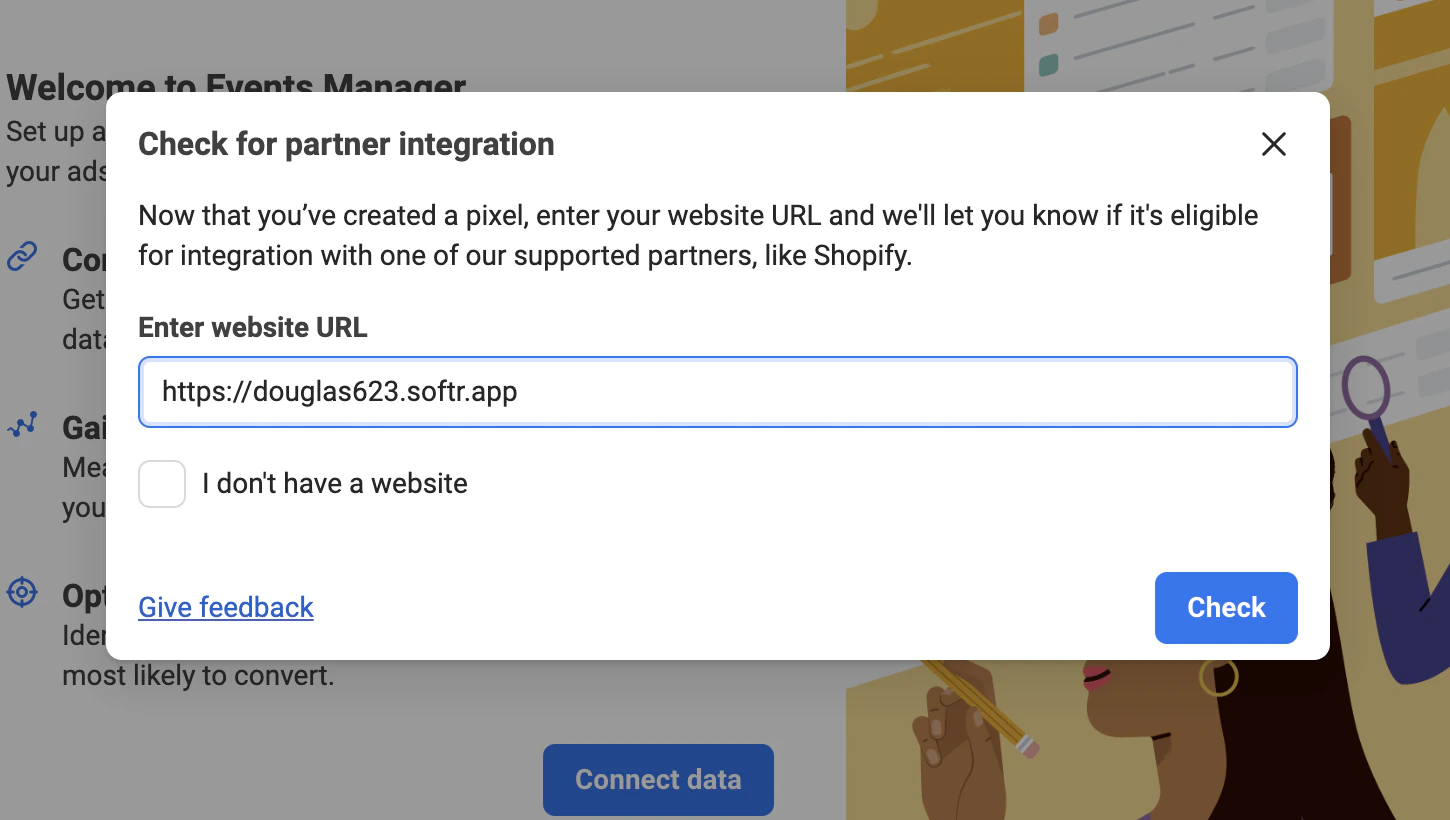
 And also enter your website URL.
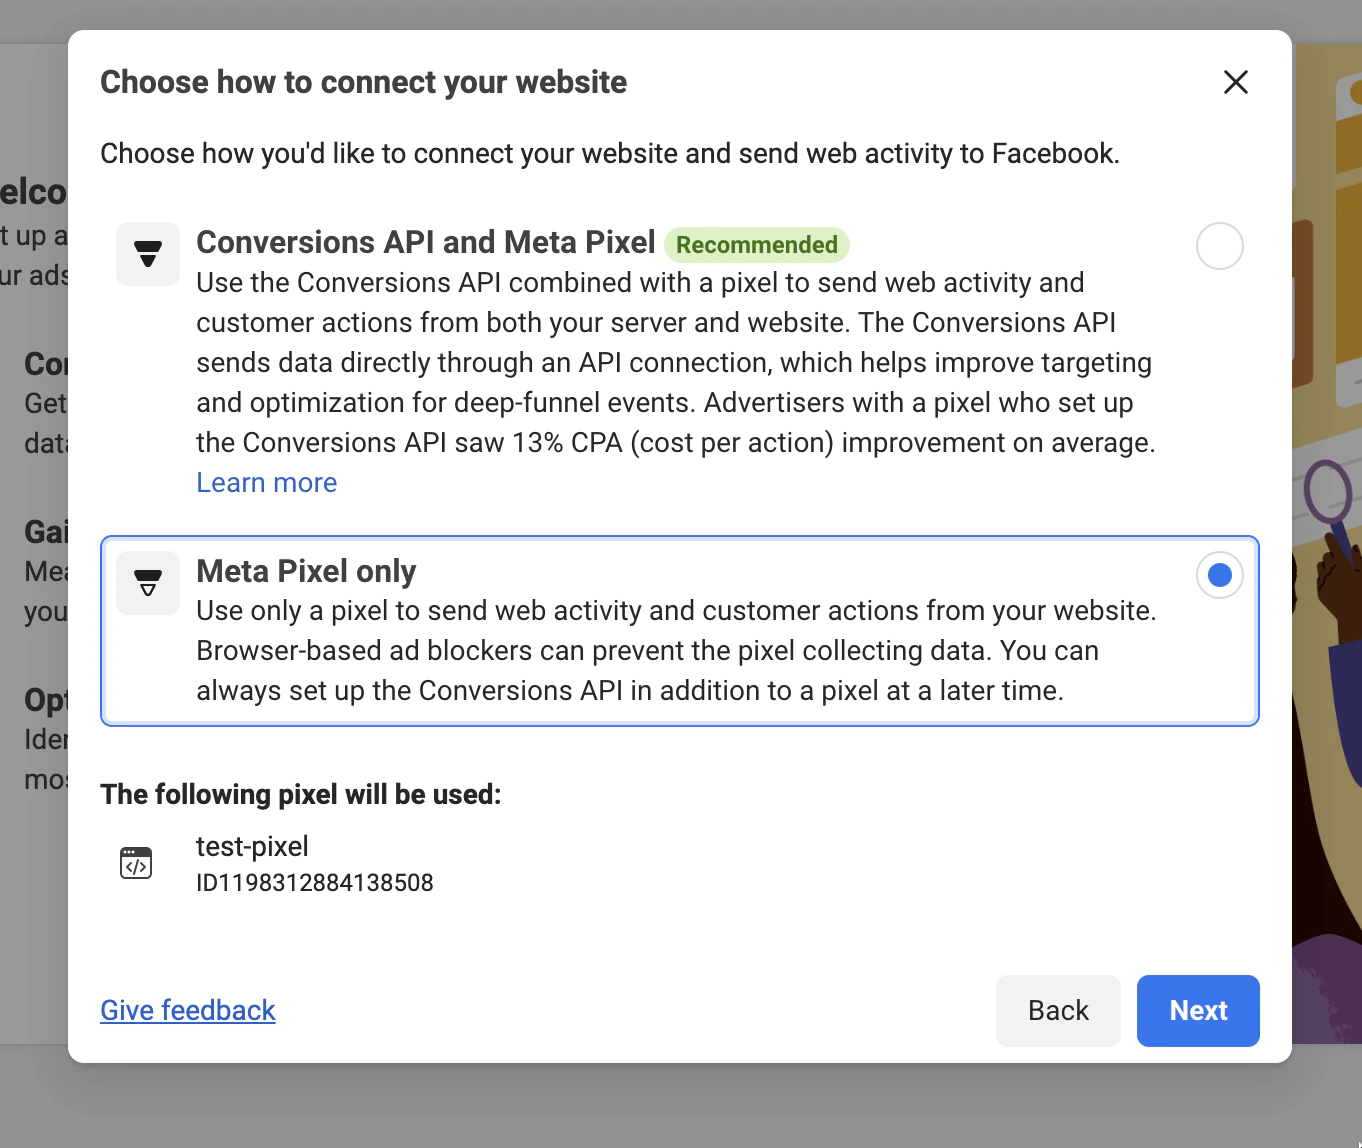
 In the following screen, you need to choose the connection type. **Conversions API** **+ Meta Pixel** is a more advanced option, and you can learn more about it [here](https://www.facebook.com/business/help/2041148702652965?id=818859032317965). Here, we are going to choose the **Meta Pixel only** option and finalize the setup.
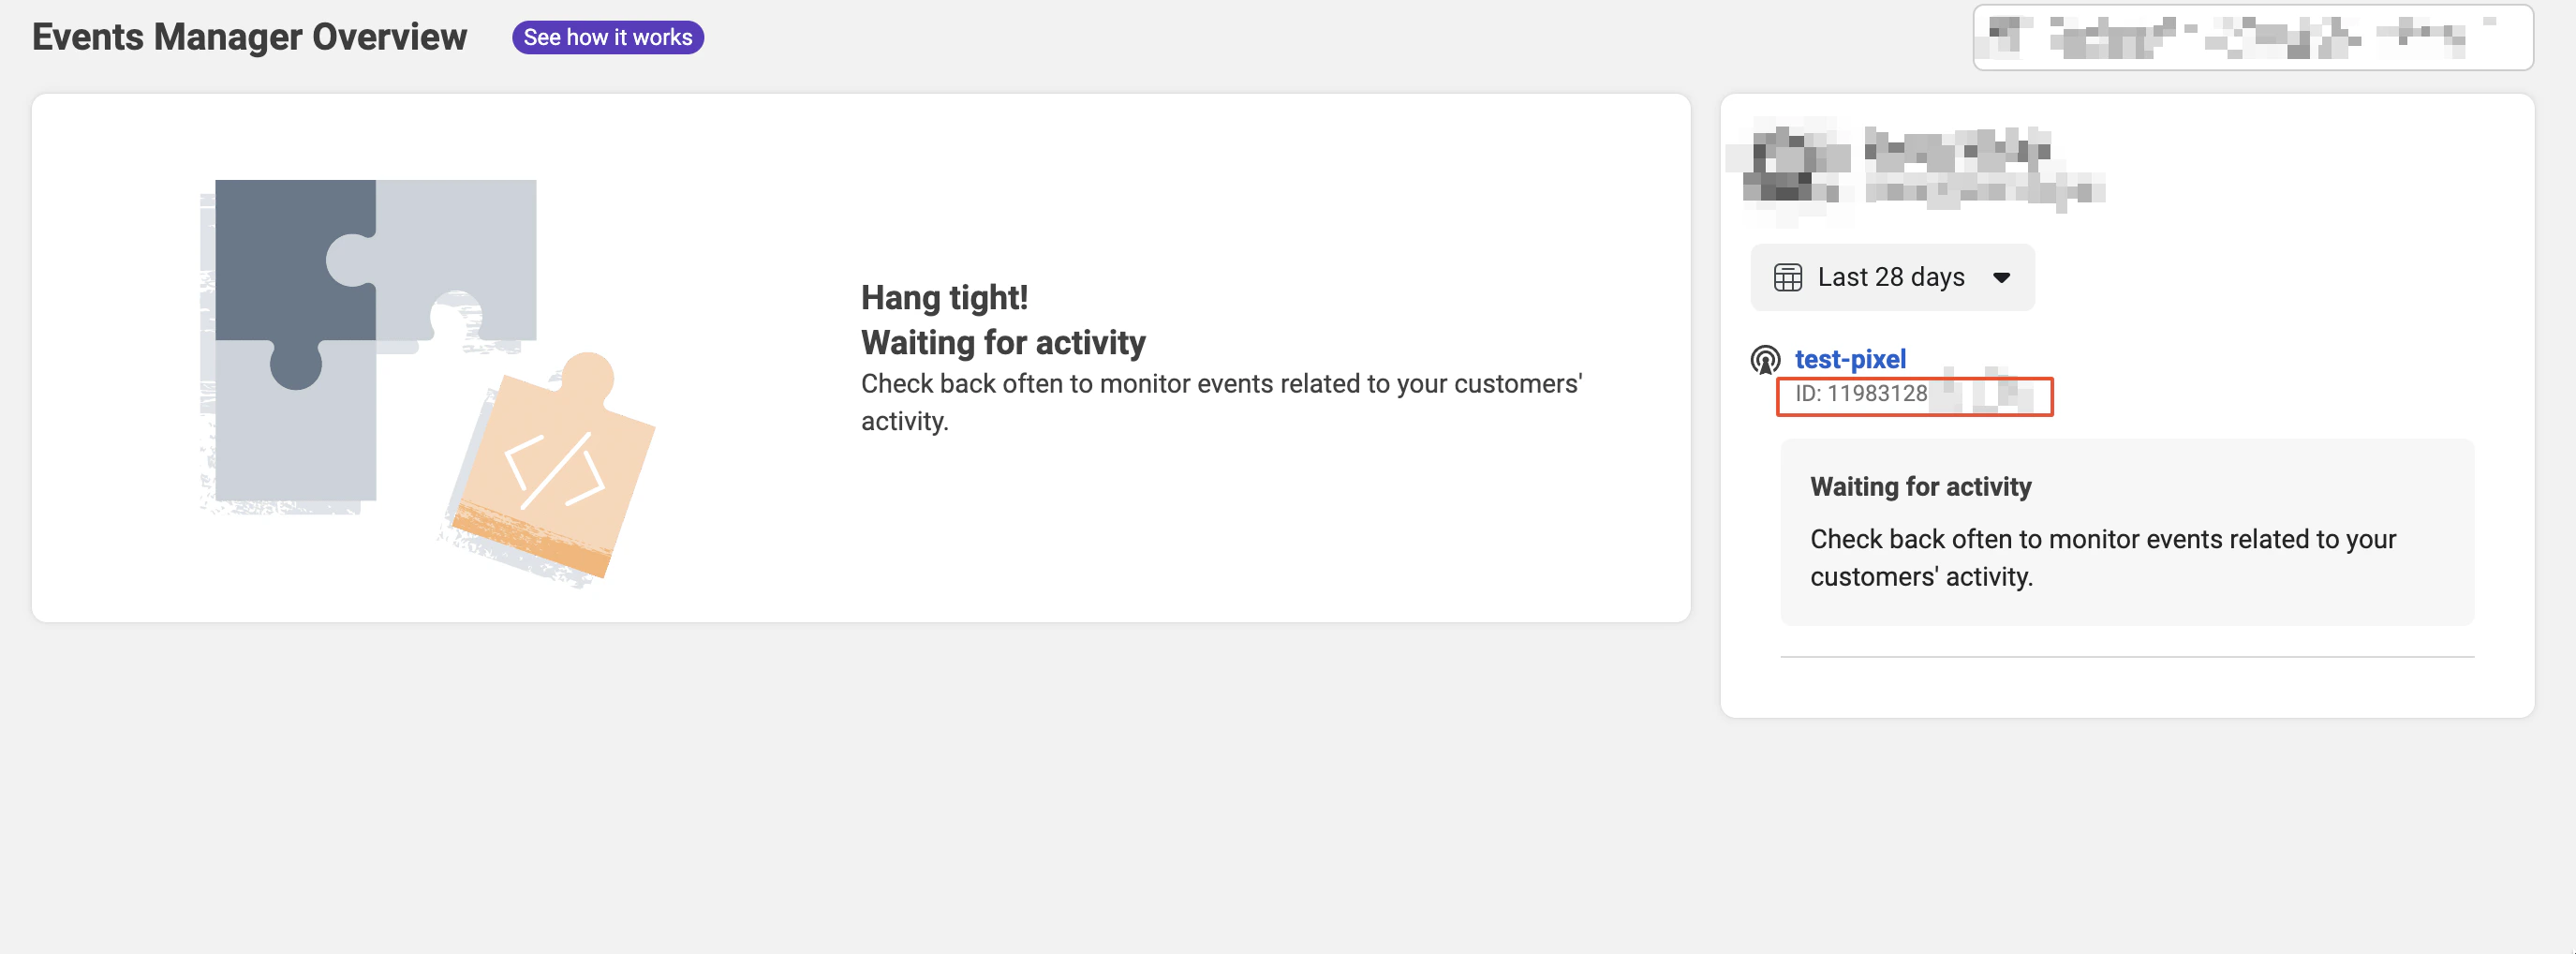
 As soon as you finish setting up your Pixel, you’ll be taken to the **Events Manager Overview**, where you should see all the Pixel-related activity. Here, you need to locate your Pixel ID (shown in the screenshot below) and paste in your Softr app’s **Settings ⇒ Integrations ⇒ Facebook Pixel**.
 That’s it. Now, you should start receiving activity from your site.
It can take up to 24 hours before Facebook starts recording activity from the Pixel.
Now, let’s see how you can make sure Pixel is installed correctly on your site.
## Testing Facebook Pixel
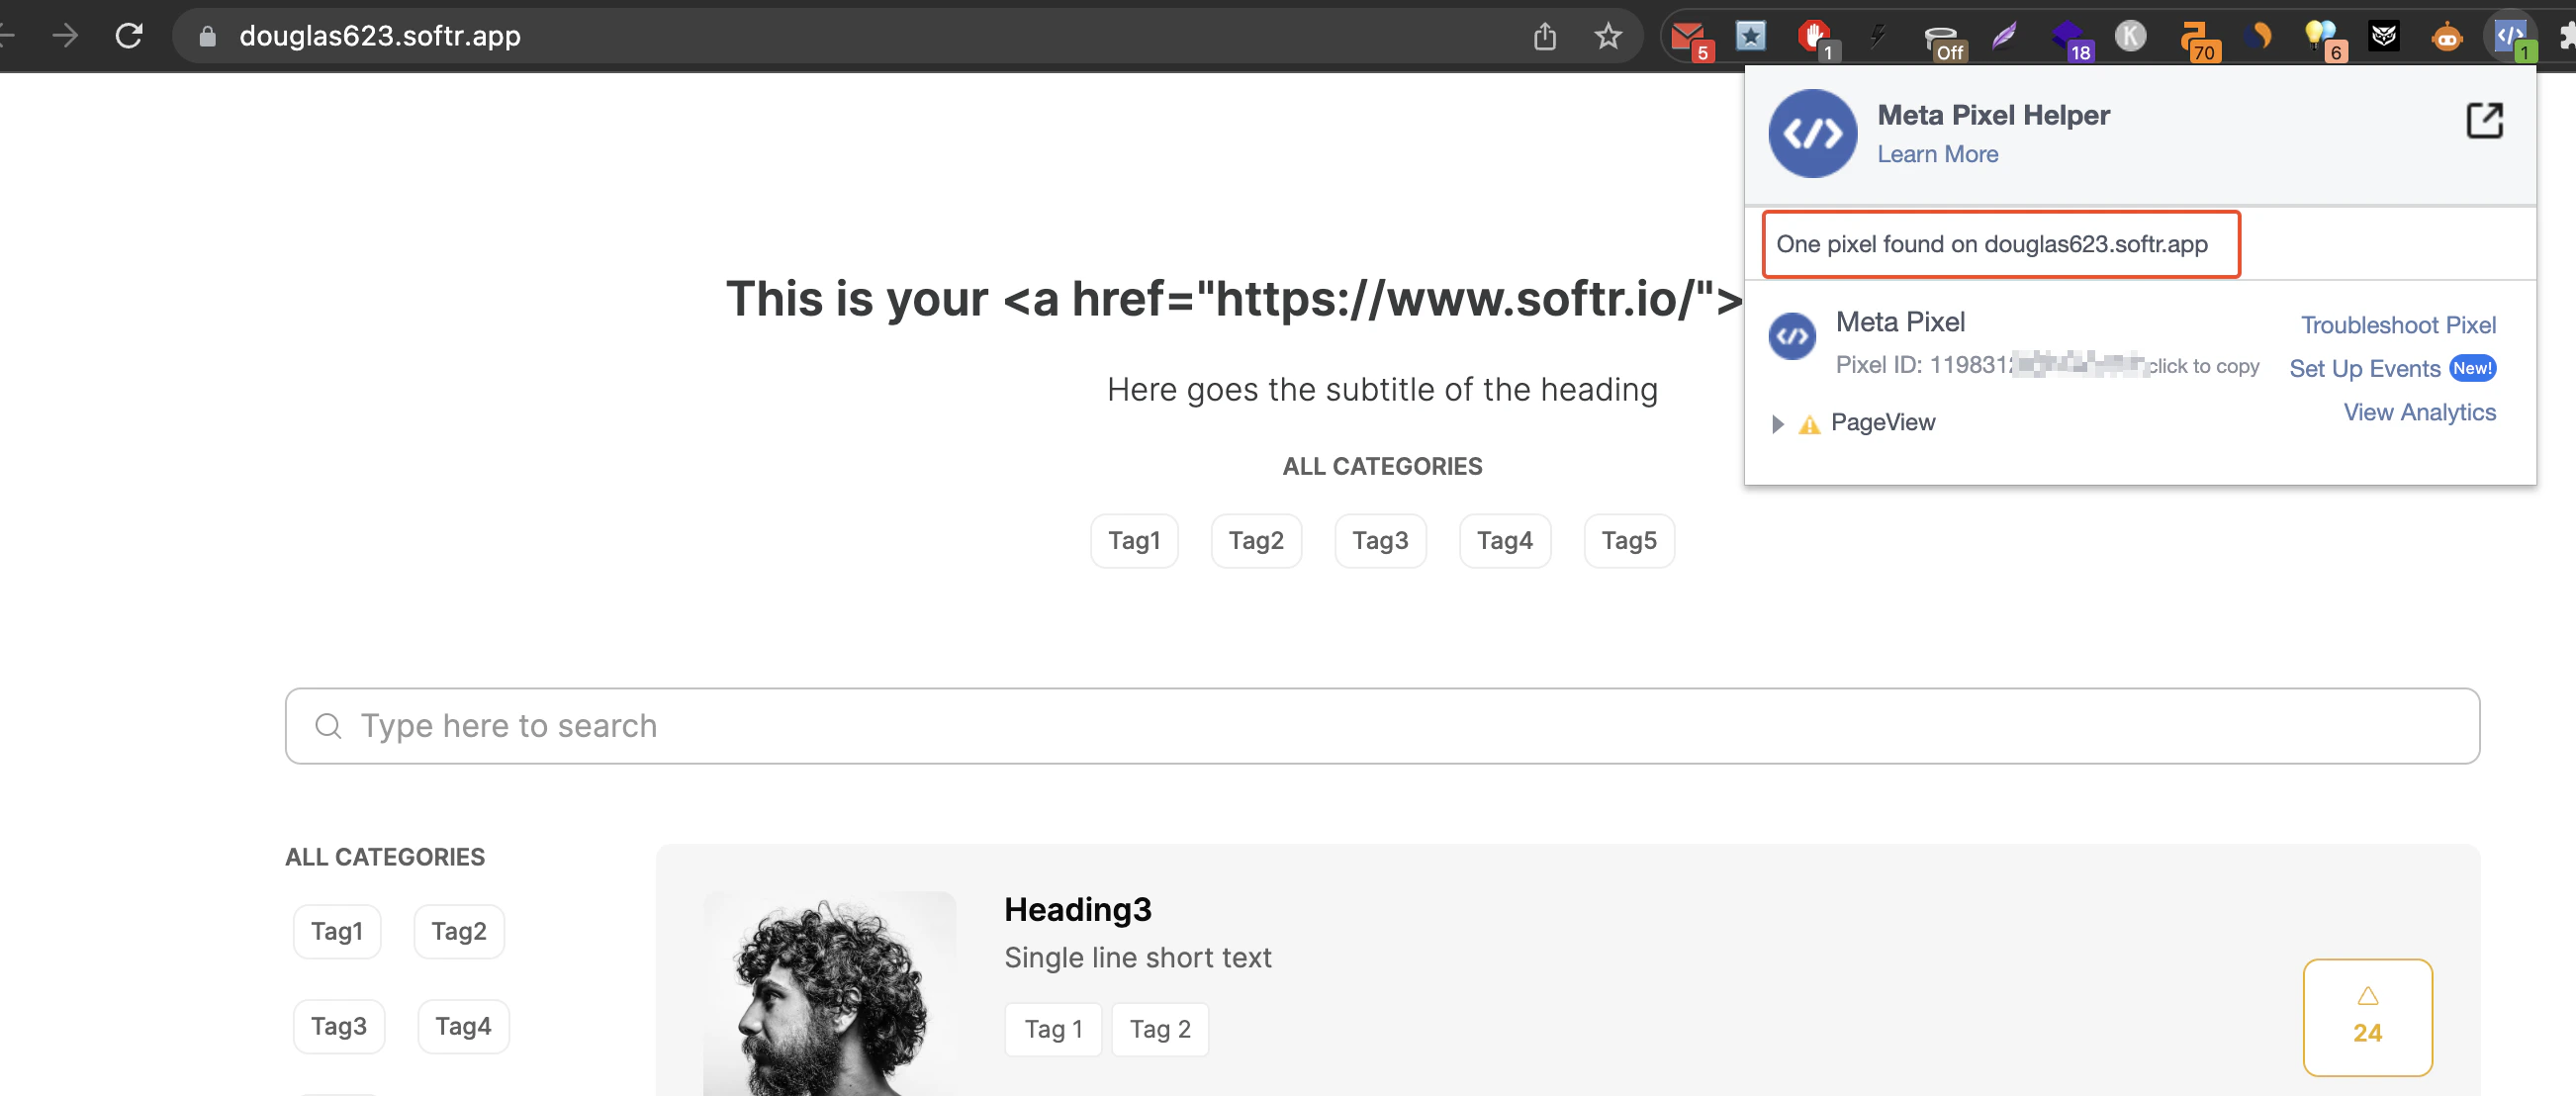
If you use Chrome, there’s a handy extensions called [Meta Pixel Helper](https://chrome.google.com/webstore/detail/meta-pixel-helper/fdgfkebogiimcoedlicjlajpkdmockpc) that lets you test Pixel setup on any of your site’s pages. Just activate the extension and open it on any of the pages where you have Pixel installed. Below, you can see how we test it on an app we just installed Pixel on. As you can see, the extension is able to detect the Pixel successfully.
That’s it. Now, you should start receiving activity from your site.
It can take up to 24 hours before Facebook starts recording activity from the Pixel.
Now, let’s see how you can make sure Pixel is installed correctly on your site.
## Testing Facebook Pixel
If you use Chrome, there’s a handy extensions called [Meta Pixel Helper](https://chrome.google.com/webstore/detail/meta-pixel-helper/fdgfkebogiimcoedlicjlajpkdmockpc) that lets you test Pixel setup on any of your site’s pages. Just activate the extension and open it on any of the pages where you have Pixel installed. Below, you can see how we test it on an app we just installed Pixel on. As you can see, the extension is able to detect the Pixel successfully.
 ## Tracking more events
What we just did is just the basic setup of Facebook Pixel. However, you can do much more with it, adding [standard and custom events](https://www.facebook.com/business/help/964258670337005?id=1205376682832142) to track such actions as add to cart, purchase, and more.
You can use the [Header Custom Code](/0392ff65acfe4b1c96923c1aac7982f7) of your Softr page to add the event code.
## Tracking more events
What we just did is just the basic setup of Facebook Pixel. However, you can do much more with it, adding [standard and custom events](https://www.facebook.com/business/help/964258670337005?id=1205376682832142) to track such actions as add to cart, purchase, and more.
You can use the [Header Custom Code](/0392ff65acfe4b1c96923c1aac7982f7) of your Softr page to add the event code.