> ## Documentation Index
> Fetch the complete documentation index at: https://docs.softr.io/llms.txt
> Use this file to discover all available pages before exploring further.
# Custom Code Block Overview
> Applying custom code on your Softr app.
Custom code is available for users on the [Basic plan and above](https://www.softr.io/pricing).
The **Custom code** block is a powerful feature which allows you to insert custom snippet of code, including **HTML, CSS** and/or **Javascript**, anywhere in your application. The code snippet will be added inside the html element.
**NOTE:** If you want to add custom code snippets inside "\" element, or at the end of the page, before the "\" element closes, you can do that from [Settings => Custom Code](/application-settings/n3K2UEfpC9BpHgakMzUU5Y/general-settings/7YdGy1J8X2tjJSv8BGvWQU) for application level changes or from [Page Settings](/0392ff65acfe4b1c96923c1aac7982f7) for page level modifications. This tutorial covers the cases when you want to add a code snippet anywhere inside the "\" element.
## Adding a Custom code block
Custom code is added through the Custom Code block in **Blocks => Static => Custom code**.
You need to be on a paid plan to be able to use the **Custom code** block.
## Adding the code inside the block
Next, you need to open the block settings and paste the code snippet you would like to add. It can contain standard **HTML elements**, elements containing custom CSS rules, and even tags containing JavaScript code.
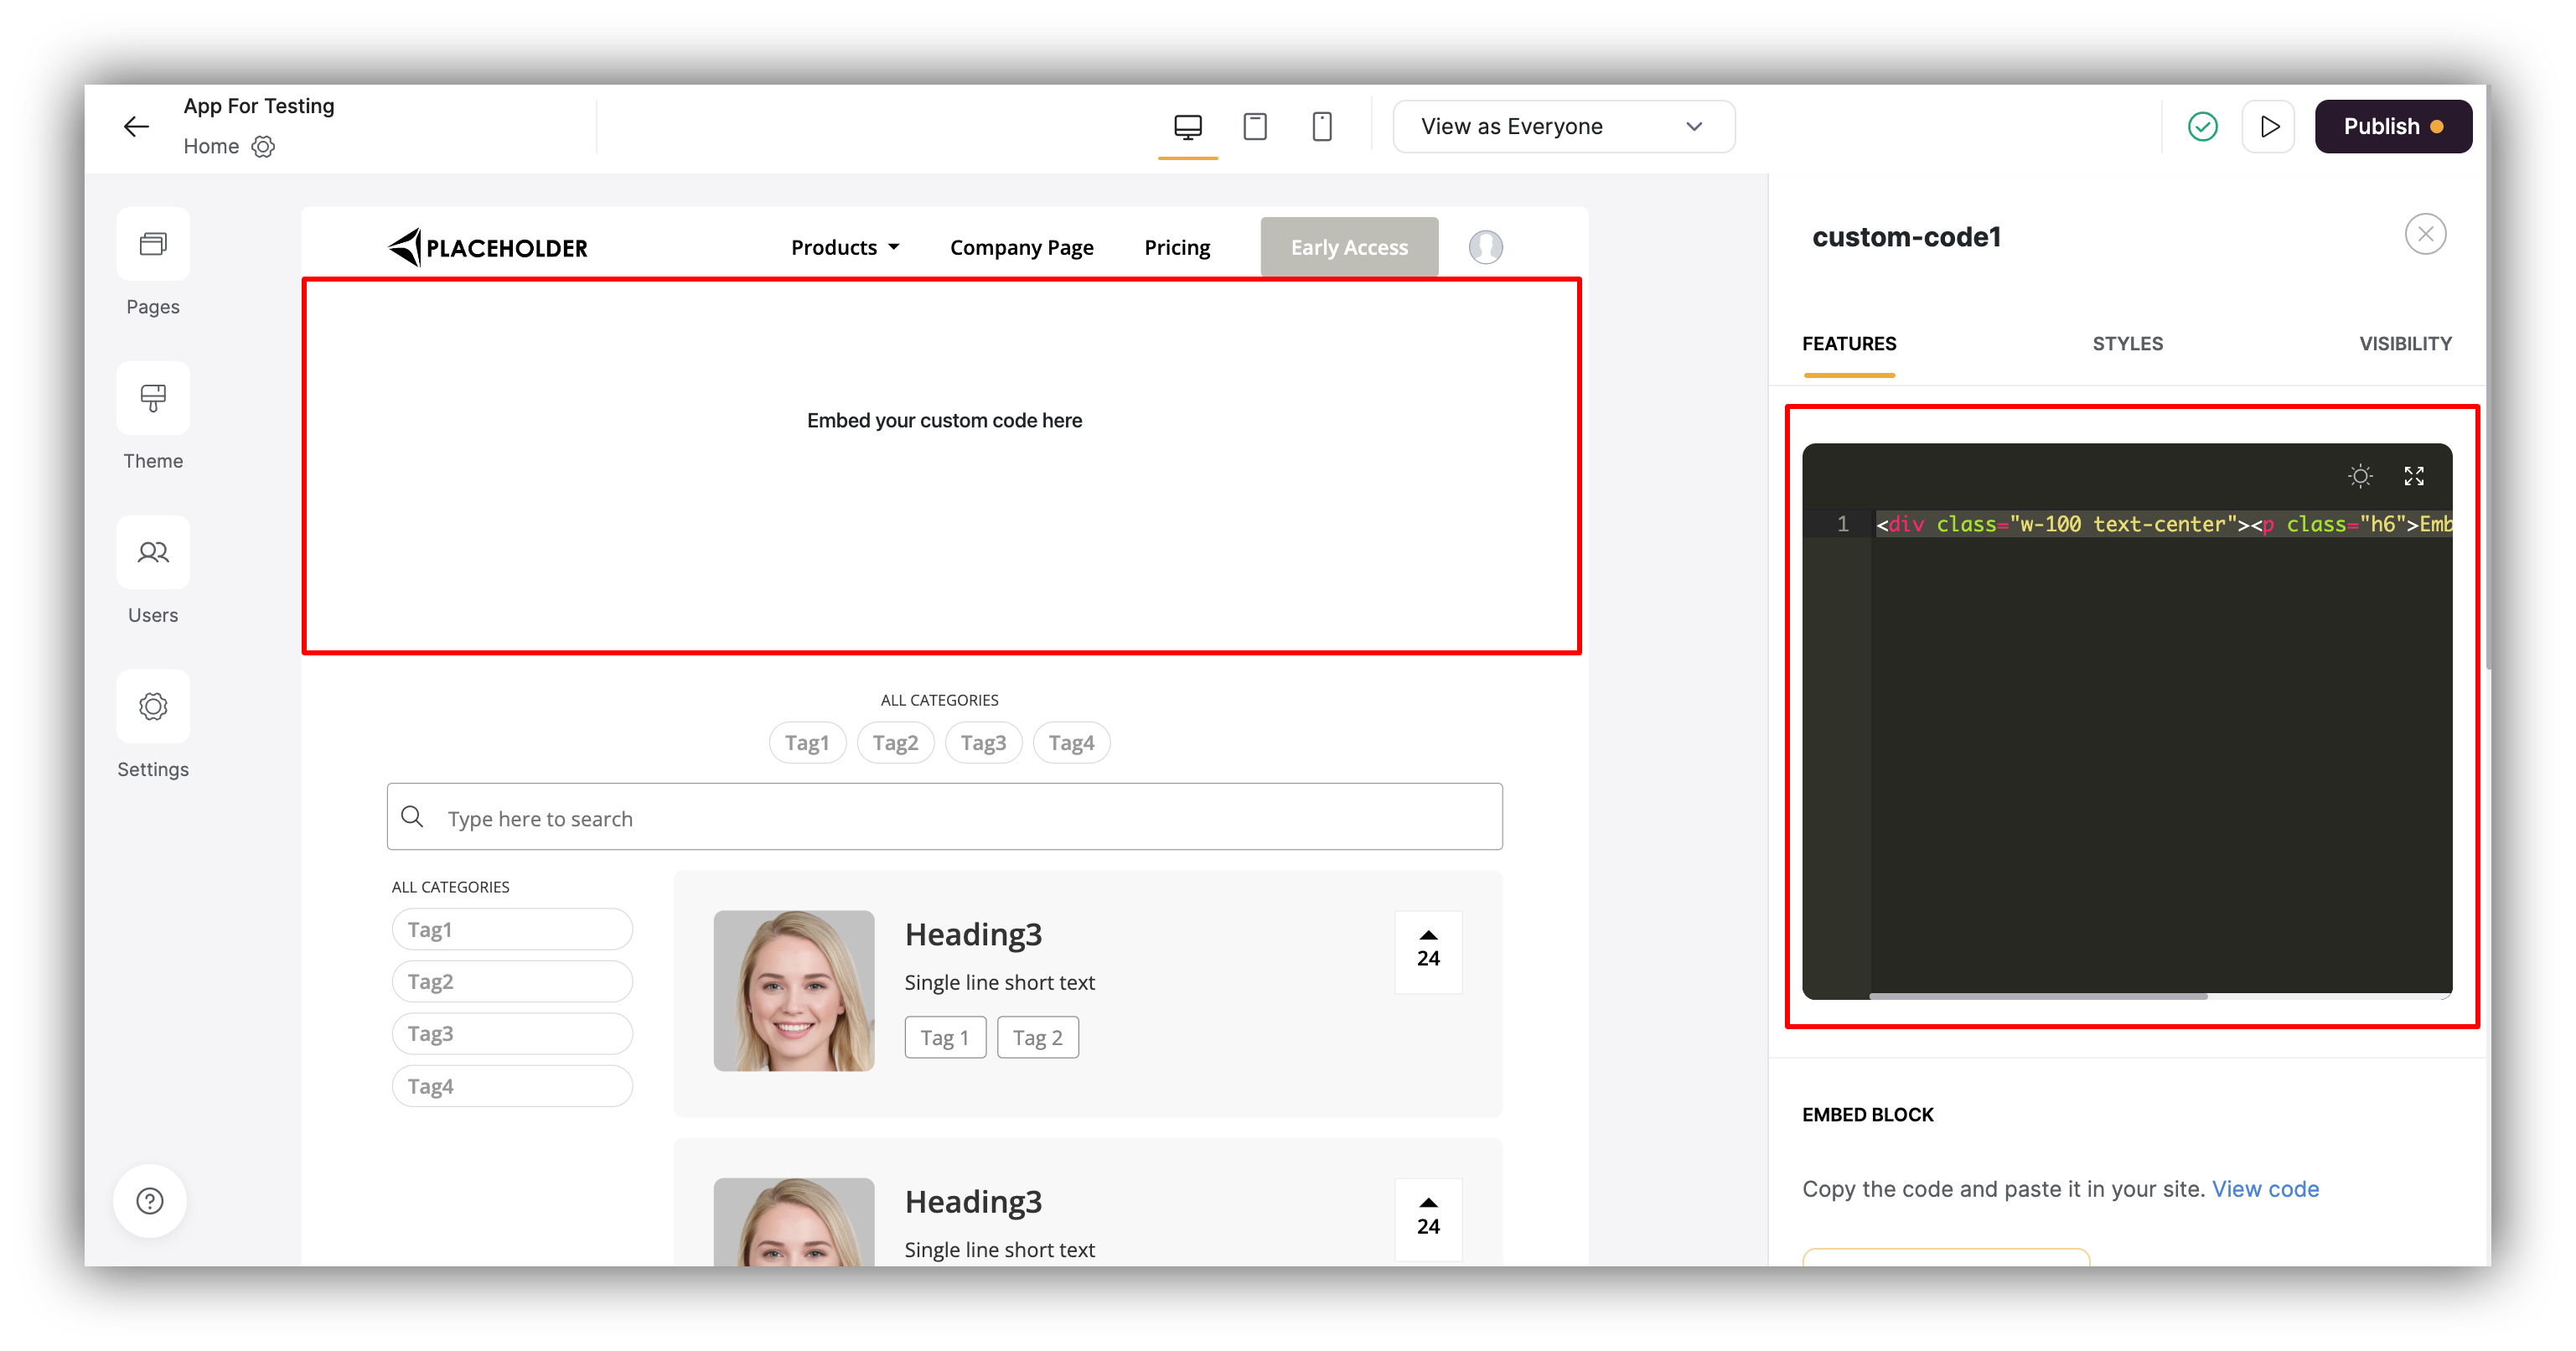 Now, you can **Preview** your Softr app to see the changes.
## Use Case - Embed Calendly in Softr app
Let's see how the Custom Code block works on a specific example. We'll use it to embed a [Calendly](https://calendly.com/) widget within our Softr app.
### **Getting the Embed Code**
In our Calendly account, we are going to navigate to **Share Your Link** in the **Account** dropdown menu.
Now, you can **Preview** your Softr app to see the changes.
## Use Case - Embed Calendly in Softr app
Let's see how the Custom Code block works on a specific example. We'll use it to embed a [Calendly](https://calendly.com/) widget within our Softr app.
### **Getting the Embed Code**
In our Calendly account, we are going to navigate to **Share Your Link** in the **Account** dropdown menu.
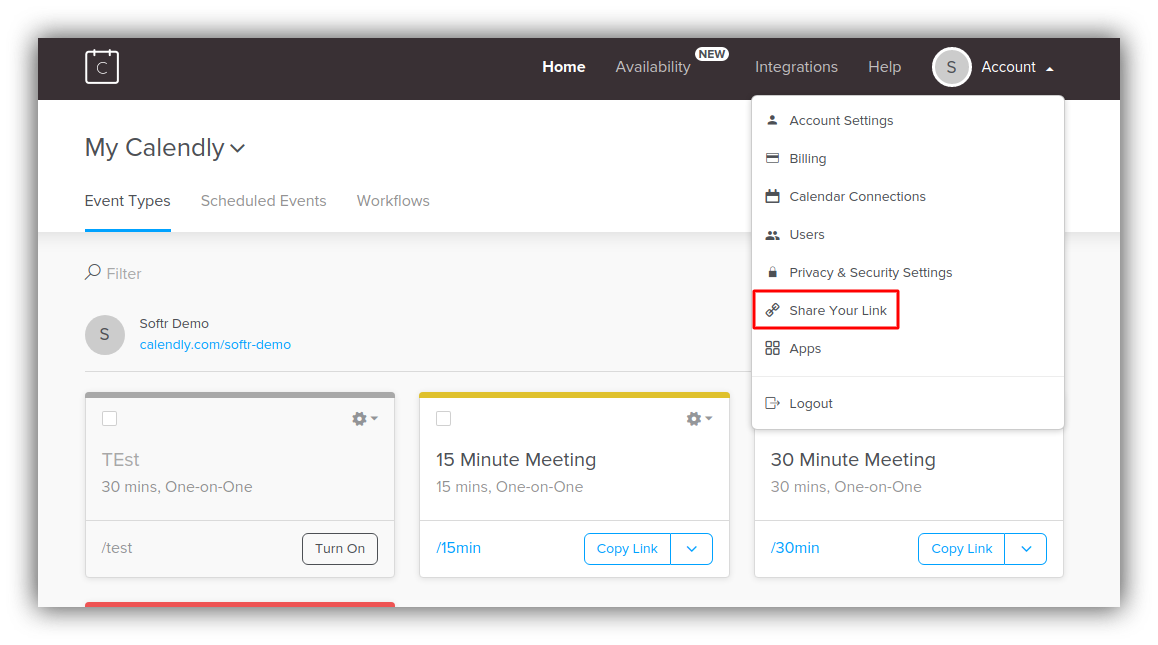 In the pop-up that appears next, let's choose the embed option as shown below.
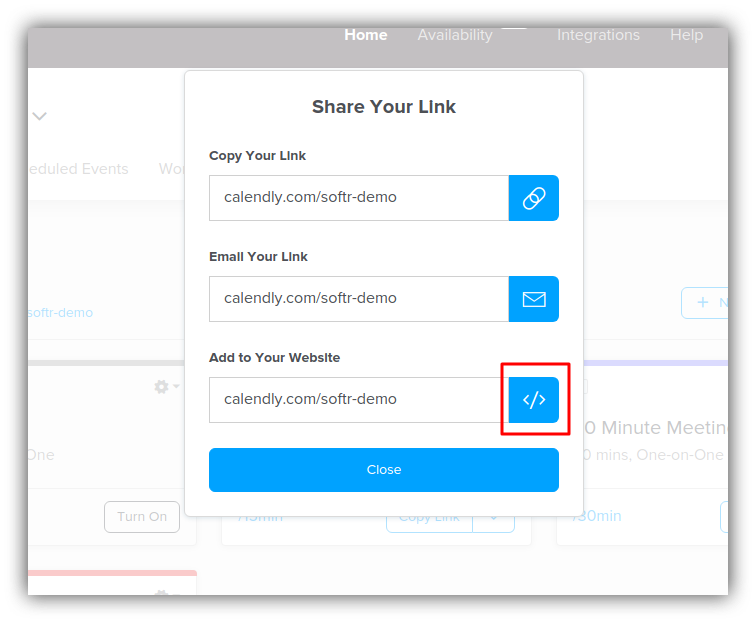 Next, we'll select **Inline** **Embed** and hit continue.
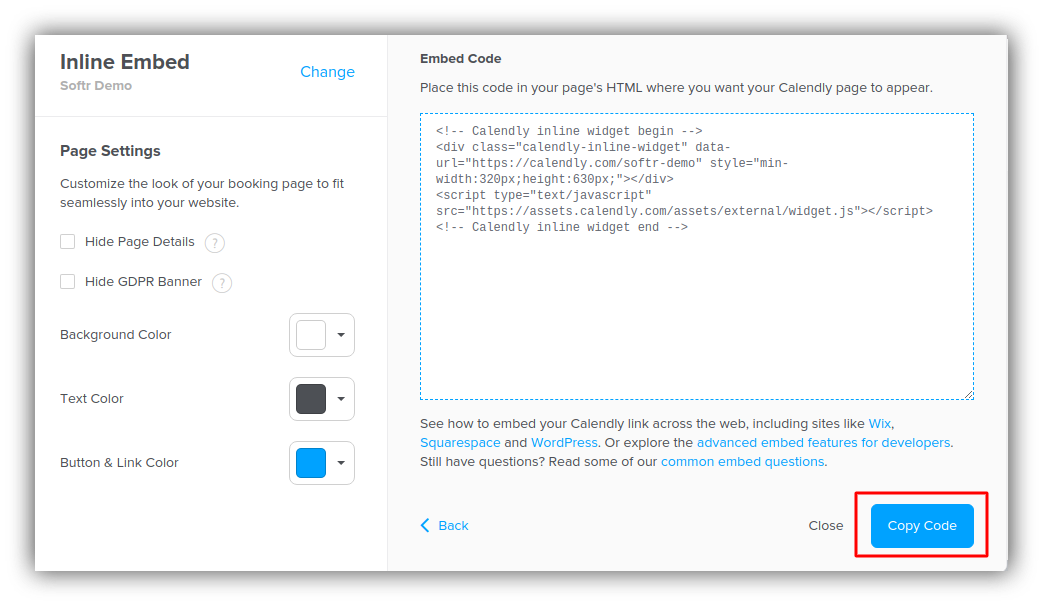
 In the following screen, we can customize our Calendly widget, and, when we're done, we need to click **Copy Code**.
 ### **Adding the code to the block**
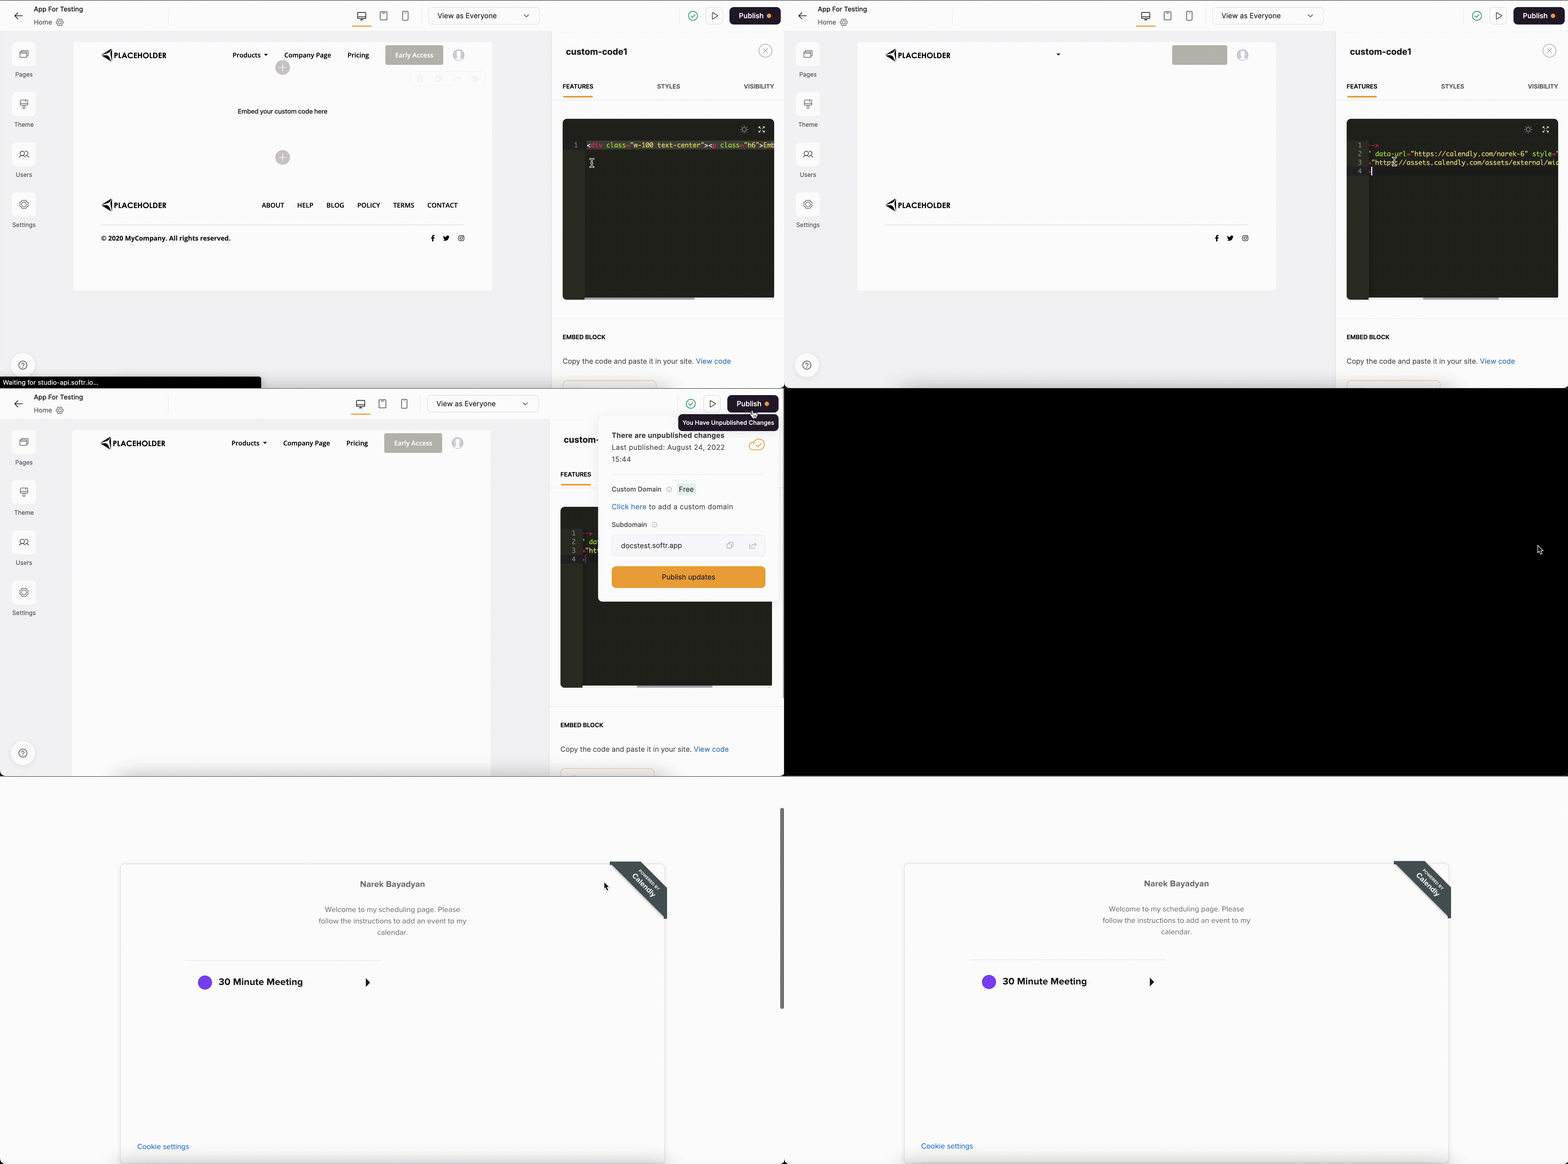
Finally, we will go back to our Softr app, paste the code in the **Custom code** block, and hit **Preview** to see what it looks like.
### **Adding the code to the block**
Finally, we will go back to our Softr app, paste the code in the **Custom code** block, and hit **Preview** to see what it looks like.
 ## Guidelines for custom code in SPA mode
In SPA mode (Single-Page Application), custom code works a little differently than non SPA mode. Since we never do full page reload in the SPA mode, page level custom code needs to ensure that it doesn't interfere with other pages.
## TL;DR
* Keep page specific code out of app level custom code.
* Whenever possible, use plain HTML/CSS instead of Javascript.
* Use `
```
## Cleanup timers and resize observers on page unload
If your page custom code sets up timers or resize observers, they need to be cleaned up before the page unloads. This ensures that the timers don't keep running after navigating away from the page.
For example, here's a custom code block which shows the number of seconds this page has been open for
```html theme={null}
The page has been open for 0 second(s)
```
## Don't use DOMContentLoaded in page level custom code
DOMContentLoaded will only fire once, on app load. Navigating between the pages will **not** re-run the event listener.
Instead, `window.SOFTR_PAGE.waitFor` provides a simple way to wait for an element to be on the page before continuing.
```html theme={null}
```
## Guidelines for custom code in SPA mode
In SPA mode (Single-Page Application), custom code works a little differently than non SPA mode. Since we never do full page reload in the SPA mode, page level custom code needs to ensure that it doesn't interfere with other pages.
## TL;DR
* Keep page specific code out of app level custom code.
* Whenever possible, use plain HTML/CSS instead of Javascript.
* Use `
```
## Cleanup timers and resize observers on page unload
If your page custom code sets up timers or resize observers, they need to be cleaned up before the page unloads. This ensures that the timers don't keep running after navigating away from the page.
For example, here's a custom code block which shows the number of seconds this page has been open for
```html theme={null}
The page has been open for 0 second(s)
```
## Don't use DOMContentLoaded in page level custom code
DOMContentLoaded will only fire once, on app load. Navigating between the pages will **not** re-run the event listener.
Instead, `window.SOFTR_PAGE.waitFor` provides a simple way to wait for an element to be on the page before continuing.
```html theme={null}
```