> ## Documentation Index
> Fetch the complete documentation index at: https://docs.softr.io/llms.txt
> Use this file to discover all available pages before exploring further.
# Map
> Show locations through a map.
The **Map** block can be used to display a list of locations from a [data source](/4230abecf813402aa2926466c313290a) through a **Google Map**. Let's see how it's configured.
Maps block is available on **all paid plans**.
## Preparing Data
First of all, you need to have the list of your locations in your data source. Let’s use [Airtable](/data-sources/1YYStCJukT15Lh2j93qo9A/airtable/jHX7kfH7QvkVcELQvS3VoX) as an examples and set up the data there. Below you can see the example data set we're going to use.
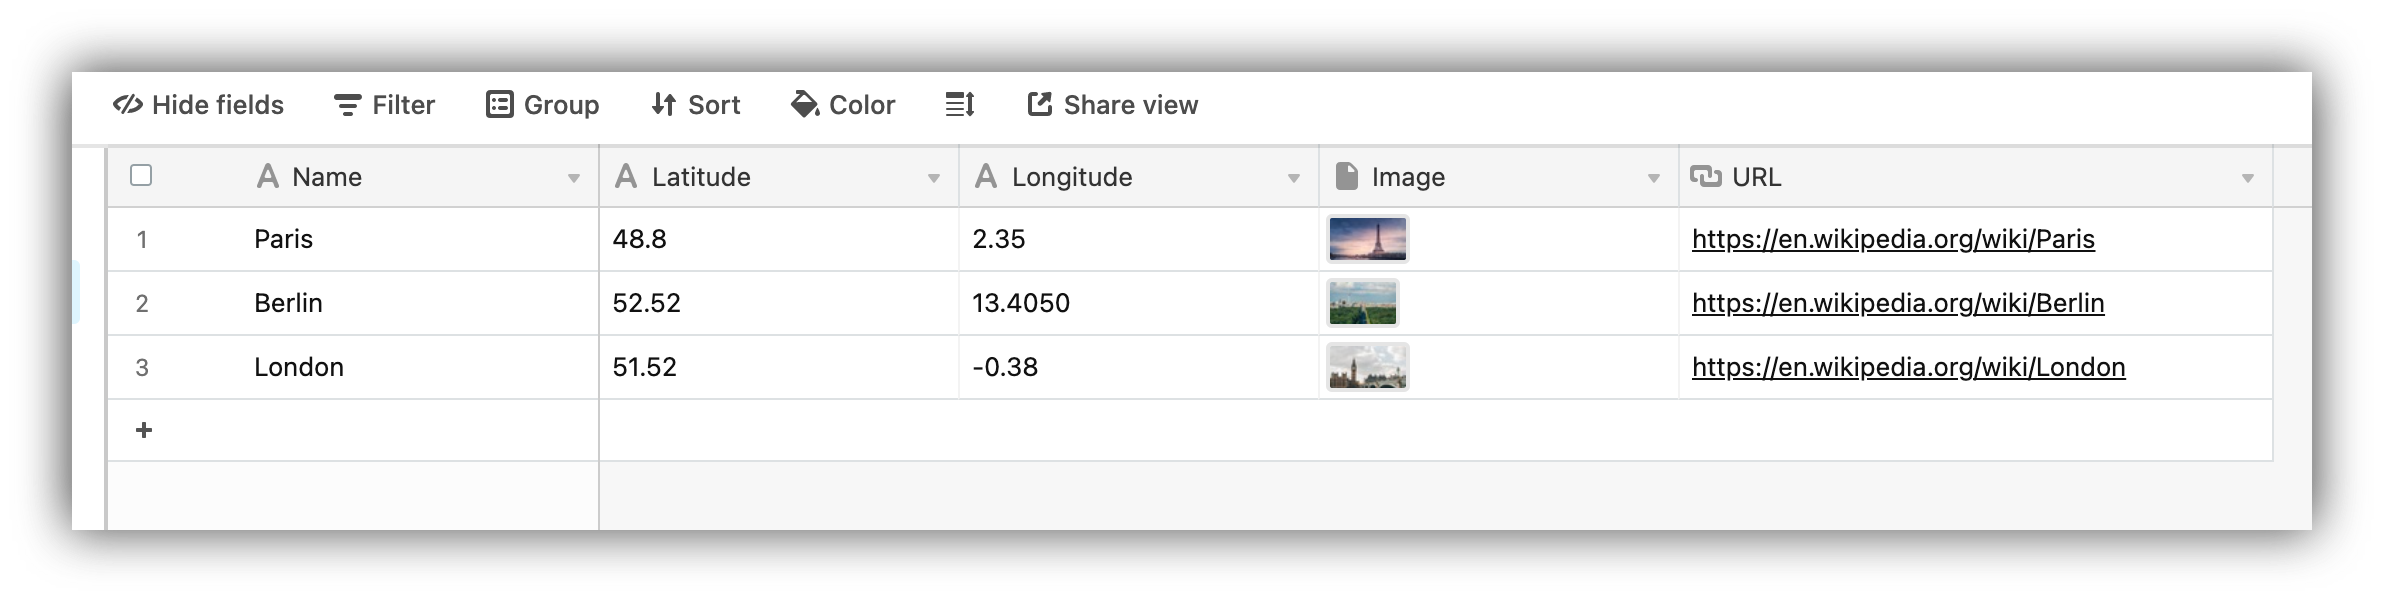 As you can see, we've added three cities with their respective **coordinates**, **images**, and **URLs**. The **Image** and **URL** fields are optional and, if added, will be displayed inside the pop-up that opens when clicking on the location. We'll discuss this in greater detail a bit later.
## Setting up the map block
As soon as we have our data, we can proceed to setting up the Map on Softr. So, let's add the block and start configuring it.
### **Selecting Base and Table**
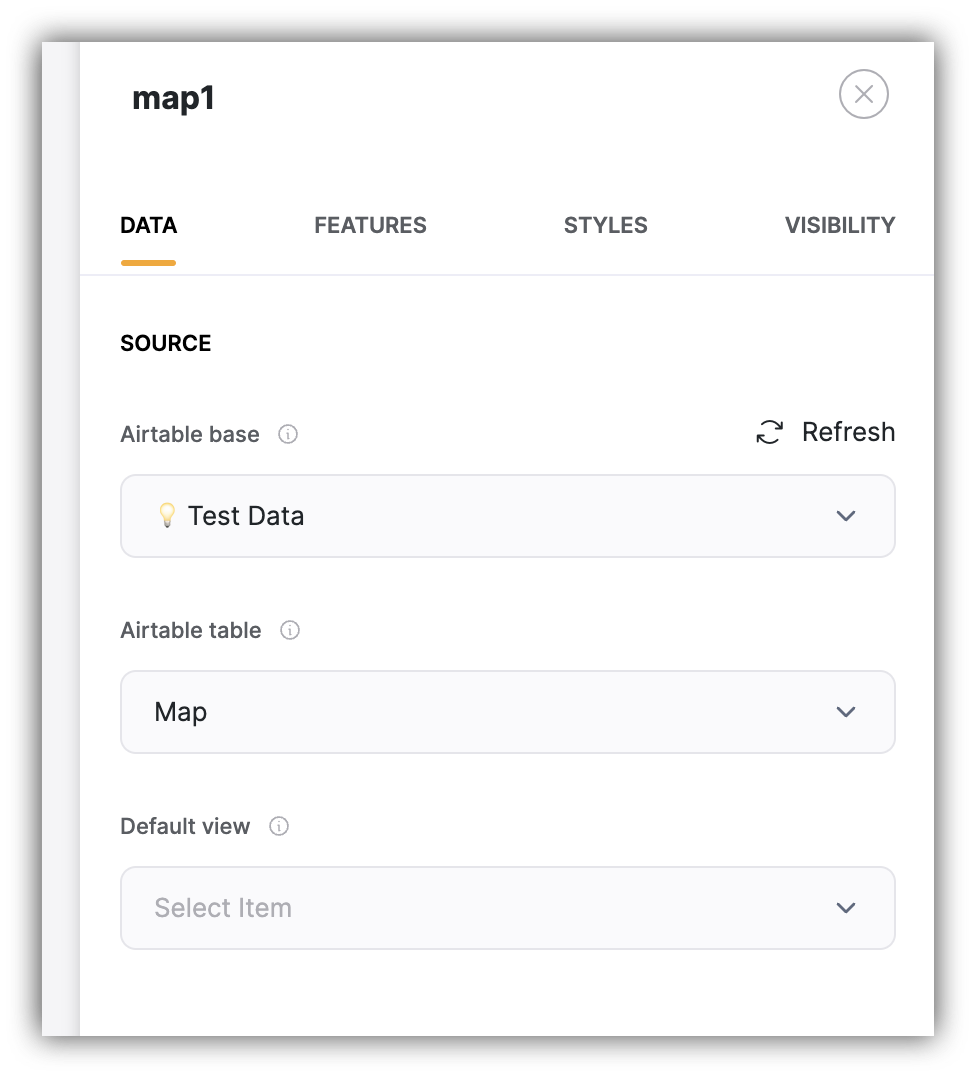
First of all, we need to select the **base** and **table** where the map data is stored. To do that, we need to navigate to the **Data** tab in block settings.
As you can see, we've added three cities with their respective **coordinates**, **images**, and **URLs**. The **Image** and **URL** fields are optional and, if added, will be displayed inside the pop-up that opens when clicking on the location. We'll discuss this in greater detail a bit later.
## Setting up the map block
As soon as we have our data, we can proceed to setting up the Map on Softr. So, let's add the block and start configuring it.
### **Selecting Base and Table**
First of all, we need to select the **base** and **table** where the map data is stored. To do that, we need to navigate to the **Data** tab in block settings.
 ### **Inline Filters**
Now, let's navigate to the **Features** tab and see what we got there. **Inline Filters** let you add a filter to your Map to allow users filter the map by a given field. This works similar to the [List block inline filters](/building-blocks/vikC2AWEpQGkZd4jGyoVxo/list-block/pQhPYuA28VXr5tLLFBcbCU).
### **Map Options**
**Title and Subtitle**
Here, you can add a Title and Subtitle for the block.
**Map API Key**
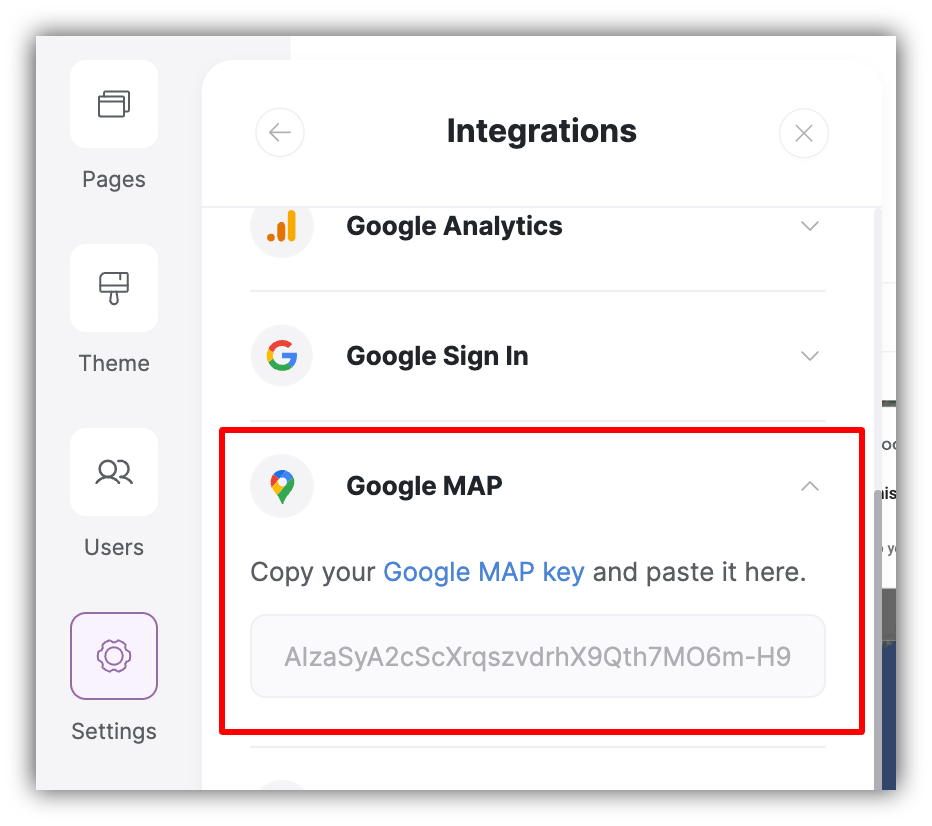
To be able to use the map, you need to create an API key through your Google developer account and add it in **Settings => Integrations => Google Map**. A detailed guide on setting up the API key can be found [here](https://developers.google.com/maps/documentation/javascript/get-api-key).
### **Inline Filters**
Now, let's navigate to the **Features** tab and see what we got there. **Inline Filters** let you add a filter to your Map to allow users filter the map by a given field. This works similar to the [List block inline filters](/building-blocks/vikC2AWEpQGkZd4jGyoVxo/list-block/pQhPYuA28VXr5tLLFBcbCU).
### **Map Options**
**Title and Subtitle**
Here, you can add a Title and Subtitle for the block.
**Map API Key**
To be able to use the map, you need to create an API key through your Google developer account and add it in **Settings => Integrations => Google Map**. A detailed guide on setting up the API key can be found [here](https://developers.google.com/maps/documentation/javascript/get-api-key).
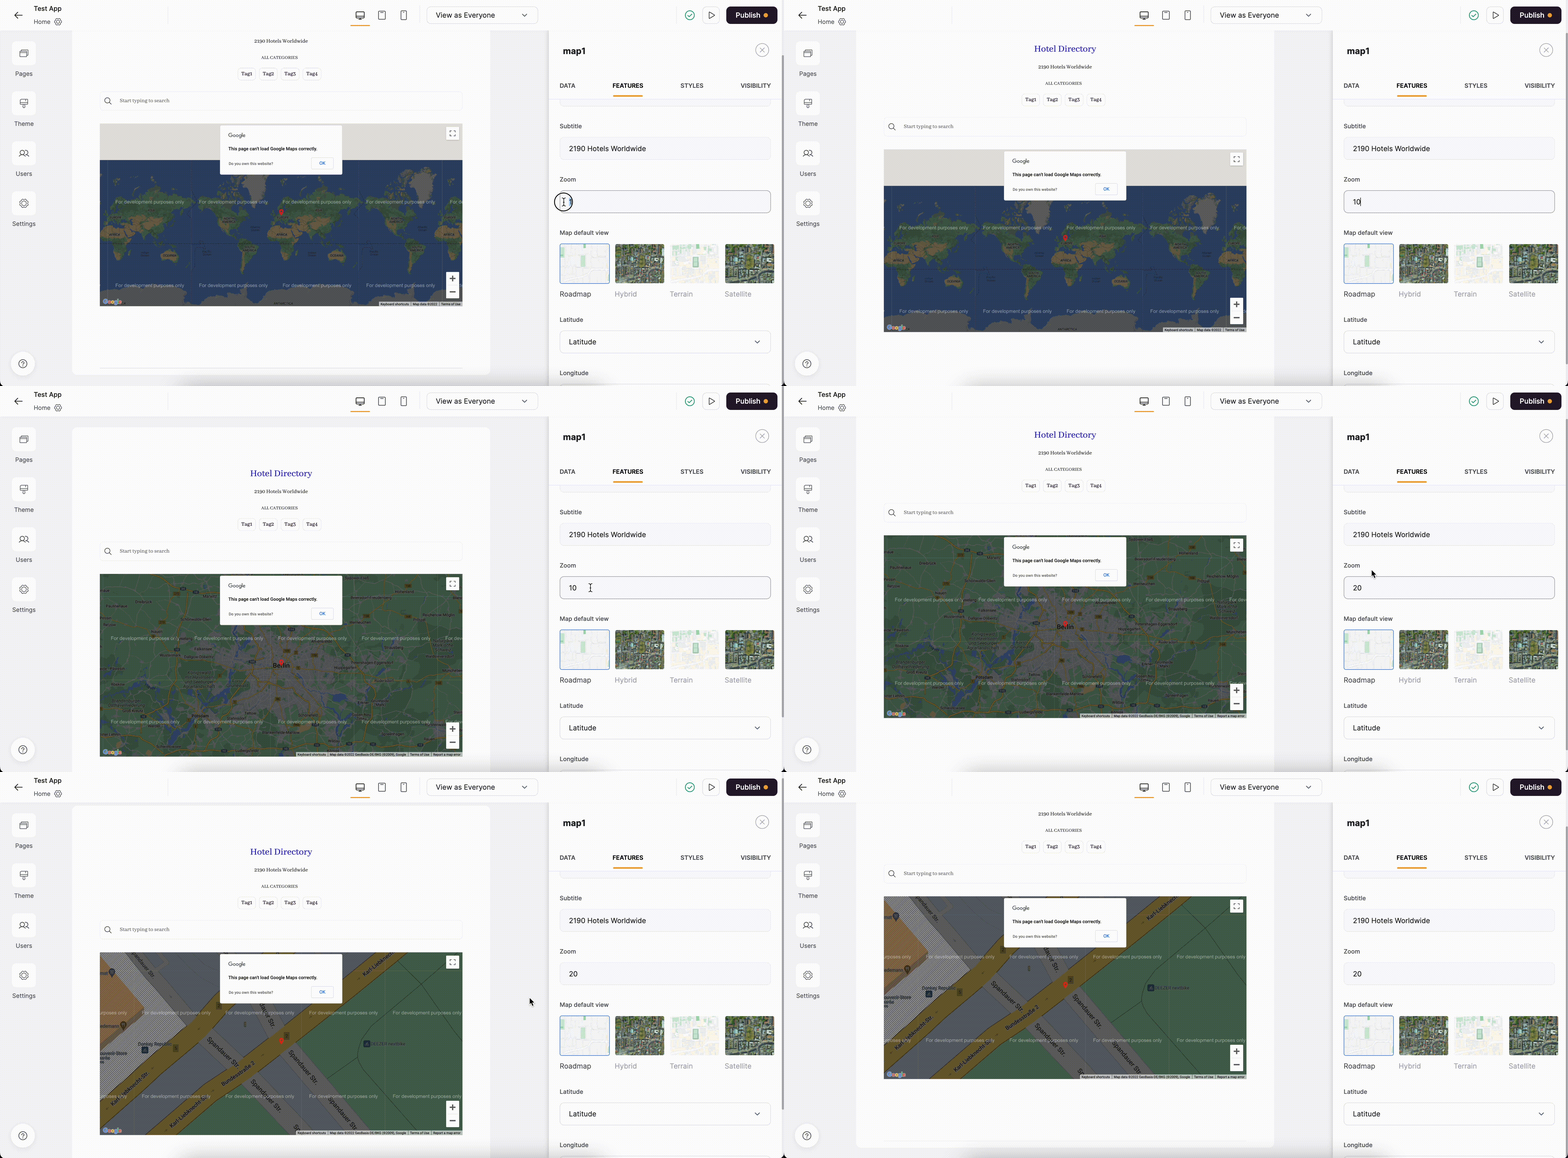
 **Zoom**
Here, you define the zoom level of the map. The map can have a different number of zoom levels based on the location, but it’s usually around 21 (i.e. you can enter a decimal ranging from 1 to 21). See how it works below.
**Zoom**
Here, you define the zoom level of the map. The map can have a different number of zoom levels based on the location, but it’s usually around 21 (i.e. you can enter a decimal ranging from 1 to 21). See how it works below.
 **Latitude and Longitude**
Lastly, we need to select the **coordinate** fields from our Airtable data we had prepared earlier.
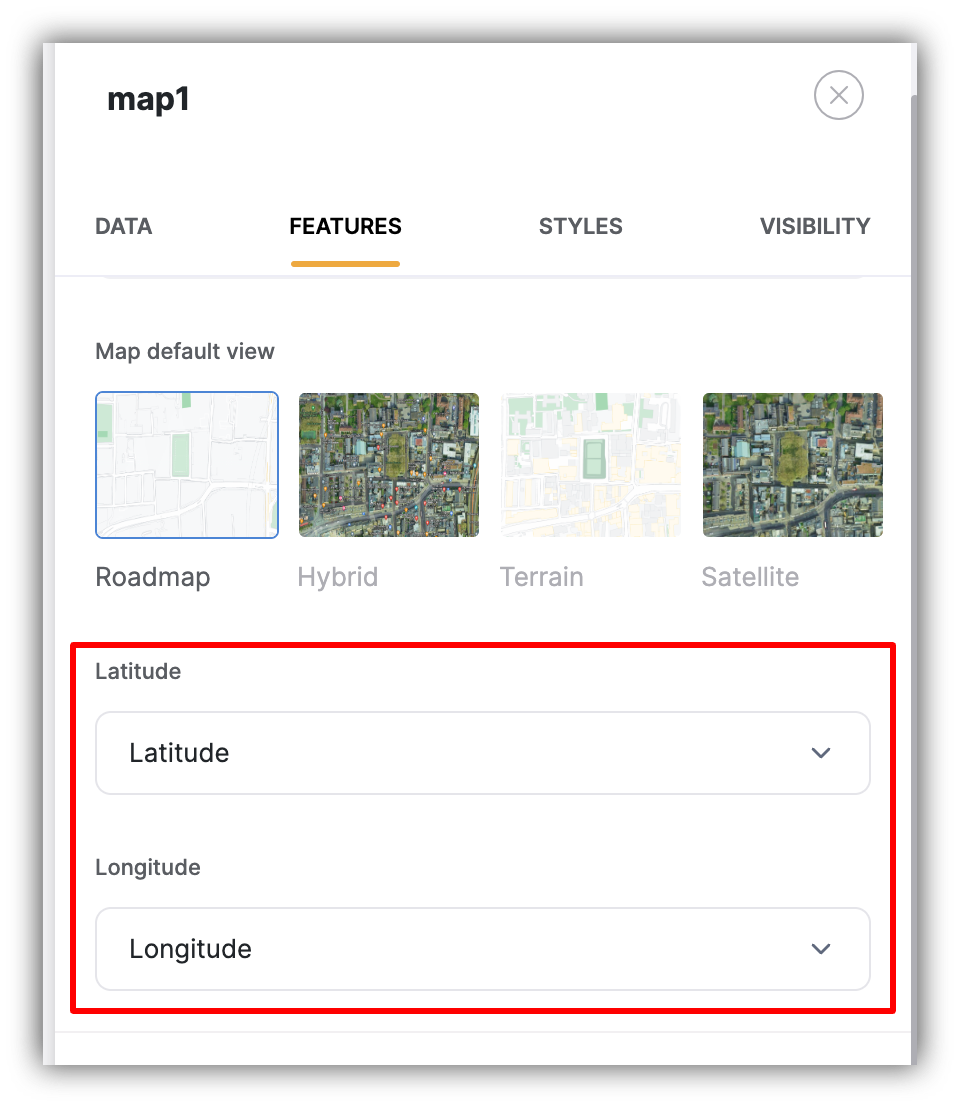
**Latitude and Longitude**
Lastly, we need to select the **coordinate** fields from our Airtable data we had prepared earlier.
 ### **Marker Option**
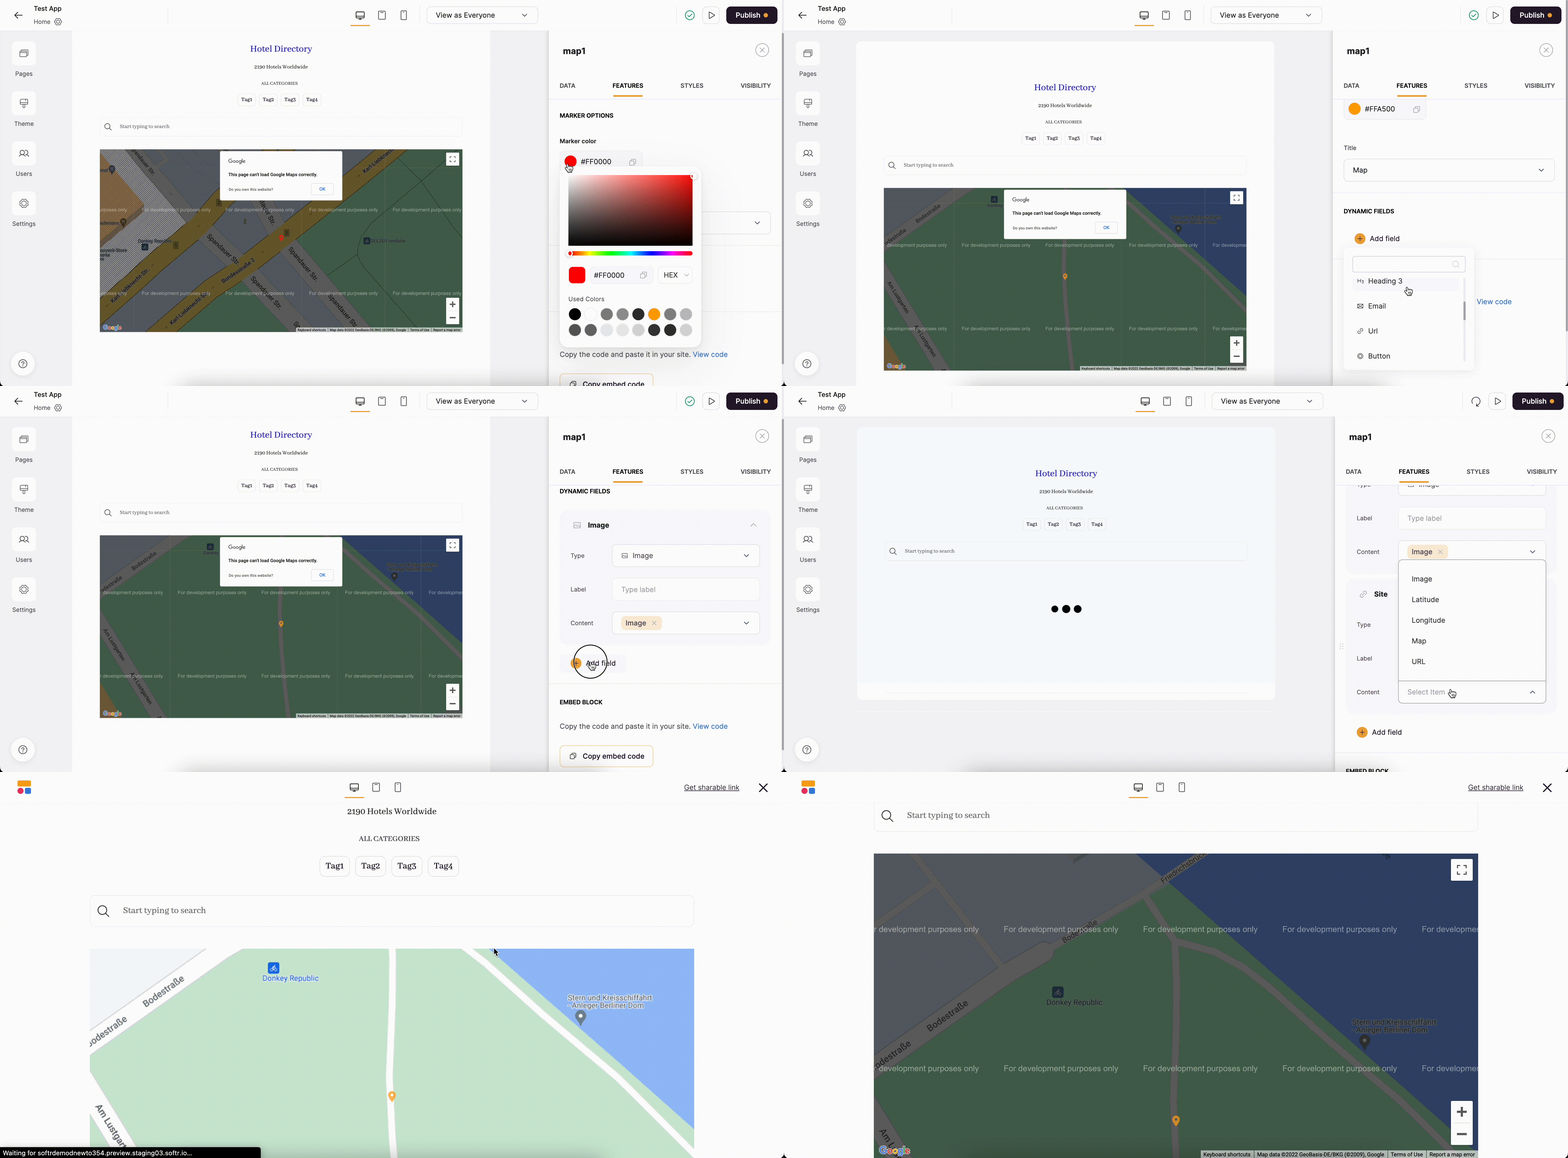
Finally, you need to configure the map marker. Apart from the **Color**, you need to define the **Title** of each location to be shown inside a pop-up when clicking on the location.
Further down, you can see how we configure the marker settings.
### **Dynamic Fields**
You can add any number of additional fields that will be displayed inside a pop-up that appears when the user clicks on the location. Below, you can see how we set up the marker along with dynamic fields. We add **Image** and **URL** fields and check how they appear inside the location pop-up.
### **Marker Option**
Finally, you need to configure the map marker. Apart from the **Color**, you need to define the **Title** of each location to be shown inside a pop-up when clicking on the location.
Further down, you can see how we configure the marker settings.
### **Dynamic Fields**
You can add any number of additional fields that will be displayed inside a pop-up that appears when the user clicks on the location. Below, you can see how we set up the marker along with dynamic fields. We add **Image** and **URL** fields and check how they appear inside the location pop-up.