> ## Documentation Index
> Fetch the complete documentation index at: https://docs.softr.io/llms.txt
> Use this file to discover all available pages before exploring further.
# User Profile
> Let user view and edit their profiles.
This page covers the legacy User Profile block found in legacy apps (read more about legacy apps and migration [here](/application-settings/n3K2UEfpC9BpHgakMzUU5Y/migrating-app-versions/4ASdHE4RECmauL82yzcVam)). New apps use the [Account Settings Utility page](/building-blocks/vikC2AWEpQGkZd4jGyoVxo/account-settings/54HYs3JEjZj8DGwRCNUpH9) instead.
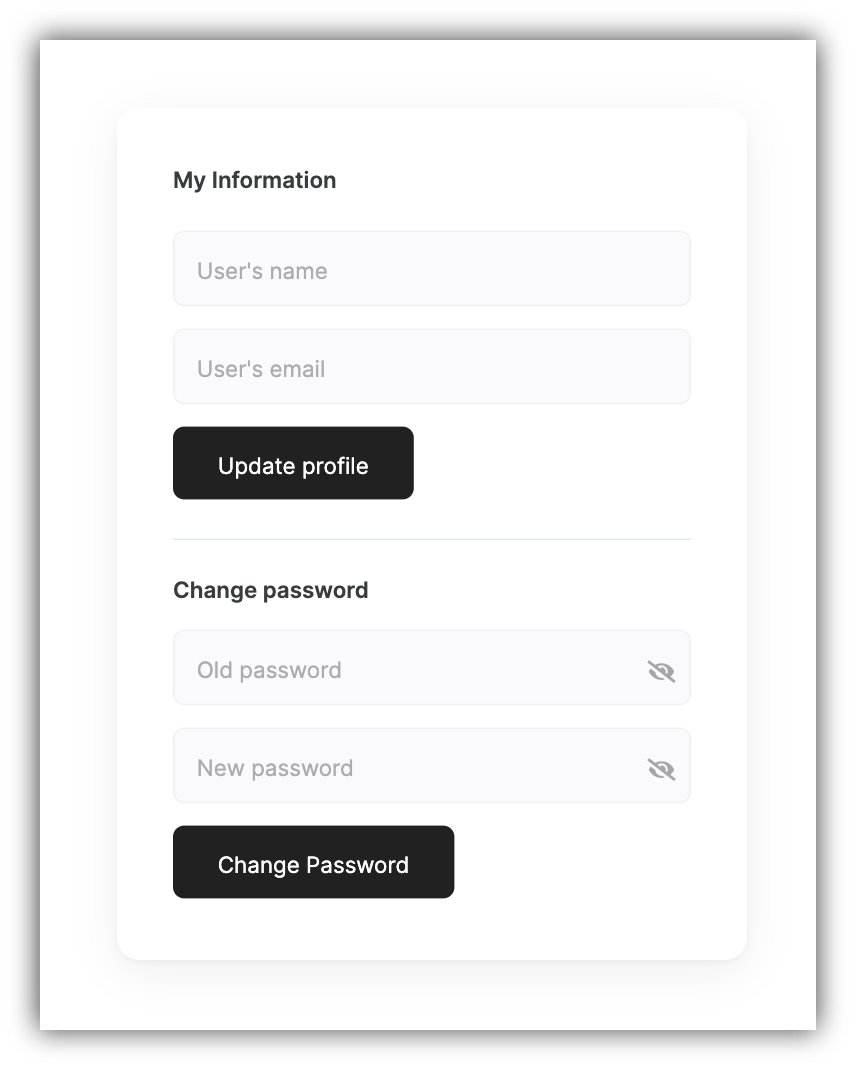 The **User Profile** block allows your users to edit their info and password.
The link to the page with the **User Profile** block can be added under [Profile Links](/11ba304436ed4354a8669d4869624b9c) when **Show User Profile** is enabled on the **Header**.
The **User Profile** block allows your users to edit their info and password.
The link to the page with the **User Profile** block can be added under [Profile Links](/11ba304436ed4354a8669d4869624b9c) when **Show User Profile** is enabled on the **Header**.
 Now, let's check out what configuration options are available for the block.
## Background image
Now, let's check out what configuration options are available for the block.
## Background image
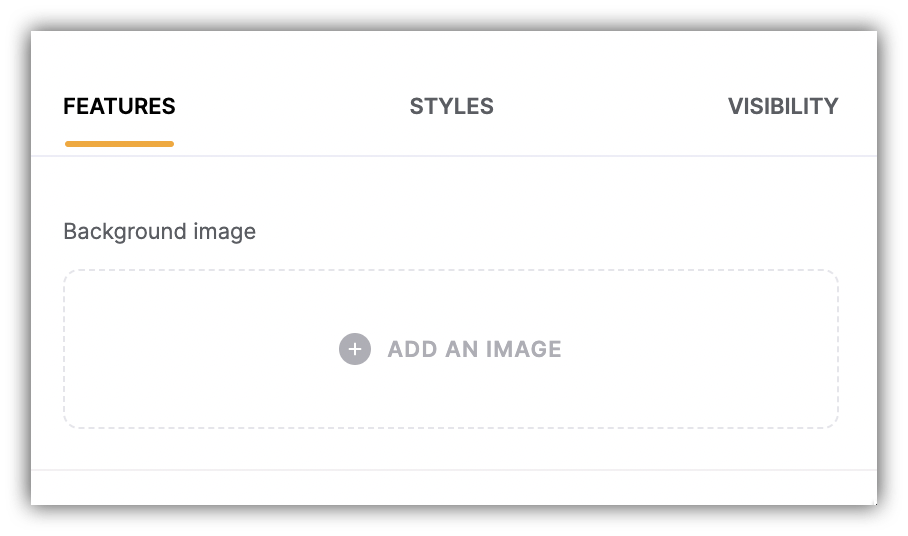 Here, you can set a background image for the block.
## My Profile
### **Default Fields**
Here, you can set a background image for the block.
## My Profile
### **Default Fields**
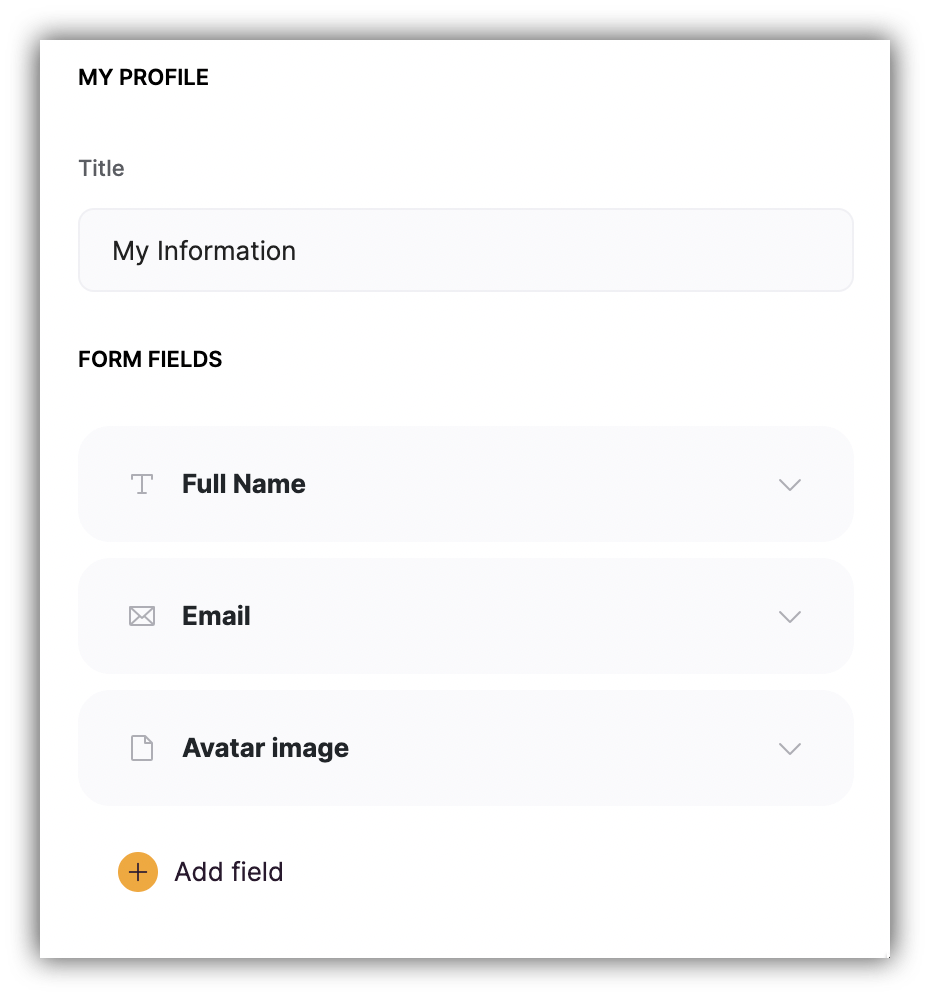 Here, you can configure the section **Title** as well as the placeholders of the **Name** and **Email** fields. Please, note that the **Update Profile** button's **Action** is predefined and cannot be changed.
Moreover, you have the **Avatar image** field (we’ll discuss it shortly), which can be deleted in case you don't need it.
### **Additional Fields**
If you've [connected users to a data source](/add-and-manage-users/pxnkp9H3qyEVMF6XUceqnj/syncing-users-with-a-data-source/hshRGygHr4T33EnaLntGf9) with additional user parameters, you can add more fields to the User Profile block and link them to these parameter fields in your data source, so that your users are able to edit those as well. If there's no data source connected yet, you'll see a **Create Data Source** button, which you can use to connect one. Let's examine this on a specific example.
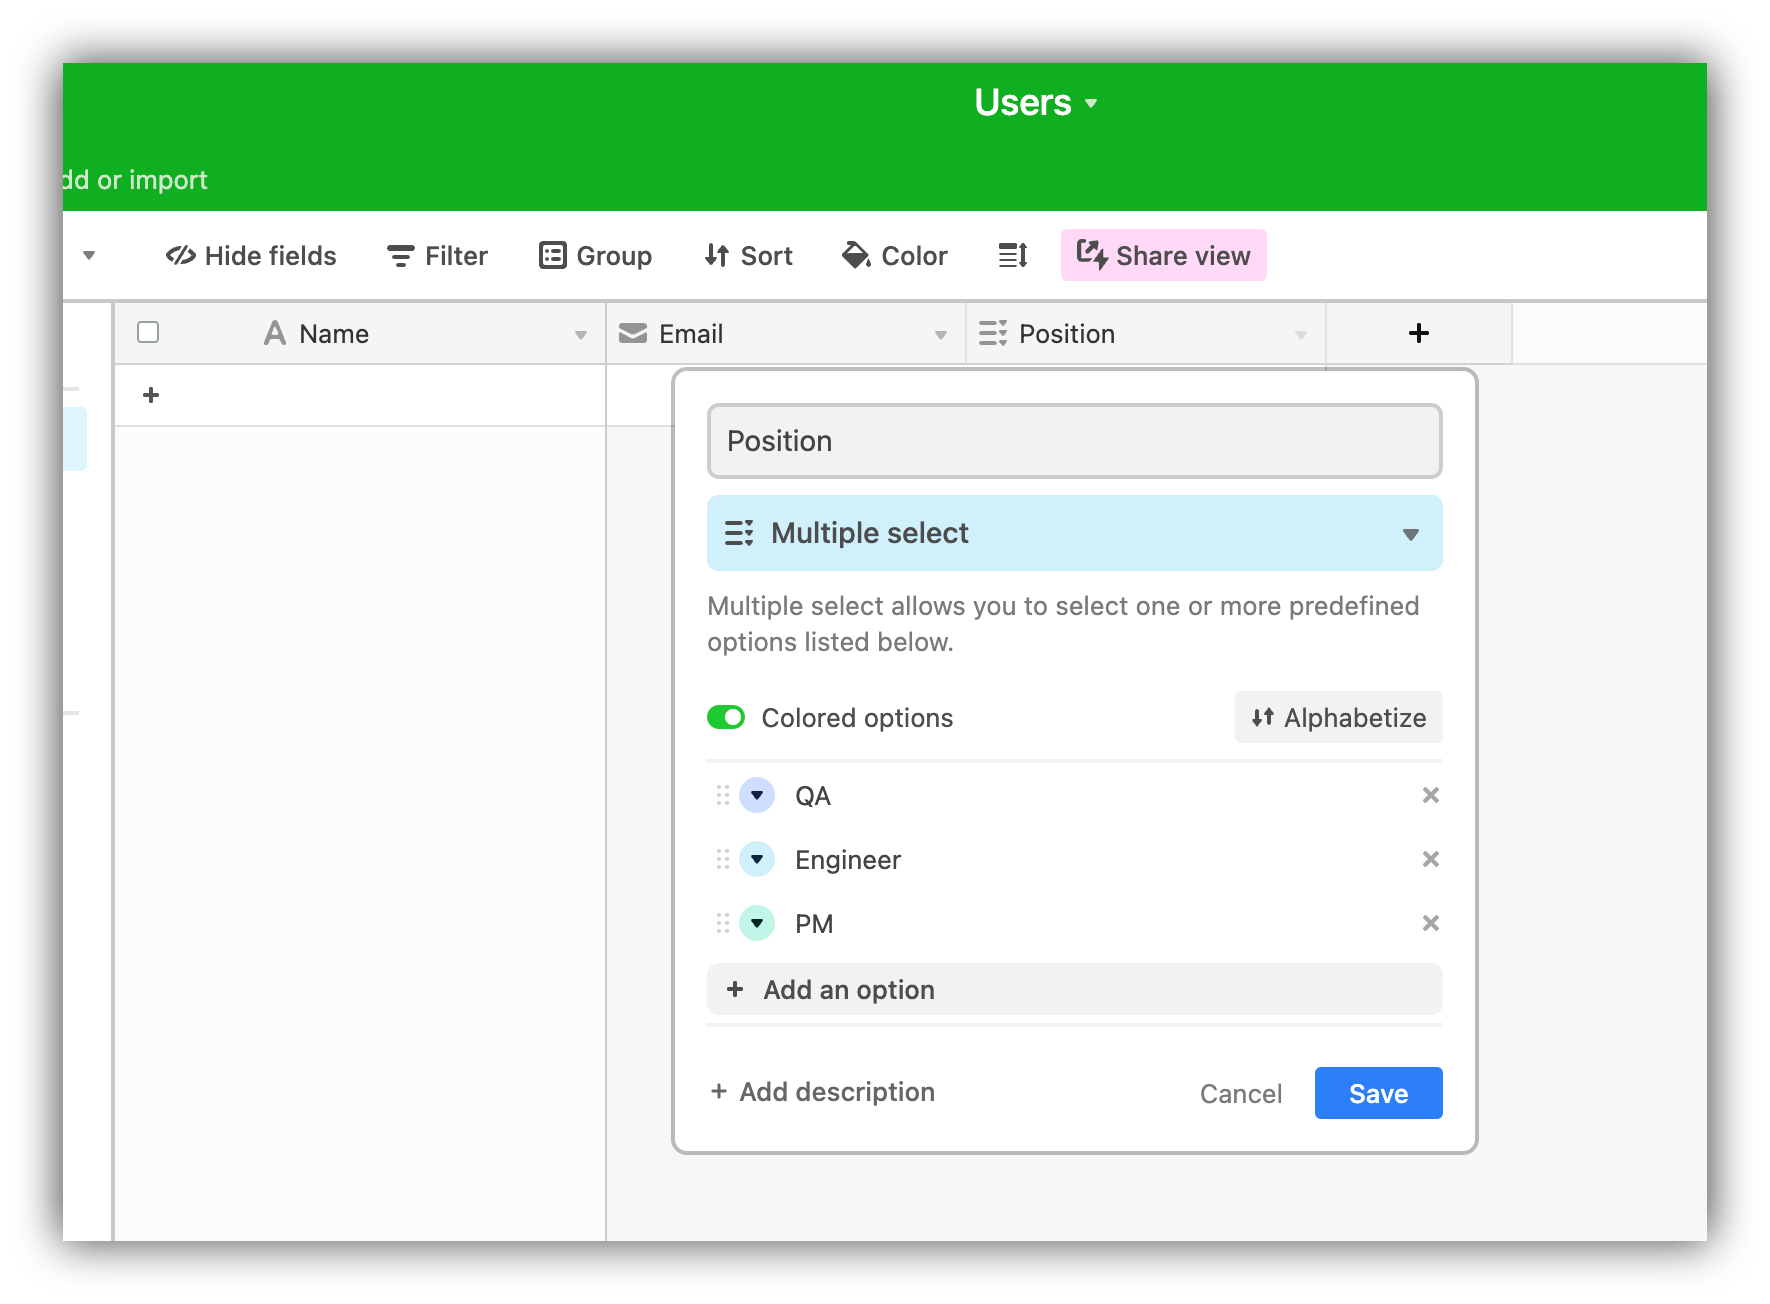
Let's say our users are company employees that have a **Position** within the company. To account for that, we have an additional **Position** field in our users [Airtable](/data-sources/1YYStCJukT15Lh2j93qo9A/airtable/jHX7kfH7QvkVcELQvS3VoX) along with its different options.
Here, you can configure the section **Title** as well as the placeholders of the **Name** and **Email** fields. Please, note that the **Update Profile** button's **Action** is predefined and cannot be changed.
Moreover, you have the **Avatar image** field (we’ll discuss it shortly), which can be deleted in case you don't need it.
### **Additional Fields**
If you've [connected users to a data source](/add-and-manage-users/pxnkp9H3qyEVMF6XUceqnj/syncing-users-with-a-data-source/hshRGygHr4T33EnaLntGf9) with additional user parameters, you can add more fields to the User Profile block and link them to these parameter fields in your data source, so that your users are able to edit those as well. If there's no data source connected yet, you'll see a **Create Data Source** button, which you can use to connect one. Let's examine this on a specific example.
Let's say our users are company employees that have a **Position** within the company. To account for that, we have an additional **Position** field in our users [Airtable](/data-sources/1YYStCJukT15Lh2j93qo9A/airtable/jHX7kfH7QvkVcELQvS3VoX) along with its different options.
 So, on the **User Profile** block, we can create a new field and link it to the **Position** field on Airtable.
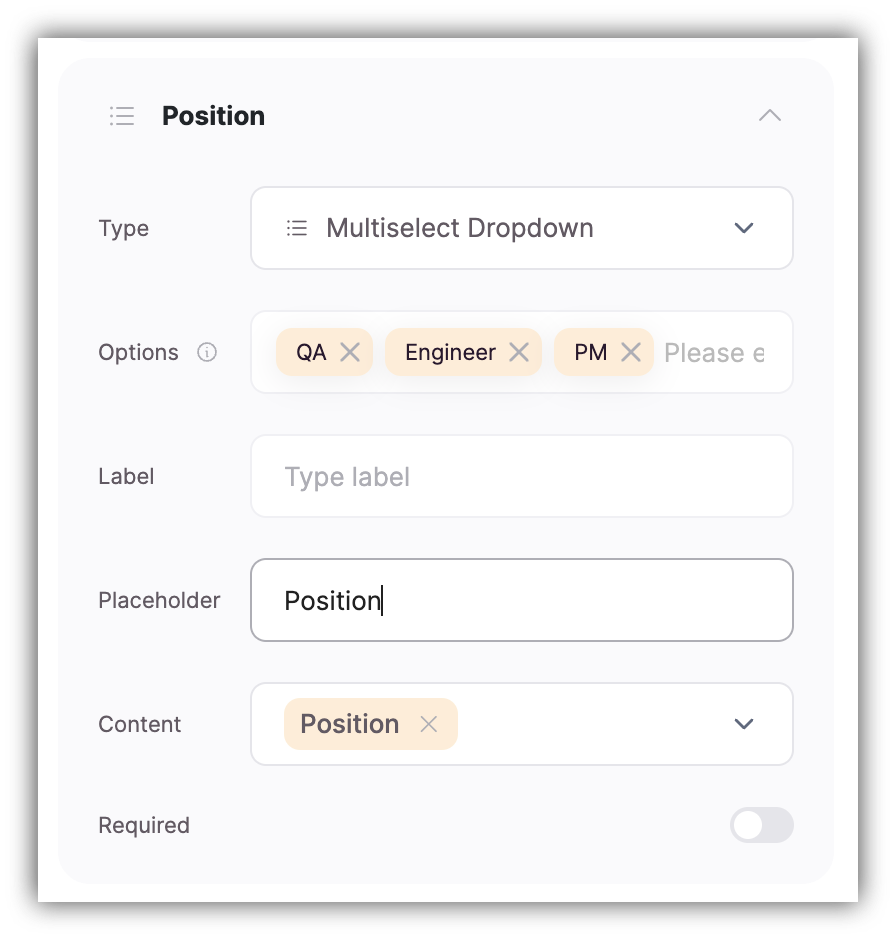 Now, users will be able to edit their position from the user profile as shown below.
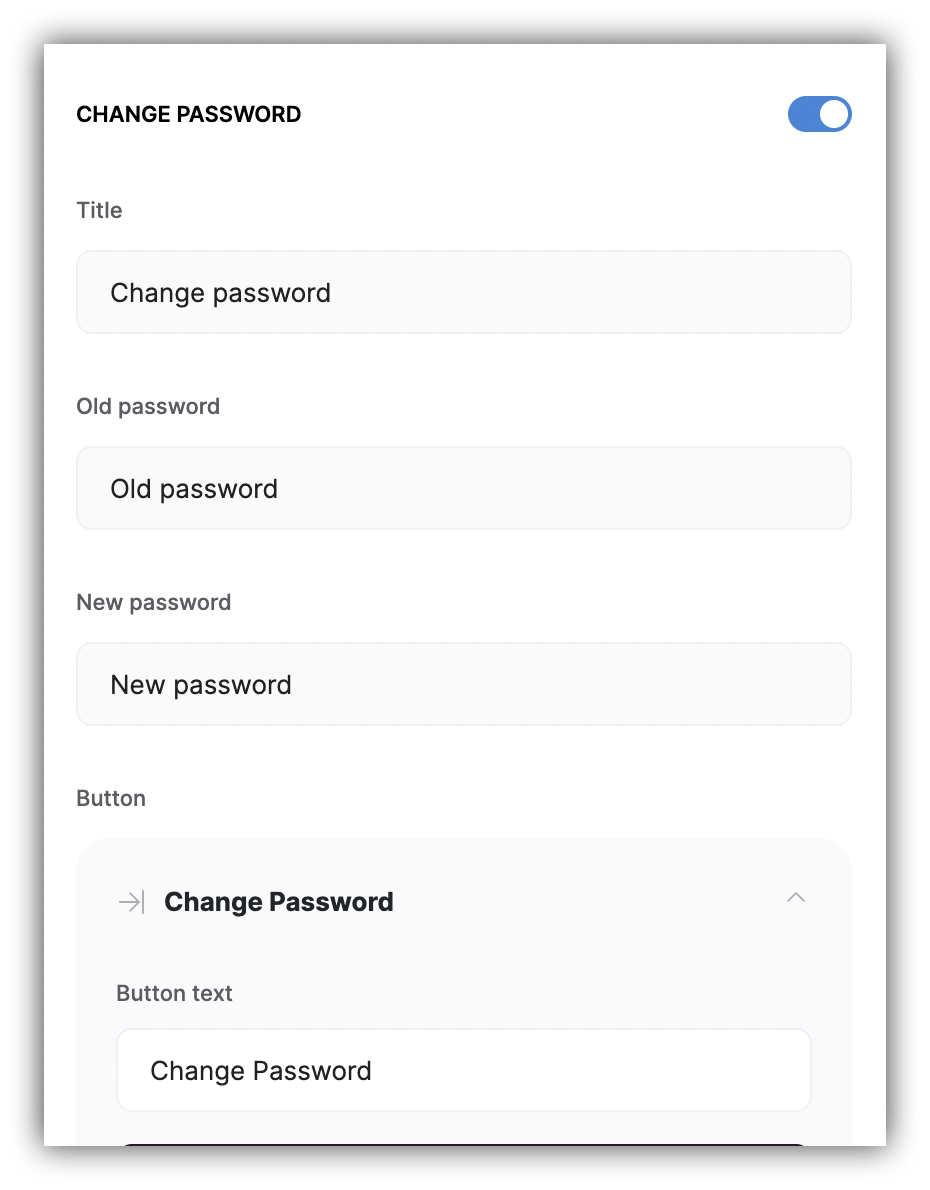
 ## **Change Password**
Here, you can configure the placeholder texts of the **Change Password** fields and modify the section title.
## **Change Password**
Here, you can configure the placeholder texts of the **Change Password** fields and modify the section title.
 ## Enabling user avatar
Let's see how you can allow your users to upload avatar images to be shown on site header.
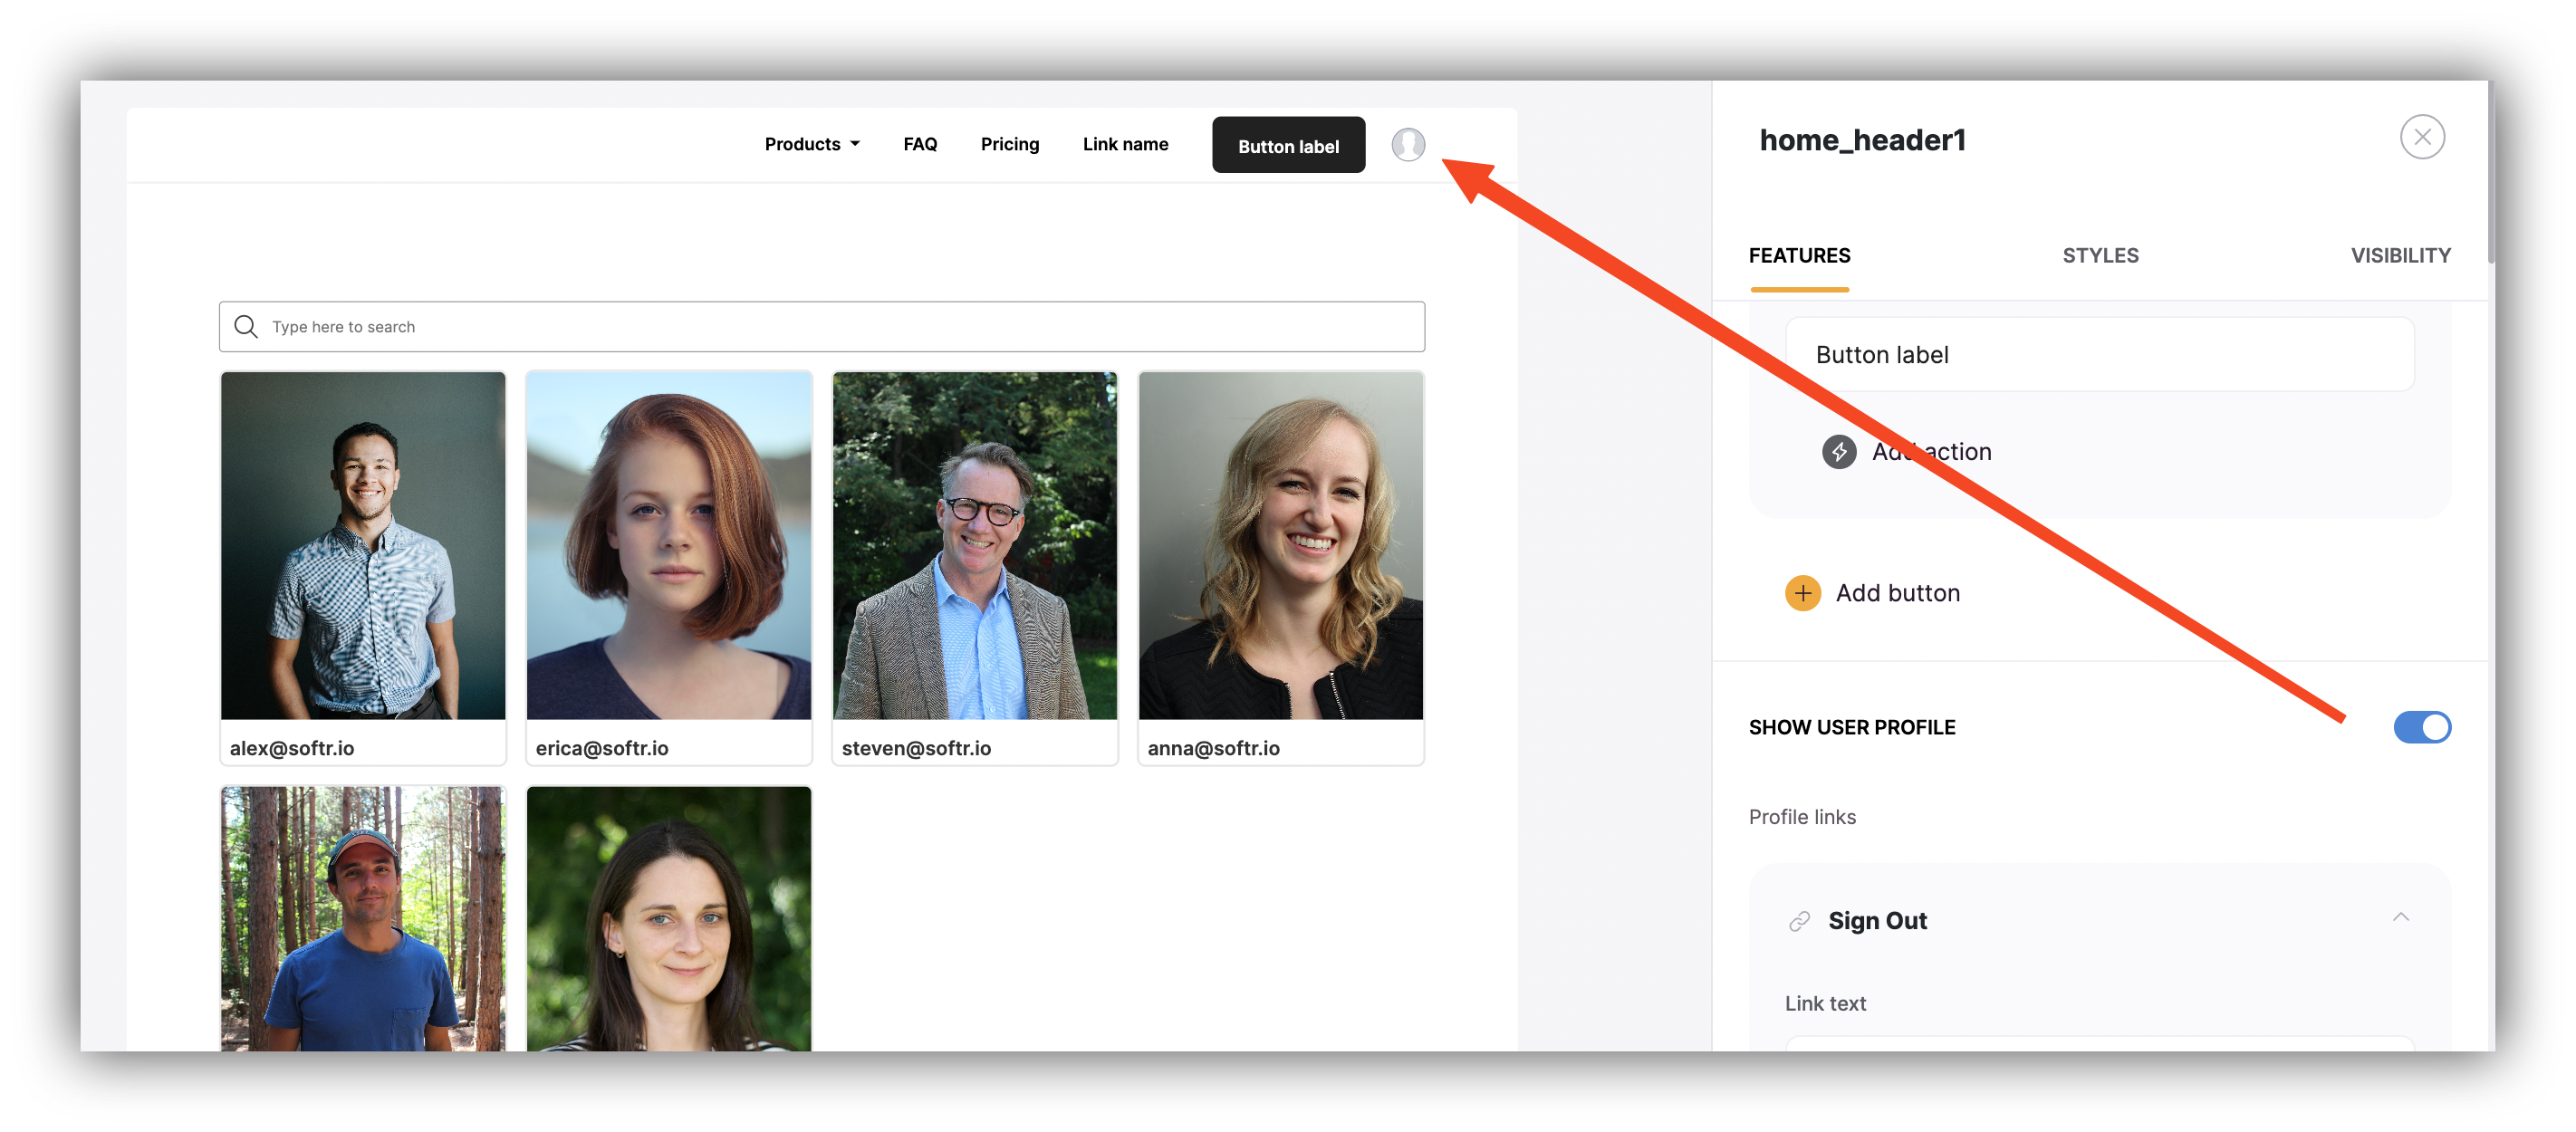
### **Enabling user profile on header**
First of all, you need to enable the "Show user profile" toggle on your Softr app header.
## Enabling user avatar
Let's see how you can allow your users to upload avatar images to be shown on site header.
### **Enabling user profile on header**
First of all, you need to enable the "Show user profile" toggle on your Softr app header.
 Make sure to update your header block, as the avatar functionality won't work on header blocks created before its introduction.
### **Mapping the avatar field to a data source**
Now, you need to map the avatar field to a [data source](/4230abecf813402aa2926466c313290a), so that images uploaded by users are stored there. You may or may not have your users base connected to a data source already. Let's consider the two cases separately as the workflow is a bit different for each.
**Data source is not connected**
If you haven't connected your users to a data source, you can do so from the **User Profile** block or [Users Tab](/add-and-manage-users/pxnkp9H3qyEVMF6XUceqnj/users-menu/5JTzjtbvp8Skemd26A9ho9), mapping the Avatar field. As soon as you do that, the Avatar field will automatically appear on your User Profile block as shown below. Below, you can see how we connect [Airtable](/data-sources/1YYStCJukT15Lh2j93qo9A/airtable/jHX7kfH7QvkVcELQvS3VoX) and map the avatar field.
Make sure to update your header block, as the avatar functionality won't work on header blocks created before its introduction.
### **Mapping the avatar field to a data source**
Now, you need to map the avatar field to a [data source](/4230abecf813402aa2926466c313290a), so that images uploaded by users are stored there. You may or may not have your users base connected to a data source already. Let's consider the two cases separately as the workflow is a bit different for each.
**Data source is not connected**
If you haven't connected your users to a data source, you can do so from the **User Profile** block or [Users Tab](/add-and-manage-users/pxnkp9H3qyEVMF6XUceqnj/users-menu/5JTzjtbvp8Skemd26A9ho9), mapping the Avatar field. As soon as you do that, the Avatar field will automatically appear on your User Profile block as shown below. Below, you can see how we connect [Airtable](/data-sources/1YYStCJukT15Lh2j93qo9A/airtable/jHX7kfH7QvkVcELQvS3VoX) and map the avatar field.
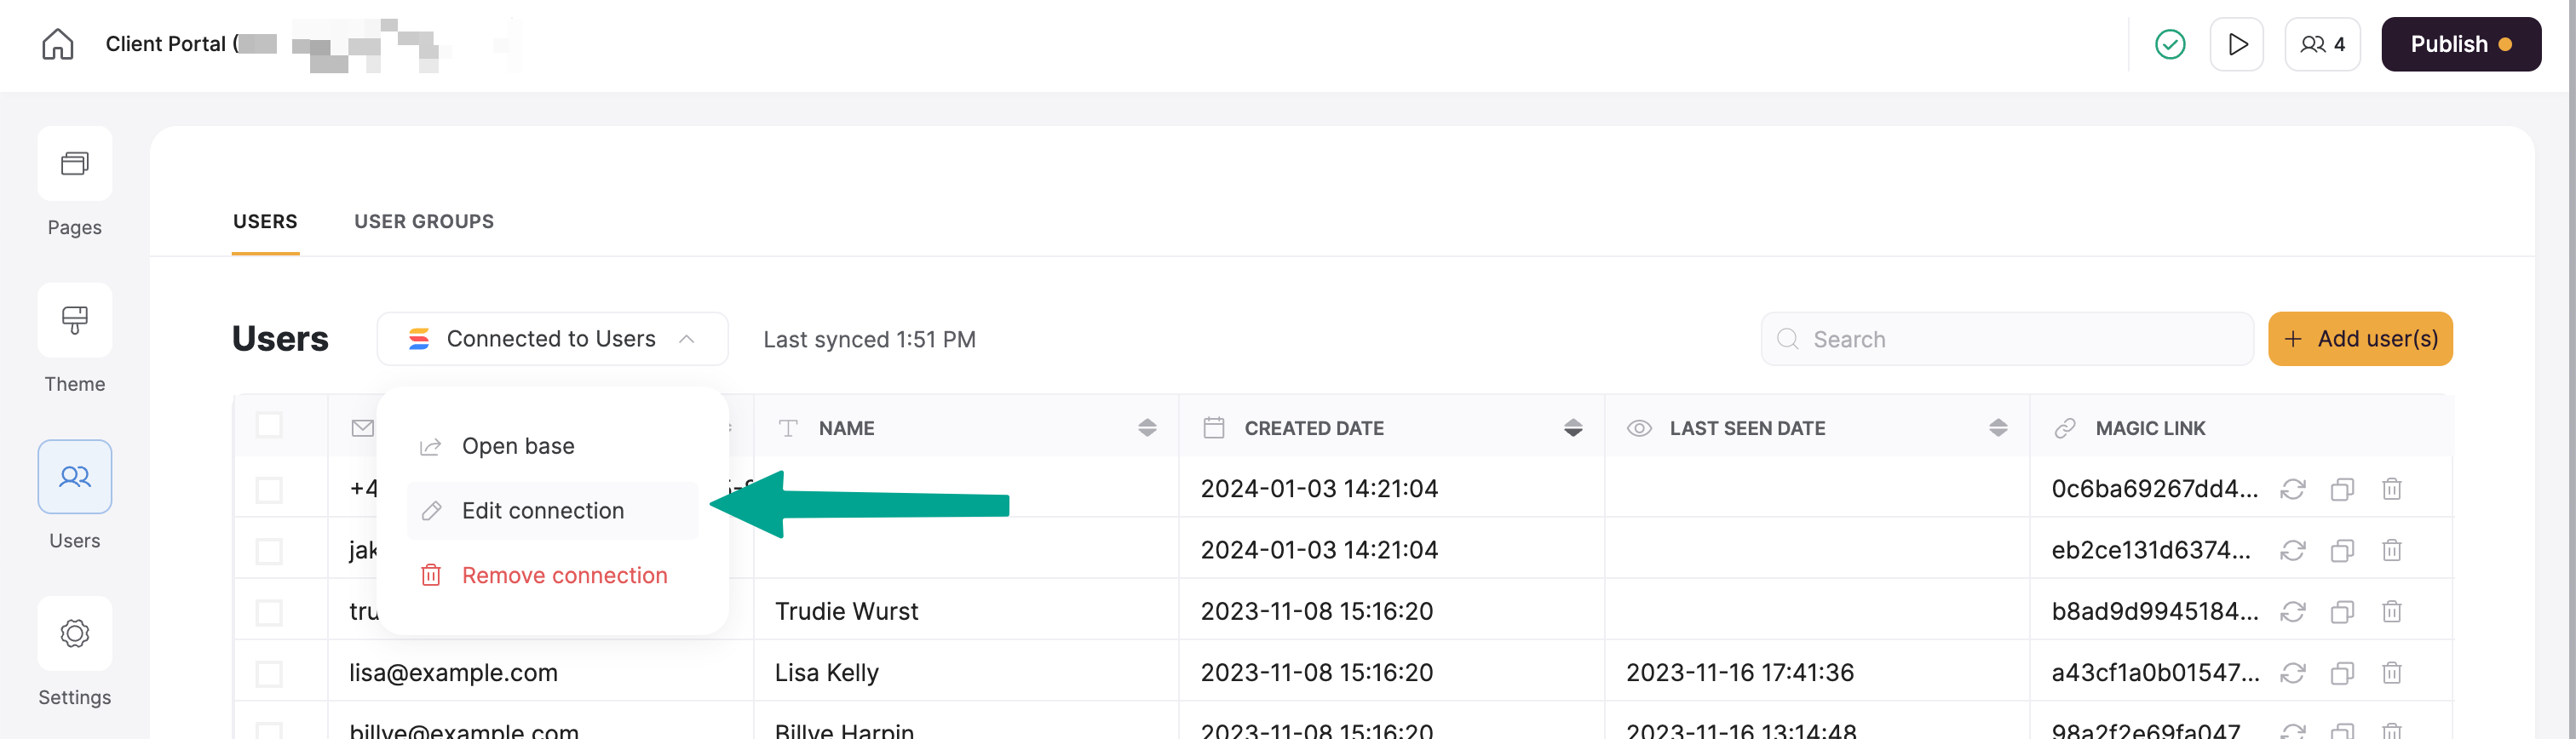
 Data source **is connected**
If you already have a data source connected, you can add a "File" type field in your User Profile block settings and map it to the corresponding field in the data source **manually**.
You need to edit your [data source connection](/add-and-manage-users/pxnkp9H3qyEVMF6XUceqnj/syncing-users-with-a-data-source/hshRGygHr4T33EnaLntGf9)
Data source **is connected**
If you already have a data source connected, you can add a "File" type field in your User Profile block settings and map it to the corresponding field in the data source **manually**.
You need to edit your [data source connection](/add-and-manage-users/pxnkp9H3qyEVMF6XUceqnj/syncing-users-with-a-data-source/hshRGygHr4T33EnaLntGf9)
 Then map **the same** field there as well (**Select Avatar field** option as shown in the screen recording above).
Note that mapping the field from **BOTH** the **User Profile**
block and **data source connection** settings is **necessary** for enabling the avatar.
### **Avatar upload by the user**
That's it, now the logged-in users will see an option to upload an avatar on their **User Profile** and can update it at any time. See below how it works.
Then map **the same** field there as well (**Select Avatar field** option as shown in the screen recording above).
Note that mapping the field from **BOTH** the **User Profile**
block and **data source connection** settings is **necessary** for enabling the avatar.
### **Avatar upload by the user**
That's it, now the logged-in users will see an option to upload an avatar on their **User Profile** and can update it at any time. See below how it works.