> ## Documentation Index
> Fetch the complete documentation index at: https://docs.softr.io/llms.txt
> Use this file to discover all available pages before exploring further.
# Signup Form
> Signup form overview.
This method of Signup is only for [Legacy Softr Apps](/application-settings/n3K2UEfpC9BpHgakMzUU5Y/migrating-app-versions/4ASdHE4RECmauL82yzcVam). For the new Signup blocks and method for authentication, see the articles on [User Authentication](/core-concepts-overview/c5VwEbsWtTfPyUZjmEKvfx/user-authentication/7gJmq6B7syYE3hRoFxLs5J), [Utility Blocks](/application-settings/n3K2UEfpC9BpHgakMzUU5Y/utility-pages/49UoDpTpTPbkoKVwksoqfh), and the [Signup](/building-blocks/vikC2AWEpQGkZd4jGyoVxo/signup/54HYs3JEjYZA33S96fP3de) utility page.
## Logo, Title, and Background Image
Under the Features tab of block settings, you can add a logo to the block, change the title, as well as set a background image for the whole block.
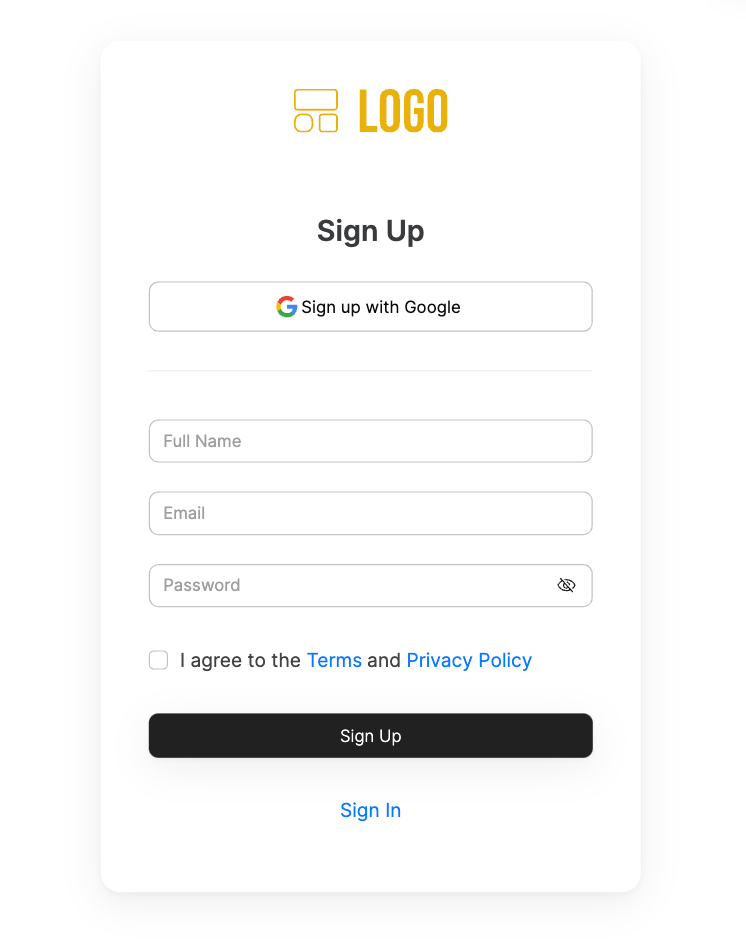 ## Signup Form
### **Sign up with Google**
If you enable this option, a **Sign up with Google** button will be added to the form, allowing your users to sign up with their Google Accounts.
## Signup Form
### **Sign up with Google**
If you enable this option, a **Sign up with Google** button will be added to the form, allowing your users to sign up with their Google Accounts.
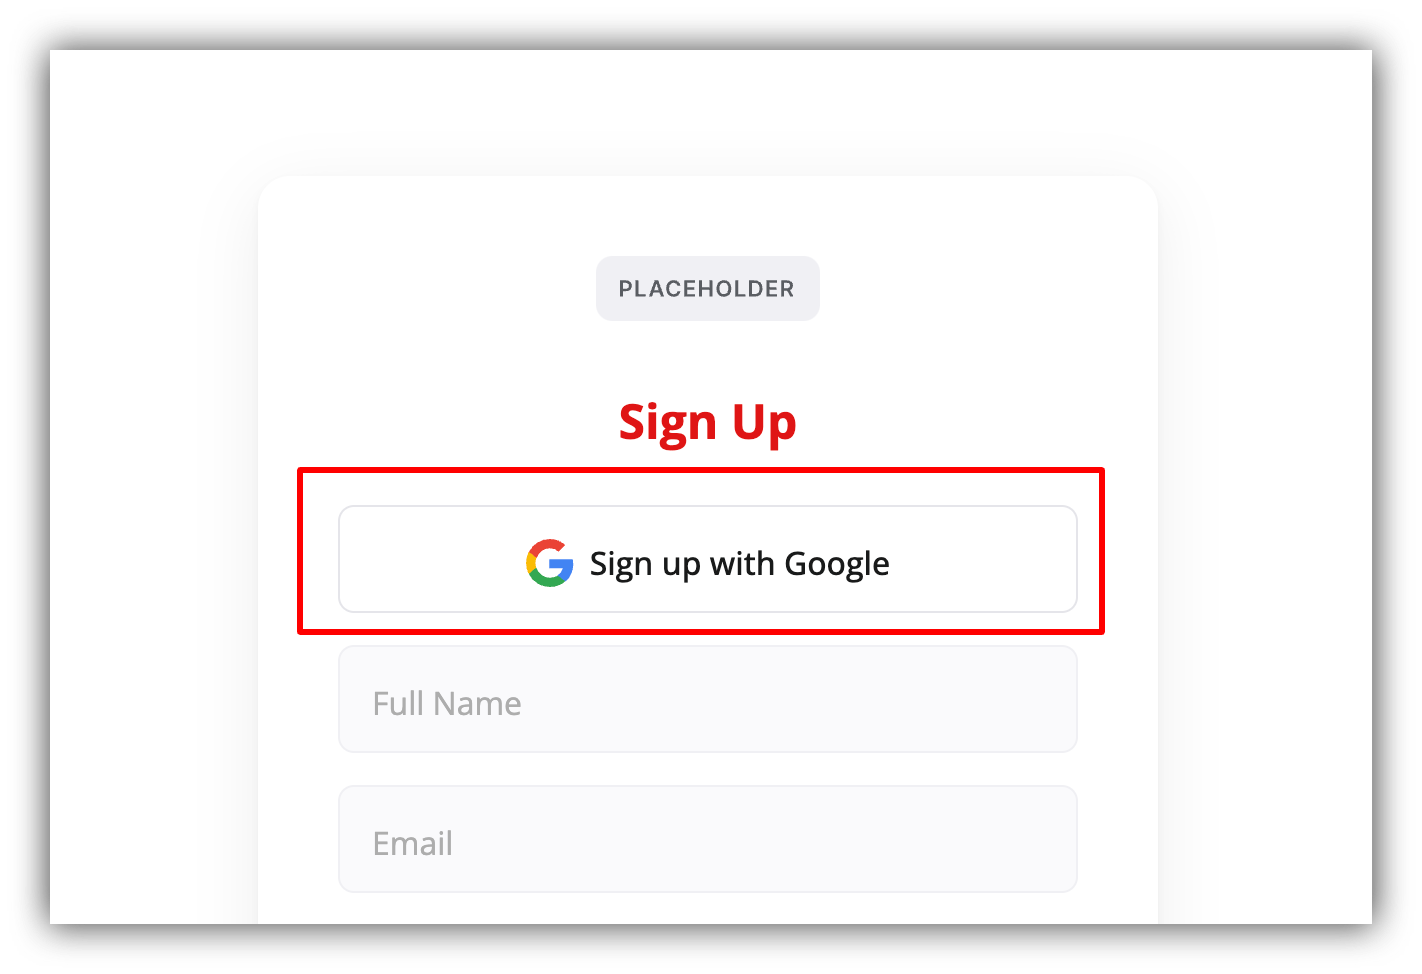 To enable Google Signup, you first need to add your Google APP Client details in **Integrations => Google Sign In**. You can find instructions on getting the **Client ID** and **Client Secret** [here](/integrations/etS18kJqm1fuD58KCsjC3z/google-sign-in/2hBabh9UqoE8W7aWrfPVFd).
### **Domain-based signup**
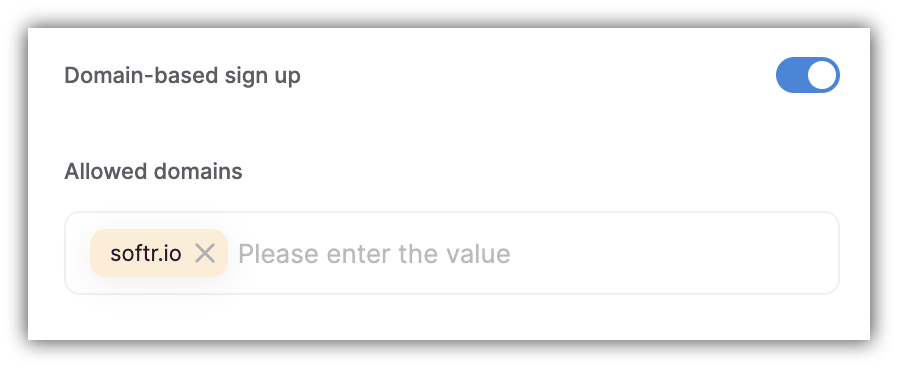
Here, you can allow users to sign up only from specified domains. To do so, you need to add these domains inside the **Allowed domains** field. For instance, if you want only people with "softr.io" domains (e.g. [john@softr.io](mailto:john@softr.io)) to sign up, you need to enter "softr.io" into **Allowed domains** and hit **Enter** (see below). You can add as many domains as needed.
To enable Google Signup, you first need to add your Google APP Client details in **Integrations => Google Sign In**. You can find instructions on getting the **Client ID** and **Client Secret** [here](/integrations/etS18kJqm1fuD58KCsjC3z/google-sign-in/2hBabh9UqoE8W7aWrfPVFd).
### **Domain-based signup**
Here, you can allow users to sign up only from specified domains. To do so, you need to add these domains inside the **Allowed domains** field. For instance, if you want only people with "softr.io" domains (e.g. [john@softr.io](mailto:john@softr.io)) to sign up, you need to enter "softr.io" into **Allowed domains** and hit **Enter** (see below). You can add as many domains as needed.
 ## Form fields
### **Default Fields**
By default, you have three fields: **Name**, **Email**, and **Password,** where the **Name** field can be enabled or disabled. The placeholder texts of these fields can be modified as well. However, it's also possible to add any number of additional fields after connecting an Airtable users base, which we'll discuss next.
### **Adding Custom Fields**
You also have the option of customizing the Signup block by adding more fields. The values of additional fields will be stored in your [data source](/4230abecf813402aa2926466c313290a), therefore you need to have [a data source connected](/add-and-manage-users/pxnkp9H3qyEVMF6XUceqnj/syncing-users-with-a-data-source/hshRGygHr4T33EnaLntGf9) in the **Users** section. If you haven't connected a users base data source yet, you'll see a **Create Data Source** option under the **Signup Form** section in the **Features** tab.
## Form fields
### **Default Fields**
By default, you have three fields: **Name**, **Email**, and **Password,** where the **Name** field can be enabled or disabled. The placeholder texts of these fields can be modified as well. However, it's also possible to add any number of additional fields after connecting an Airtable users base, which we'll discuss next.
### **Adding Custom Fields**
You also have the option of customizing the Signup block by adding more fields. The values of additional fields will be stored in your [data source](/4230abecf813402aa2926466c313290a), therefore you need to have [a data source connected](/add-and-manage-users/pxnkp9H3qyEVMF6XUceqnj/syncing-users-with-a-data-source/hshRGygHr4T33EnaLntGf9) in the **Users** section. If you haven't connected a users base data source yet, you'll see a **Create Data Source** option under the **Signup Form** section in the **Features** tab.
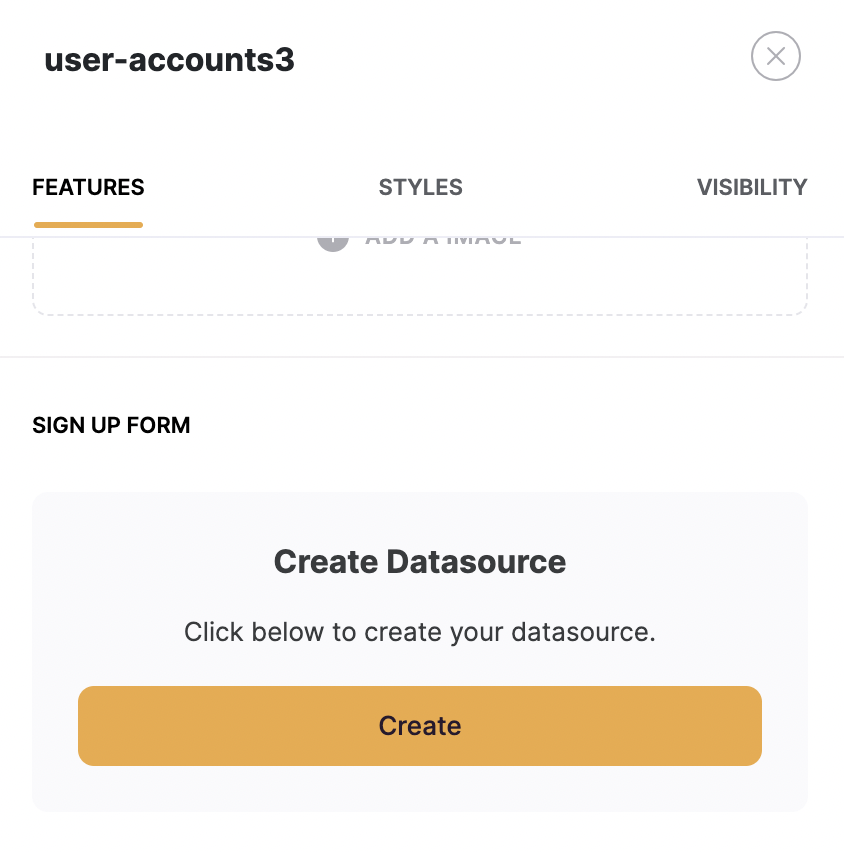 After clicking the **Create** button, you'll need to follow the process described [here](/integrations/etS18kJqm1fuD58KCsjC3z/google-sign-in/2hBabh9UqoE8W7aWrfPVFd) to connect a data source where user data will be synced. Further on, in your database, you can define additional fields to store extra user parameters and add those to the **Signup** form as well. Let's consider a specific example to give you a better idea of how this works.
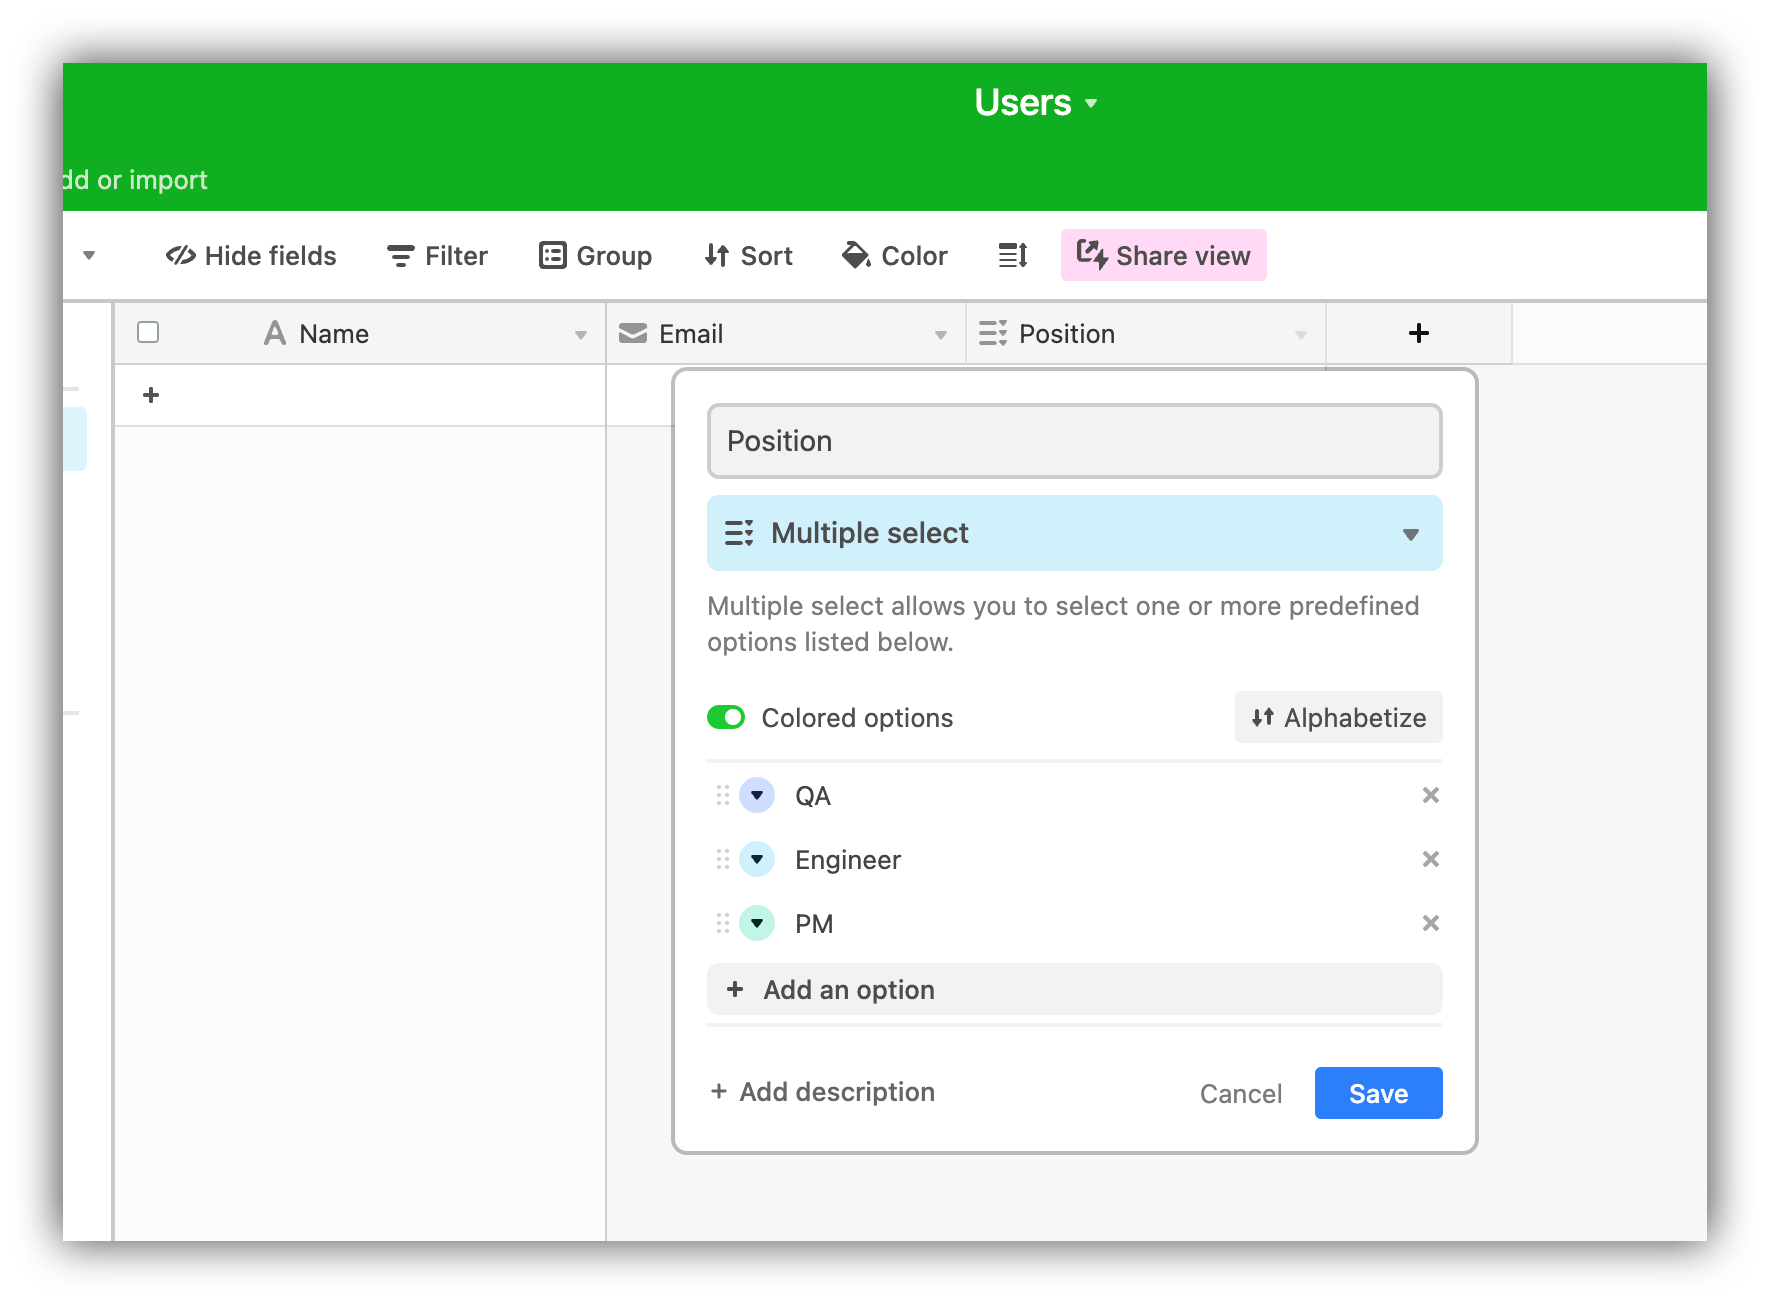
Let's connect an Airtable users base, where we have added an additional **Position** field that indicates the position of the registered employee within the company.
After clicking the **Create** button, you'll need to follow the process described [here](/integrations/etS18kJqm1fuD58KCsjC3z/google-sign-in/2hBabh9UqoE8W7aWrfPVFd) to connect a data source where user data will be synced. Further on, in your database, you can define additional fields to store extra user parameters and add those to the **Signup** form as well. Let's consider a specific example to give you a better idea of how this works.
Let's connect an Airtable users base, where we have added an additional **Position** field that indicates the position of the registered employee within the company.
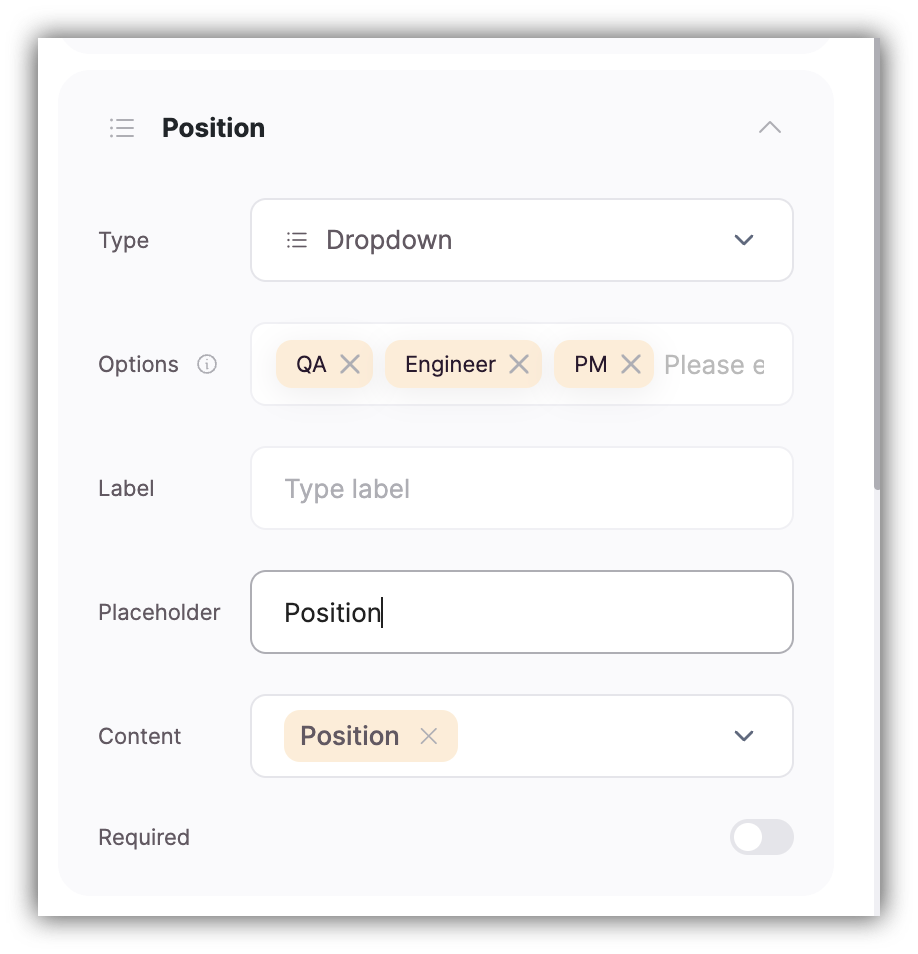
 Now, we can add a position field to our Signup form and link it to this field on Airtable as done below.
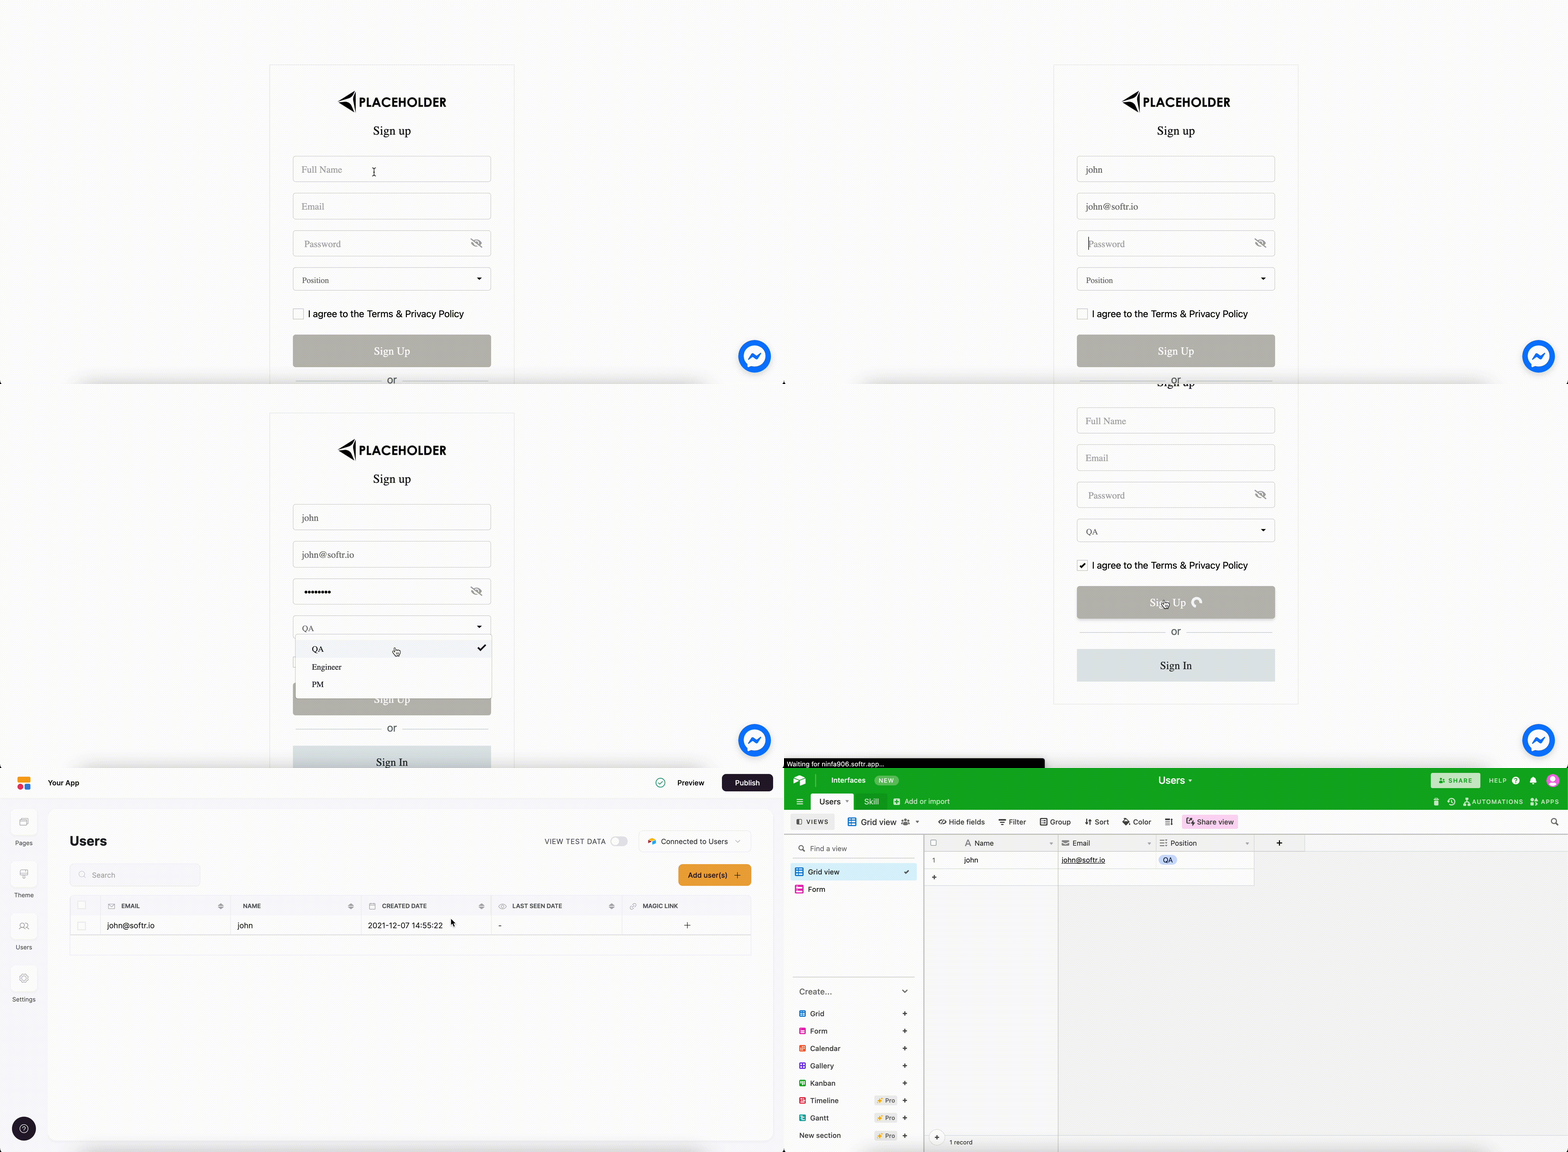
 As a result, the users can now select a **Position** on signup, and it will be stored in the connected Airtable base as shown below.
 ### **Sign Up Button**
Lastly, there's the **Sign Up** button. The button **Text** can be changed, while the **Action** is predefined and can't be modified.
## Terms and Conditions
Here, you can choose if you want to display a **Terms & Conditions** checkbox on the form, so that the users have to accept it before proceeding with the registration. If the checkbox is enabled, there are two fields for linking **Terms** and **Privacy Policy** pages.
## Show Sign In
Choose whether you want to show a sign-in button (takes the user to the sign-in page) or not.
## On Sign up
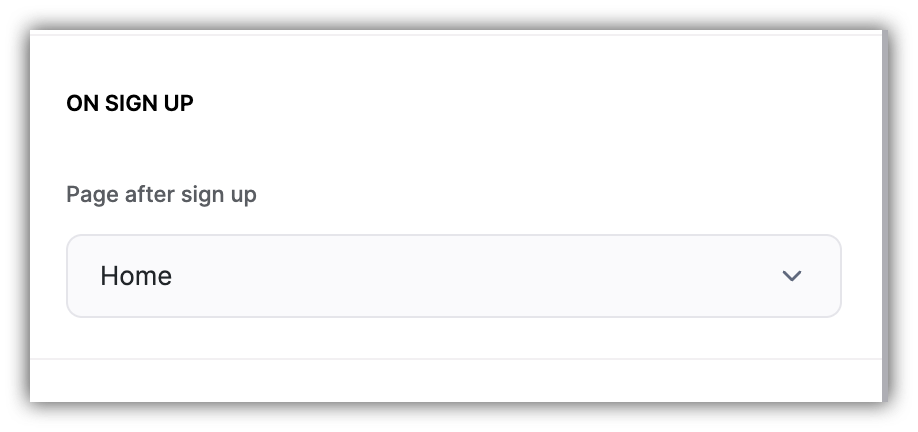
Lastly, we need to set what page the user should be taken to after successfully signing up.
### **Sign Up Button**
Lastly, there's the **Sign Up** button. The button **Text** can be changed, while the **Action** is predefined and can't be modified.
## Terms and Conditions
Here, you can choose if you want to display a **Terms & Conditions** checkbox on the form, so that the users have to accept it before proceeding with the registration. If the checkbox is enabled, there are two fields for linking **Terms** and **Privacy Policy** pages.
## Show Sign In
Choose whether you want to show a sign-in button (takes the user to the sign-in page) or not.
## On Sign up
Lastly, we need to set what page the user should be taken to after successfully signing up.
 ## **Enable reCaptcha**
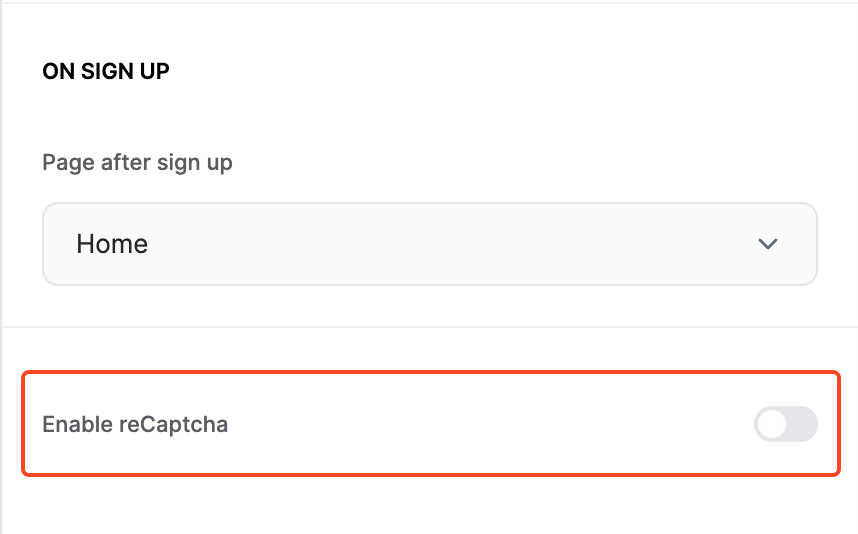 By adding reCaptcha authentication to your sign up form, you'll protect it from getting spammed or misused.
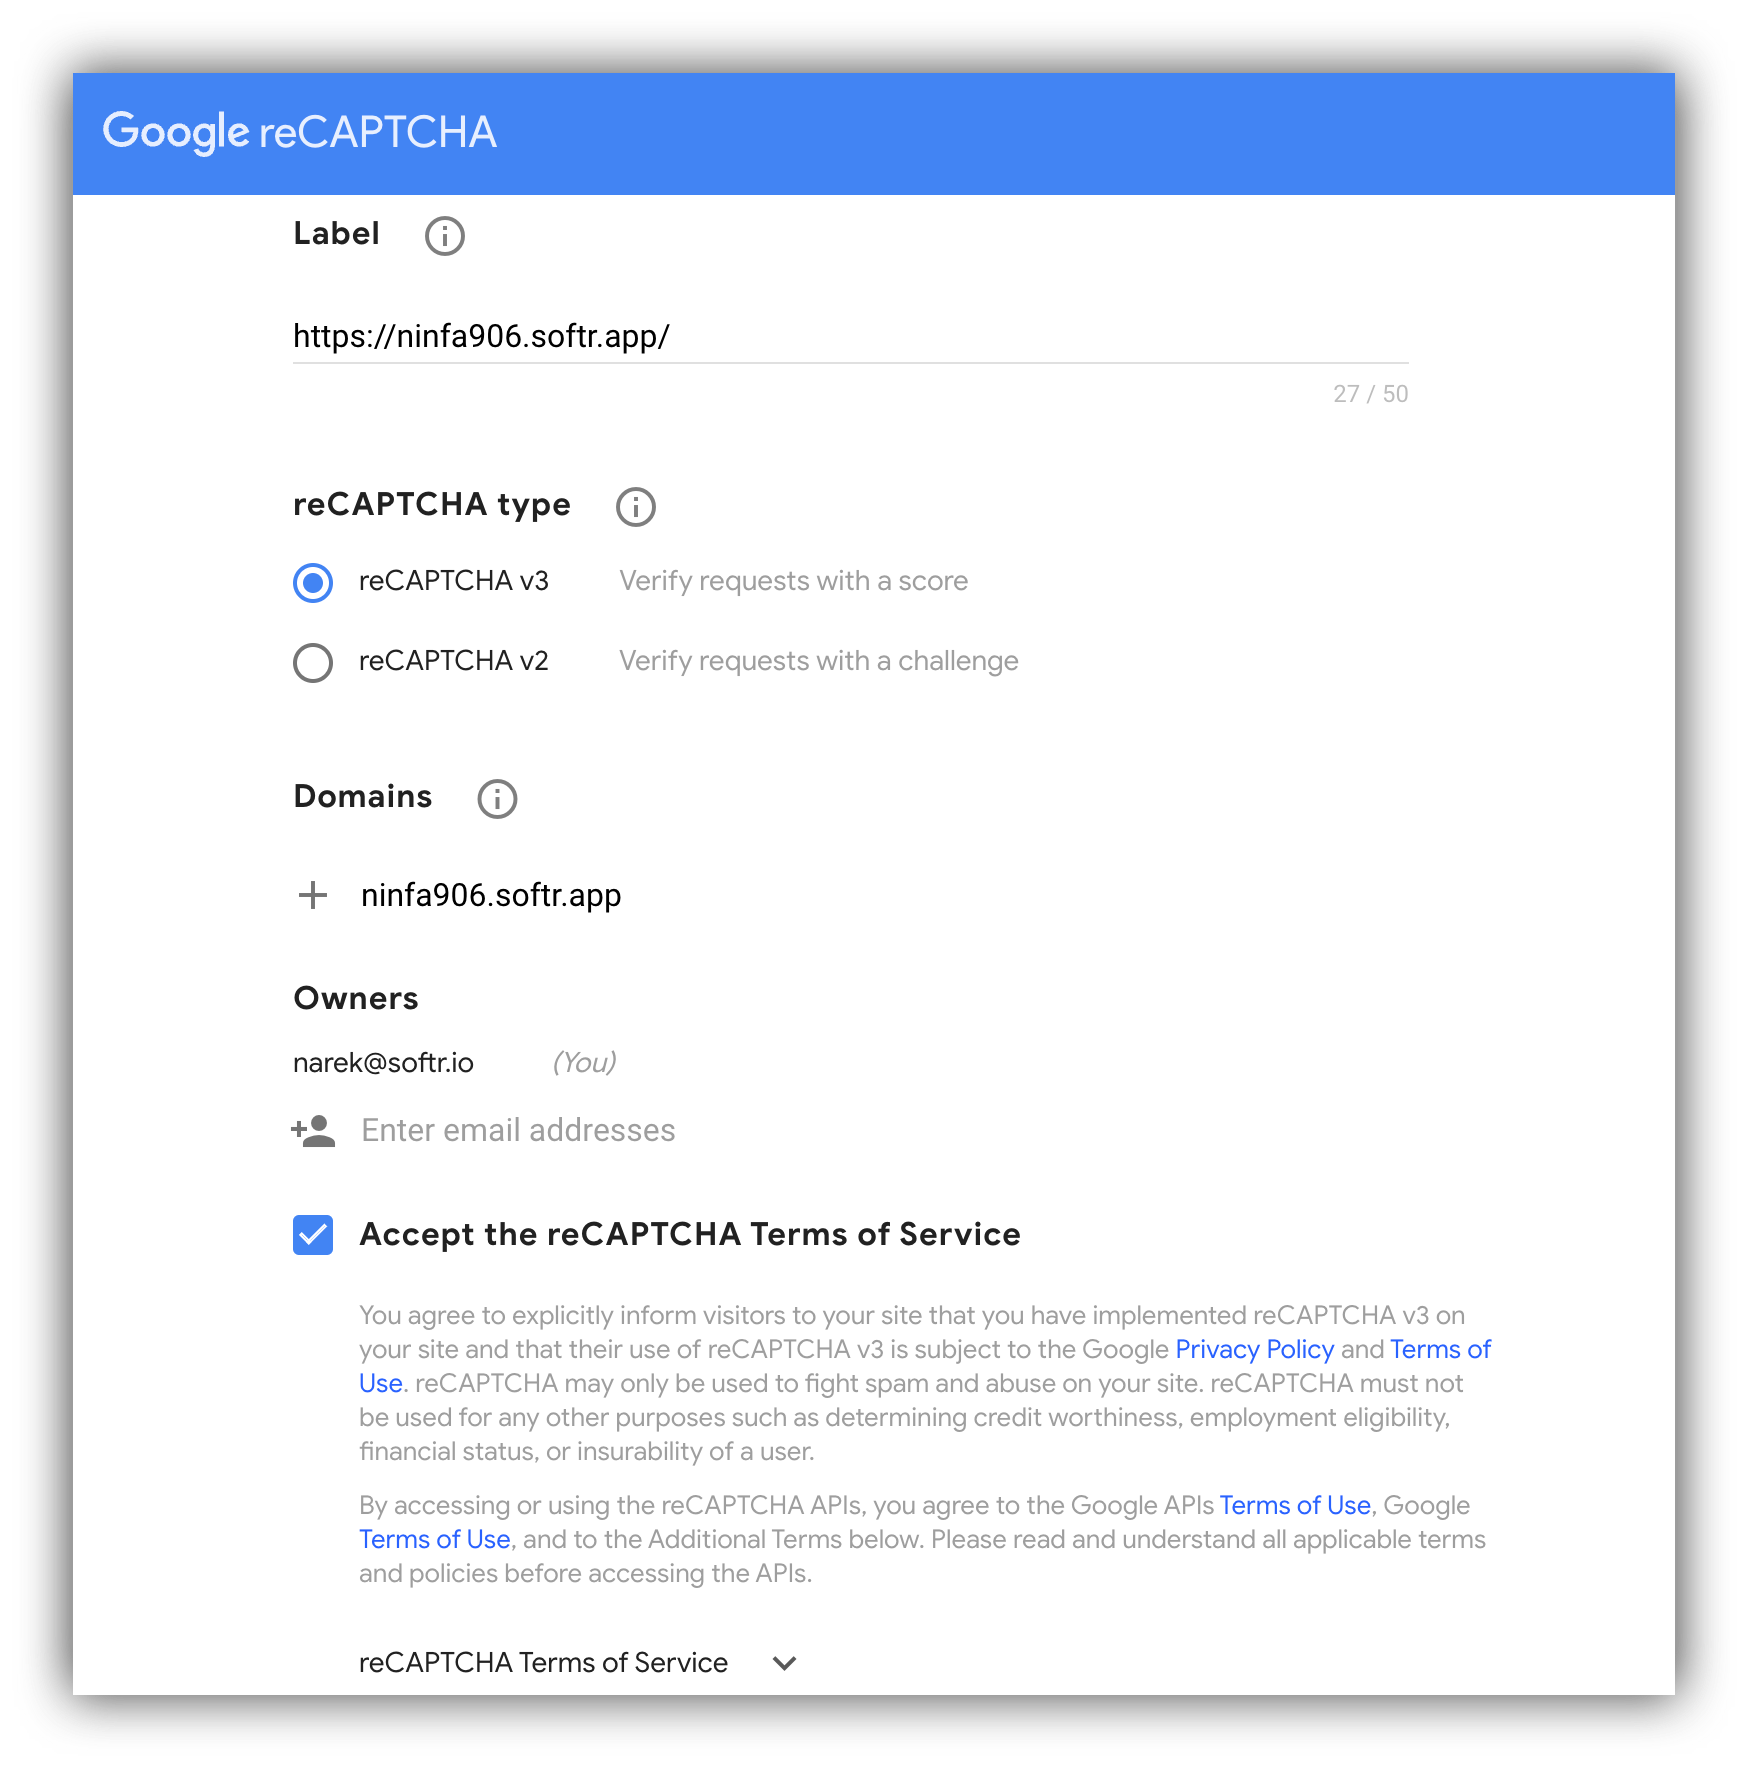
Please, note that Softr only supports [reCaptcha v3](https://developers.google.com/recaptcha/docs/versions).
To set up reCaptcha, you need to go to [https://www.google.com/recaptcha/admin/create](https://www.google.com/recaptcha/admin/create)
and enter your site details as shown below.
By adding reCaptcha authentication to your sign up form, you'll protect it from getting spammed or misused.
Please, note that Softr only supports [reCaptcha v3](https://developers.google.com/recaptcha/docs/versions).
To set up reCaptcha, you need to go to [https://www.google.com/recaptcha/admin/create](https://www.google.com/recaptcha/admin/create)
and enter your site details as shown below.
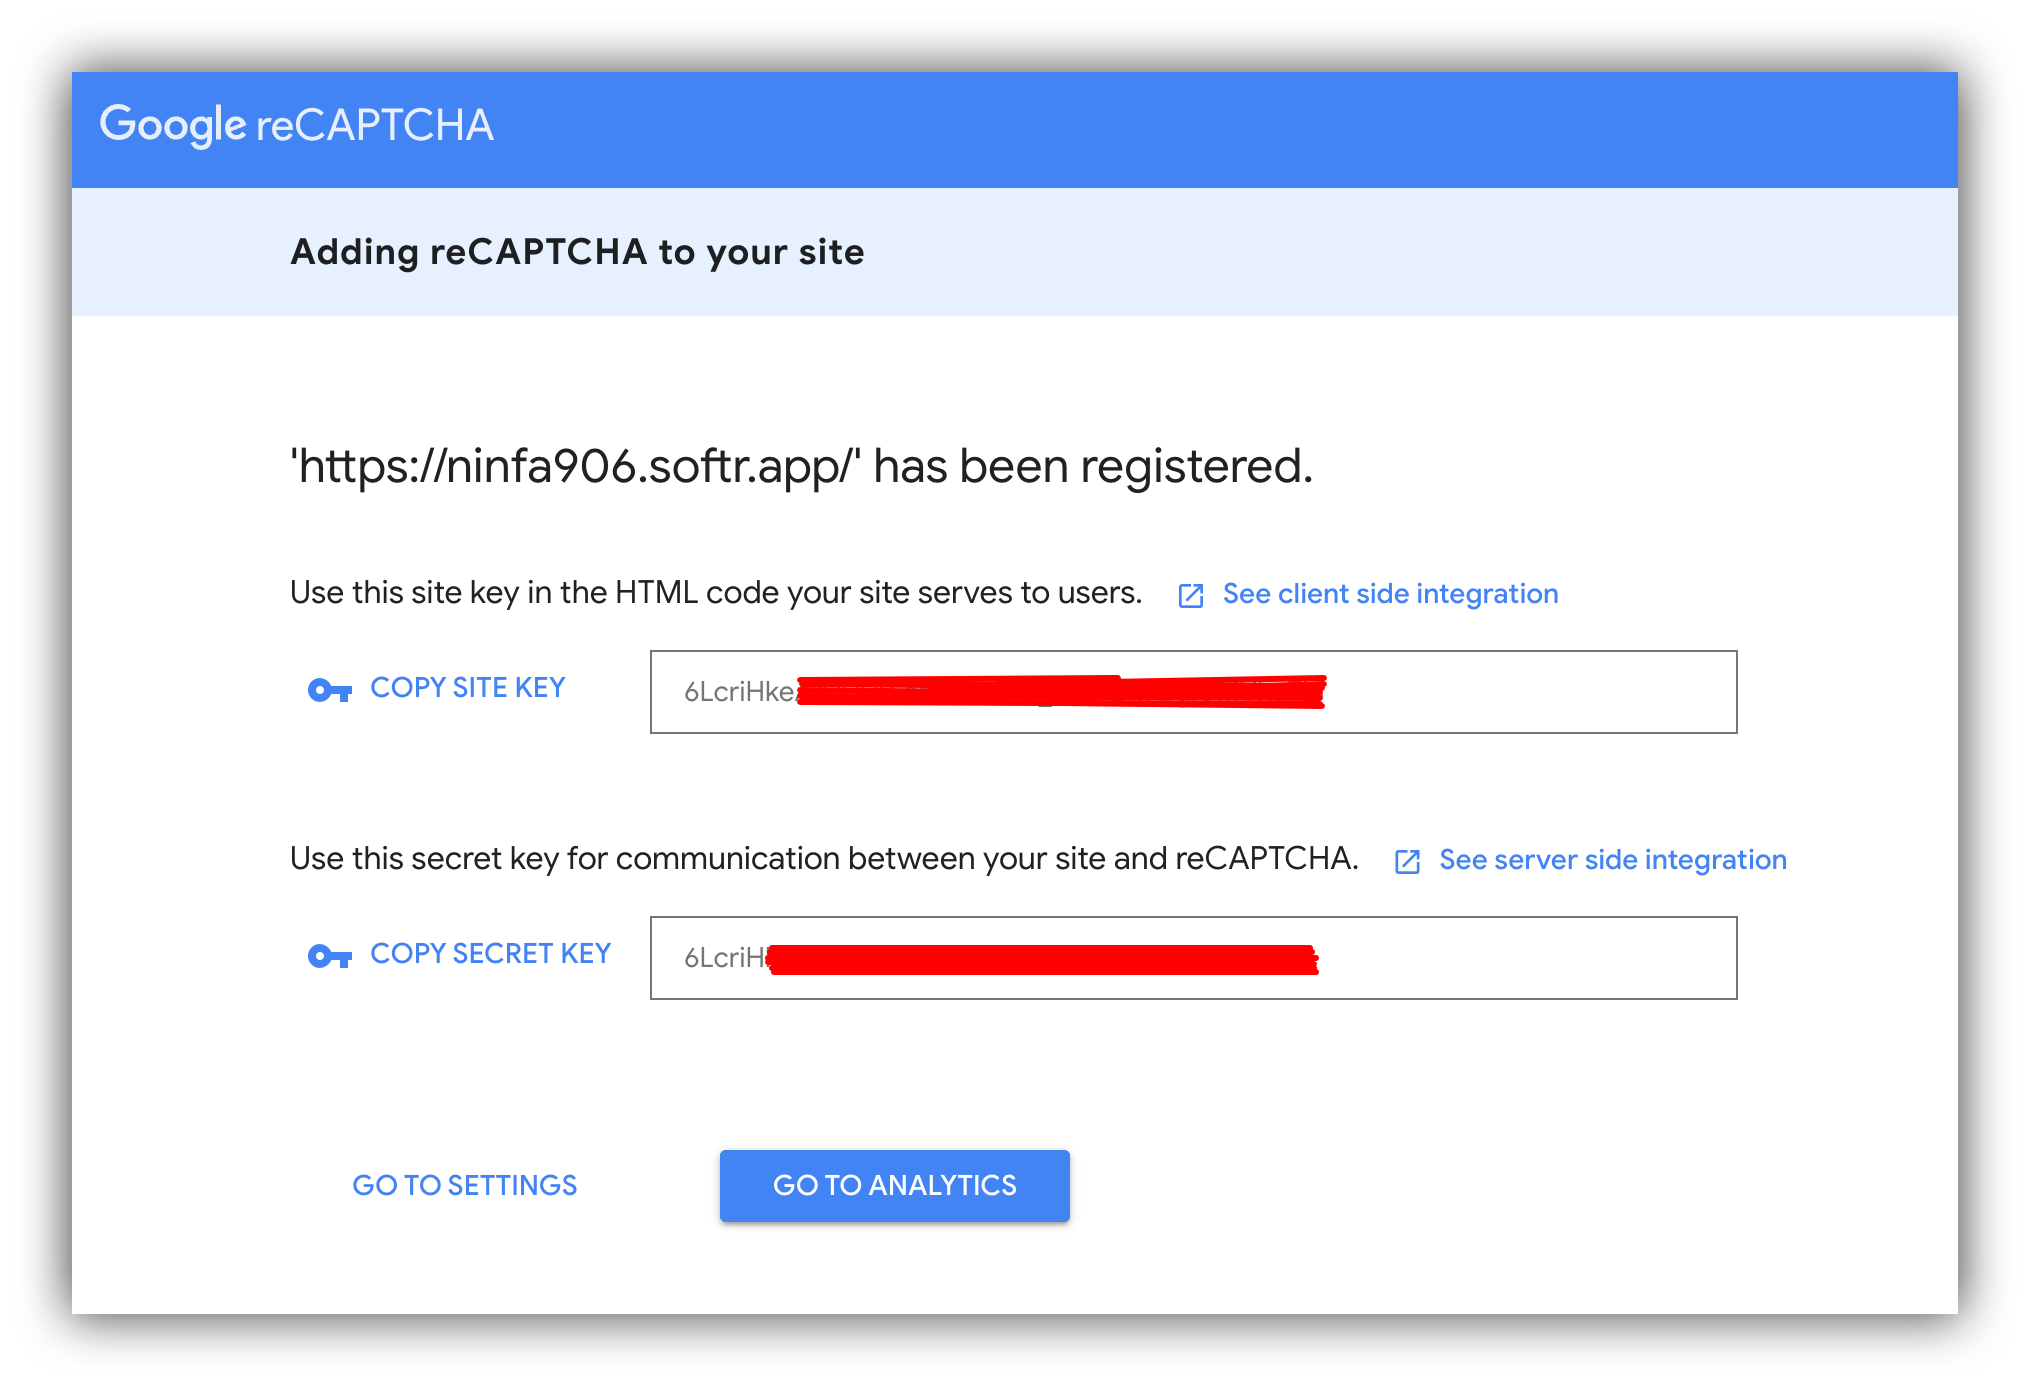
 In the next screen, you just need to copy the **Site Key** and **Secret Key.**
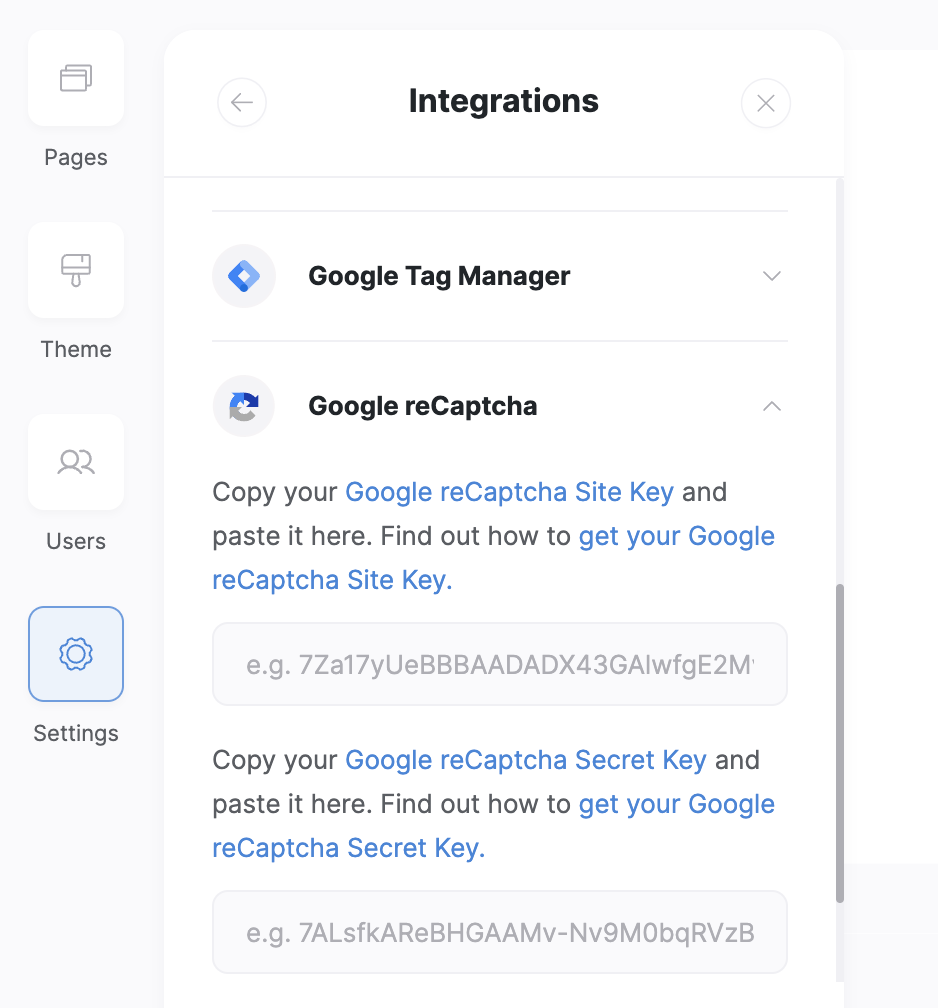
 To finalize the setup, paste the Site Key and Secret Key in your Softr app's **Settings => Integrations => Google reCaptcha.**
 ## Block visibility
The block is visible to all visitors of the app, and you have no control over its visibility, hence the default visibility setting is set to "Non-logged in users”.
## Block visibility
The block is visible to all visitors of the app, and you have no control over its visibility, hence the default visibility setting is set to "Non-logged in users”.