> ## Documentation Index
> Fetch the complete documentation index at: https://docs.softr.io/llms.txt
> Use this file to discover all available pages before exploring further.
# Add or import users manually
> Add or import users to your Softr app manually.
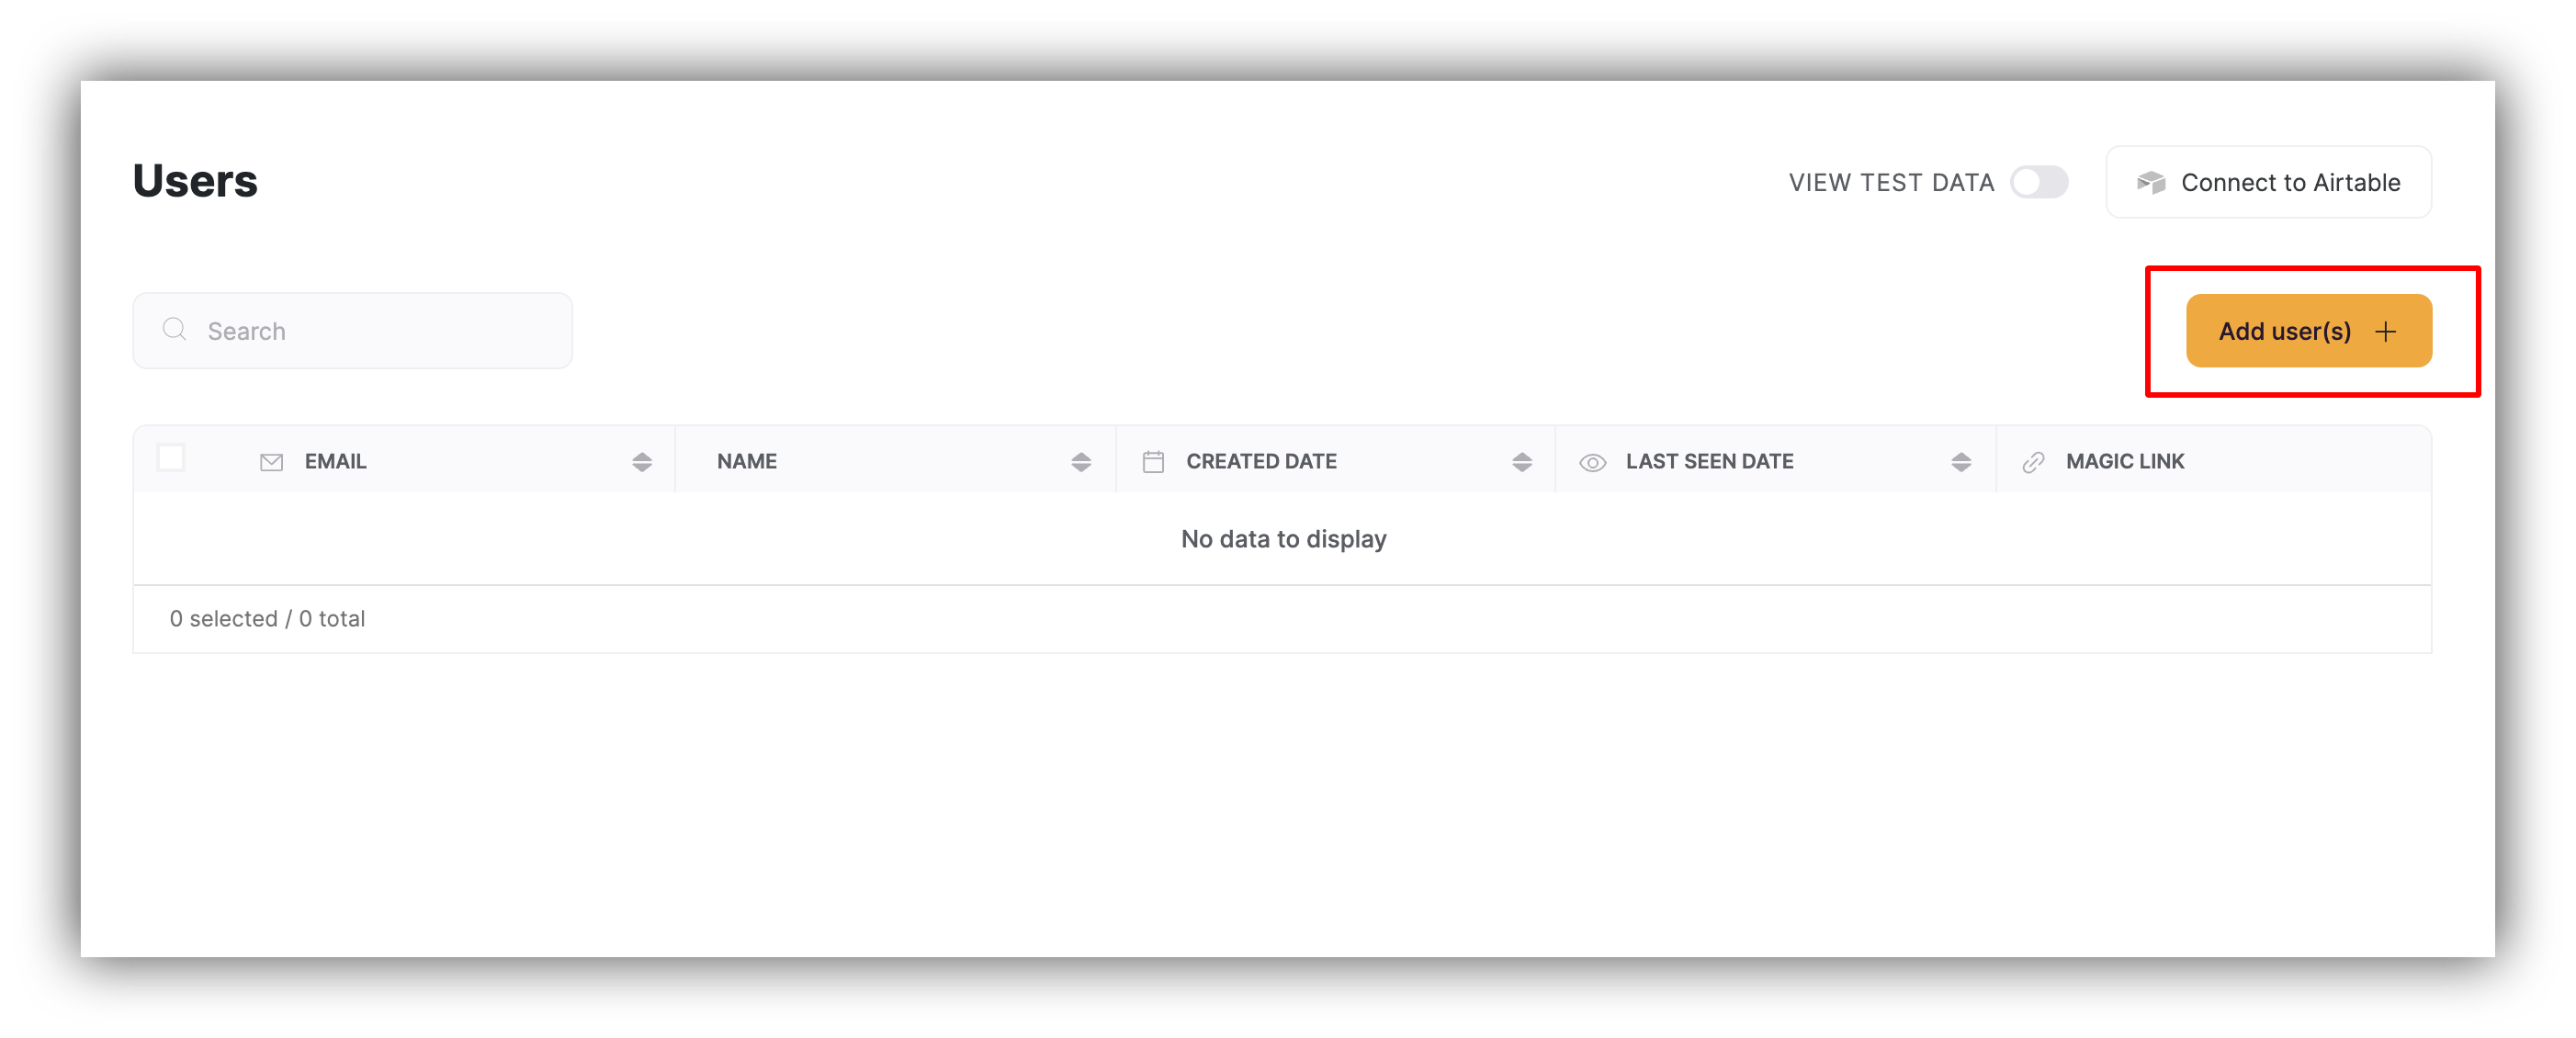
To manually add users to your Softr app, you can click on **Add user(s)** button.
 ### **Adding a single user**
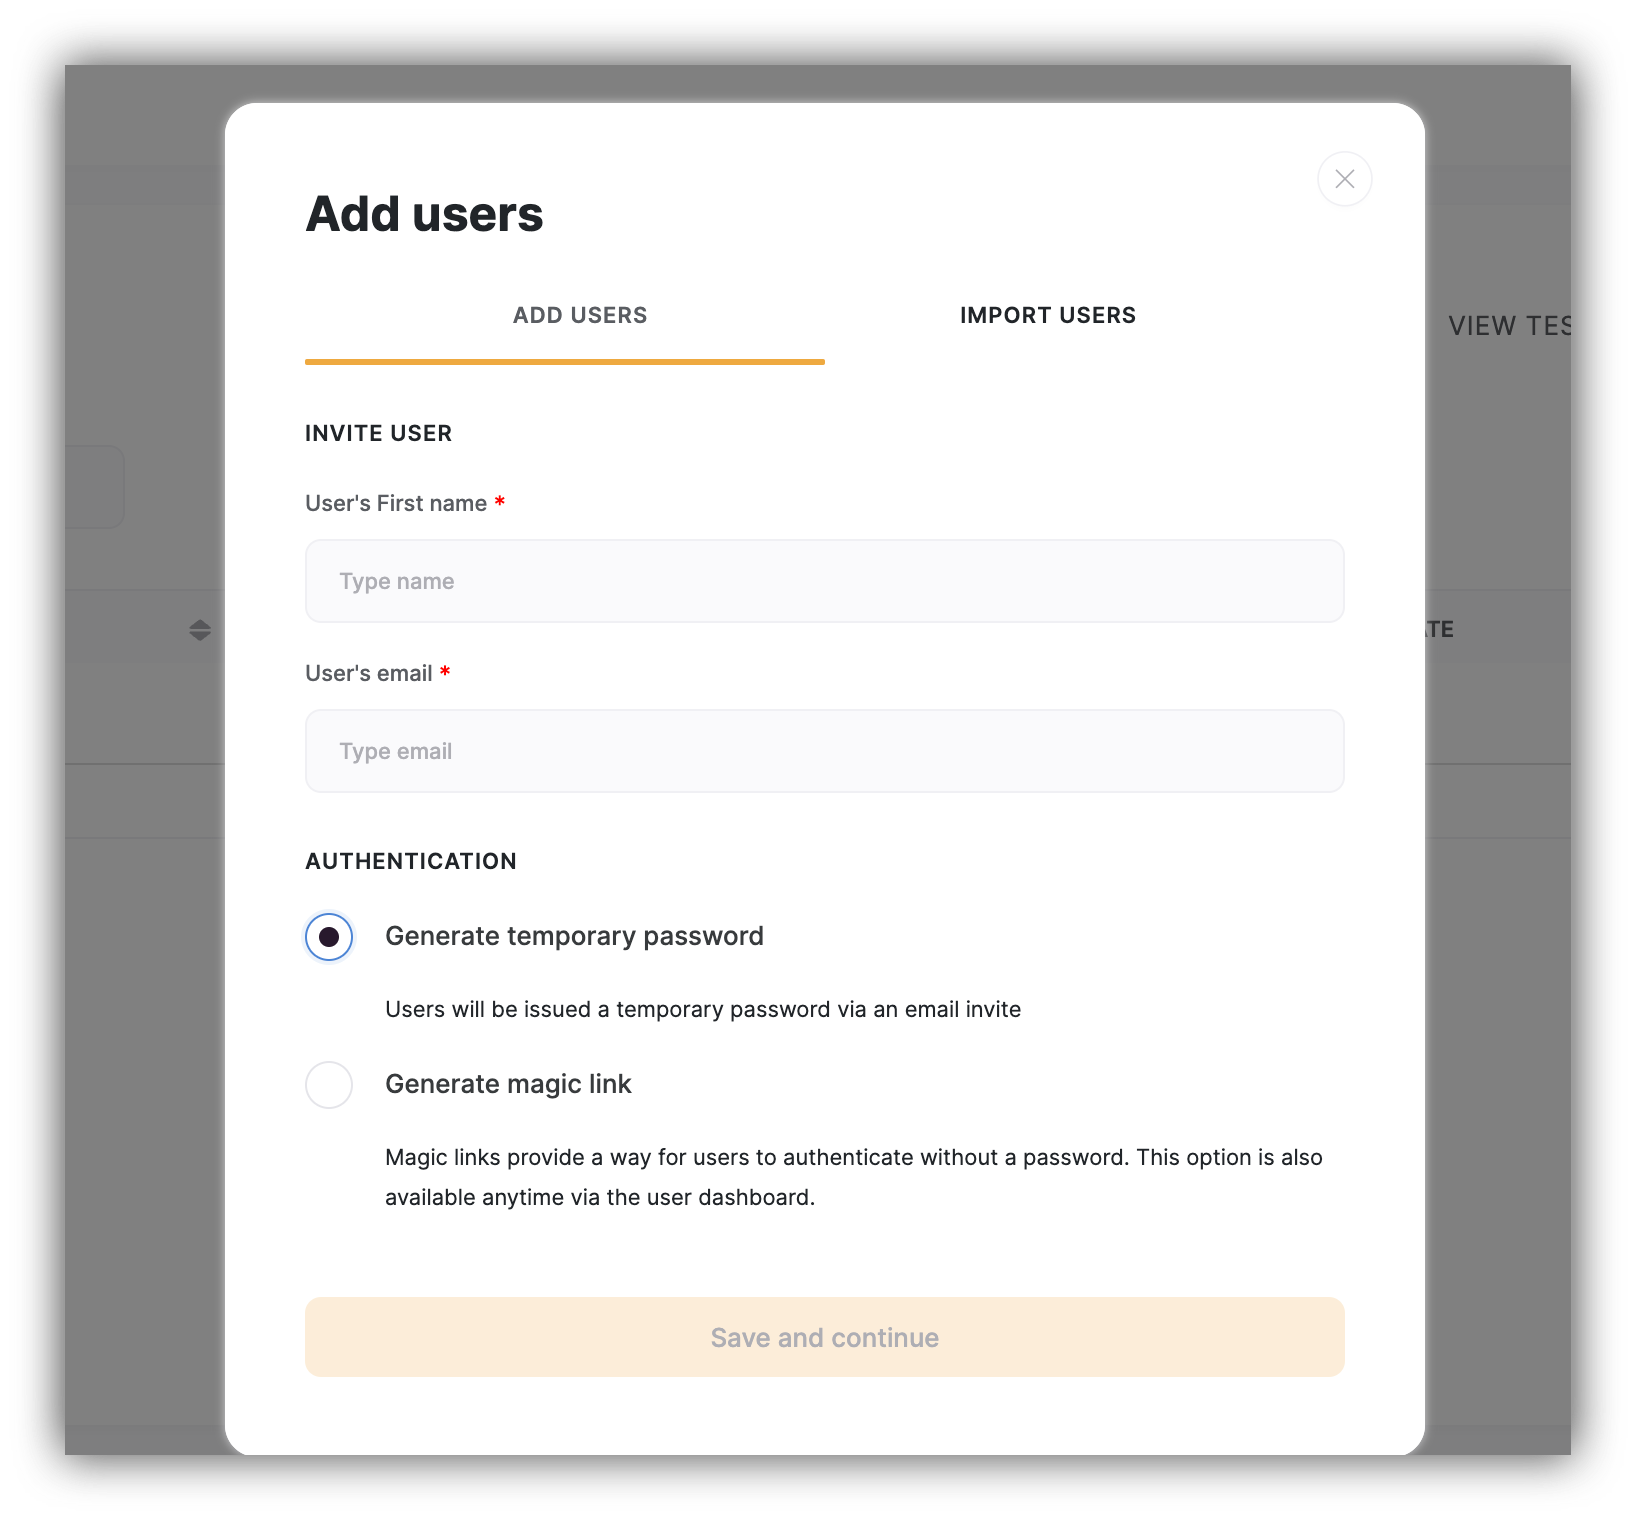
To add a single user, go to **ADD USERS** tab:
1. Enter the `Name` and `Email` of the user you want to add.
2. Select the authentication method. (We’ll explain more below)
### **Adding a single user**
To add a single user, go to **ADD USERS** tab:
1. Enter the `Name` and `Email` of the user you want to add.
2. Select the authentication method. (We’ll explain more below)
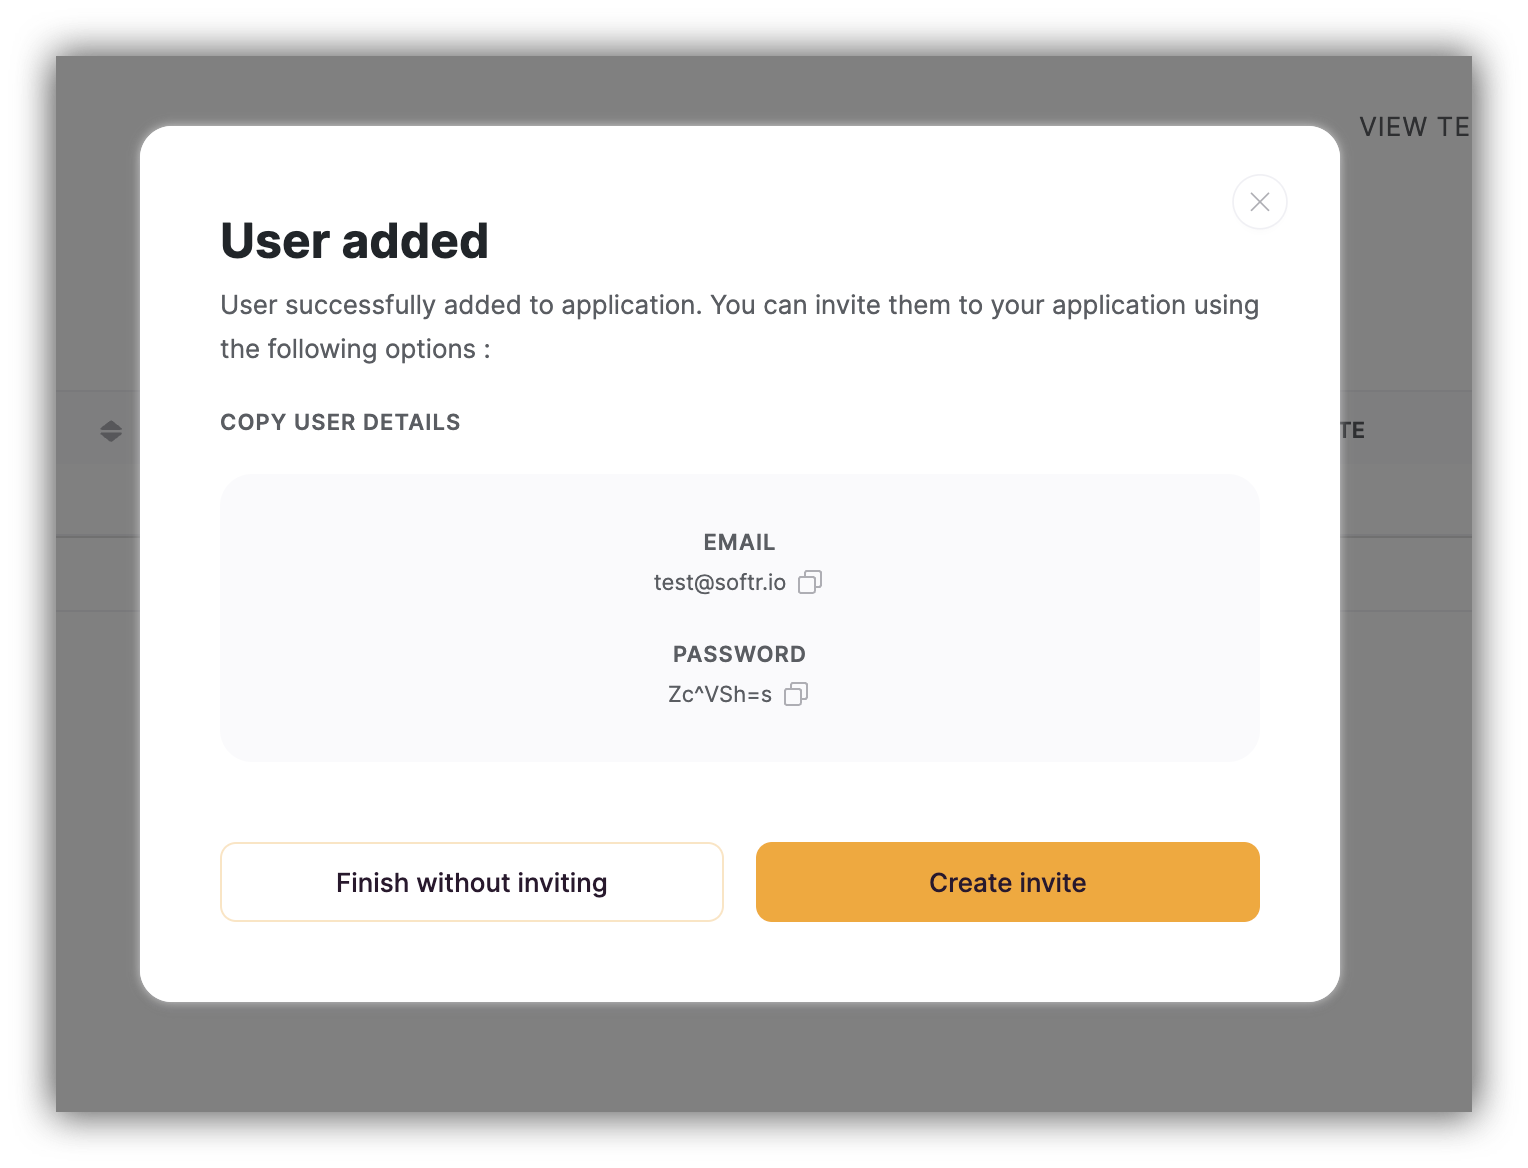
 If you choose to generate a temporary password, after hitting **Save and continue**, the user will be created, and you'll be taken to the next screen with user credentials.
You can either:
* **Finish without inviting**
* **Create invite,** which will allow you to send an email to the user with his/her login credentials included.
If you choose to generate a temporary password, after hitting **Save and continue**, the user will be created, and you'll be taken to the next screen with user credentials.
You can either:
* **Finish without inviting**
* **Create invite,** which will allow you to send an email to the user with his/her login credentials included.
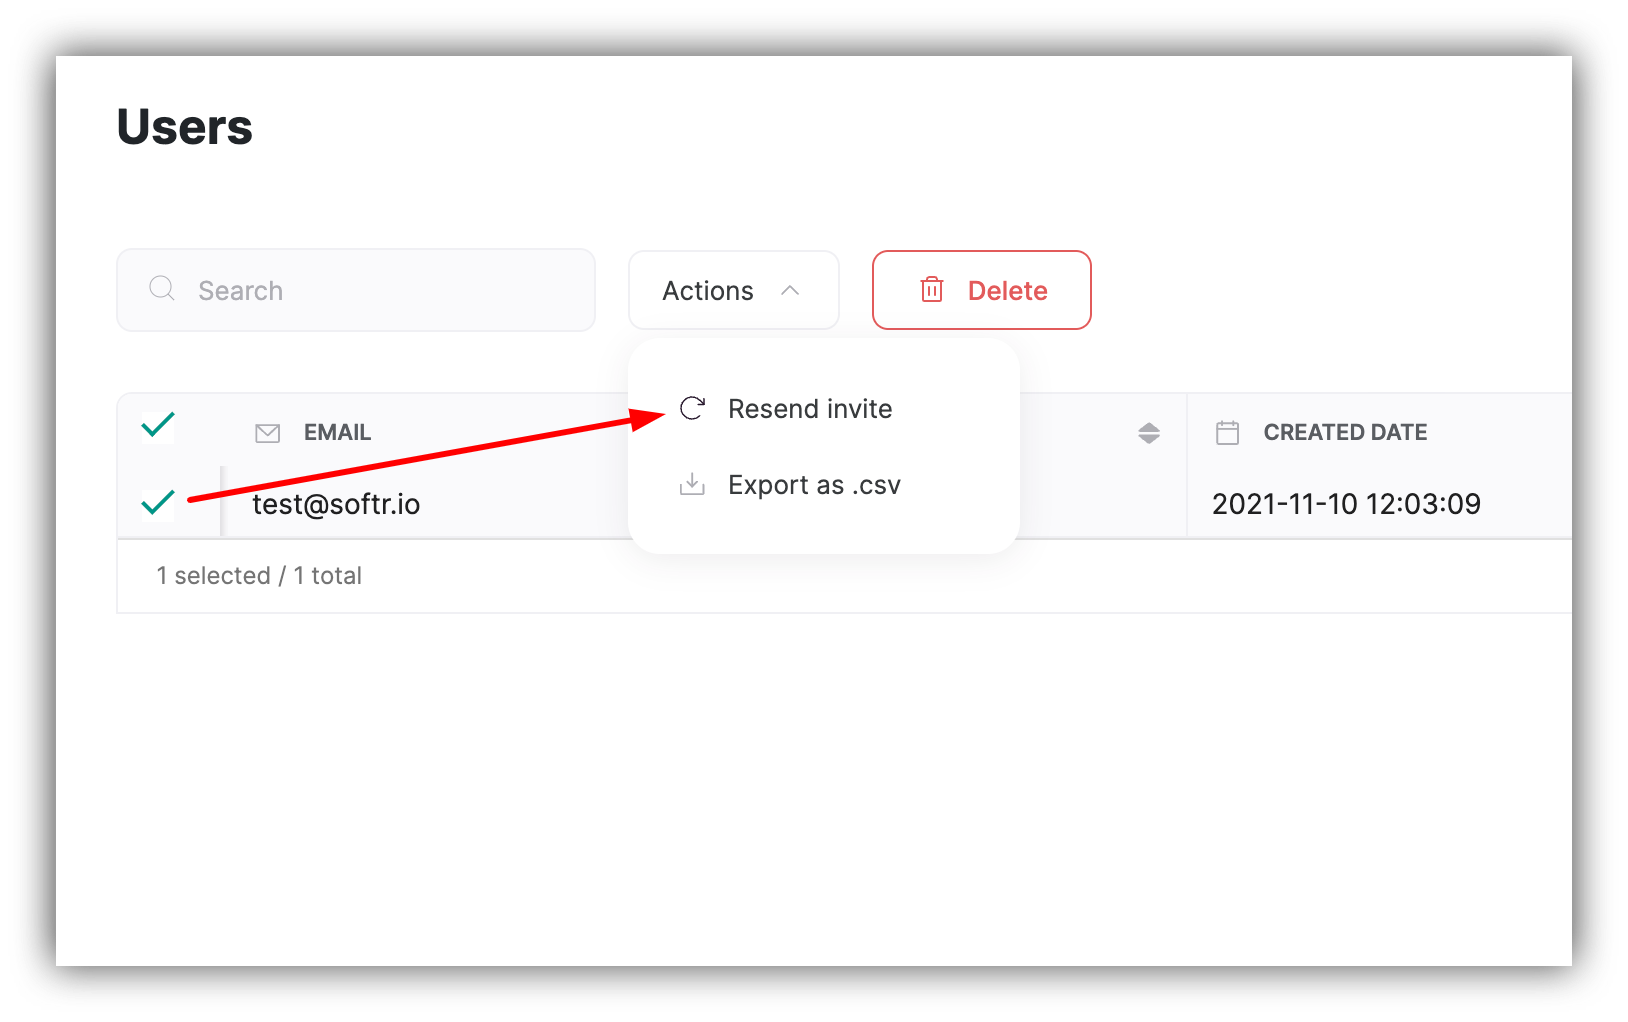
 In the future, if you need to resend the invite, you can select the user from the list and choose the **Resend Invite** action as shown below.
 ### **Import users**
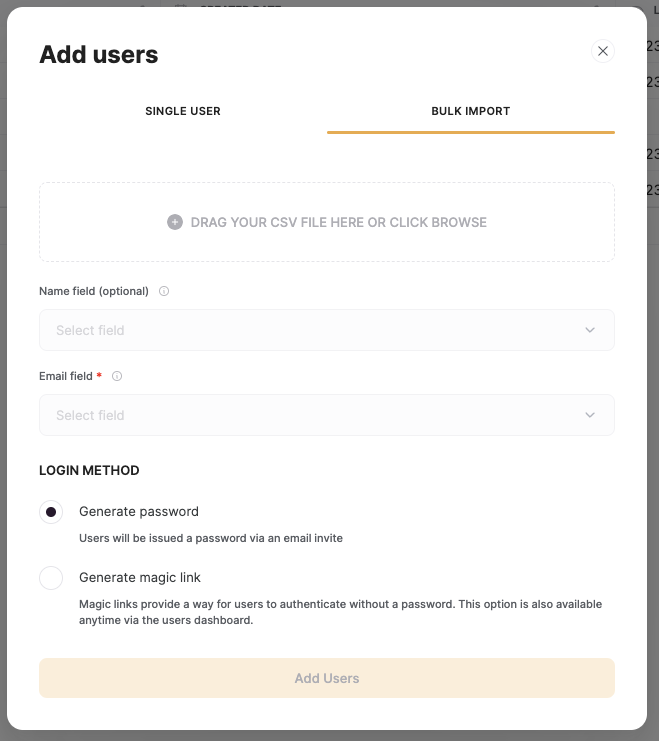
To bulk import multiple users, go to **IMPORT USERS** tab:
1. Upload the CSV file that contains your user data.
2. Map `Email` field.
3. (Optional) Map the `Name` field.
4. Select the default login method the users will use to login to the app for the first time. You can choose to generate a temporary password or generate a magic link. We recommend asking them in the invite email to visit their profile and change their password on first login.
### **Import users**
To bulk import multiple users, go to **IMPORT USERS** tab:
1. Upload the CSV file that contains your user data.
2. Map `Email` field.
3. (Optional) Map the `Name` field.
4. Select the default login method the users will use to login to the app for the first time. You can choose to generate a temporary password or generate a magic link. We recommend asking them in the invite email to visit their profile and change their password on first login.
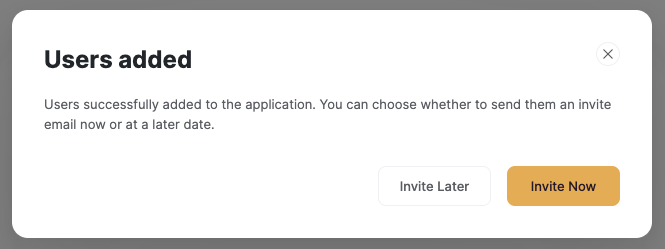
 Click **Add Users**, then you can select whether you want to send Invites to all Users now or send invites later.
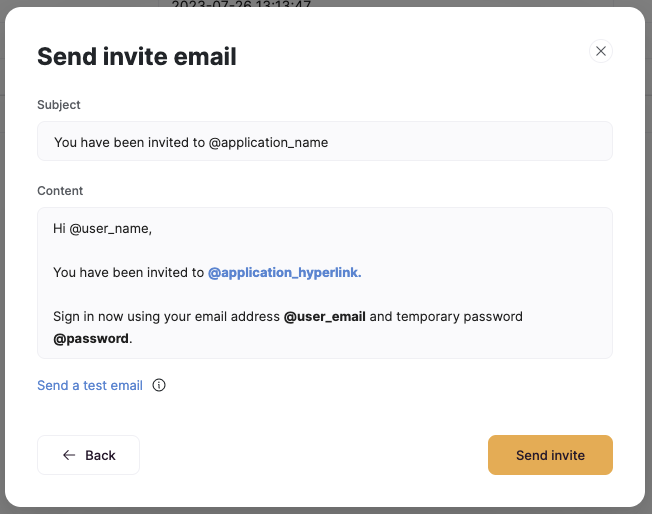
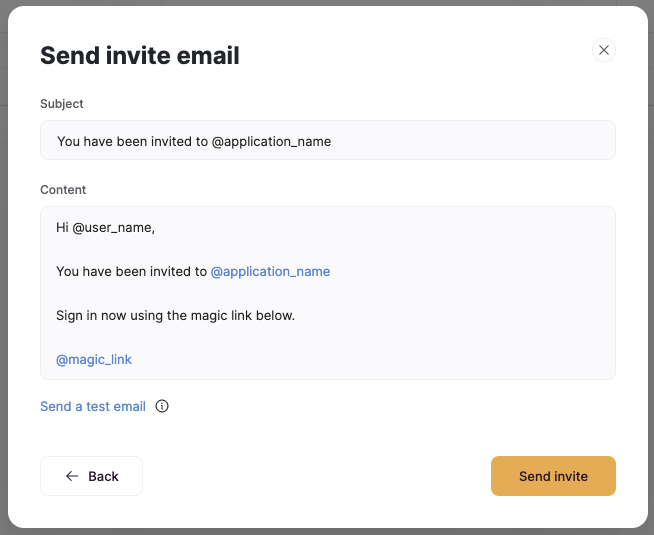
 Clicking **Invite Now** will open another popup where you can customize the Invite email that will be sent to the users. You can send a test email to yourself to see how it will appear. You can use handles to reference dynamic data within the email as well:
* **@application\_name** - will automatically populate the published name of your application
* **@application\_hyperlink** - will automatically populate a link to your published application
* **@user\_name** - will automatically populate the user’s imported name
* **@user\_email** - will automatically populate the user’s imported email
* **@password** - will populate the user’s Softr-generated temporary password, if you chose this option
* **@magic\_link** - will populate the user’s Softr-generated magic link, if you chose this option
Clicking **Invite Now** will open another popup where you can customize the Invite email that will be sent to the users. You can send a test email to yourself to see how it will appear. You can use handles to reference dynamic data within the email as well:
* **@application\_name** - will automatically populate the published name of your application
* **@application\_hyperlink** - will automatically populate a link to your published application
* **@user\_name** - will automatically populate the user’s imported name
* **@user\_email** - will automatically populate the user’s imported email
* **@password** - will populate the user’s Softr-generated temporary password, if you chose this option
* **@magic\_link** - will populate the user’s Softr-generated magic link, if you chose this option